manuals.online logo
Brands
  1. Home
  2. •
  3. Brands
  4. •
  5. Backyard Cat Enclosures
  6. •
  7. Pet Care Product
  8. •
  9. Backyard Cat Enclosures Kitty Kondo User manual

Backyard Cat Enclosures Kitty Kondo User manual

Kitty Kondo!
The
Assembly Instructions
™
getting started
Requirements & Tips
1Nd some help? Email us at [email protected] or phone 1300 440 453
You will need to paint your cat enclosure & make sure you repaint every 3 years
to keep it in top condition & for warranty purposes. Some locations in Australia
may require more regular coats due to the harsh environment. You must paint
both sides of every panel. We recommend you do this PRIOR TO ASSEMBLY for
the best nish. We recommend Dulux Weathershield Exterior Paint.
1
UNPACK YOUR BOX COMPLETELY
and line up all the bags of
hardware so you can easily
grab bolts and screws during
assembly.
3Put a Phillips head bit (Size:
PH2) on a power drill. Ensure
your bit ts nicely into the
screws. We have provided
one if you don’t have one.
4Give yourself
around 3 hours
so you don’t
rush and make
mistakes.
3
HRS
5
Assemble the Kitty
Kondo near where you
plan on keeping it.
2
Get someone to give you a
hand to make assembling
the enclosure quicker!
6Visit your customer portal for great articles to
read and tips for setting up your enclosure.
backyardcatenclosures.com.au/customer-portal
Password: meowmeow
7
Pictures!
Send us
your cat
Read!
Must
screws

1
A x 8 pcs
B x 42 pcs
C x 4 pcs
D x 16 pcs
E x 18 pcs
As you have probably painted your
enclosure, this page will be helpful
in identifying each panel by shape
instead of number!
Tip
x2
What’s Inside Your Boxes
2
Disclaimer : This product is designed solely for the
purpose of giving your cat an outdoor living option. It is not
intended to keep all predators out, and may not be enough
to stop a dog or other animal from harming your cat.
To ensure security and safety, additional measures such as
a secure foundation and ooring, backyard fencing, electric
fences, night lights and additional locks may be required
to prevent burrowing in or out. The addition of padlocks
to the enclosure to prevent entry by other humans is also
recommended if of concern to you.
2x2 3x2 567x2
16
8
4x2
10 x3 12 13 x7
9x2
11 x6 14 x7
15 x7
17
18
19
F x 4 pcs
G x 4 pcs
nuts + bolts
wheels
H x 2 pcs
checklist
Let’s start with setting up the base!
1 2
3
Pieces
Take ‘piece 5’ (the front door panel) and ‘piece 6’ (the
back panel) and attach them to what you made in
STEP 1, using ‘B’ screws. Screw the handle, ‘piece 7’,
into the pre-drilled holes using ‘C’ screws.
B
5
1
Nd some help? Email us at sales@backyardcatenclosures.com.au or phone 1300 440 453
B
B
B
H
FG
2
F
G
34
H
F
G
B
B
B
B
4
Take ‘piece 1’ and attach ‘piece 3’ to the base. Similarly, take
’piece 2’ and attach ‘piece 4’. Finally, secure the wheels in
place as shown, using ‘F’ and ‘G‘ bolts.
B
B
B
B
B
B
B
B
B
B
B
B
5
6
6
7
Diagram
Instructions
C
7
Pieces Diagram
Instructions
Step 2Step 1
3
2
1
H
Next, prepare the enclosure flooring supports. Lay down
‘piece 8’ so that the bottom faces up. Take the supports,
‘pieces 9’ and screw them in as shown, use ‘B’ screws.
8
9
Pieces
Take the structure you put together in STEP 2 and
place the floor, ‘piece 8’ into it. Secure the floor
base with ‘E’ screws.
Nd some help? Email us at sales@backyardcatenclosures.com.au or phone 1300 440 453 4
Diagram
Instructions
Pieces Diagram
Instructions
8
9
B
B
9
8
E
E
E
E
8
Step 4Step 3
Let’s assemble the cat shelves! Take one ‘piece 10’ and
attach 2 support brackets, ‘pieces 11’, on either side of the
bottom, using ‘E‘ screws. There are three of these shelves,
so you will need to repeat these steps for the other two.
10
11
Pieces
For the purpose of clarity, the wire mesh has been removed
in this diagram. After completing the three shelves from
the previous step, you will need to secure them in place as
shown. You will nd pre-drilled holes to help you determine
correct placement of the shelves, use ‘D’ screws.
Nd some help? Email us at sales@backyardcatenclosures.com.au or phone 1300 440 453
Diagram
Instructions
Pieces Diagram
Instructions
5
x3
x6 11
E
E
E
E
10
11
10
D
D
D
D
D
D
11
10
11
x3
Step 6Step 5
Pawesome job, we are halfway there! Time to assemble
the top section. Grab all the wall parts, pieces 12, 13, 14,
15 and secure them together with ‘B‘ screws. Secure the
door handle, ‘piece 7’ with ‘C’ screws using the pre-drilled
holes.
12
Pieces
Let’s get that roof on! Secure ‘piece 16’ into place as
shown, using ‘B‘ screws. For the next step, it would
be much easier if you had a helping hand, because
we will be mounting the top half of the Kitty Kondo
to the base.
Nd some help? Email us at sales@backyardcatenclosures.com.au or phone 1300 440 453
Diagram
Instructions
Pieces Diagram
Instructions
B
BB
B
B
B
B
B
C
1514
13
12
15
13 14
77
16
B
B
B
B
B
B
16
Step 8Step 7
6
Time to assemble the two enclosure parts together! We
would suggest having someone help you with this part.
Carefully lift the top section and place it on top of the base
you have built. Then take ‘A’ screws and screw them in the
direction as shown, securing the two parts together rmly.
The wire mesh has been removed in this diagram for
the purpose of clarity. Take the rounded shelf, ‘piece 17’
and attach the shelf support brackets, ‘pieces 18’, to the
bottom using ‘E’ screws. Then place the assembled shelf
inside, as indicated in the diagram, securing it in place
with ‘D’ and ‘A‘ screws.
Nd some help? Email us at sales@backyardcatenclosures.com.au or phone 1300 440 453
Instructions
Pieces Diagram
Instructions
17
A
A
A
A
A
A
A
Diagram
D
D
A
18
18
E17
17
Step 10Step 9
7
Last part to put onto your Kitty Kondo and it’s super easy!
This piece will help make maneuvering your enclosure a
breeze. Take ‘piece 19’ and use the ‘B‘ screws to attach it
to the back of the tower as shown.
19
Pieces
Now your kitties can nally
enjoy the outdoors safely
in their very own Kitty
Kondo!
Nd some help? Email us at sales@backyardcatenclosures.com.au or phone 1300 440 453
Diagram
Instructions
B
B
19
Step 11
pawesome
You’re all Done!
8
Ninja enjoying the outdoors safely!
*Once you have provided us with your images, we will provide you with a
discount code. Single transaction use only - not valid with any other offers. Item
must be in stock on our website. Photos must be high resolution and able to be
shared online as per our customer photo guide available on our website.
9
Send us a picture of
for use on any of our
cat accessories
Kitty Kondo
your cat in the
to get a 10%off code
*
TM
Nd some help? Email us at sales@backyardcatenclosures.com.au or phone 1300 440 453
See Our Range Here
accessories online
check out our cat
We are here for you!
Need some advice, having issues setting up
your enclosure or perhaps you have some
kitty questions? We’re happy to help!
Get in touch with us, call, live chat or email
us anytime!
Need a helping hand?
Backyardcatenclosures.com.au
sales@backyardcatenclosures.com.au
1300 440 453
™

Other Backyard Cat Enclosures Pet Care Product manuals

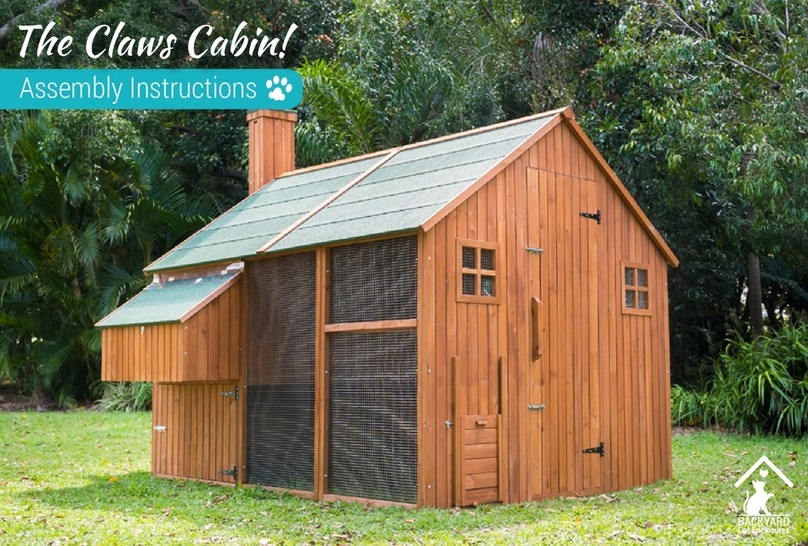
Backyard Cat Enclosures Claws Cabin User manual

Backyard Cat Enclosures

Backyard Cat Enclosures Claws Cabin User manual

Backyard Cat Enclosures Paws Playhouse User manual

Backyard Cat Enclosures

Backyard Cat Enclosures Paws Playhouse User manual

Popular Pet Care Product manuals by other brands

OUTPAW PetIdent 160 user manual

OUTPAW

OUTPAW PetIdent 160 user manual

Cardinal Gates SG-1 Assembly instructions

Cardinal Gates

Cardinal Gates SG-1 Assembly instructions

Exo Terra PT2464 operating instructions

Exo Terra

Exo Terra PT2464 operating instructions

Tri-Tronics SPORT JUNIOR Guide

Tri-Tronics

Tri-Tronics SPORT JUNIOR Guide

Premier Pet Pet Zipline GTV00-16550 product manual

Premier Pet

Premier Pet Pet Zipline GTV00-16550 product manual

Tellur TLL331471 user manual

Tellur

Tellur TLL331471 user manual

Einstein E-Collar ET-800A owner's manual

Einstein

Einstein E-Collar ET-800A owner's manual

Andrew James 6 Day Pet Feeder user manual

Andrew James

Andrew James 6 Day Pet Feeder user manual

Zolia Barking Stop Plus user manual

Zolia

Zolia Barking Stop Plus user manual

Trixie TX8 Smart instructions

Trixie

Trixie TX8 Smart instructions

Songmics Feandrea PCT99 manual

Songmics

Songmics Feandrea PCT99 manual

EYENIMAL 250 REMOTE TRAINER user guide

EYENIMAL

EYENIMAL 250 REMOTE TRAINER user guide

Xiaomi XWWF01MG-EU user manual

Xiaomi

Xiaomi XWWF01MG-EU user manual

Trixie Top Trainer manual

Trixie

Trixie Top Trainer manual

Yaheetech 610994 Assembly instructions

Yaheetech

Yaheetech 610994 Assembly instructions

Prevue Pet Products 1307 Read first

Prevue Pet Products

Prevue Pet Products 1307 Read first

Petsafe Happy Ride Get started

Petsafe

Petsafe Happy Ride Get started

SportDOG Upland Hunter 1875 operating guide

SportDOG

SportDOG Upland Hunter 1875 operating guide

manuals.online logo
manuals.online logoBrands
  • About & Mission
  • Contact us
  • Privacy Policy
  • Terms and Conditions

Copyright 2025 Manuals.Online. All Rights Reserved.