BOOMERANG
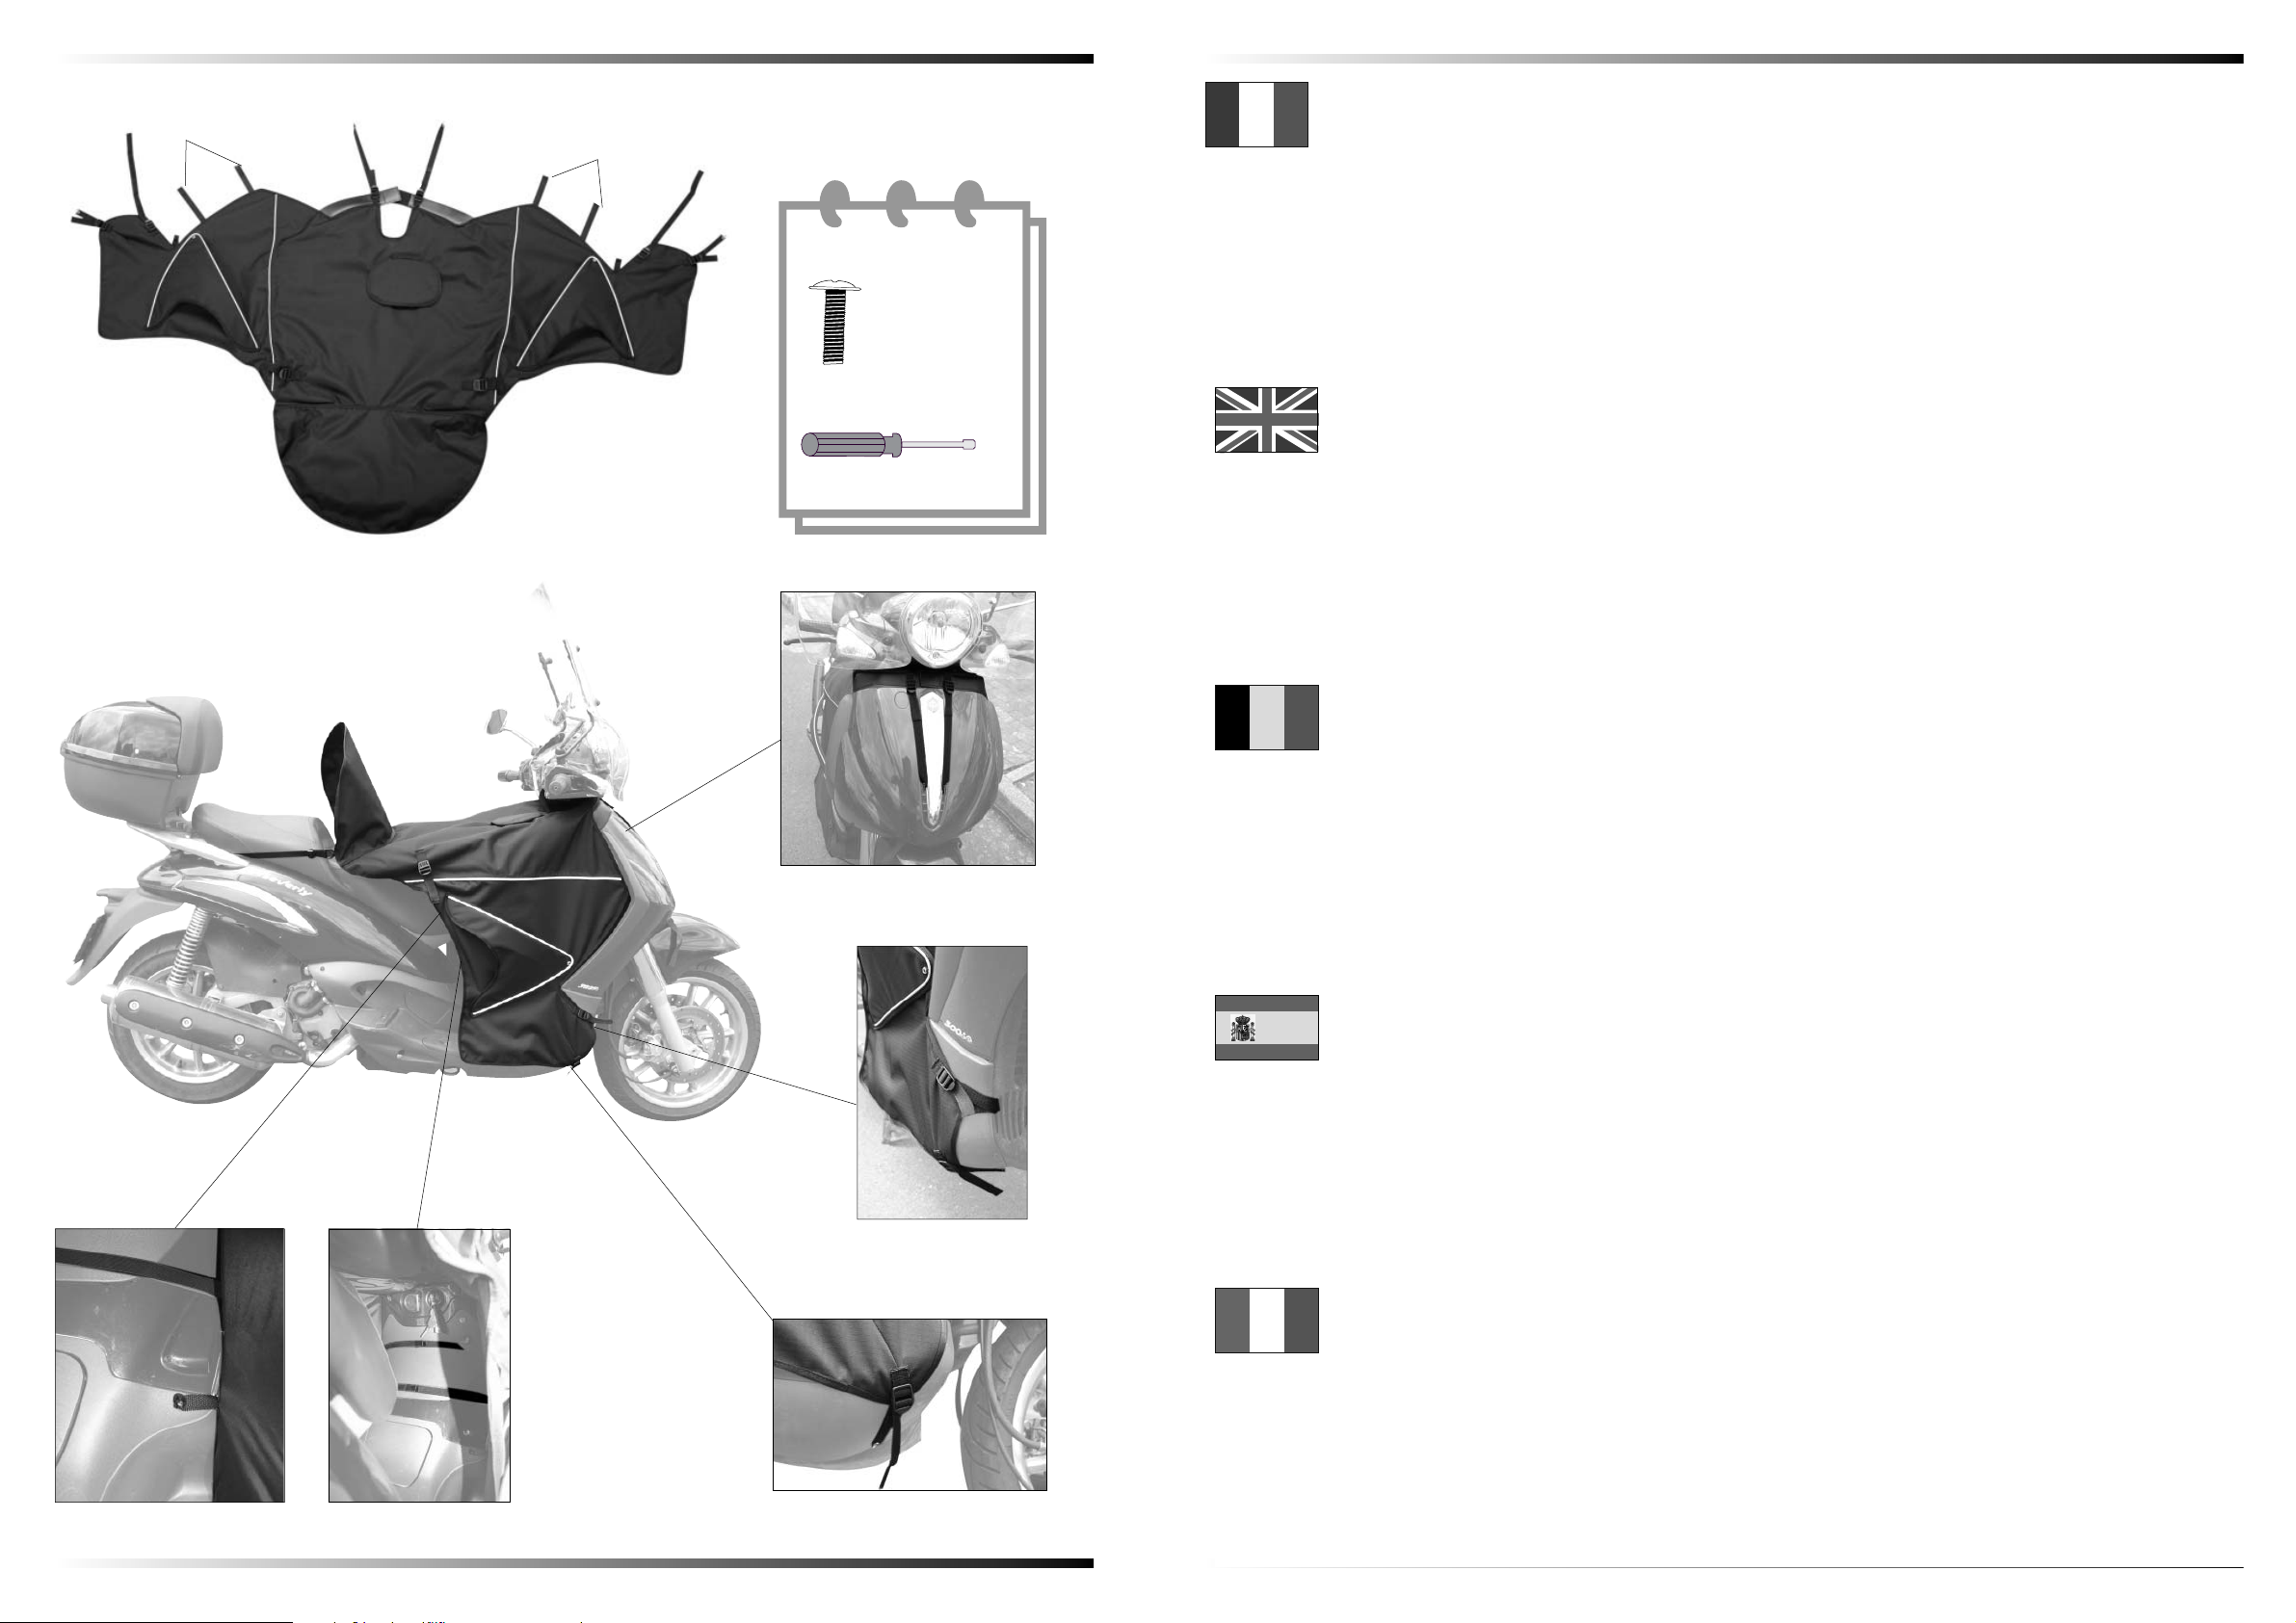
1 - Positionner le tablier sur le scooter.
2 - Fixer les sangles dans les trous du carénage (Photo A)
3 - Fermer la languette velcro (Photo A)
4 - Fixer la sangle dans le passage de roue. (Photo B)
5 - Fixer la sangle sous le scooter (Photo C)
6 - A l’intérieur accrocher les élastiques par velcro (Photo D).
7 - A l’intérieur fixer avec la vis d’origine (Photo E)
www.bagster.com
Mise à jour le 07/10
Ö
Õ
Ø
A
C
D’
www.bagster.com
Õ
C’
Ø
B
Ø
B’ FRANÇAIS
A
D
E
B
C
Ø
A’
Ø
E’
D
Ø
E
ENGLISH
1 - Place the apron on the scooter.
2 - Attach the straps in the holes of the fairing (Picture A).
3 - Close the flap with the velcro (PictureA).
4 - Attach the strap in the wheel passage. (Picture B).
5 - Attach the strap under the scooter (Picture C).
6 - Inside, attach the elastics with the velcro (Picture D).
7 - Inside, attach with the scooter’s own screw (Picture E).
DEUTSCH
1 - Die Beindecke auf dem Motorroller positionieren
2 – Die Riemen in den Verkleidungslöchern befestigen (Bild A)
3 - Mit dem Klettverschluss schließen (Bild A)
4 - Den Riemen in dem Radabschnitt befestigen (Bild B)
5 - Den Riemen unter dem Motorroller befestigen (Bild C)
6 - Innen, die Gummibänder mit einem Klettverschluss anhängen (Bild D)
7 - Innen mit den Ursprungsschrauben befestigen (Bild E)
ESPAÑOL
1 - Colocar el delantal sobre el scooter
2 - Fijar las cinchas en los agujeros del carenado (foto A)
3 - Cerrar la lengüeta velcro (foto A)
4 - Fijar la cincha en el paso de rueda (foto B)
5 - Fijar la cincha por debajo del scooter (foto C)
6 - Al interior, enganchar los elásticos por velcro (foto D)
7 - Al interior, fijar con el tornillo de origen (foto E)
ITALIANO
1 - Posizionare il coprigambe sullo scooter
2 - Fissare le cinghie nei buchi delle carene (Foto A)
3 - Chiudere la linguetta velcro (Foto A)
4 - Fissare la cinghia nel passaggio delle ruote (Foto B)
5 - Fissare la cinghia sotto lo scooter (Foto C)
6 - Allinterno appendere gli elastici con il velcro (Foto D)
7 - All’interno fissare con la vite originale (Foto E)


