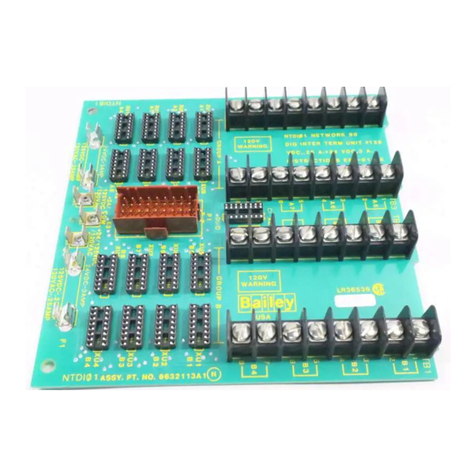
Bailey Infi 90 NTCU01 User manual

®
®
Process Control and
Automation Solutions
from Elsag Bailey Group
E96-417
Serial Interface Termination Unit
(NTCU01)

WARNING notices as used in this instruction apply to hazards or unsafe practices that could result in
personal injury or death.
CAUTION notices apply to hazards or unsafe practices that could result in property damage.
NOTES highlight procedures and contain information that assists the operator in understanding the
information contained in this instruction.
WARNING
INSTRUCTION MANUALS
DO NOT INSTALL, MAINTAIN, OR OPERATE THIS EQUIPMENT WITHOUT READING, UNDERSTANDING,
AND FOLLOWING THE PROPER Elsag Bailey INSTRUCTIONS AND MANUALS; OTHERWISE, INJURY OR
DAMAGE MAY RESULT.
RADIO FREQUENCY INTERFERENCE
MOST ELECTRONIC EQUIPMENT IS INFLUENCED BY RADIO FREQUENCY INTERFERENCE (RFI). CAU-
TION SHOULD BE EXERCISED WITH REGARD TO THE USE OF PORTABLE COMMUNICATIONS EQUIP-
MENT IN THE AREA AROUND SUCH EQUIPMENT. PRUDENT PRACTICE DICTATES THAT SIGNS
SHOULD BE POSTED IN THE VICINITY OF THE EQUIPMENT CAUTIONING AGAINST THE USE OF POR-
TABLE COMMUNICATIONS EQUIPMENT.
POSSIBLE PROCESS UPSETS
MAINTENANCE MUST BE PERFORMED ONLY BY QUALIFIED PERSONNEL AND ONLY AFTER SECURING
EQUIPMENT CONTROLLED BY THIS PRODUCT. ADJUSTING OR REMOVING THIS PRODUCT WHILE IT IS
IN THE SYSTEM MAY UPSET THE PROCESS BEING CONTROLLED. SOME PROCESS UPSETS MAY
CAUSE INJURY OR DAMAGE.
AVERTISSEMENT
MANUELS D’OPÉRATION
NE PAS METTRE EN PLACE, RÉPARER OU FAIRE FONCTIONNER L’ÉQUIPEMENT SANS AVOIR LU,
COMPRIS ET SUIVI LES INSTRUCTIONS RÉGLEMENTAIRES DE Elsag Bailey. TOUTE NÉGLIGENCE À
CET ÉGARD POURRAIT ÊTRE UNE CAUSE D’ACCIDENT OU DE DÉFAILLANCE DU MATÉRIEL.
PERTURBATIONS PAR FRÉQUENCE RADIO
LA PLUPART DES ÉQUIPEMENTS ÉLECTRONIQUES SONT SENSIBLES AUX PERTURBATIONS PAR
FRÉQUENCE RADIO. DES PRÉCAUTIONS DEVRONT ÊTRE PRISES LORS DE L’UTILISATION DU MATÉ-
RIEL DE COMMUNICATION PORTATIF. LA PRUDENCE EXIGE QUE LES PRÉCAUTIONS À PRENDRE
DANS CE CAS SOIENT SIGNALÉES AUX ENDROITS VOULUS DANS VOTRE USINE.
PERTURBATIONS DU PROCÉDÉ
L’ENTRETIEN DOIT ÊTRE ASSURÉ PAR UNE PERSONNE QUALIFIÉE EN CONSIDÉRANT L’ASPECT
SÉCURITAIRE DES ÉQUIPEMENTS CONTRÔLÉS PAR CE PRODUIT. L’AJUSTEMENT ET/OU L’EXTRAC-
TION DE CE PRODUIT PEUT OCCASIONNER DES À-COUPS AU PROCÉDÉ CONTRÔLE LORSQU’IL EST
INSÉRÉ DANS UNE SYSTÈME ACTIF. CES À-COUPS PEUVENT ÉGALEMENT OCCASIONNER DES
BLESSURES OU DES DOMMAGES MATÉREILS.
NOTICE
The information contained in this document is subject to change without notice.
Elsag Bailey, its affiliates, employees, and agents, and the authors and contributors to this publication specif-
ically disclaim all liabilities and warranties, express and implied (including warranties of merchantability and
fitness for a particular purpose), for the accuracy, currency, completeness, and/or reliability of the information
contained herein and/or for the fitness for any particular use and/or for the performance of any material and/
or equipment selected in whole or part with the user of/or in reliance upon information contained herein.
Selection of materials and/or equipment is at the sole risk of the user of this publication.
This document contains proprietary information of Elsag Bailey, Elsag Bailey Process Automation, and
is issued in strict confidence. Its use, or reproduction for use, for the reverse engineering, development
or manufacture of hardware or software described herein is prohibited. No part of this document may be
photocopied or reproduced without the prior written consent of Elsag Bailey.
I-E96-417A
Preface
The NTCU01 unit terminates the connection of a computer,
modem, or diagnostic terminal to a INSIM01 Serial Interface
Module. It provides a place to connect an RS-232-C cable from
the computer or terminal.
This manual explains how to install and use the NTCU01 unit.
It explains how to install the cables and mount the termination
unit.

I-E96-417A
®
List of Effective Pages
Total number of pages in this instruction is 28, consisting of the following:
Page No. Change Date
Preface Original
List of Effective Pages Original
iii through v Original
1-1 through 1-5 Original
2-1 through 2-6 Original
3-1 Original
4-1 Original
5-1 Original
A-1 through A-5 Original
B-1 through B-3 Original
Index-1 Original
When an update is received, insert the latest changed pages and dispose of the super-
seded pages.
NOTE: On an update page, the changed text or table is indicated by a vertical bar in the outer mar-
gin of the page adjacent to the changed area. A changed figure is indicated by a vertical bar in the
outer margin next to the figure caption. The date the update was prepared will appear beside the
page number.

I-E96-417A v
Safety Summary
Sommaire de Sécurité
GENERAL
WARNINGS Equipment Environment
All components, whether in transportation, operation or storage,
must be in a noncorrosive environment.
Electrical Shock Hazard During Maintenance
Disconnect power or take precautions to insure that contact with
energized parts is avoided when servicing.
Special Handling
This module uses Electrostatic Sensitive Devices (ESD).
AVERTISSEMENTS
D’ORDRE
GÉNÉRAL
Environnement de l’équipement
Ne pas soumettre les composants à une atmosphère corrosive lors
du transport, de l’entreposage ou l’utilisation.
Possibilité de chocs électriques durant l’entretien
Débrancher l’alimentation ou prendre les précautions pour éviter
tout contact avec des composants sous tension durant l’entretien.
Precautions de manutention
Ce module des composantes sensibles aux decharges
electro-statiques.

Table of Contents
Page
I-E96-417A iii
SECTION 1 - INTRODUCTION....................................................................................................1-1
OVERVIEW ..................................................................................................................1-1
INTENDED USER.........................................................................................................1-1
HARDWARE DESCRIPTION..........................................................................................1-1
HARDWARE APPLICATION...........................................................................................1-1
FEATURES...................................................................................................................1-2
HOW TO USE THIS MANUAL .......................................................................................1-3
INSTRUCTION CONTENT .............................................................................................1-3
NOMENCLATURE ........................................................................................................1-3
GLOSSARY OF TERMS AND ABBREVIATIONS .............................................................1-4
REFERENCE DOCUMENTS..........................................................................................1-5
SPECIFICATIONS.........................................................................................................1-5
SECTION 2 - INSTALLATION.....................................................................................................2-1
INTRODUCTION...........................................................................................................2-1
SPECIAL HANDLING ....................................................................................................2-1
UNPACKING AND INSPECTION ....................................................................................2-2
INSTALLING THE TERMINATION UNIT .........................................................................2-2
MOUNTING THE TERMINATION UNIT ..........................................................................2-2
CABLE INSTALLATION.................................................................................................2-2
Termination Unit Cables ........................................................................................2-2
Communication Cable............................................................................................2-5
SECTION 3 - MAINTENANCE.....................................................................................................3-1
INTRODUCTION...........................................................................................................3-1
MAINTENANCE SCHEDULE.........................................................................................3-1
SECTION 4 - REPAIR/REPLACEMENT PROCEDURES...........................................................4-1
INTRODUCTION...........................................................................................................4-1
TERMINATION UNIT REPLACEMENT ...........................................................................4-1
SECTION 5 - SUPPORT SERVICES...........................................................................................5-1
INTRODUCTION...........................................................................................................5-1
REPLACEMENT PARTS AND ORDERING INFORMATION ..............................................5-1
TRAINING ....................................................................................................................5-1
TECHNICAL DOCUMENTATION ...................................................................................5-1
APPENDIX A - IMSPM01 SERIAL PORT MODULE CONFIGURATION...................................A-1
INTRODUCTION.......................................................................................................... A-1
JUMPER CONFIGURATION ......................................................................................... A-3
Jumpers JP3/JP5................................................................................................. A-4
Jumpers JP4/JP6................................................................................................. A-4
Jumper JP11/JP12............................................................................................... A-5
Jumpers JP9/JP10............................................................................................... A-5
APPENDIX B - INSIM01 SERIAL INTERFACE MODULE CONFIGURATION..........................B-1
INTRODUCTION.......................................................................................................... B-1

iv I-E96-417A
No. Title Page
List of Figures
®
1-1. The NTCU01 Termination Unit Connecting a Diagnostic Terminal
to the INSPM01 Module ......................................................................................... 1-2
2-1. Mounting and Securing the TCU Unit on the Field Termination Panel .................... 2-3
2-2. TCU Circuit Board Layout ..................................................................................... 2-4
2-3. TCU Cable Connection to the SIM Module ............................................................. 2-4
2-4. RS-232-C Compatible Cable Wiring Requirements ................................................. 2-6
A-1. SPM Circuit Board Component Locations ..............................................................A-1
B-1. Serial Interface Module Component Locations........................................................B-1
B-2. Jumper Settings for Communication Baud Rates ...................................................B-3
List of Tables
No. Title Page
1-1. Nomenclature........................................................................................................ 1-3
1-2. Glossary of Terms and Abbreviations ..................................................................... 1-4
1-3. Reference Documents ............................................................................................ 1-5
1-4. Specifications ........................................................................................................ 1-5
2-1. TCU Cable Applications ......................................................................................... 2-5
3-1. Maintenance Schedule........................................................................................... 3-1
A-1. Address Switch Settings (S2) .................................................................................A-2
A-2. Port Option Switch (S3) Settings ............................................................................A-2
A-3. Port Operational Option Switch (S4) Settings .........................................................A-3
B-1. Operations Option Switch (SW4) Settings (Firmware Revision F and above) ...........B-2
B-2. SW2 Computer Port Address .................................................................................B-2
B-3. Computer/Diagnostic Port Options (SW3) ..............................................................B-2
B-4. Handshaking Signal Options .................................................................................B-3

OVERVIEW
I-E96-417A 1 - 1
SECTION 1 - INTRODUCTION
OVERVIEW
The NTCU01 Serial Interface Termination Unit provides a ter-
mination point for a INSIM01 Serial Interface Module or
optionally to a IMSPM01 Serial Port Module. The NTCU01 ter-
mination unit has two DB-25 connectors so that a diagnostic
terminal (port one) and a computer or modem (port two) can
connect to it through RS-232-C cables. The serial interface ter-
mination unit (TCU) connects to the serial interface module
(SIM) or serial port module (SPM) through a termination cable.
Figure 1-1 shows an example of the TCU termination unit
being used to connect a diagnostic terminal to the SPM
module.
INTENDED USER
Technicians should read this manual before installing the TCU
termination unit. Do not put the TCU termination unit into
operation until you read and understand this instruction.
HARDWARE DESCRIPTION
The TCU unit mounts on a NFTP01 Field Termination Panel,
inside the INFI 90®cabinet. It is a printed circuit board that
consists of:
•Two DB-25 connector sockets.
•Cable connector.
•Current limiting resistors.
•Faston tabs for system common.
HARDWARE APPLICATION
The NTCU01 unit provides a place to connect two RS-232-C
communication cables from a computer, modem or diagnostic
terminal to the serial port module and the serial interface mod-
ule. It is a passive device that channels the communication sig-
nals to each module.
The INSIM01 module is part of the INPCI01 Plant Loop to Com-
puter Interface. It enables a host computer to communicate
with any node on the plant loop. Interface software enables the
computer to acquire data, do process monitoring, load control
strategies and configure modules.
® - INFI 90 is a registered trademark of Elsag Bailey Process Automation.

INTRODUCTION
FEATURES
1 - 2 I-E96-417A
®
The IMSPM01 module interfaces a computer to INFI 90 mod-
ules within a process control unit (PCU). The SPM module
communicates with other modules over the module bus.
Built-in SPM functions support Bailey Controls computer or
engineering work station (EWS) software commands. These
functions allow computer access to module configuration I/O
and status information.
FEATURES
Current limiting resistors prevent excessive current from flow-
ing through the RS-232-C cable if there is a significant differ-
ence of potential between the signal ground of the computer
and the signal ground of the INFI 90 components.
Figure 1-1. The NTCU01 Termination Unit Connecting a
Diagnostic Terminal to the INSPM01 Module
COMMUNICATION HIGHWAY (INFI-NET OR PLANT LOOP)
MODULE BUS
OTHER MODULES
COMMUNICATION
MODULES
T00591A
MFC
SLAVE
MODULES (OPTIONAL)
SLAVE EXPANDER BUS
TU
SPM
COMPUTER
DIAGNOSTIC
TERMINAL
(OPTIONAL)
PORT 2
PORT 1

INTRODUCTION
HOW TO USE THIS MANUAL
I-E96-417A 1 - 3
HOW TO USE THIS MANUAL
Read this manual before installing the TCU unit. Do the instal-
lation steps in order. Do not operate the TCU unit until you
complete all the steps in the next section. Refer to the appendix
for a quick reference guide to SPM or SIM module dipswitch
and jumper settings.
INSTRUCTION CONTENT
This manual provides introductory, installation, maintenance
and repair/replacement procedures. This manual has five sec-
tions and two appendices.
Introduction The introduction provides an overview of the TCU termination
unit, a description of the hardware, a glossary of terms and
abbreviations, and a table of electrical, physical and environ-
mental specifications.
Installation Section 2 is the installation section. It explains physical instal-
lation, wiring and cable requirements.
Maintenance This section contains a maintenance schedule.
Repair/Replacement
Procedures Section 4 contains instructions explaining how to replace the
termination unit.
Support Services Support services cover training, documentation, and how to
order parts from Bailey Controls.
Appendices The appendices briefly discuss the IMSPM01 and INSIM01
modules and provide a cross-reference of dipswitch and
jumper settings for those modules.
NOMENCLATURE
Table 1-1 lists the nomenclature of related hardware.
Table 1-1. Nomenclature
Hardware Nomenclature
Field termination panel NFTP01
Serial interface module INSIM01
Serial port module IMSPM01
Termination cable,
TCU unit to SIM/SPM (PVC jacket)
TCU unit to SIM/SPM (non-PVC jacket) NKTU01
NKTU11
RS-232-C cable HCBL01

INTRODUCTION
GLOSSARY OF TERMS AND ABBREVIATIONS
1 - 4 I-E96-417A
®
GLOSSARY OF TERMS AND ABBREVIATIONS
Table 1-2 contains a glossary of terms and abbreviations.
® - Network 90 is a registered trademark of Elsag Bailey Process Automation.
Table 1-2. Glossary of Terms and Abbreviations
Term Definition
ACIA Asynchronous communication interface adapter. A device that interfaces RS-232-C
serial computer, peripheral or modem data. Provides serial/parallel data conversion,
handshaking control, and data receive and transmission.
DCE Data communication equipment or data circuit-terminating equipment. Equipment
that establishes and terminates a communication link between two devices. In
RS-232-C communication systems, the DCE nomenclature indicates the signals that
appear at specified cable connectioncontacts. A modemis an example of this type of
device.
Dipswitch A dual in-line package that contains switches.
DTE Data terminal equipment. Equipment comprising the data source, data sink or both
that provides the communication control function. In RS-232-C communication
systems, the DTE nomenclature indicates the signals that appear at specified cable
connection contacts. Terminals and printers are examples of this type of device.
FTP Field termination panel. A panel inside the INFI 90 cabinet on which to mount
termination units.
Handshaking Procedures and protocol used by two devices to establish and maintain
communication.
Module Bus Peer to peer communication link used to transfer information between intelligent
modules within a process control unit.
PCU Process control unit. A node on the plant-wide communication network containing
master and slave modules.
RS-232-C A serial communication interface standard developed by the Electronics Industry
Association (EIA) specifying what signals and voltages will be used to transmit data
from computer (DTE) to a modem (DCE).
Serial Data Data transmitted sequentially on one signal line.
Termination Unit Provides input/output connection between plant equipment and the INFI 90/Network
90®process modules.

INTRODUCTION
REFERENCE DOCUMENTS
I-E96-417A 1 - 5
REFERENCE DOCUMENTS
Table 1-3 lists reference documents.
SPECIFICATIONS
Table 1-4 contains TCU termination unit specifications.
Table 1-3. Reference Documents
Number Document
I-E96-217 Serial Port Module IMSPM01
I-E96-620 Plant Loop to Computer Interface INPCI01
Table 1-4. Specifications
Property Characteristic/Value
Mounting Screw mounts to the field termination panel.
Cooling Requirements No cooling necessary when used in Bailey cabinets and operated
within stated environmental limits.
Operating Temperature 0°C to 70°C (32°F to 158°F)
Relative Humidity 5% to 90% (±5%) up to 55°C (131°F) noncondensing
5% to 40% (±5%) up to 70°C (158°F) noncondensing
Air Quality Bailey equipment should be operated and stored in a noncorrosive
environment.
Certification CSA certified as process control equipment for use in an ordinary
(nonhazardous) location.
SPECIFICATION SUBJECT TO CHANGE WITHOUT NOTICE

INTRODUCTION
I-E96-417A 2 - 1
SECTION 2 - INSTALLATION
INTRODUCTION
This section explains how to install the NTCU01 Serial Inter-
face Termination Unit. The installation procedure covers han-
dling, cable connection and physical installation.
SPECIAL HANDLING
Observe these steps when handling electronic circuitry:
NOTE: Always use Bailey's Field Static Kit (P/N 1948385A1 - con-
sisting of two wrist straps, ground cord assembly, alligator clip, and
static dissipative work surface) when working with the modules. The
kit connects a technician and the static dissipative work surface to
the same ground point to prevent damage to the modules by elec-
trostatic discharge.
1. Use Static Shielding Bag. Keep the modules in the static
shielding bag until you are ready to install them in the system.
Save the bag for future use.
2. Ground Bag Before Opening. Before opening a bag con-
taining an assembly with CMOS devices, touch it to the equip-
ment housing or a ground to equalize charges.
3. Avoid Touching Circuitry. Handle assemblies by the
edges; avoid touching the circuitry.
4. Avoid Partial Connection of CMOS device. Verify that all
devices connected to the modules are properly grounded before
using them.
5. Ground Test Equipment.
6. Use an Antistatic Field Service Vacuum. Remove dust
from the module if necessary.
7. Use a Grounded Wrist Strap. Connect the wrist strap to
the appropriate grounding plug on the power entry panel. The
grounding plug on the power entry panel must be effectively
connected to the earth grounding electrode system through the
DC common bus.
8. Do Not Use Lead Pencils to Set Dipswitches. To avoid
contamination of switch contacts that can result in unneces-
sary circuit board malfunction, do not use a lead pencil to set a
dipswitch.

INSTALLATION
UNPACKING AND INSPECTION
2 - 2 I-E96-417A
®
UNPACKING AND INSPECTION
1. Examine the termination module immediately for any ship-
ping damage.
2. Notify the nearest Bailey Controls sales office of any
damage.
3. File a claim for any damage with the transportation com-
pany that handled the shipment.
4. Use the original packing material or container to store the
termination module.
5. Store the module in an environment of good air quality, free
from temperature and moisture extremes.
INSTALLING THE TERMINATION UNIT
The serial interface termination unit (TCU) is ready to install.
There are no jumpers to set on the TCU circuit board.
MOUNTING THE TERMINATION UNIT
To mount the termination unit:
1. Insert the tabs of the circuit board into the proper slots of
the termination panel standoff (see Figure 2-1) and slide the
circuit board into position.
2. Secure the termination unit circuit board to the field termi-
nation panel with two number 10 screws (see Figure 2-1).
3. Connect the chassis ground to the field termination panel
by installing a number 10 self-tapping sheet metal screw and
star washer through E2 on the TCU circuit board. See Figures
2-1 and 2-2.
CABLE INSTALLATION
Termination Unit Cables
After mounting the termination unit to the field termination
panel, install the termination cable. Table 2-1 lists the termi-
nation cable, its application, connector assignment and length
restrictions. Figure 2-3 shows a diagram of cable connections
to the TCU termination unit. To install the termination unit
cable:
1. Insert the socket connector end of the cable into P1 on the
TCU circuit board. See Figure 2-2 for the location of P1 on the
TCU circuit board.

INSTALLATION
CABLE INSTALLATION
I-E96-417A 2 - 3
2. Install the hooded end of the appropriate cable in the mod-
ule mounting unit (MMU) backplane slot assigned to the
INSIM01 Serial Interface Module.
NOTES:
1. Installation procedures for the INSIM01 module apply to the
optional IMSPM01 Serial Port Module also.
2. If the serial interface module (SIM) module is installed in its slot,
pull the module away from the MMU backplane several inches. The
card edge of the module must not come into contact with the card
edge connector of the termination cable while installing the cable.
After installing the cable, slide the module into the MMU slot so that
the card edge sits within the card edge connector. Refer to the prod-
uct instructions for the INSIM01 or IMSPM01 for more information
about the installation or removal of those modules.
Figure 2-1. Mounting and Securing the TCU Unit on the Field Termination Panel
CHASSIS COMMON
SCREW
TABS STANDOFF
MOUNTING SCREWS
FIELD TERMINATION PANEL
T00592A

INSTALLATION
CABLE INSTALLATION
2 - 4 I-E96-417A
®
Figure 2-2. TCU Circuit Board Layout
Figure 2-3. TCU Cable Connection to the SIM Module
NTCU01
COMPUTER PORT
P3
DIAGNOSTIC PORT
P2
NSM
P1
E2
CHASSIS GROUND E1
SYSTEM COMMON
T00593A
INSIM01
NKTU01/11
P1
P3 P1
NTCU01
T00594A
ALTERNATE
CONNECTION POINT
FOR COMPUTER OR
MODEM (PORT 2)
TO DIAGNOSTIC
MONITOR (PORT 1)
RS-232
CABLE
RS-232
CABLE
P3
P2

INSTALLATION
CABLE INSTALLATION
I-E96-417A 2 - 5
Communication Cable
The RS-232-C cable connects the serial interface termination
unit to the computer, modem or diagnostic terminal. Table 2-1
contains information about the connector assignments and
length restrictions of the RS-232-C cable. The RS-232-C cable
routes the handshaking signals and data being transferred
between data terminal equipment (DTE) or data communica-
tion equipment (DCE) and the SIM module. Figure 2-4 shows
the RS-232-C cable wiring requirements for use with DTE and
DCE devices. When using a null modem to set up the serial
module to interface to a DCE device, refer to the appendices for
the proper handshaking signal jumper settings of each mod-
ule. Refer to the product instruction of a particular module for
detailed installation information. To install the RS-232-C
cable:
NOTE:
Make sure power to the device being connected to the serial
interface termination unit is OFF before installing the RS-232-C
cable.
1. Connect the RS-232-C cable to the termination unit at P2
(port one) or P3 (port two).
2. The other end of the cable connected to P3 (port two) con-
nects to a computer or modem.
3. The other end of the cable connected to P2 (port one) con-
nects to a diagnostic terminal.
4. Attach a 14 AWG wire from the DC common bus bar at the
bottom of the cabinet to the E1 terminal of the TCU termina-
tion unit.
Table 2-1. TCU Cable Applications
Nomenclature/
Description Application NTCU01
Connector
Maximum
Length Meters
(Feet)
NKTU01 (PVC jacket)
NKTU11 (non-PVC jacket)
termination cable
Connects the TCU
termination unit to the SIM or
SPM module
P1 30 (100)
HCBL01/RS-232-C cable Connects DCE and DTE
devices to the termination unit P2 and P3 15.2 (50)1
NOTE: 1. The specified maximum length only applies to the HCBL01 cable in particular. The performance of the serial modules
do not place a restriction on the maximum length of the RS-232-C cable. Follow industry-wide accepted RS-232-C practices and
rules when selecting a suitable RS-232-C cable for your system.

INSTALLATION
CABLE INSTALLATION
2 - 6 I-E96-417A
®
The NTCU01 unit is ready for operation if:
1. The termination unit is mounted in the field termination
panel.
2. All required cables are properly connected to the termina-
tion unit.
Figure 2-4. RS-232-C Compatible Cable Wiring Requirements
CHASSIS GND
TX
RX
RTS
CTS
DSR
SIG GND
DCD
DTR
CHASSIS GND
TX
RX
RTS
CTS
DSR
SIG GND
DCD
DTR
CHASSIS GND
TX
RX
RTS
CTS
DSR
SIG GND
DCD
DTR
CHASSIS GND
TX
RX
RTS
CTS
DSR
SIG GND
DCD
DTR
1
2
3
4
5
6
7
8
20
1
2
3
4
5
6
7
8
20
1
2
3
4
5
6
7
8
20
1
2
3
4
5
6
7
8
20
NTCU01
(DCE) NTCU01
(DCE)
DATA TERMINAL
EQUIPMENT DATA COMMUNICATION
EQUIPMENT
T00595A

INTRODUCTION
I-E96-417A 3 - 1
SECTION 3 - MAINTENANCE
INTRODUCTION
The NTCU01 Serial Interface Termination Unit requires mini-
mal maintenance. Doing the tasks in Table 3-1 will provide
long, trouble free service. Please note that only qualified per-
sonnel should perform maintenance.
MAINTENANCE SCHEDULE
Table 3-1 is the maintenance schedule. These tasks are to be
performed at the specified intervals.
Table 3-1. Maintenance Schedule
Task Interval
Clean and tighten all cable and
power connections. Every 6 months or during plant
shutdown, whichever occurs first.
Use a static safe vacuum cleaner
to remove dust from:
Termination units
Field termination panel

INTRODUCTION
I-E96-417A 4 - 1
SECTION 4 - REPAIR/REPLACEMENT PROCEDURES
INTRODUCTION
Repair procedures are limited to termination unit replacement.
If the NTCU01 Serial Interface Termination Unit fails, remove it
and replace it with another one.
TERMINATION UNIT REPLACEMENT
If you determine that the serial interface termination unit
(TCU) is faulty, replace it with a new one. Do not try to repair
the module; replacing components may affect the module per-
formance and certification.
Follow Steps 1 through 8 to replace the TCU termination unit.
NOTE: Power to the computer, modem or diagnostic terminal
should be OFF before removing the RS-232-C cable.
1. Disconnect the RS-232-C cable from the termination unit.
2. Disconnect the termination unit cable from the P1 socket
on the termination unit.
3. Remove and save the chassis ground screw (with star
washer) and the two mounting screws that secure the termina-
tion unit to the field termination panel.
4. Remove the faulty termination unit.
5. Insert the tabs of the replacement termination unit into the
same slots of the termination panel standoff as shown in Fig-
ure 2-1 and slide the circuit board into position.
6. Secure the termination unit circuit board to the field termi-
nation panel with the two mounting screws and chassis
ground screw (with star washer) saved from Step 3.
7. Connect the termination unit cable and the RS-232-C cable
to the TCU circuit board.
8. Turn on power to the computer, modem or diagnostic
terminal.
Table of contents
Other Bailey Recording Equipment manuals

Bailey
Bailey Infi 90 INIPR01 User manual

Bailey
Bailey Infi 90 INPCI01 User manual

Bailey
Bailey Infi 90 INPCI02 User manual

Bailey
Bailey INFI 90 NTDI01 User manual

Bailey
Bailey Infi 90 IMEDI01 User manual

Bailey
Bailey INFI 90 INPPR01 User manual

Bailey
Bailey 40 Series User manual

Bailey
Bailey infi 90 40 Series User manual