Bakcou Mule User manual

Mule / Mule Jager Bike Assembly

REQUIRED TOOLS:
We recommend using medium grade Loctite on any bolts
that seem to loosen while riding
Cutting Pliers (to cut box poly strapping and
heavy bike banding)
Scissors (to remove bubble wrap)
Allen wrenches (4mm, 5mm, 6mm included in box)
Wrenches (10mm, 15mm included in box)
Approximate Assembly Time: 20 - 30 minutes
Bakcou Mule Assembly
Make certain to pay attention to all bold italicized text
UNBOXING
1. Cut banding straps from exterior of box and open box.
2. Remove “Tool Kit” box containing pedals, headlight, battery
charger, and hardware from box.
3. Remove bike from box. (If necessary, lay box on side and
slide out, or use two people to lift out)
4. Cut banding straps to release the front tire from the frame of the
bike. (Use caution in cutting banding straps, paying particular
attention to brake, derailleur, and all other cables on bike)
5. Cut banding straps to remove front and rear fenders from the
front tire. (Rear fender may already be assembled on bike)
6. Cut banding straps to release handle bars from the frame of the
bike. (Avoid letting handlebars hang for extended periods and
thus putting stress on cables. Make certain cable connections
have not pulled apart during this step, or in shipping)
7. Remove remaining bubble wrap, foam, and shipping
materials needed to protect the bike during assembly. Note:
Make certain to remove plastic (if present) from both sides
of the motor to allow for ventilation while operating.
BAKCOU.COM
Terminology:
• Front Fork
• Quick Release
• Thru Axle
• Handle Bars
• Stem
• Front Fender
• Rear Fender
• Pedal CR-L
• Pedal CR-R
For further assistance, go online for helpful instructional videos at bakcou.com
1.

BAKCOU.COM
HANDLEBAR ASSEMBLY
8. Using 4mm Allen wrench, remove 4 screws from bicycle stem
9. After removing the front plate of bicycle stem, insert center of
handle bars into bicycle stem, then reattach the front plate and
4 screws to secure handlebars. (Make certain handlebars are
positioned with the throttle to the left and the rapid-fire index
shifting levers on the right. Slightly insert each of the 4 screws
prior to tightening. Also prior to tightening, rotate handlebars
forward or backwards to customize position of handlebars
to rider). Note: Most often, brake levers should be angled
approximately 45 degrees downward for optimal positioning.
10. Display screen can easily be rotated by hand, moving forward
or backwards, to accommodate rider’s desired position.
3. For further assistance, go online for helpful instructional videos at bakcou.com
FRONT FENDER & HEADLIGHT ASSEMBLY
11. Attach front fender and headlight to front fork bracket using
a long bolt from hardware package, 5mm Allen wrench, and
10mm wrench. Attach the light cable to the loose cable in the
cable harness. (Note: Place light bracket and fender bracket on
the backside of the fork bracket)

PUTTING ON FRONT TIRE
12. If present, remove plastic spacer from bottom of front fork.
13. Unthread thru axle from front fork (axle of front wheel).
14. If present, remove the plastic insert from between front brake
pads. Do not squeeze brake levers after removing this plastic
insert before installing the front tire.
15. Position front wheel in the front fork and the front brake rotor
between the brake pads and tighten. Reinstall thru axle
BAKCOU.COM
5. For further assistance, go online for helpful instructional videos at bakcou.com
PUTTING ON PEDALS
16. Remove pedals from “Tool Kit” box.
17. Dierentiate the right pedal from the left pedal by locating the
small “CR-L” (for the left) and “CR-R” (for the right) inscribed on
the bolt of the pedal. (See Picture)
18. Attach right pedal by screwing into right crank in a clockwise
pattern using 15mm wrench. (Note: It is recommended that you
use a medium grade Loctite to ensure bolt does not loosen)
19. Attach left pedal by screwing into left crank in counterclockwise
pattern using 15mm wrench. (Note: It is recommended that you
use a medium grade Loctite to ensure bolt does not loosen)
20. Make certain crank bolts are tightened using 10mm
Allen wrench

BAKCOU.COM
7.
PUMP UP TIRES
21. Using a schrader valve bike pump, inate the tires to
around 20 psi.
INSTALL BATTERY
23. Key is not needed to install battery; Simply place the bottom
of the battery into lower slot and rmly push top of battery into
upper slot. Make sure battery is locked rmly into place prior to
riding, as a loose battery may cause inadvertent loss of power,
or the battery may fall out of chamber and become damaged.
After reinserting, check the battery attachment by pulling out
and up on the handle to ensure it is securely fastened.
For further assistance, go online for helpful instructional videos at bakcou.com
READ BEFORE USE
24. Make sure to check all nuts and bolts to
ensure they have not loosened during
shipping.
25. Battery typically has a partial charge straight
from the box. Riding the bike straight out
of the box will not impact battery life or
compromise the battery in any way.
26. Battery can be charged while on the bike or it
can be removed and charged o of the bike.
27. Keys are only used to remove battery from
bike. Simply insert key into lock and turn,
while pulling out and up on battery handle
to remove battery.
28. To re-insert battery, key is not needed: simply
place bottom of battery into lower slot and
rmly push top of battery into upper slot.
(Note: make sure battery is locked rmly
into place prior to riding as a loose battery
may cause inadvertent loss of power, or
battery may fall out of chamber and become
damaged. After reinserting, check battery
attachment by pulling out and up on handle
to ensure it is securely fastened)
29. Assembly is now complete, however,
minor adjustments are often necessary
to precisely t ebike to rider. These
adjustments can include rotating locking
handle grips, moving/rotating brake levers,
throttle, and shifters. These adjustments
are easily performed. However, feel free
to contact us via email or phone with
any questions.
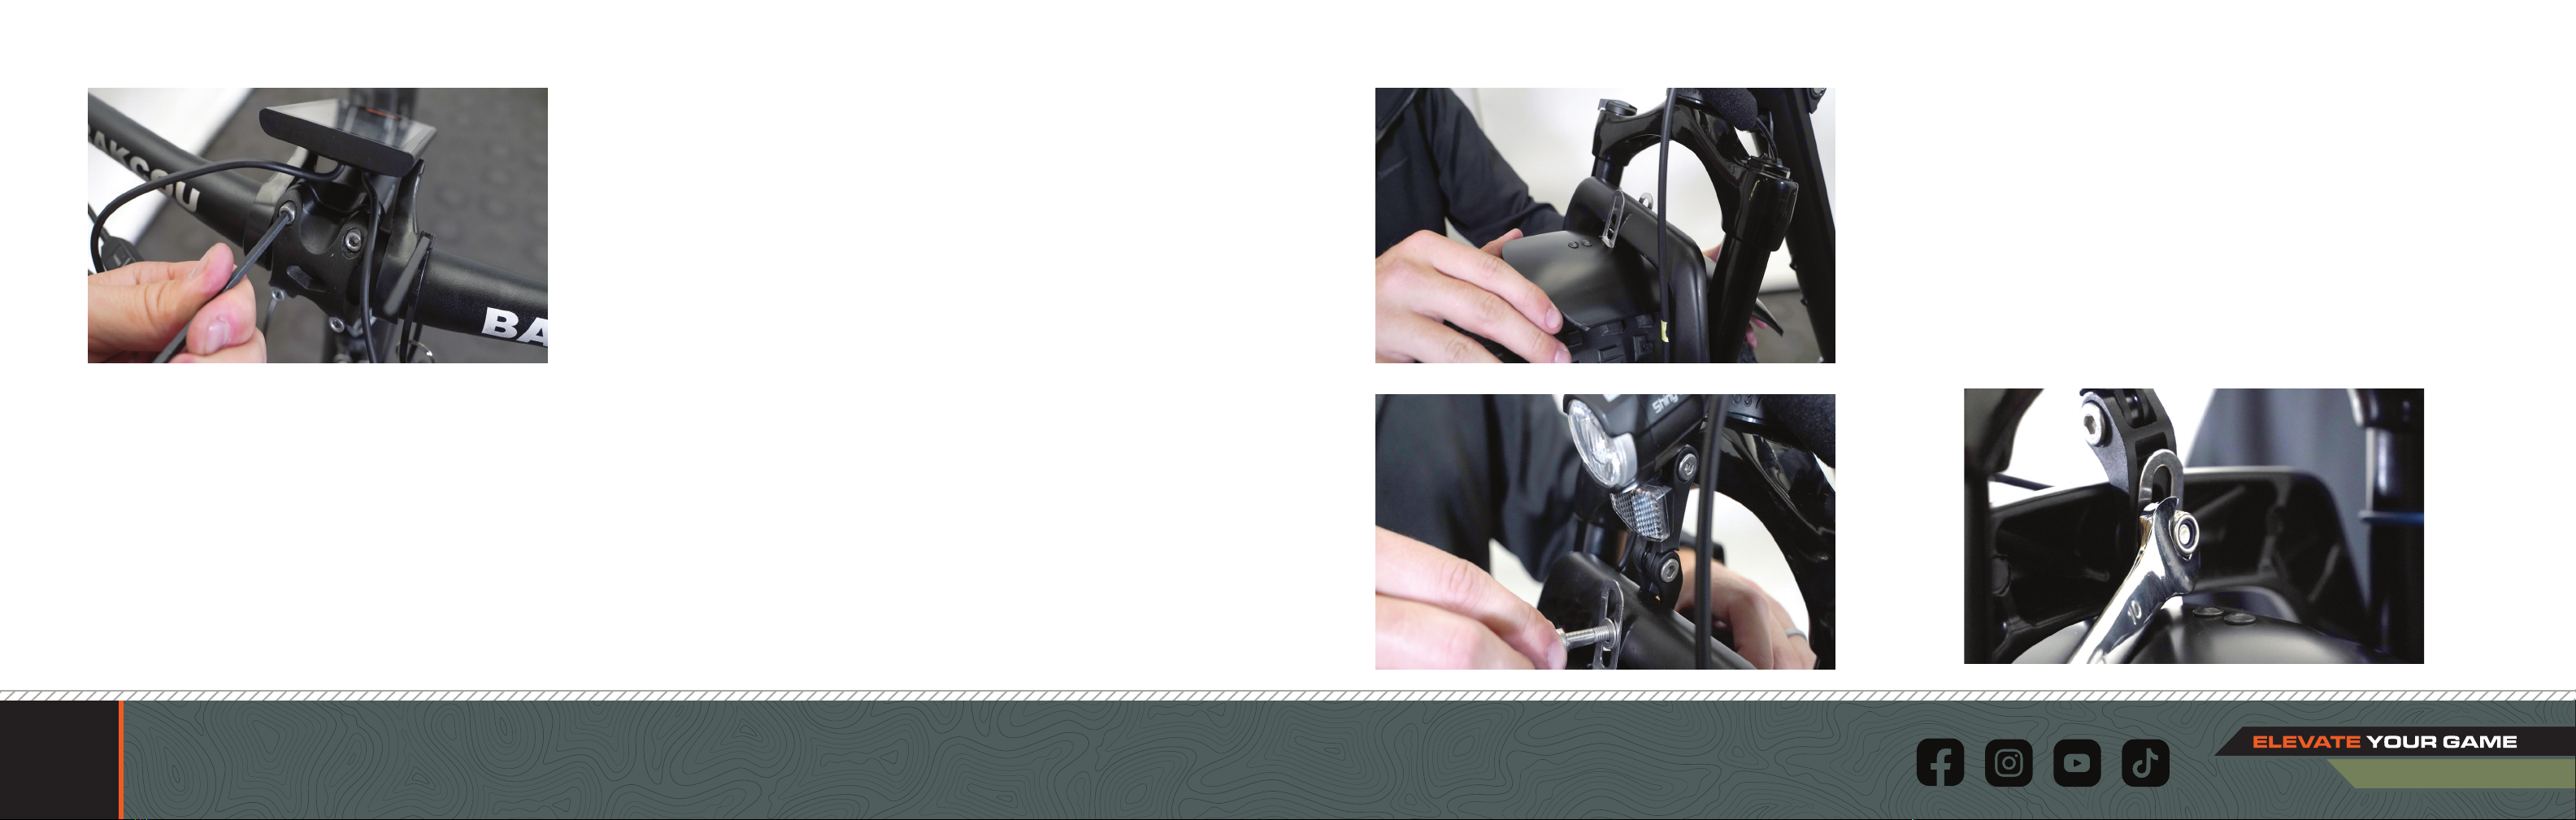
30. Note: A Suspension Adjustment video and
Display Use video can each be viewed
under “Support” on the Bakcou website.
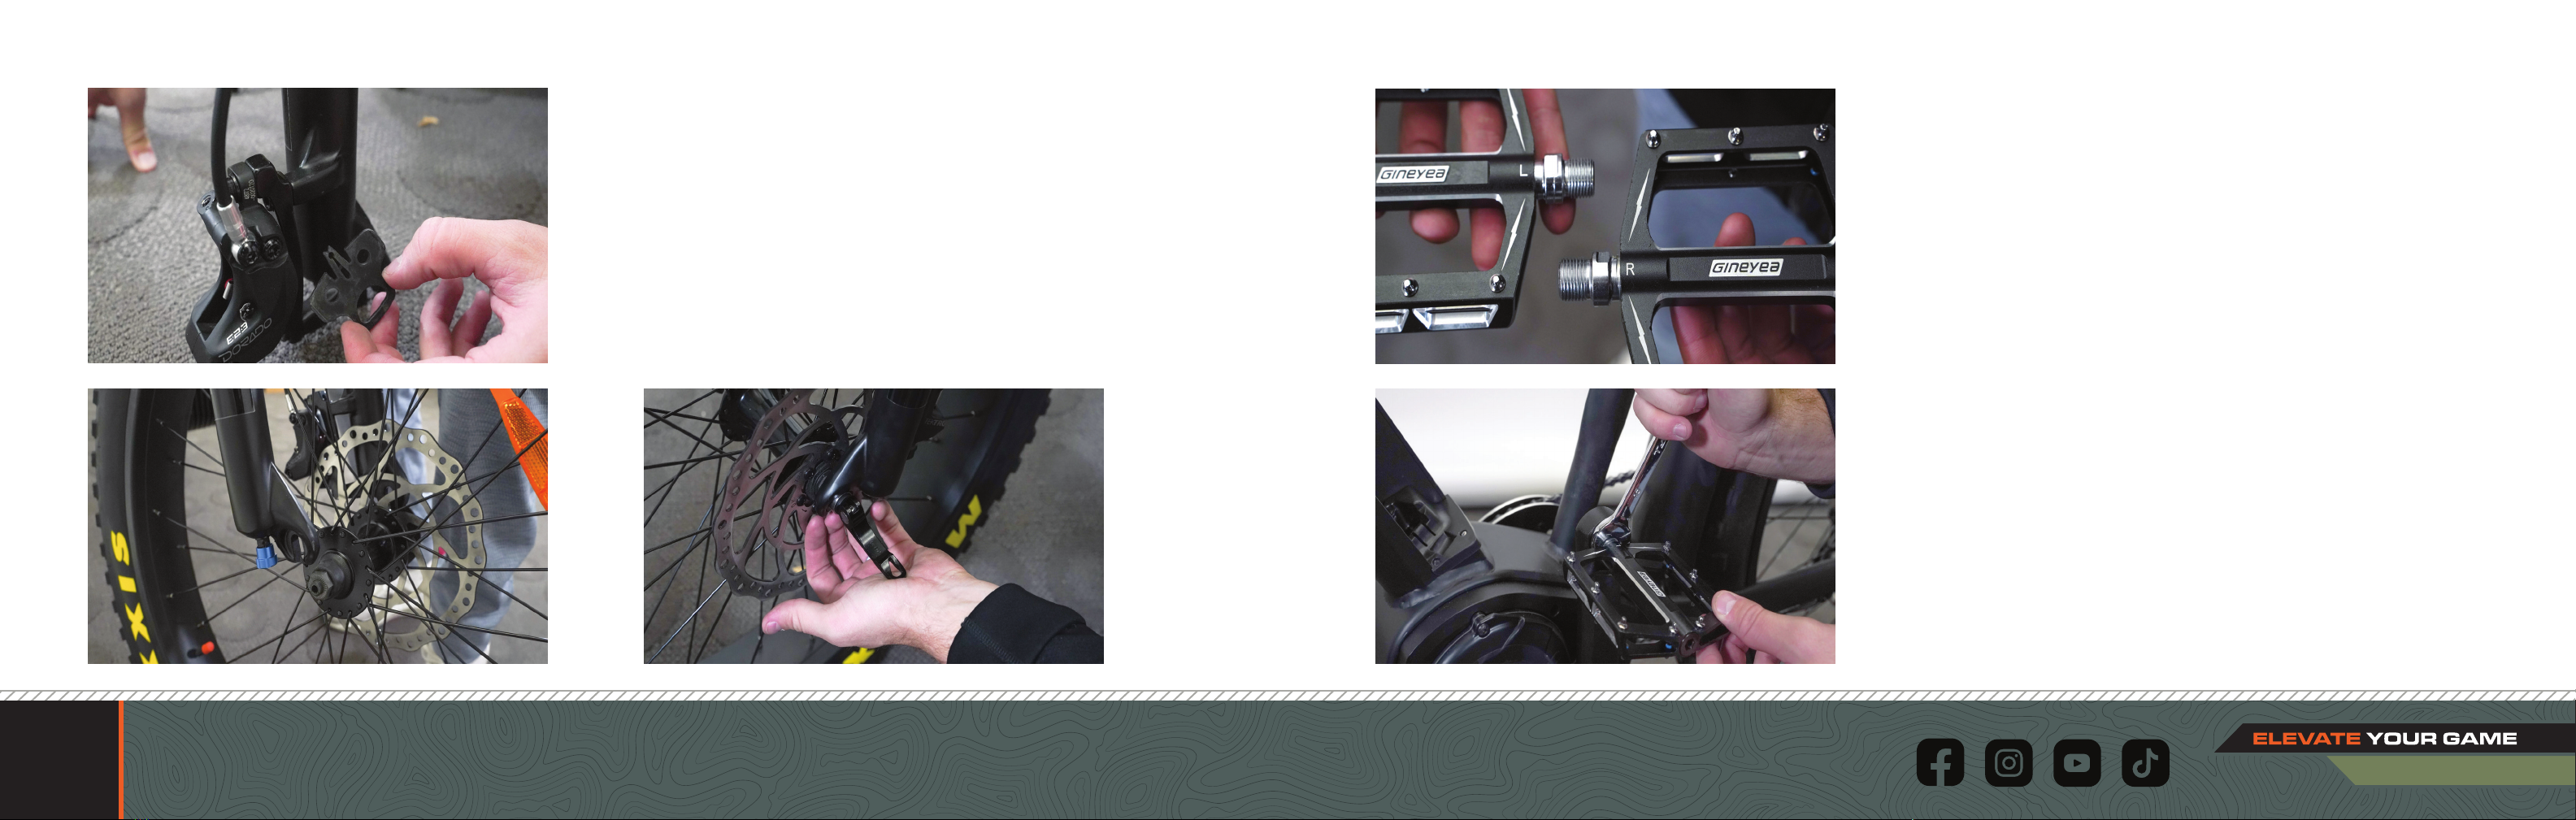
Note: Located at the bottom of some
right front forks is a blue knob called
a shock dampener. This knob is used
to control the rebound speed of the
fork. Knob can be twisted clockwise
to close or counter-clockwise to open,
thus allowing more or less air ow to
increase/decrease rebound speed. Make
certain to tighten the screw inside the
dampener knob and we recommend
using Loctite on the threads to keep
screw in place. After tightening screw
tighten (clockwise) the dampener knob
and then back o 1 ½ turns. After
getting used to your Mule’s suspension,
adjust accordingly.
31. It may be necessary to adjust your
derailleur prior to rst use. Refer to our
Troubleshooting Shifting Problems video on
the Bakcou website for support adjusting
your derailleur, or visit your local bike shop
for assistance.
32. Two “green” rolls of puncture proof tire liners
may be located in the bike box or in the tool
kit box. The liner goes in between the tube
and the tire. If the liners are not in the box
or tool kit box then they were installed at
the factory. Some riders prefer to use these
liners as well as a tube sealant such as Flat
Out for added protection from punctures.
The liner will add some weight to the tire
and does aect the exibility of the rubber
thus slightly changing how the tire rolls
across some terrain. We strongly encourage
using the puncture proof liner when riding
in areas with heavy “goat heads” or other
tube puncturing thorns. (Bakcou YouTube
instructional video available online)
33. Regular and routine maintenance of your
ebike is not only recommended, but highly
essential to ensure proper function, safety,
and longevity of your ebike.
See owners manual for further instruction.
34. Always wear a helmet and other
protective gear while riding.
35. Always know and observe trac and trail
laws and regulations.

BAKCOU.COM
9. For further assistance, go online for helpful instructional videos at bakcou.com
TO POWER YOUR BIKE FOLLOW
THE STEPS BELOW:
ITEMS INCLUDED
WITH YOUR BIKE
• Pedals
• Charger
• Headlight
• Allen wrenches - 4mm, 5mm, 6mm
• Wrenches - 10mm, 15mm
• Hardware
1. Power On Battery
Press battery button.
2. Power On/O Display
Hold power button on control pad
for 3 seconds.
3. Power O Battery
Hold battery button for 3 seconds.

Other manuals for Mule
2
This manual suits for next models
1
Table of contents
Other Bakcou Bicycle manuals