DE
- This charger is not waterproof. Do not use it under the rain or in wet conditions.
- Keep and use it dry.
- If your powerbank accidentally falls into the water, use a dry cloth to dry, make sure not to turn it on
before it is totally dry.
- Do not use in corrosive environments or above 80 degrees Celsius.
- Do not incinerate.
- Your mobile charger is not a toy. Do not allow children to use or play with it.
If it is not working, please perform the following tests :
1 ) Check that the connector you use is suitable for your device .
2) If you have not used your powerbank for several days, maybe that the battery is low or empty. Put
your mobile charger to charge for a minimum of 13 hours to have a correct battery level.
If your powerbank does not work , do not try to x it yourself and return it to a competent service.
Note: If the charger is connected too long, once fully charged it will turn o completely for safety.
WARNING
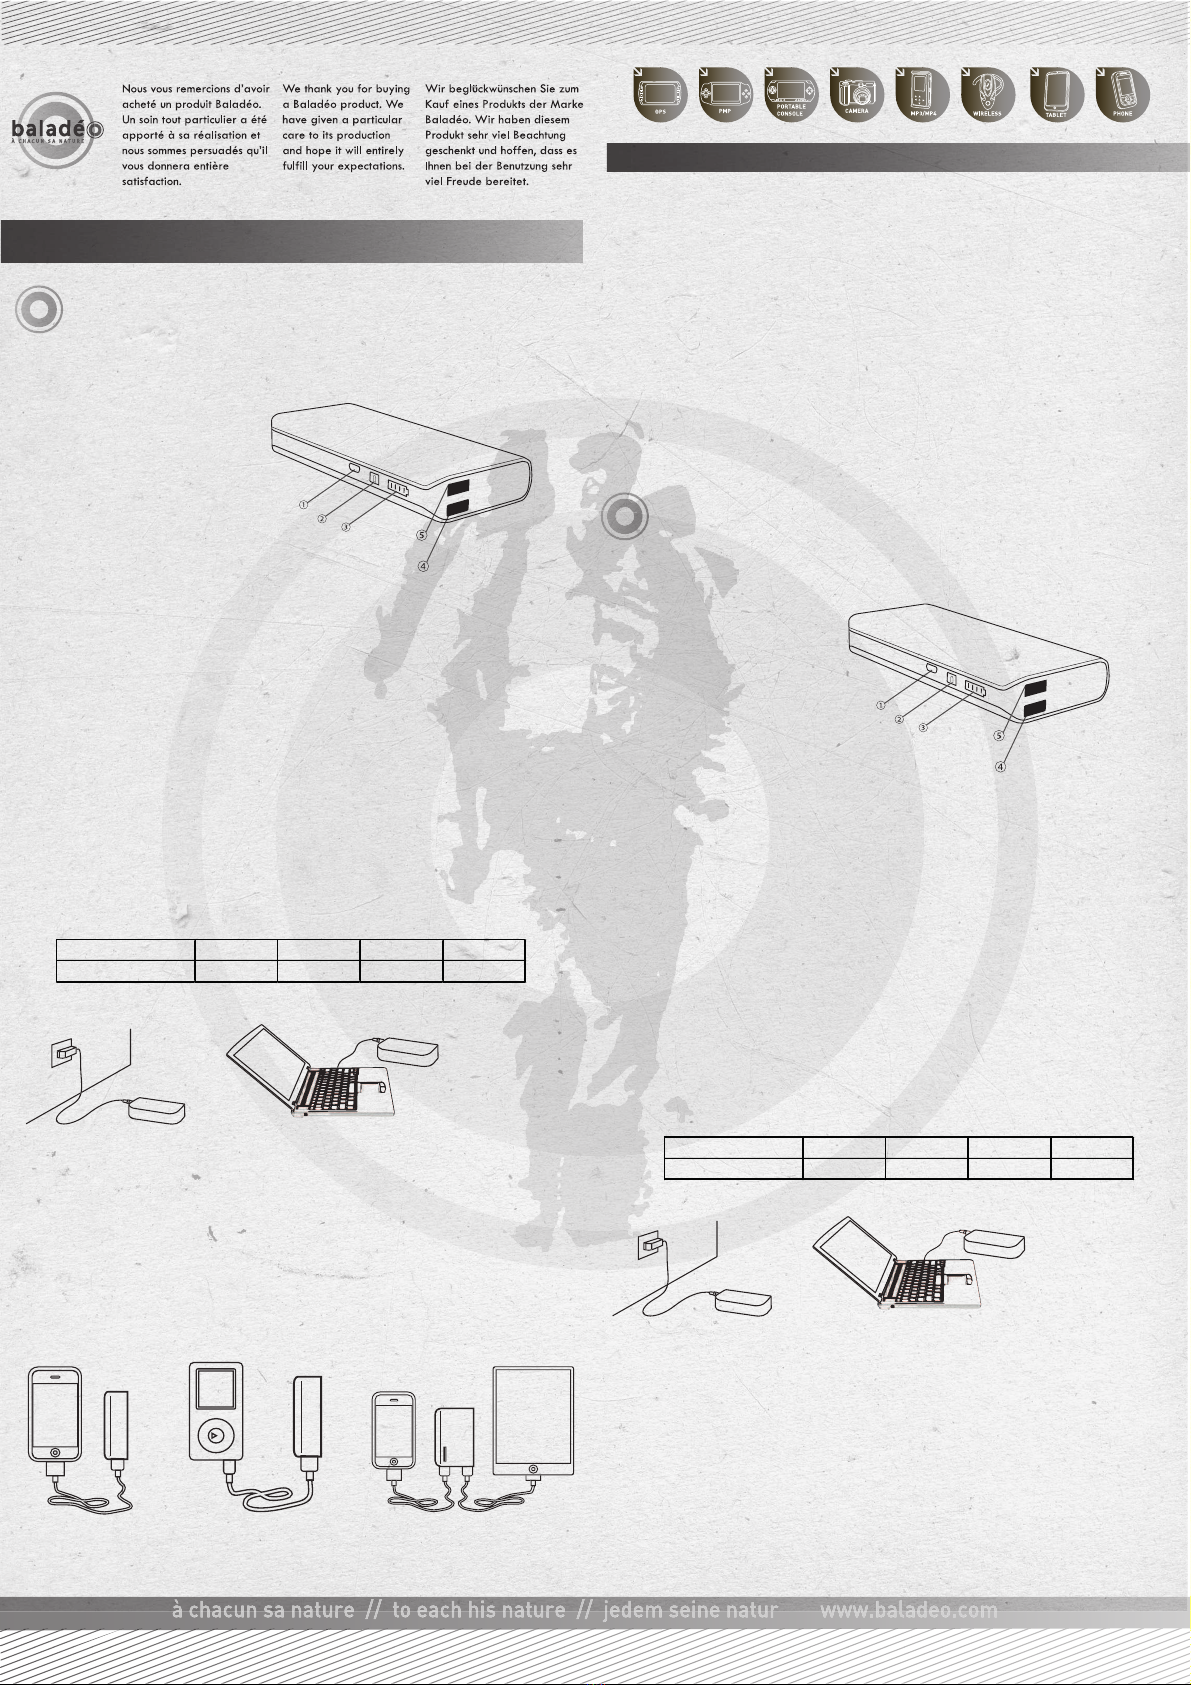
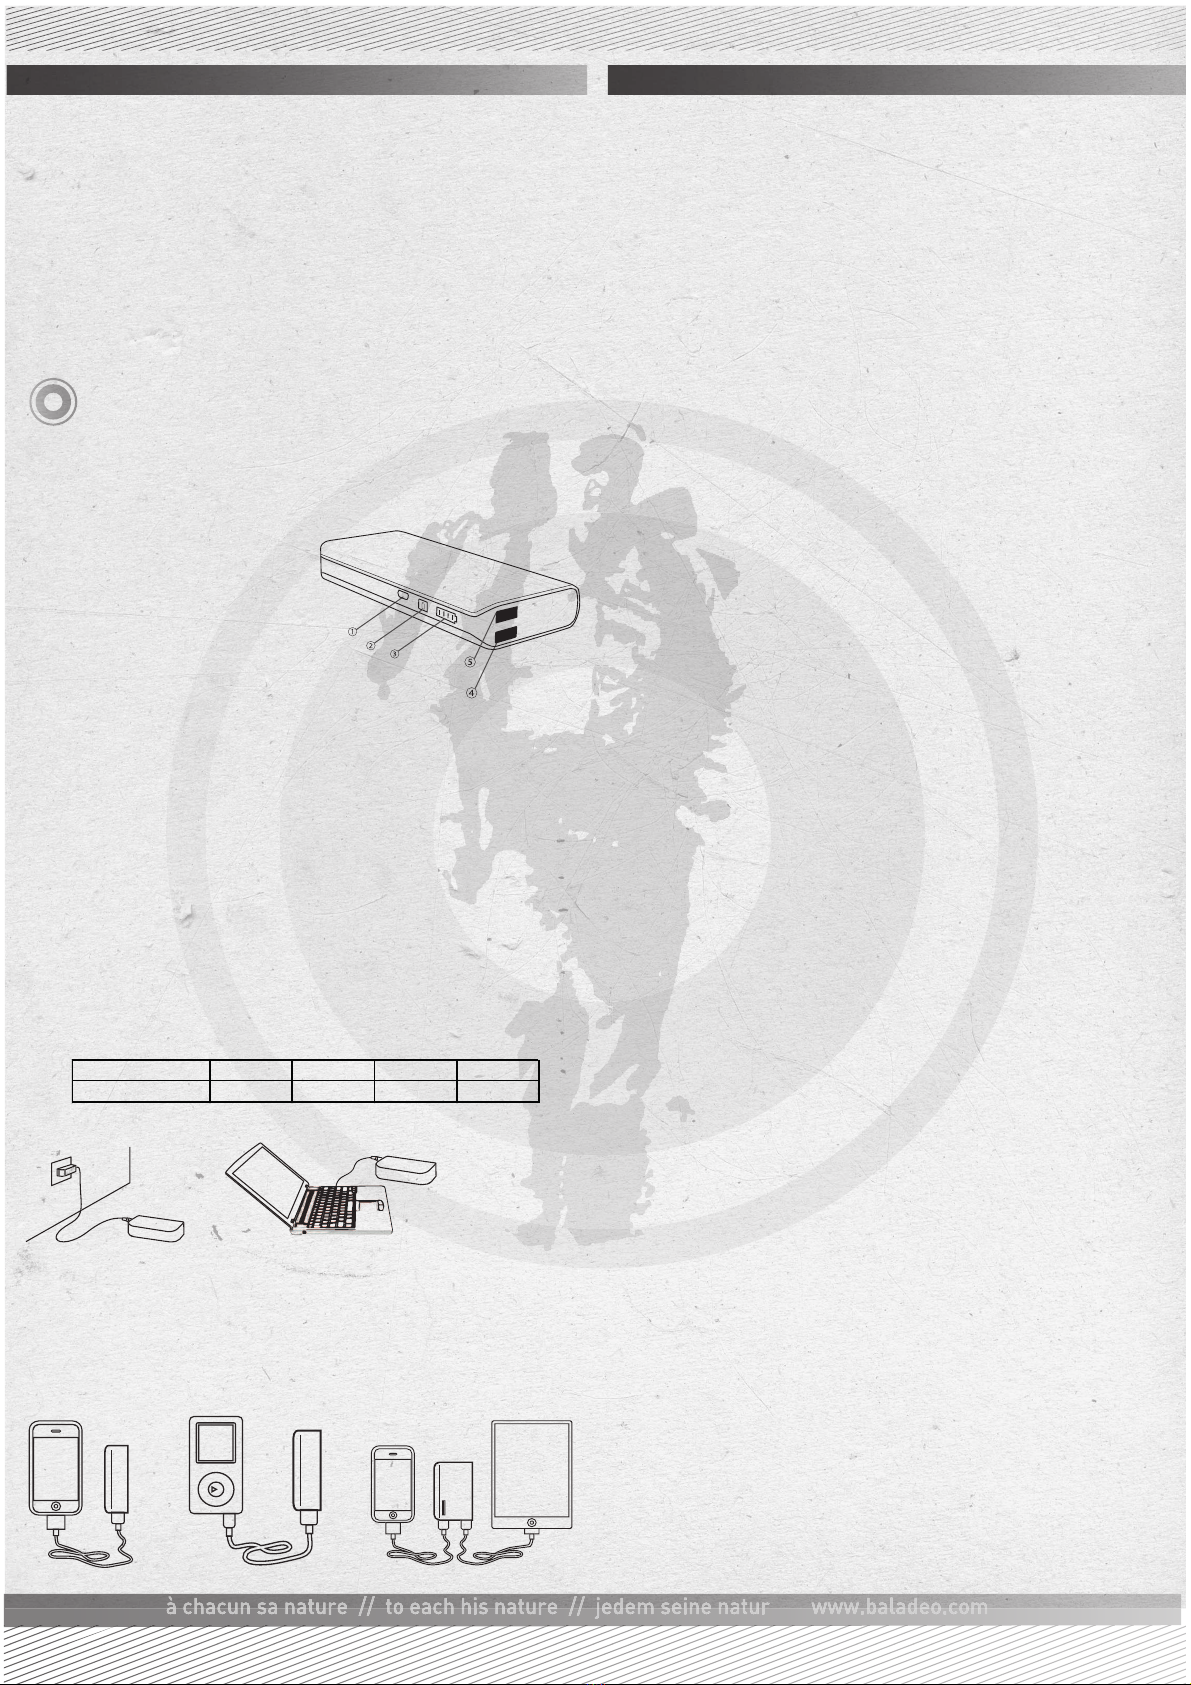
PRODUKTBESCHREIBUNG
①Mikro-USB-Port 5V
②ON/OFF Knopf
③Ladestandsanzeige
④USB-Port 5V/2.1A
⑤USB-Port 5V/1A
TECHNISCHE DETAILS
Batterie: Lithium-Ionen-Batterie
Kapazität: 11000 mAh
Ausgangsleistung des USB-Ports (Output) : 5V/1A; 5V2.1A
Eingangsleistung des Mikro-USB-Ports (Input) : 5V/1A
Ladezeit: 13 Stunden
Maße: 138x62x21,5 mm
Gewicht: 240 g
Um eine optimale Leistung zu garantieren, empfehlen wir Ihnen, das Gerät vor der ersten
Verwendung mindestens 13 Stunden am Stück zu laden.
VERWENDUNG
LADEN DER POWERBANK
Um die Powerbank zu laden, benutzen Sie das mitgelieferte USB-Kabel.
Benutzen Sie das mitgelieferte Kabel, um den Mikro-USB-Port ①der Powerbank mit einem
USB-fähigen Ladeadapter, oder dem USB-Port eines Computers zu verbinden.
Während das Gerät geladen wird blinkt die Ladestandsanzeige ⑥. Ist das Gerät vollständig geladen, so
leuchten alle 4 LED-Leuchten.
Um die Ladestandsanzeige einzuschalten, drücken Sie den ON/OFF①Knopf. Die Ladestandsanzeige ③
zeigt das Batterieniveau der Powerbank an. Sie ③schaltet sich automatisch nach 3 Sekunden aus.
Hinweis: Um eine optimale Leistung zu garantieren, empfehlen wir Ihnen, das Gerät mindestens einmal
im Quartal vollständig zu laden.
Diese Powerbank ist ein kabelloses Ladegerät, mit dem Sie elektronisches Zubehör wie Handys,
Tablet-PC‘s, MP3-/MP4-Player, Spielkonsolen, usw. aufladen können.
Die Powerbank verfügt über eine Kapazität von 11000 mAH, einen 5V Micro-USB-Port und zwei
USB-Ports 5V/1A und 5V/2.1A. Die Powerbank muss vor dem ersten Gebrauch vollständig
aufgeladen werden
- Das Ladegerät ist nicht wasserdicht. Es ist nicht zur Verwendung bei Regen oder in einem feuchten
Umfeld geeignet. Halten Sie das Gerät stets trocken.
- Falls Ihr Gerät aus Versehen ins Wasser fällt, trocknen Sie es mit einem Baumwolltuch und achten Sie
darauf, dass Sie es nicht unter Strom setzen.
- Bringen Sie das Gerät nicht mit ätzenden Substanzen in Verbindung und benutzen Sie es nicht in
Umgebungen über 80°C. Werfen Sie das Gerät nicht ins Feuer.
- Die Powerbank ist kein Spielzeug. Kinder sollten das Gerät weder benutzen, noch damit spielen.
Sollte ein Problem während der Benutzung der Powerbank auftreten, führen Sie bitte folgende Tests
durch:
1) Stellen Sie sicher, dass das Verbindungskabel mit dem zu ladenden Gerät kompatibel ist.
2) Wenn Sie die Powerbank mehrere Tage nicht verwendet haben, kann es sein, dass die Batterie
schwach oder leer ist. Ist dies der Fall, laden Sie die Powerbank mindestens 13 Stunden lang auf, um
eine ausreichende Kapazität zu erreichen.
Eventuelle Reparaturen dürfen ausschließlich von einem autorisierten Fachhändler durchgeführt
werden.
Hinweis: Wenn die Powerbank zu lange an den Strom angeschlossen bleibt, schaltet sie sich nach der
vollständigen Auadung selbstständig ab.
WARNHINWEISE
LADEN EXTERNER GERÄTE
Stellen Sie sicher, dass die Powerbank vollständig geladen ist.
Verbinden Sie die Powerbank mit dem zu ladenden Elektrogerät über den USB-Port ④oder ⑤.
Dank der zwei USB-Ports können Sie zwei Geräte gleichzeitig laden.
Hinweis: Wenn die Powerbank nicht geladen ist, können keine externen Geräte geladen werden.
OUTPUT
DC5V 1A
OUTPUT
DC5V 2.1A
INPUT DC5V