www.balluff.com 7english
Ignition protection
“nA” and “tb”
2.4 Use and inspection
2.4.1 Device category and suitability
The transducer has been classified as electrical equipment
in device group II, i.e. it is suitable for all explosive areas,
with the exception of fire damp-prone mines. It may be
used in gas and dust explosive areas in accordance with
the following descriptions.
Gas explosion protection
Device category II3G covers devices that have been
designed to ensure a normal level of safety during normal
operation within the operational parameters stated by the
manufacturer. Devices in the category may be used in
zone2, i.e. in areas in which an explosive atmosphere
caused by gases, vapors, or mist is not expected. If such
an atmosphere develops, this is very likely to occur only
seldom and for a short period.
The ignition protection type nA ensures that the electrical
equipment is unable to ignite a surrounding explosive
atmosphere during normal operation and under specific
abnormal conditions.
The risk of sparks is minimized.
Gas group IIC indicates that the transducer can be used in
all gases in compliance with the temperature class.
Temperature class T4 indicates that the outer surface
temperature of the transducer is below 135°C, even if the
permissible operating conditions are unfavorable. As a
result, an explosive gas atmosphere with an ignition
temperature of over 135°C cannot be ignited.
Dust explosion protection
Device category II 2 D covers devices that have been
designed to ensure the required amount of safety, even in
case of frequent device malfunctions or error states which
are generally to be expected. Devices in this category may
be used in zone21 in which an explosive atmosphere
caused by dust/air mixtures may occasionally occur.
The ignition protection type tb indicates that the electrical
equipment is protected against dust entry by housing.
Dust group IIIC covers possible use in all areas with an
explosive dust atmosphere, both with conductive and
non-conductive dusts and flammable fibers.
The temperature specification T135°C indicates that the
external surface temperature of the transducer is below
135°C under all conditions of the device category.
IP6x confirms the dust resistance of the housing.
2.4.2 Special conditions (“X” symbol)
The “X” symbol indicates special conditions that must be
noted for safe operation:
– The permissible ambient temperature is limited to
−40°C to +60°C.
– The impact resistance test was done in accordance
with a low degree of mechanical risk.
– Cable and line inlets were tested with reduced tensile
force in accordance with EN60079-0. This is why the
connection cable must be routed in a permanent
location and protected against tension and rotary loads
using an additional clamp. Drag chains may not be
used.
2.4.3 Operator documents
Zone classification in the system is the responsibility of the
operator and must be documented in an explosion
protection document. This document must also contain
the hazard analysis and assessment, proof of training,
maintenance plans and other documents as required
under Directive 1999/92/EC.
We expressly recommend including the user’s guide in the
operator’s documentation. For safety reasons, it must be
taken over completely and without any changes.
2.5 Assembly, installation, and setup
Assembly, installation, and setup of the transducer must
not be done in an explosive atmosphere.
Protect the transducer from damage and wear. In addition
to mechanical protection, this also includes precautions to
prevent non-permissible operating conditions and damage
due to environmental influences.
Note that the position measuring system must be
connected to the potential compensation system in
accordance with the requirements in EN60079-14. The
external connection for the transducer is accomplished by
means of metallic conducting installation in a grounded
area. The flange and housing are mechanically fixed with
electrically conductive connections, so that no potential
differences can occur between them. The cable shield is
connected to the housing and must be connected to the
potential of the system’s control cabinet.
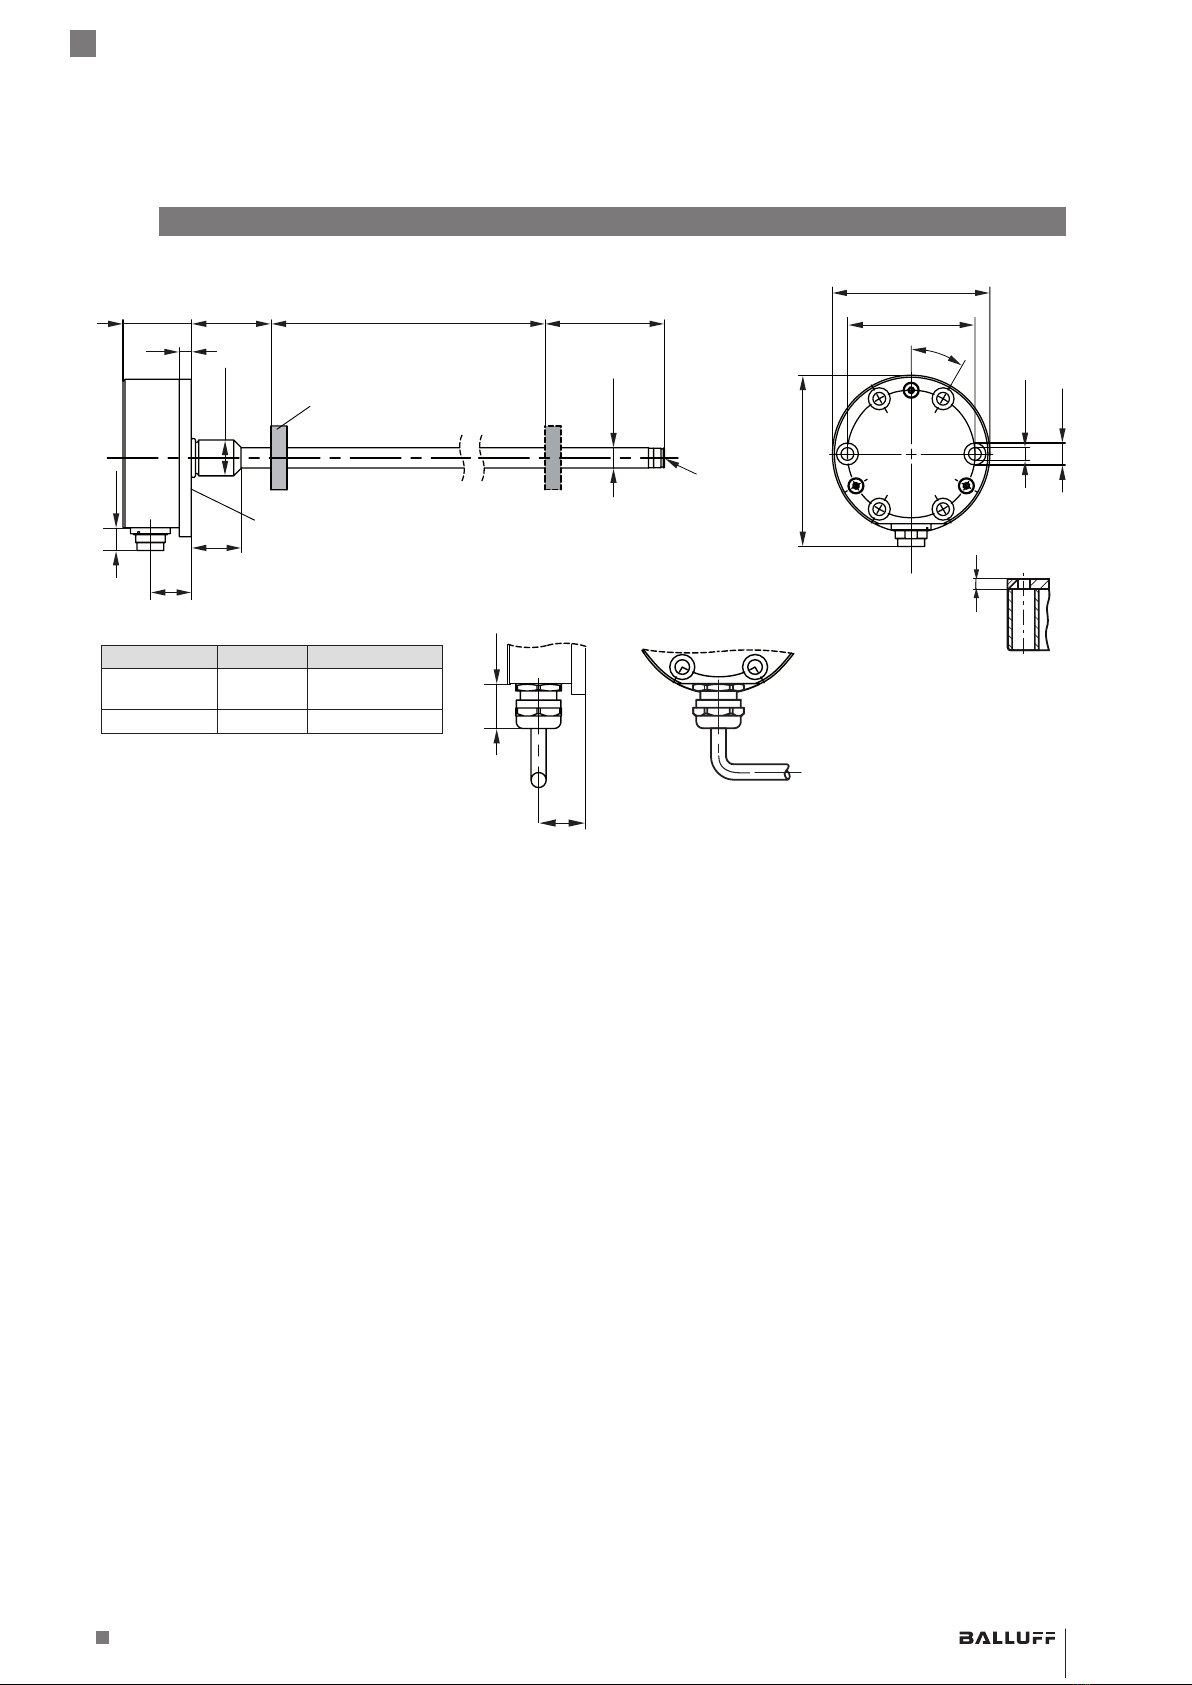
2ATEX safety notes (continued)
BTL7-A/C/E/G5__-M____-K(8)-NEX-SR32/K___
Micropulse Transducer - Rod Style