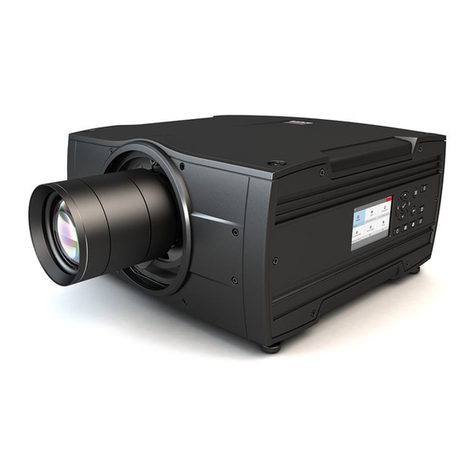
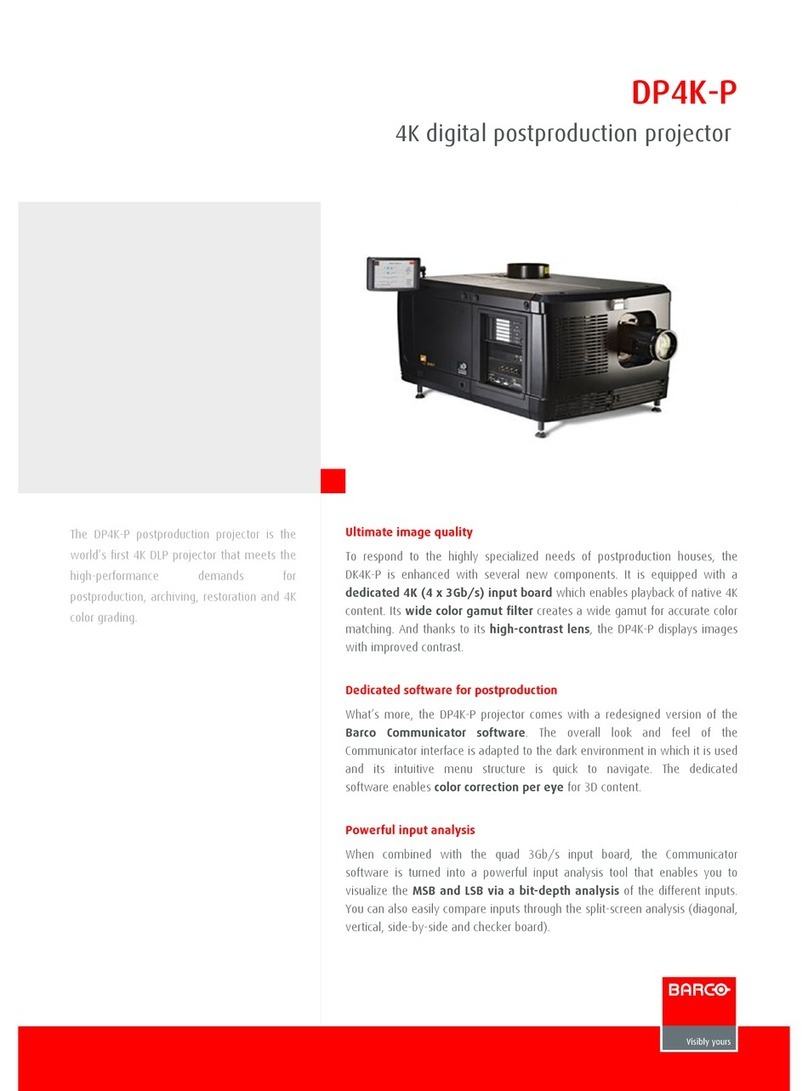
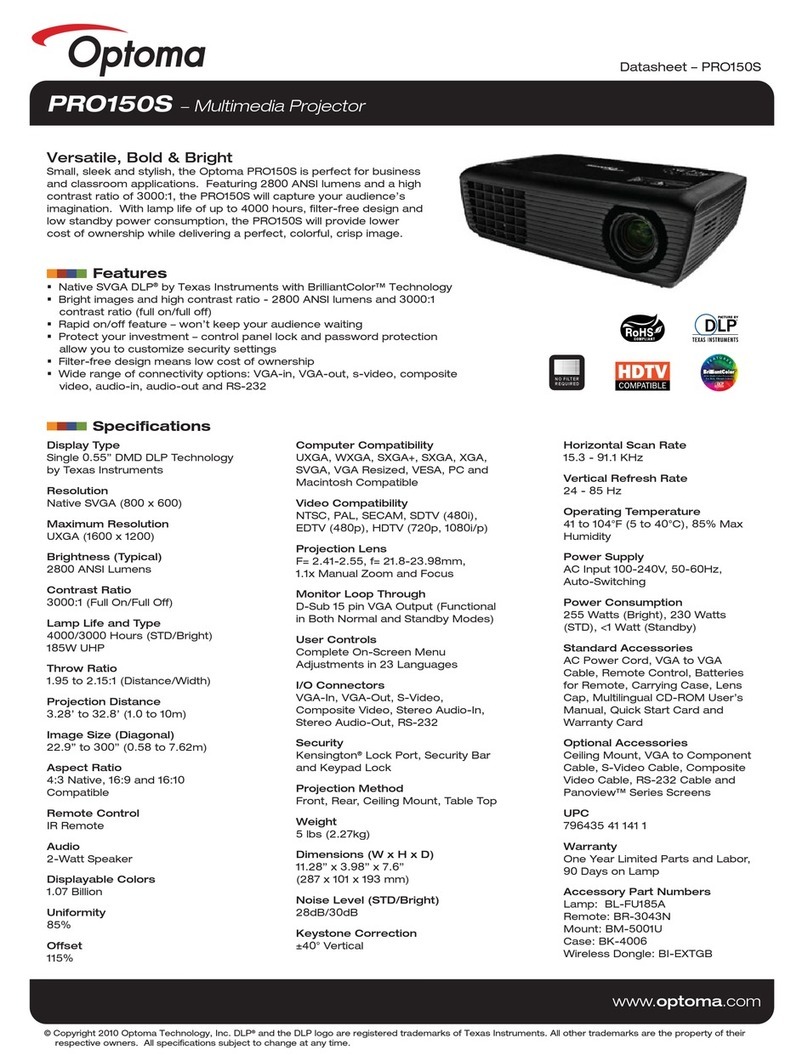
Barco F50 User manual

F50
User Manual
601–0307–00/02
25/02/2016

Barco Fredrikstad AS
Habornveien 53, N-1630 Gamle Fredrikstad, Norway
Phone: +47 6930 4550
Fax: +47 6930 4580
Support: [email protected]
Visit us at the web: www.barco.com
Printed in N0

Changes
Barco provides this manual ’as is’ without warranty of any kind, either expressed or implied, including but not limited to the implied war-
ranties or merchantability and fitness for a particular purpose. Barco may make improvements and/or changes to the product(s) and/or the
program(s) described in this publication at any time without notice.
This publication could contain technical inaccuracies or typographical errors. Changes are periodically made to the information in this
publication; these changes are incorporated in new editions of this publication.
The latest edition of Barco manuals can be downloaded from the Barco web site www.barco.com or from the secured Barco web site
https://www.barco.com/en/signin.
Copyright ©
All rights reserved. No part of this document may be copied, reproduced or translated. It shall not otherwise be recorded, transmitted or
stored in a retrieval system without the prior written consent of Barco.
Federal Communications Commission (FCC Statement)
This equipment has been tested and found to comply with the limits for a class A digital device, pursuant to Part 15 of the FCC rules.
These limits are designed to provide reasonable protection against harmful interference when the equipment is operated in a commercial
environment. This equipment generates, uses, and can radiate radio frequency energy and, if not installed and used in accordance with
the instruction manual, may cause harmful interference to radio communications. Operation of this equipment in a residential area may
cause harmful interference, in which case the user will be responsible for correcting any interference at his own expense
Changes or modifications not expressly approved by the party responsible for compliance could void the user’s authority to operate the
equipment
EN55022/CISPR22 Class A ITE (Information Technology Equipment)
Class A ITE is a category of all other ITE which satisfies the class A ITE limits but not the class B ITE limits. Such equipment should not
be restricted in its sale but the following warning shall be included in the instructions for use:
Warning : This is a class A product. In a domestic environment this product may cause radio interference in which case the user may be
required to take adequate measures.
Guarantee and Compensation
Barco provides a guarantee relating to perfect manufacturing as part of the legally stipulated terms of guarantee. On receipt, the purchaser
must immediately inspect all delivered goods for damage incurred during transport, as well as for material and manufacturing faults Barco
must be informed immediately in writing of any complaints.
The period of guarantee begins on the date of transfer of risks, in the case of special systems and software on the date of commissioning,
at latest 30 days after the transfer of risks. In the event of justified notice of complaint, Barco can repair the fault or provide a replacement
at its own discretion within an appropriate period. If this measure proves to be impossible or unsuccessful, the purchaser can demand a
reduction in the purchase price or cancellation of the contract. All other claims, in particular those relating to compensation for direct or
indirect damage, and also damage attributed to the operation of software as well as to other services provided by Barco, being a component
of the system or independent service, will be deemed invalid provided the damage is not proven to be attributed to the absence of properties
guaranteed in writing or due to the intent or gross negligence or part of Barco.
If the purchaser or a third party carries out modifications or repairs on goods delivered by Barco, or if the goods are handled incorrectly,
in particular if the systems are operated incorrectly or if, after the transfer of risks, the goods are subject to influences not agreed upon in
the contract, all guarantee claims of the purchaser will be rendered invalid. Not included in the guarantee coverage are system failures
which are attributed to programs or special electronic circuitry provided by the purchaser, e.g. interfaces. Normal wear as well as normal
maintenance are not subject to the guarantee provided by Barco either.
The environmental conditions as well as the servicing and maintenance regulations specified in this manual must be complied with by the
customer.
Software License Agreement
You should carefully read the following terms and conditions before using this software. Your use of this software indicates your acceptance
of this license agreement and warranty.
Terms and Conditions:
1. No redistribution of the software is allowed.
2. Reverse-Engineering. You may not reverse engineer, decompile, disassemble or alter this software product.
Disclaimer of Warranty:
This software and the accompanying files are sold “as is” and without warranties as to performance or merchantability or any other war-
ranties whether expressed or implied. In no event shall Barco be liable for damage of any kind, loss of data, loss of profits, business

interruption or other pecuniary loss arising directly or indirectly. Any liability of the seller will be exclusively limited to replacement of the
product or refund of purchase price.
Trademarks
Brand and product names mentioned in this manual may be trademarks, registered trademarks or copyrights of their respective holders.
All brand and product names mentioned in this manual serve as comments or examples and are not to be understood as advertising for
the products or their manufacturers.

Table of contents
TABLE OF CONTENTS
1. Introduction ......................................................................................................... 3
1.1 Welcome.............................................................................................................................. 4
1.2 About this manual . . .................................................................................................................. 5
2. Safety................................................................................................................. 7
2.1 General Considerations .............................................................................................................. 8
2.2 Important safety instructions ......................................................................................................... 9
2.3 Product safety labels ................................................................................................................13
3. Getting to know the projector...................................................................................15
3.1 Introducing a small revolution.......................................................................................................16
3.2 About the projector ..................................................................................................................17
3.3 Projector components ...............................................................................................................18
3.4 User interface........................................................................................................................19
3.5 Accessories..........................................................................................................................20
4. Lenses...............................................................................................................23
4.1 Lens range . . . ........................................................................................................................24
4.2 Installing a lens ......................................................................................................................25
4.3 Lens shift.............................................................................................................................26
4.4 Adjust zoom, focus and iris..........................................................................................................27
4.5 Lens lock.............................................................................................................................28
5. Installation .........................................................................................................29
5.1 Installing the projector...............................................................................................................30
5.2 Installation conditions ...............................................................................................................31
5.3 Initial inspection......................................................................................................................33
5.4 Positioning the projector.............................................................................................................34
5.5 Mounting the projector on a flat surface ............................................................................................36
5.6 Installing the projector to a ceiling mount or frame.................................................................................37
5.7 Throw distance ......................................................................................................................38
5.8 Lens shift and offset matrix..........................................................................................................40
5.9 Scheimpflug (Boresight) adjustment ................................................................................................42
5.10 Scheimpflug adjustment.............................................................................................................43
6. Input and communication........................................................................................45
6.1 Local keypad.........................................................................................................................46
6.2 Status indicator light.................................................................................................................47
6.3 Wireless remote control .............................................................................................................48
6.4 Connector Panel.....................................................................................................................49
6.5 Connect to a source .................................................................................................................50
6.6 Extended Display Identification Data (EDID).......................................................................................51
6.7 HDBaseT ............................................................................................................................52
6.8 VGA.................................................................................................................................. 53
6.9 DVI-D ................................................................................................................................54
6.10 HDMI.................................................................................................................................55
6.11 Display Port 1........................................................................................................................ 56
6.12 Display Port 2........................................................................................................................ 57
6.13 LAN (Control)........................................................................................................................58
6.14 RS232 (Control) ..................................................................................................................... 59
6.15 USB-A ...............................................................................................................................60
6.16 Sync 1 and 2.........................................................................................................................61
6.17 Sync 3................................................................................................................................62
7. Change projector settings.......................................................................................63
7.1 Select a power mode................................................................................................................64
7.2 Lock the projector ................................................................................................................... 65
7.3 Customize the On Screen Display (OSD) ..........................................................................................66
7.4 Review and change network settings ...............................................................................................67
7.5 Review system status ...............................................................................................................68
7.6 Revert to factory settings............................................................................................................ 69
8. Set up the picture .................................................................................................71
8.1 Select the image orientation ........................................................................................................72
8.2 Use test images .....................................................................................................................73
8.3 Set up Picture-by-Picture............................................................................................................74
8.4 Apply a display profile ............................................................................................................... 75
8.5 Adjust lamp power...................................................................................................................76
8.6 Use gamma curves..................................................................................................................77
8.7 Adjust brightness, saturation and contrast..........................................................................................79
8.8 Choose an aspect ratio..............................................................................................................80
601–0307–00 F50 25/02/2016 1

Table of contents
9. Advanced picture adjustments .................................................................................81
9.1 Apply smear reduction processing (SRP) . .........................................................................................83
9.2 Crop the image ......................................................................................................................84
9.3 Manual adjustments on VGA inputs ................................................................................................86
10. Color calibration...................................................................................................87
10.1 RealColor™ ......................................................................................................................... 88
10.2 BrilliantColor™ ......................................................................................................................90
10.3 Define the x,y coordinates for RGB(W).............................................................................................91
10.4 Use color temperature to adjust white point ........................................................................................92
10.5 Color calibration best practice.......................................................................................................93
10.6 Calibrate projector color.............................................................................................................94
11. Multichannel installations .......................................................................................95
11.1 Synchronization best practice.......................................................................................................96
11.2 Synchronization concept for the F50 ...............................................................................................97
11.3 The Installation — Synchronization menu . ........................................................................................98
11.4 Synchronization menu 2D . ..........................................................................................................99
11.5 Synchronization menu 3D . .........................................................................................................100
11.6 Troubleshoot source sync issues ..................................................................................................102
12. Stereoscopic multichannel setup ............................................................................ 105
12.1 AS3D modes. .......................................................................................................................106
12.2 AS3D synchronization best practice...............................................................................................107
12.3 The 3D menu .......................................................................................................................108
12.4 Synchronous frame sequential.....................................................................................................109
12.5 Asynchronous frame sequential . . .................................................................................................110
12.6 Synchronous side by side . . ........................................................................................................111
12.7 Asynchronous side by side.........................................................................................................112
13. Color wheel....................................................................................................... 113
13.1 VizSim (RGB).......................................................................................................................114
13.2 VizSim Bright (RGB)................................................................................................................115
13.3 High Brightness MKIII (RGBC + White)............................................................................................116
14. User maintenance............................................................................................... 117
14.1 Replace the projector lamp.........................................................................................................118
14.2 Update the projector firmware......................................................................................................119
15. Technical Specifications ....................................................................................... 121
15.1 F50 1080............................................................................................................................122
15.2 F50 WUXGA........................................................................................................................123
15.3 F50 WQXGA........................................................................................................................124
15.4 F50 Panorama ......................................................................................................................125
16. Environmental information .................................................................................... 127
16.1 Disposal information................................................................................................................128
16.2 RoHS compliance ..................................................................................................................129
16.3 Production address . ................................................................................................................131
2601–0307–00 F50 25/02/2016

1. Introduction
1.1 Welcome
Welcome!
Congratulations on your purchase of a Barco F50 projector! The F50 projectors are part of a proud tradition of quality projectors built
for superior performance, and feature compact footprint, high performance optics and lenses, excellent resolution, Active Stereo 3D
capabilities and built-in frame-lock synchronization.
4601–0307–00 F50 25/02/2016

1. Introduction
1.2 About this manual
General
We recommend you read this user manual before setting up and operating your projector for the first time. Familiarizing yourself
with the projectors’ features and functions, as well as its safety and maintenance features, will help ensure you enjoy many years
of hassle-free projection.
Following is a brief overview of how information in the manual is organized and presented.
The content in this manual is systematized primarily by function, and then topic.
On the first page of each chapter is an overview of the chapter contents.
A menu path is expressed in the following manner: Main Menu — Sub Menu — Sub sub menu. For example, Main Menu —
Installation — Synchronization
All physical measurement units given in this manual are according to the International Standard of Units (SI units). Conversion from
this to other measurement units is the responsibility of the user.
Illustrations used in the manual are for general reference only, and may differ from your product.
601–0307–00 F50 25/02/2016 5

1. Introduction
6601–0307–00 F50 25/02/2016

2. Safety
2. SAFETY
About this chapter
Read this chapter thoroughly before attempting to install or operate the projector.
To prevent personal injury to users or physical damage to the projector while installing and using your projector, ensure that you
understand and follow all safety guidelines, instructions and warnings included in this chapter and this manual.
Overview
• General Considerations
• Important safety instructions
• Product safety labels
601–0307–00 F50 25/02/2016 7

2. Safety
2.1 General Considerations
General safety instructions
• Before operating this equipment please read this manual thoroughly and retain it for future reference.
• All warnings on the projector and in the documentation manuals shall be adhered to.
• All instructions for operating and use of this equipment shall be followed precisely.
• All local installation codes shall be adhered to.
Owner’s record
The part number and serial number are printed on a label which is stuck on the respective part. Record these numbers in the spaces
provided below. Refer to them whenever you call upon your Barco dealer regarding this product.
Product article number
Product serial number
Dealer
General conditions for use
• Use only the cables and cords supplied with the projector or original replacement cables. Using other cables or cords may lead
to malfunction and permanent damage to the unit.
• Always use a grounded (3–pronged) power cord to ensure proper grounding of the unit. Never use 2-pronged power cords, as
this is dangerous and could lead to electrical shock.
• Do not attempt to open the projector unit. The projector contains no user serviceable parts. Refer all repairs to qualified per-
sonnel only. Make sure that no objects enter into the vents and openings of the chassis.
• Do not spill any liquids on the projector or into the vents or openings of the unit.
• Always remove the lens cap before switching on the projector. If the lens cap is not removed, it may melt due to the high energy
light emitted through the lens. Melting the lens cap may permanently damage the surface of the projection lens.
• Only place the projector on a stable surface, or mount it securely using an approved ceiling-mount.
• Always operate the projector according to the rotation guidelines. Operating the unit in other positions may reduce lamp life
significantly, and may lead to overheating, resulting in malfunctioning.
• Always allow ample airflow through the projector. Never block any of the air vents. Never cover the unit in any way while
running. Allow for sufficient distance to walls and ceilings to avoid overheating.
• Minimum safety (clearance) distance to the sides and rear of the unit is 50cm / 20” in any direction (15 cm/ 6” to ceiling).
• Hot air is exhausted from the rear vent. Do not place objects that are sensitive to heat nearer than 50cm / 20” to the exhaust
vent.
• The projector is designed for indoor use only. Never operate the unit outdoors.
• Do not operate the projector outside its temperature and humidity specifications, as this may result in overheating and malfunc-
tioning.
• Only connect the projector to signal sources and voltages as described in the technical specification. Connecting to unspecified
signal sources or voltages may lead to malfunction and permanent damage of the unit.
• Wherever possible, use main power supply with surge protection to prevent damage to the projector caused by unscheduled
power surges.
• Allow lamp to cool down for at least 60 minutes before changing. USE ONLY ORIGINAL LAMPS.
• Connecting sources to a powered projector may result in product failure. It is recommended that the power cable connector
(projector-end) or the mains power socket is accessible whilst the product is in use to enable mains power to be disconnected
or switched off when connecting source devices. This should be considered during product installation.
8601–0307–00 F50 25/02/2016

2. Safety
2.2 Important safety instructions
To prevent the risk of electrical shock
• This projector should be operated from an AC power source. Ensure that the mains voltage and capacity matches the projector
electrical ratings. If you are unable to install the AC requirements, contact your electrician. Do not defeat the purpose of the
grounding.
• Installation according to the local electrical code and regulations by qualified technical personnel only.
• A readily accessible disconnect device must be incorporated externally to the equipment for removal of the power to the pro-
jector cord.
• Warning: High leakage current. Earth connection essential before connecting supply.
• Do not allow anything to rest on the power cord. Do not locate this projector where persons will walk on the cord.
• Do not operate the projector with a damaged cord or if the projector has been dropped or damaged - until it has been examined
and approved for operation by a qualified service technician.
• Position the cord so that it will not be tripped over, pulled, or contact hot surfaces.
• If an extension cord is necessary, a cord with a current rating at least equal to that of the projector should be used. A cord rated
for less amperage than the projector may overheat.
• Never push objects of any kind into this projector through cabinet slots as they may touch dangerous voltage points or short
circuit parts that could result in a risk of fire or electrical shock.
• Do not expose this projector to rain or moisture.
• Do not immerse or expose this projector in water or other liquids.
• Do not spill liquid of any kind on this projector.
• Should any liquid or solid object fall into the cabinet, unplug the set and have it checked by qualified service personnel before
resuming operations.
• Do not disassemble this projector, always take it to a trained service person when service or repair work is required.
• Do not use an accessory attachment which is not recommended by the manufacturer.
• Lightning - For added protection for this video product during a lightning storm, or when it is left unattended and unused for
long periods of time, remove all power from the projector. This will prevent damage to the projector due to lightning and AC
power-line surges.
601–0307–00 F50 25/02/2016 9

2. Safety
To prevent personal injury
• Isolate electrically before replacing the lamp or lamp house. Caution: Hot lamp (house).
• Caution: High pressure lamp may explode if improperly handled. Refer servicing to qualified service personnel.
• To prevent injury and physical damage, always read this manual and all labels on the system before inserting the lamp casing,
powering the projector or adjusting the projector.
• To prevent injury, ensure that the lens and all cover plates are correctly installed. See installation procedures.
• Warning: high intensity light beam. NEVER look into the lens ! High luminance could result in damage to the eye.
•Warning: extremely high brightness lamps: This projector uses extremely high brightness lamps. Never attempt to look
directly into the lens or at the lamp. If the projection distance is less than 6 meter, any person needs to be at least 4 meters
away from the projected image. Avoid close range reflection of the projected image on any reflecting surface (such as glass,
metal, …) . When operating the projector, we strongly recommend wearing suitable safety glasses.
• Before attempting to remove any of the projector’s covers, disconnect the projector power cord for removal of all power from
the projector.
• When required to remove all power from the projector, to access parts inside, always disconnect the projector power cord for
removal of all power from the projector.
• Do not place this equipment on an unstable cart, stand, or table. The product may fall, causing serious damage to it and
possible injury to the user.
• It is hazardous to operate without lens or shield. Lenses, shields or ultra violet screens shall be changed if they have become
visibly damaged to such an extent that their effectiveness is impaired. For example by cracks or deep scratches.
•Warning: Protection from ultraviolet radiation: Do not look directly in the light beam. The lamp contained in this product is
an intense source of light and heat. One component of the light emitted from this lamp is ultraviolet light. Potential eye and skin
hazards are present when the lamp is energized due to ultraviolet radiation. Avoid unnecessary exposure. Protect yourself and
your employees by making them aware of the hazards and how to protect themselves. Protecting the skin can be accomplished
by wearing tightly woven garments and gloves. Protecting the eyes from UV can be accomplished by wearing safety glasses
that are designed to provide UV protection. In addition to the UV, the visible light from the lamp is intense and should also be
considered when choosing protective eye wear.
•Mercury Vapor Warnings: Keep the following warnings in mind when using the projector. The lamp used in the projector
contains mercury. In case of a lamp rupture, explosion there will be a mercury vapor emission. In order to minimize the potential
risk of inhaling mercury vapors:
- Ensure the projector is installed only in ventilated rooms.
- Replace the lamp module before the end of its operational life.
- Promptly ventilate the room after a lamp rupture, explosion has occurred, evacuate the room (particularly in case of a preg-
nant woman).
- Seek medical attention if unusual health conditions occur after a lamp rupture, explosion, such as headache, fatigue, short-
ness of breath, chest-tightening coughing or nausea.
•Exposure to UV radiation: Some medications are known to make individuals extra sensitive to UV radiation. The American
Conference of Governmental Industrial Hygienists (ACGIH) recommends occupational UV exposure for an-8 hour day to be
less than 0,1 micro-watts per square centimeters of effective UV radiation. An evaluation of the workplace is advised to assure
employees are not exposed to cumulative radiation levels exceeding these government guidelines.
WARNING:This product contains chemicals, including lead, known to the State of California to cause birth
defects or other reproductive harm. Recycle properly, do not dispose of in ordinary waste!
WARNING:Service personnel must use eye and skin protection during servicing.
10 601–0307–00 F50 25/02/2016

2. Safety
To prevent fire hazard
• Do not place flammable or combustible materials near the projector!
• Barco large screen projection products are designed and manufactured to meet the most stringent safety regulations. This
projector radiates heat on its external surfaces and from ventilation ducts during normal operation, which is both normal and
safe. Exposing flammable or combustible materials into close proximity of this projector could result in the spontaneous ignition
of that material, resulting in a fire. For this reason, it is absolutely necessary to leave an “exclusion zone” around all external
surfaces of the projector whereby no flammable or combustible materials are present. The exclusion zone must be not less
than 40 cm (16”) for all DLP Cinema projectors. The exclusion zone on the lens side must be at least 5 m. Do not cover the
projector or the lens with any material while the projector is in operation. Keep flammable and combustible materials away from
the projector at all times. Mount the projector in a well ventilated area away from sources of ignition and out of direct sun light.
Never expose the projector to rain or moisture. In the event of fire, use sand, CO2or dry powderfire extinguishers. Never use
water on an electrical fire. Always have service performed on this projector by authorized Barco service personnel. Always
insist on genuine Barco replacement parts. Never use non-Barco replacement parts as they may degrade the safety of this
projector.
• Slots and openings in this equipment are provided for ventilation. To ensure reliable operation of the projector and to protect
it from overheating, these openings must not be blocked or covered. The openings should never be blocked by placing the
projector too close to walls, or other similar surface. This projector should never be placed near or over a radiator or heat
register. This projector should not be placed in a built-in installation or enclosure unless proper ventilation is provided.
• Projection rooms must be well ventilated or cooled in order to avoid build up of heat. It is necessary to vent hot exhaust air from
console to the outside of the building.
• Let the projector cool completely before storing. Remove cord from the projector when storing.
• Heat sensitive materials should not be placed in the path of the exhaust air or on the lamp house.
To prevent projector damage
• This projector has been designed for use with a specific lamp (house) type. See installation instructions for its correct type.
•Theairfilters of the projector must be cleaned or replaced on a regular basis (a "clean" booth would be monthly-minimum).
Neglecting this could result in disrupting the air flow inside the projector, causing overheating. Overheating may lead to the
projector shutting down during operation.
• The projector must always be installed in a manner which ensures free flow of air into its air inlets.
• In order to ensure that correct airflow is maintained, and that the projector complies with Electromagnetic Compatibility (EMC)
and safety requirements, it should always be operated with all of it’s covers in place.
• Slots and openings in the cabinet are provided for ventilation. To ensure reliable operation of the product and to protect it from
overheating, these openings must not be blocked or covered. The openings should never be blocked by placing the product
on a bed, sofa, rug, or other similar surface. This product should never be placed near or over a radiator or heat register. The
device should not be placed in a built-in installation or enclosure unless proper ventilation is provided.
• Ensure that nothing can be spilled on, or dropped inside the projector. If this does happen, switch off and remove all power
from the projector. Do not operate the projector again until it has been checked by qualified service personnel.
• Do not block the projector cooling fans or free air movement around the projector. Loose papers or other objects may not be
nearer to the projector than 10 cm (4") on any side.
• Do not use this equipment near water.
• Proper operation of the projector can only be guaranteed in table mounting. It is not permitted to use the projector in another
position. See installation procedure for correct installation. A ceiling mount will be supported in the future.
•Special care for Laser Beams: Special care should be used when DLP projectors are used in the same room as high power
laser equipment. Direct or indirect hitting of a laser beam on to the lens can severely damage the Digital Mirror DevicesTM in
which case there is a loss of warranty.
• Never place the projector in direct sunlight. Sunlight on the lens can severely damage the Digital Mirror DevicesTM in which
case there is a loss of warranty.
• Save the original shipping carton and packing material. They will come in handy if you ever have to ship your equipment. For
maximum protection, repack your set as it was originally packed at the factory.
• Disconnect the power to the projector before cleaning. Do not use liquid cleaners or aerosol cleaners. Use a damp cloth for
cleaning. Never use strong solvents, such as thinner or benzine, or, patrol, or abrasive cleaners, since these will damage the
cabinet. Stubborn stains may be removed with a cloth lightly dampened with mild detergent solution.
• To ensure the highest optical performance and resolution, the projection lenses are specially treated with an anti-reflective
coating, therefore, avoid touching the lens. To remove dust on the lens, use a soft dry cloth. Do not use a damp cloth, detergent
solution, or thinner.
• Rated maximum ambient temperature, ta= 35°C (95°F).
• The lamp house shall be replaced if it has become damaged or thermally deformed.
601–0307–00 F50 25/02/2016 11

2. Safety
On servicing
• Do not attempt to service this product yourself, as opening or removing covers may expose you to dangerous voltage potentials
and risk of electric shock.
• Refer all servicing to qualified service personnel.
• Attempts to alter the factory-set internal controls or to change other control settings not specially discussed in this manual can
lead to permanent damage to the projector and cancellation of the warranty.
• Remove all power from the projector and refer servicing to qualified service technicians under the following conditions:
- When the power cord or plug is damaged or frayed.
- If liquid has been spilled into the equipment.
- If the product has been exposed to rain or water.
- If the product does not operate normally when the operating instructions are followed. Adjust only those controls that are
covered by the operating instructions since improper adjustment of the other controls may result in damage and will often
require extensive work by a qualified technician to restore the product to normal operation.
- If the product has been dropped or the cabinet has been damaged.
- If the product exhibits a distinct change in performance, indicating a need for service.
• Replacement parts: When replacement parts are required, be sure the service technician has used original Barco replacement
parts or authorized replacement parts which have the same characteristics as the Barco original part. Unauthorized substitu-
tions may result in degraded performance and reliability, fire, electric shock or other hazards. Unauthorized substitutions may
void warranty.
• Safety check: Upon completion of any service or repairs to this projector, ask the service technician to perform safety checks
to determine that the product is in proper operating condition.
• Possible explosion hazard: Always keep in mind the caution below:
To prevent battery explosion
• Danger of explosion if battery is incorrectly installed.
• Replace only with the same or equivalent type recommended by the manufacturer.
• For disposal of used batteries, always consult federal, state, local and provincial hazardous waste disposal rules and regulations
to ensure proper disposal.
12 601–0307–00 F50 25/02/2016

2. Safety
2.3 Product safety labels
Product safety labels
Label image Label description
The Lamp House is very hot after operation. To avoid burns, let the projector
cool down for at least 60 minutes before proceeding to remove the Lamp
House.
General Warning Hazard
Electric Voltage Hazard
Hot Surface Hazard
UV Hazard
Hazardous moving parts.
Keep away from moving fan blades.
Keep fingers and other body parts away.
601–0307–00 F50 25/02/2016 13

2. Safety
14 601–0307–00 F50 25/02/2016

3. Getting to know the projector
3.1 Introducing a small revolution
A world best in fit and function
The F50 is the market’s brightest, sharpest and most compact 120Hz single chip DLP® projector.
Image 3-1
Unmatched imagery
•1ChipDLP®
• Wide range of resolutions
• High Performance Optics
• Custom-designed smear reduction technology
• High ANSI contrast
Built for the challenge
• Compact footprint and weight
• Motion platform warranted (3G Certified)
• Optical locking systems
• Minimal maintenance requirements
Ideal for multichannel installations
• Large depth of focus (DoF)
• Unmatched sharpness
• RealColor™ Color Management
• Color batch matching for quicker and easier color calibration in color critical applications
16 601–0307–00 F50 25/02/2016
Other manuals for F50
4
Table of contents
Other Barco Projector manuals

Barco
Barco CINE VERSUM 60 User manual

Barco
Barco R9040411 User manual

Barco
Barco F400 User manual

Barco
Barco CLM HD8 R9050130 User manual

Barco
Barco R9002400 User manual

Barco
Barco F80-Q7 User manual

Barco
Barco R7628162K User manual

Barco
Barco XDL Series User manual

Barco
Barco HDX W18 Owner's manual

Barco
Barco MCM-100S User manual

Barco
Barco UDX Series User manual

Barco
Barco R9002260 User manual

Barco
Barco F50 User manual

Barco
Barco Graphics 808s R9000904 User manual

Barco
Barco DP-2000 User manual

Barco
Barco PFWX-51B User manual

Barco
Barco GALAXY 4 LL+ User manual

Barco
Barco UDM W22 User manual

Barco
Barco UDM 4K15 User manual

Barco
Barco UDX Series User manual