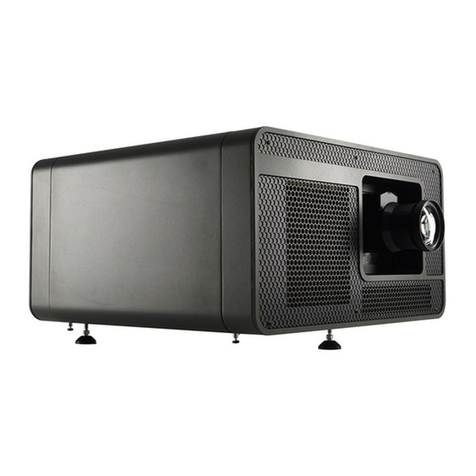
Barco G60 W Series User manual

ENABLING BRIGHT OUTCOMES
User manual
Warp and Blend Tool
G60 W series

Registered office: Barco NV
President Kennedypark 35, 8500 Kortrijk, Belgium
www.barco.com/en/support
www.barco.com
Barco NV
Beneluxpark 21, 8500 Kortrijk, Belgium
www.barco.com/en/support
www.barco.com

1Warping and Blending ...................................................................................................................................................................................5
1.1 Image Warping ......................................................................................................................................................................................6
1.2 Edge Blending .......................................................................................................................................................................................6
1.3 Black Level ..............................................................................................................................................................................................7
1.4 Image Stacking .....................................................................................................................................................................................7
2Getting started ....................................................................................................................................................................................................9
2.1 System requirements......................................................................................................................................................................10
2.2 Installing the Warping and Blending Tool ............................................................................................................................10
2.3 Set up projectors and network...................................................................................................................................................12
2.4 Network configuration, assign IP address for projectors ............................................................................................13
2.5 Network configuration, assign IP address for the computer.....................................................................................14
2.6 Network configuration, verifying the IP settings...............................................................................................................16
3Using the Warping and Blending tool..............................................................................................................................................19
3.1 Registering a projector...................................................................................................................................................................20
3.2 Selecting and deleting the projector.......................................................................................................................................21
3.3 General settings ................................................................................................................................................................................22
3.4 Warp settings ......................................................................................................................................................................................22
3.5 Warp settings, Moving Cursors.................................................................................................................................................24
3.6 Warp settings,Test Pattern ..........................................................................................................................................................24
3.7 Edge Blending ....................................................................................................................................................................................25
3.8 Edge Blending, Enable Marker .................................................................................................................................................28
3.9 Black Level ...........................................................................................................................................................................................28
3.10 Black level, transparent.................................................................................................................................................................30
3.11 Saving and opening settings ......................................................................................................................................................31
R5910890 /01 G60 W series 3
Table of contents

R5910890 /01 G60 W series4

5
Introduction
This projector provides the ability to warp the shape of the projected images and to blend the overlapped
edges of two or more images. Manipulating the projected images using the Warping and Blending Tool allows
the user to create a seamless, unified image in arbitrarily shape.
Overview
•Image Warping
•Edge Blending
•Black Level
•Image Stacking
R5910890 /01 G60 W series
Warping and
Blending 1

R5910890 /01 G60 W series6
1.1 Image Warping
About warping
The warping function allows the user to perform grid point adjustment to digitally manipulate the shape of
projected images to fit on a curve, flat, or anamorphic screen.
•Warping the image to fit on a curve projection screen.
Image 1-1
•Adjusting the grid point to change the image shape.
Image 1-2
1.2 Edge Blending
About blending
Using the edge blending function, the overlapped edges of two or more images from multiple projectors can
be seamlessly blended into a single, unified image.
Warping and Blending

R5910890 /01 G60 W series 7
OO
Image 1-3
OOverlap area
1.3 Black Level
About black level
In a blended image, the overlapping area of the adjacent images might be brighter than the rest of the image.
The black level function allows the user to adjust the black level of the images to achieve better black
uniformity.
Image 1-4
1.4 Image Stacking
About image stacking
Image Stacking increases the image brightness in a fixed image size by stacking two or more projectors.
Warping and Blending

9
Overview
•System requirements
•Installing the Warping and Blending Tool
•Set up projectors and network
•Network configuration, assign IP address for projectors
•Network configuration, assign IP address for the computer
•Network configuration, verifying the IP settings
R5910890 /01 G60 W series
Getting started 2

R5910890 /01 G60 W series10
2.1 System requirements
Overview
The following are the minimum system requirements of the Warping and Blending Tool.
Operating system 32- or 64-bit Windows® 7, 8, 8.1
Hardware •Intel Core2 Duo 2.6 GHz processor
•2 GB RAM
•1 GB available hard disk space
•Wired or wireless LAN
2.2 Installing the Warping and Blending Tool
About the tool
Download the installation file for Warping and Blending Tool from the product page on the Barco website.
How to install
1. Double click the installation file to open the setup wizard. Click Next.
Image 2-1
2. Select the installation folder and click Next.
Getting started

R5910890 /01 G60 W series12
Image 2-4
2.3 Set up projectors and network
Network connection
Use a router to create a wired or wireless network connecting the computer and projectors. Install the Warping
and Blending Tool on this computer.
N
Image 2-5
NNetwork connection
Connect the projectors of the same model.
The projectors should be set with the same resolution and light source.
For wired connection, use Cat 5 or higher category Ethernet cable.
Source connection
Use a computer installed with a graphic card that supports image overlap in the same way as the input source.
Connect the computer to projectors with video cables.
Getting started

R5910890 /01 G60 W series 13
S
Image 2-6
Graphics cards that support image overlap include NVIDIA Quadro K1200 and higher, NVS 510 and
NVS 810; AMD FirePro™W600, W5x00 and above, all AMD FirePro™S series products and AMD
Radeon™Pro workstation cards.
2.4 Network configuration, assign IP address for
projectors
About assigning IP address
Assign network IP address for the computer and projectors. Make sure each device in the network is assigned
with a unique IP address.
How to assign
1. Press Menu on the projector’s keypad or remote control.
2. Select Communications from the SETUP menu.
3. Select LAN.
Image 2-7
4. Select IP Address.
Getting started

R5910890 /01 G60 W series14
Image 2-8
5. Set the IP Address and press Enter on the projector’s keypad or remote control.
Image 2-9
2.5 Network configuration, assign IP address for
the computer
How to assign
1. Go to Network and Sharing Center and click Manage network connections.
Image 2-10
2. Right click the Local Area Connection and click Properties from the drop down menu.
Image 2-11
3. Highlight Internet Protocol Version 4 (TCP/IPv4) then click Properties.
Getting started

R5910890 /01 G60 W series16
Image 2-14
2.6 Network configuration, verifying the IP settings
What should be done?
After assigning IP address for the computer and projectors, you can verify the IP settings by using the “ping”
command at the command prompt.
How to verify
1. Open windows command prompt.
Image 2-15
2. Type in “ping”and IP address to verify the IP setting.
Getting started

19
About this chapter
This chapter provides detailed instructions to the Warping and Blending Tool, which offers three major
functions including Warp, Edge Blending and Black Level.
If the old version is already installed, please remove previous version before installing the new one.
If the projector was rebooted, please open this tool again to continue adjustment.
Overview
•Registering a projector
•Selecting and deleting the projector
•General settings
•Warp settings
•Warp settings, Moving Cursors
•Warp settings,Test Pattern
•Edge Blending
•Edge Blending, Enable Marker
•Black Level
•Black level, transparent
•Saving and opening settings
R5910890 /01 G60 W series
Using the Warping
and Blending tool 3

R5910890 /01 G60 W series20
3.1 Registering a projector
How to register?
1. Click File and select New Multi-Function to register a single projector to the network.
Image 3-1
2. Set up projector’s native resolution.
1
2
3
Image 3-2
3. Type in the projector’s IP Address, and click Connect.
Using the Warping and Blending tool
Table of contents
Other Barco Projector manuals

Barco
Barco DP2K SLP Series Operating manual

Barco
Barco FLM R22+ User manual

Barco
Barco RLM W6 User manual

Barco
Barco F32 User manual

Barco
Barco HDQ--2K40 User manual

Barco
Barco R9001190 User manual

Barco
Barco Balder Series User manual

Barco
Barco DP2K--32B User manual

Barco
Barco R9040411 User manual

Barco
Barco Bragi User manual

Barco
Barco G60 Series User manual

Barco
Barco OverView cDG67-DL User manual

Barco
Barco R9001440 Guide

Barco
Barco Galaxy NH-12 User manual

Barco
Barco BarcoSLM G8 User manual

Barco
Barco R9002327 User manual

Barco
Barco DP-2000 User manual

Barco
Barco RLM W8 User manual

Barco
Barco XLM HD30 User manual

Barco
Barco RETRO GRAPHICS 2100LC R9001319 User manual