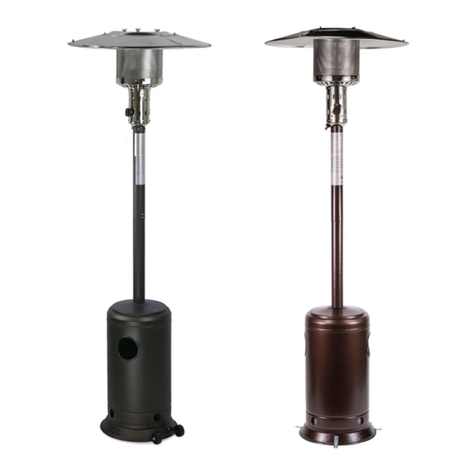
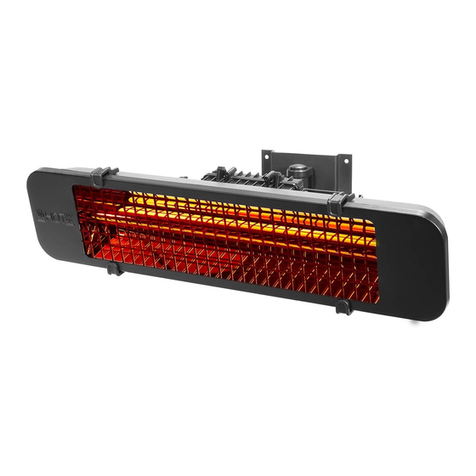
Barton 96967 Original instruction manual

OWNER’S MANUAL AND SAFETY INSTRUCTIONS
SAVE THIS MANUAL. KEEP THIS MANUAL FOR SAFETY WARNINGS, PRECAUTIONS, ASSEMBLY,
OPERATION, INSPECTION, MAINTENANCE AND CLEANING PROCEDURES. WRITE THE PRODUCT’S
SERIAL NUMBER ON THE BACK OF THE MANUAL, OR THE MONTH AND YEAR OF PURCHASE IF
PRODUCT HAS NO SERIAL NUMBER
FOR QUESTIONS, PLEASE CALL CUSTOMER SERVICE: 909.628.4900
DOUBLE HALOGEN LAMP HEATER
ITEM # 96967

SAFETY INFORMATION
Read all safety warnings and instrucons. Failure to follow the warnings and instrucons may result in
injury and/or property damage. Save all warnings and instrucons for future reference.
The warning and safety instrucons in this manual are not meant to cover all possible condions and
situaons that may occur. Common sense, cauon and care must be exercised when operang or
cleaning tools and equipment. Always contact your dealer, distributor, service agent or manufacturer
about problems or condions you do not understand before operang the product.
1
WARNING: This heater is not equipped with a device to control the room temperature. Do not use this
heater in small rooms when they are occupied by persons not capable of leaving the room on their
own, unless constant supervision is provided.
Failure to comply with the precauons and the instrucons provided with this heat lamp can result in
death, serious injury and propert damage or loss from hazards of re, explosion and burns.
To prevent and avoid the risk of burns, re, electric shock, or Injury:
• Use this device only for its intended purpose as described in this manual.
• Do not leave unit on when unaended. Unplug from outlet when not in use.
• Keep children away from and do not allow children to operate the lamp.
To disconnect from the power outlet, turn all controls to the “o’ posion and then remove the power
cord from the power source outlet.
NEVER operate this device with the protected heang element opening blocked. Keep this opening
free of lint, hair, etc. Never operate on or near a so surface such as a pillow, blanket, or bed where
this air opening may be blocked.
NEVER drop or insert any object into the protected heang element opening. Do not touch the heang
element with any object. Do not touch the internal workings of the lamp. Do not aempt to make any
repairs yourself.
DO NOT operate this device if the power cord or plug is damaged. If it is not working properly, or has
been damaged, call your nearest authorized service center.
DO NOT pull or carry this device by the power cord. Keep the power cord away from hot or wet
Store lamp in dry environment- avoid excessive moisture.
This heater is not intended for use in bathrooms, laundry areas and similar indoor locaons. NEVER
locate heater where it may fall into a bathtub or other water container. To protect against electrical
hazards, DO NOT immerse in water or other liquids.

SAFETY INFORMATION SAFETY INFORMATION
1 2
SAVE THESE WARNINGS
DO NOT touch the control panel or plug with a wet hand.
DO NOT run cord under carpeng. DO NOT cover cord with throw rugs, runners or similar coverings.
Arrange cord away from trac area and where it will not be tripped over.
DO NOT insert or allow foreign objects to enter any venlaon or exhaust opening as this may cause
an electric shock or re, or damage the heater.
To prevent a possible re, DO NOT block the air intakes or exhaust in any manner. DO NOT use on so
surfaces, like a bed, where openings may become blocked.
A heater has hot and arcing or sparking parts inside. DO NOT use in areas where gasoline, paint,
explosive and/or ammable liquids are used or stored. Keep unit away from heated surfaces and open
ames.
Avoid the use of an extension cord because the extension cord may overheat and cause a risk of re.
To avoid re or shock hazard, plug the unit directly into a 110-120V electrical socket outlet.
ALWAYS place the heater on a at, level surface. This heater should only be hung from a ceiling.
WARNING: To reduce the risk of re or electric shock, DO NOT use this unit with any solid-state speed
control device.
DO NOT aempt to repair or adjust any electrical or mechanical funcons on this unit. Doing so will
void your warranty. The inside of the unit contains no user serviceable parts. Qualied personnel
should perform all servicing only.
Connect to properly grounded outlets only.
WARNING: This heater is not equipped with a device to control the room temperature. Do not use this
heater in small rooms when they are occupied by persons not capable of leaving the room on their
own, unless constant supervision is provided.
The heater must not be located in front of a socket outlet.
• These appliances must be earthed.
• Before installing or replacing the bulb, the appliance must be always being disconnected from the 110-
120V supply.
• The appliance must be disconnected from the 110-120V supply before the lid is opened.
• The appliance mist be installed exclusively in perfect horizontal posion. Do not connect the heater to
the electrical outlet unl assembly is complete.

INSTALLATION INFORMATION
3 4
When xing the heater to a wall, ensure hinges are in the underside so that the lid hands down in the
open posion.
Minimum required distances:
• 1 from the side wall
• The heater must be placed with a clearance of 6 to the oor and 2 feet to the ceiling.
• Never x or place heater near ammable or combusble materials. Mount the heater outside, in a
large area free from branches, obstrucons or near any combusble objects aected by heat such as
furniture, curtains, pillows etc. Keep the heater at least 3.5 .
• If the heaters are placed in areas where spray painng of any descripon is taking place, they should
not be used during the painng operaons.
• Never use the heater in parcularly dusty and explosive areas.
PRODUCT DIAGRAM
WARNING: Remove protecve lm from the heater before assembling the heater, or turning it on.

INSTALLATION / OPERATION
3 4
INSTALLATION INSTRUCTIONS
A. Heater must be installed by a qualied electrician.
B. Place the heater on a rm, level ceiling surface; level ceiling surface; installaon of the heater on a
strong rigid support (such as strong wooden beams or metal rails etc).
C. The Hook on the ceiling hanging the Pao Heater must be able to take a weight 3 or 4 mes that of the
Pao Heater itself.
D. Place the Hook A around the Ceiling Hook and clip on any Ring of the Chain to adjust the height of the
Pao Heater to the Floor.
E. The distance between the boom of the Pao Heater to the Floor must be over1.8M.
F. Plug the Pao Heater into a grounded 110-120V 50-60Hz power outlet.
G. Only operate the heater when it is in the upright posion.
• Plug the Pao Heater into a grounded 110-120v 50-60Hz power outlet
• Only operate the heater when it is in the upright posion.
• Our Electric Pao Heater is equipped with Three heat sengs
• The ON-OFF switch on the heater is used to control the power of the heater.
WARNING: The heater must be properly installed before it is used This unit is equipped with one heat
seng On I O.
REMOTE CONTROL
A. Press on the On/O switch to acvate the heater
B. To operate the heater on high power (800W), press on the le side buon of the remote control
C. To operate the heater on low (700W), press on the right side buon of the remote control
D. Press on both the le and right side buon of the remote control for maximum power (1500W)
E. To operate the LED light, press the top buon of the remote control
The main power switch must be turned on to use the remote control
ACTIVATION BUTTON
A. Press on the On/O switch to acvate the heater
B. Press on the buon once to operate the heater on low (800W) power.
C. Press on the buon twice to operate the heater on high (1500W) power.
D. Press on the buon three mes to acvate the LED ambient lighng without heat.
E. Press on the buon four mes to acvate the LED ambient lighng and to operate the heater on high
(1500W) power.
F. Press on the buon ve mes to shut the light and heat o.

MAINTENANCE / TROUBLESHOOTING
5
12. The unit must be placed with the clearance of 6 to the oor
13. The unit must be correctly installed according to the instrucons. Make sure the head is at least 6
from the oor.
14. The unit must be securely placed on a vercal and at ceiling.
15. The unit is at high temperature during operaon. It keeps hot for a period aer shut down. Potenal
danger would occur when touching it during this period.
16. Don’t place the unit closed to curtain and/or other ammable objects. Otherwise there will be a
danger of catching re.
17. Don’t cover the unit with anything during operaon or a short me aer it’s shut down.
18. Don’t wrap the power supply cord on the unit.
19. The unit must be handled with care, and avoid vibraon or hing.
20. The unit must be securely grounded during operaon.
21. If the unit gets damaged, it must be repaired by professional electricians.
22. When the power supply cord is damaged, it must be replaced by authorized agent or other
professional to avoid danger.
23. The unit must not be posioned under a socket.
24. When assembling, keep clear from any board or ammable material.
25. The unit must be supervised by adults if it’s used by a child.
26. It is not safe to install the unit by a swimming pool, in a bathroom or shower area.
OPERATION
Only use the halogen heater on a rm solid vercal wall where the Mounng Bar is in contact with
the wall.
1. Mount the heater outside or in a large open area and well away from any obstrucons such as
branches or where the heater is near any objects that can be aected by heat, such as furniture, curtains
or other inammable objects (minimum distance 3 feet meter).
2. Do not use near bath tubs, wash areas or swimming pools.
3. Do not use in unvenlated areas.
4. Do not use where gas, petrol, paint or other inammable goods are stored.
5. Do not push any items through, obstruct or cover the grill of the heater head.
6. Do not posion immediately above or below an electrical socket.
7. Do not move when connected to an electrical supply and always wait for the pao heater to cool
down before storing away.
8. Do not touch the heater head when in use.
9. Do not leave turned on and unaended especially when children and or animals are in the vicinity.
10. The indicaon of the dierent posions of switches shall be visible from a distance of 3Ft.
11. The Marking concerning covering shall be visible aer the heater has been installed. It shall not be
placed on the back of heaters.
6

5
CARE AND MAINTENANCE
MAINTENANCE
Unplug the unit and let it cool completely.
• To keep the heater clean, the outer shell may be cleaned with a so, damp cloth. You may use a mild
detergent if necessary. Aer cleaning, dry the unit with a so cloth.
• DO NOT use alcohol, gasoline, abrasive powders, furniture polish, or rough brushes to clean the
heater. This may cause damage or deterioraon to the surface of the heater.
• Although this heater is outdoor approved, DO NOT immerse the heater in water for your safety.
Wait unl the unit is completely dry before use.
Care and maintenance
• When disconnected from the electrical supply, clean the outside of the pao heater with a damp
cloth. Never use corrosive or solvent cleaners or immerse in water.
• Any maintenance or repairs including replacing the halogen tube should only be carried out by a
qualied electrician or by a recommended service center.
Technical specicaon
• Power supply 110-120V (50~60 Hz)
• Waage max 1500w
• Insulaon class I
27. It is not safe to use on a building site, greenhouse, barn or stable where there’s ammable dust.
28. The head of the unit is at high temperature during operaon. Unplug the unit and wait ll it cools
before cleaning.
29. Don’t use this unit in place where causcity or volale air exists, i.e. dust, steam, gas, etc.
30. Don’t use this unit as a cloth drier or towel drier.
31. Don’t use this unit as a sauna heater.
32. Don’t use this unit as a room heater.
33. Don’t use this unit in place of animal propagang and rising.
34. Don’t immerse this unit into water for cleaning.
35. The unit should be plugged in a socket, which is easily visible and reachable.
36. Two Dark points may exist on the surface of the heang elements during the rst few minutes aer
it is turned on. This is normal, and will not aect the performance of the unit.
37. This appliance is not intended for use by persons (including children) with reduced physical. Sensory
or mental capabilies, or lack of experience and knowledge, unless they have been given supervision or
instrucon concerning use of the appliance by a person responsible for their safety.
38. Children should be supervised to ensure that they do not play with the appliance.
39. The heater must not be located in front of a socket outlet.
6

7
PLEASE READ THE FOLLOWING CAREFULLY
THE MANUFACTURER AND/OR DISTRIBUTOR HAS PROVIDED THE PARTS LIST AND ASSEMBLY
DIAGRAM IN THIS MANUAL AS A REFERENCE TOOL ONLY. NEITHER THE MANUFACTURER OR
DISTRIBUTOR MAKES ANY REPRESENTATION OR WARRANTY OF ANY KIND TO THE BUYER THAT HE
OR SHE IS QUALIFIED TO MAKE ANY REPAIRS TO THE PRODUCT, OR THAT HE OR SHE IS QUALIFIED
TO REPLACE ANY PARTS OF THE PRODUCT. IN FACT, THE MANUFACTURER AND/OR DISTRIBUTOR
EXPRESSLY STATES THAT ALL REPAIRS AND PARTS REPLACEMENTS SHOULD BE UNDERTAKEN
BY CERTIFIED AND LICENSED TECHNICIANS, AND NOT BY THE BUYER. THE BUYER ASSUMES
ALL RISK AND LIABILITY ARISING OUT OF HIS OR HER REPAIRS TO THE ORIGINAL PRODUCT OR
REPLACEMENT PARTS THERETO, OR ARISING OUT OF HIS OR HER INSTALLATION OF REPLACEMENT
PARTS THERETO.
Record Product’s Serial Number Here:
Note: If product has no serial number, record month and year of purchase instead.
Note: Some parts are listed and shown for illustration purposes only and are not available
individually as replacement parts.
MADE IN CHINA
DISCLAIMER
Table of contents
Other Barton Heater manuals