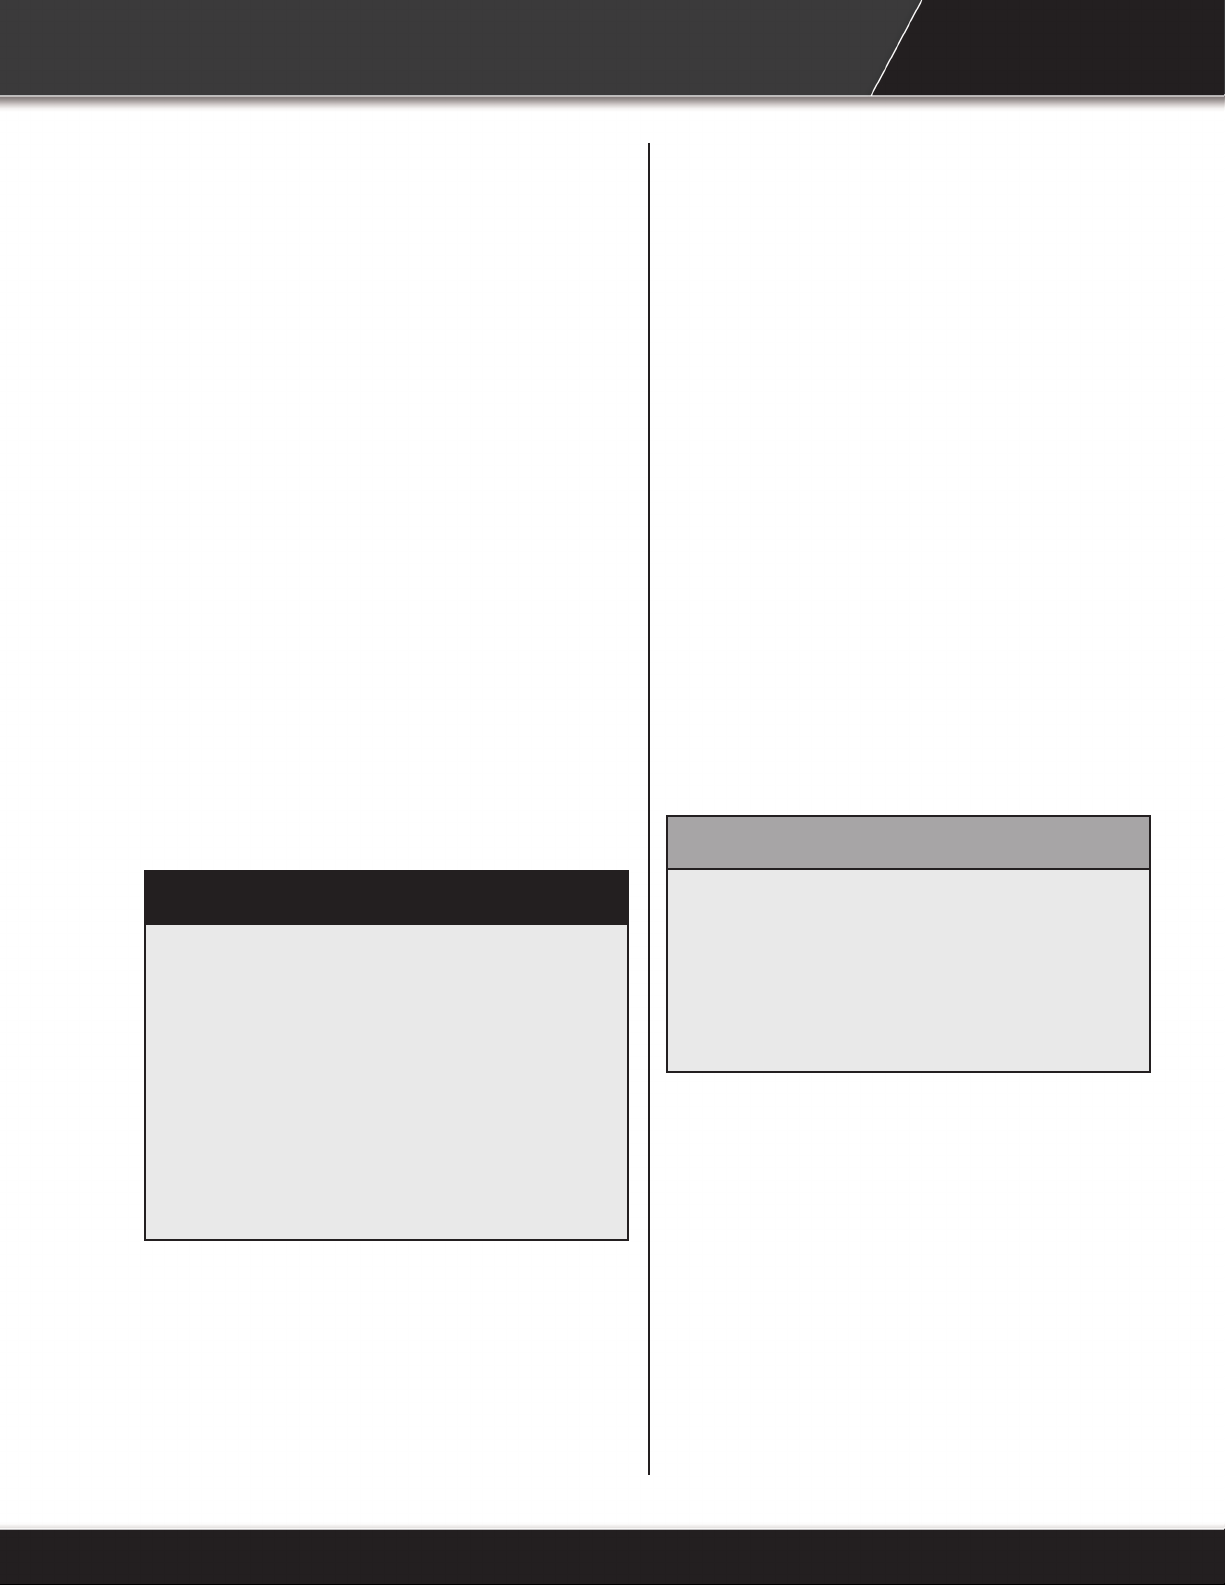
Baumalight DR434 User manual

DR434, DR438, DR444 And DR448 Tree Spade
OPERATOR’S MANUAL
Issue Date: May 2023

Following is a list of videos and documents available on Baumalights website and also on YouTube to
help and enhance maintaining the tree spade. The list below was current at the time this manual was
issued. Additional content may be available.
Activity ID Number Activity Name Description Item Available
89 Inserting Pin In 8 And 14 Pin
Connector.
Changing Pins In Aux
Receptacle. Video
2

TABLE OF CONTENTS
1 INTRODUCTION ��������������������������������������������������������������������������������������������������������������������������������� 4
1�1 Overview�������������������������������������������������������������������������������������������������������������������������������������� 4
1�2 Intended Use And Foreseeable Misuse ������������������������������������������������������������������������������������ 4
2 SAFETY������������������������������������������������������������������������������������������������������������������������������������������������ 5
2�1 Safety Alert Symbol And Safety Words ������������������������������������������������������������������������������������ 5
2�2 Operational Hazards������������������������������������������������������������������������������������������������������������������� 5
Prepare For Emergencies ���������������������������������������������������������������������������������������������������������� 6
Replace Safety Signs ����������������������������������������������������������������������������������������������������������������� 6
Do Not Allow Riders ������������������������������������������������������������������������������������������������������������������� 6
Lower Operating Speed ������������������������������������������������������������������������������������������������������������� 6
Avoid Rollover ���������������������������������������������������������������������������������������������������������������������������� 7
Avoid Powerlines & Underground Utilities ������������������������������������������������������������������������������ 7
Detach Tree Spade Safely���������������������������������������������������������������������������������������������������������� 7
Hazards From Modifying Equipment ���������������������������������������������������������������������������������������� 8
2�3 Maintenance Hazards����������������������������������������������������������������������������������������������������������������� 9
3 SAFETY SIGNS��������������������������������������������������������������������������������������������������������������������������������� 10
4 OPERATION �������������������������������������������������������������������������������������������������������������������������������������� 12
4�1 Preparation For Use ����������������������������������������������������������������������������������������������������������������� 12
4�2 Attach Tree Spade �������������������������������������������������������������������������������������������������������������������� 12
4�3 Electrical Connections (If Equipped)�������������������������������������������������������������������������������������� 13
4�4 Machine Components �������������������������������������������������������������������������������������������������������������� 13
�������������������������������������������������������������������������������������� 14
�������������������������������������������������������������������������������������������� 14
4�5 Pre-Operation Check List �������������������������������������������������������������������������������������������������������� 15
4�6 Transporting������������������������������������������������������������������������������������������������������������������������������ 15
4�7 Detach Tree Spade ������������������������������������������������������������������������������������������������������������������� 15
4�8 First Time User Tips ����������������������������������������������������������������������������������������������������������������� 15
4�9 Digging A Tree��������������������������������������������������������������������������������������������������������������������������� 16
�������������������������������������������������������������������������������������������������������������� 17
����������������������������������������������������������������������������������������������������������� 17
5 SERVICE AND MAINTENANCE������������������������������������������������������������������������������������������������������ 18
5�1 Maintenance������������������������������������������������������������������������������������������������������������������������������ 18
5�2 Inspections�������������������������������������������������������������������������������������������������������������������������������� 18
5�3 Lubrication ������������������������������������������������������������������������������������������������������������������������������� 18
6 WORKING WITH TREES������������������������������������������������������������������������������������������������������������������ 19
6�1 Planting Procedure������������������������������������������������������������������������������������������������������������������� 19
6�2 Care For Your Trees������������������������������������������������������������������������������������������������������������������ 19
7 TROUBLESHOOTING ���������������������������������������������������������������������������������������������������������������������� 24
8 STORAGE������������������������������������������������������������������������������������������������������������������������������������������ 25
8�1 Storing ��������������������������������������������������������������������������������������������������������������������������������������� 25
8�2 Remove From Storage ������������������������������������������������������������������������������������������������������������� 25
BAUMALIGHT ATTACHMENT WARRANTY������������������������������������������������������������������������������������� 26
3

1 INTRODUCTION
Congratulations on your choice of a Baumalight
Tree Spade. This equipment has been designed
and manufactured to meet the needs of a
discriminating buyer for ecient operation.
Safe, ecient and trouble free operation of your
tree spade requires that you and anyone else who
will be operating or maintaining the tree spade,
read and understand this Operator’s Manual.
This manual covers the DR434, DR438,DR444 and
DR448 Baumalight Tree Spade. Use the Table of
Contents as a guide to locate required information.
Keep this manual handy for frequent reference
and to pass on to new operators or owners. Call
your Baumalight dealer, distributor or the factory
if you need assistance, information or additional
copies of the manuals.
When this machine is worn out and no longer in
use, it should be returned to the retailer or other
party for recycling.
OPERATOR ORIENTATION - The directions left,
right, front and rear, as mentioned throughout this
manual, are as seen from the operator’s seat and
facing in the direction of travel.
1�1 Overview
The Tree Spade is designed to be used by
experienced operators, trained in the safe
operation of a skidsteer and trained in the hazards
related to using the tree spade and the safe use of
the tree spade for the intended purpose. Operators
will require personal protective equipment to
reduce the risk from some hazards that cannot be
completely eliminated or controlled by the design
of the tool.
Care is required to ensure that the tree spade will
not come across metallic objects, stones or other
materials.
The tree spade is not designed for use in
hazardous atmospheres where there is a risk
of re or explosion due to ammable gases or
vapors. Use in hazardous, explosive atmospheres
is prohibited.
Serious injury or death of the operator or
bystanders may be caused if the tree spade is
misused. Misuse may also cause damage to the
machine carrying the implement.
1�2 Intended Use And Foreseeable
Misuse
4

2 SAFETY
You must read, understand and follow the
instructions given by the operating unit
manufacturers, as well as the instructions in this
manual.
The safety information in this manual is denoted
by the safety alert symbol:
^
This symbol means ATTENTION! BECOME
ALERT! YOUR SAFETY IS INVOLVED!
The level of risk is indicated by the following signal
words:
^^ DANGER
DANGER - Indicates a hazardous
situation, which, if not avoided, WILL
result in death or serious injury�
^ WARNING
WARNING - Indicates a hazardous
situation, which, if not avoided, could
result in death or serious injury�
^ CAUTION
CAUTION - Indicates a hazardous
situation, which, if not avoided, could
result in minor or moderate injury�
NOTICE
NOTICE - Indicates a situation that could
result in damage to the equipment or
other property�
2�1 Safety Alert Symbol And Safety
Words
2�2 Operational Hazards
^ WARNING
Prevent serious injury or death�
Read and understand this manual before
operating the tree spade�
Always stop engine and remove key
before leaving operators seat�
Never allow anyone near the tree spade
during operation�
Travel at a safe speed�
^ WARNING
Prevent serious injury or death from
moving parts�
Moving parts can crush and dismember�
Do not operate without guards and
shields in place�
Disconnect and lockout power source
before adjusting or servicing�
^ WARNING
Use tree spade only for the designed
applications�
Any other use may result in personal
injury, damage to equipment and may
void the warranty�
5

^ WARNING
Prevent serious injury or death�
Verify tree spade is attached to skid
before operation or transport�
^ WARNING
Wear proper safety glasses, goggles,
debris�
Carefully read all safety messages in this manual
and on equipment safety signs. Keep safety signs
in good condition and replace missing or damaged
safety signs.
New equipment components and repair parts must
include the current safety decal.
Learn how to properly operate equipment.
NEVER operate or work around this equipment
without proper instruction, while fatigued or under
the inuence of alcohol, prescription or non-
prescription medication or if feeling ill.
Keep your equipment in proper working condition.
Know the regulations and laws that apply to you
and your industry. This manual is not to replace
any regulations or laws. Additional information
may be found at: www.asae.org or www.osha.gov.
If you do not understand any part of this manual,
contact Baumalight at 866-820-5603.
Prepare For Emergencies
• Be prepared in case of emergencies.
• Keep a re extinguisher and rst aid kit close
to the machine.
• Keep emergency phone numbers close to your
phone.
• Know your address so emergency services
can locate you if an emergency arises.
Replace Safety Signs
• Replace missing or damaged safety signs.
• Safety signs are identied in Section 3 of this
manual.
• Replacement safety signs are available from
your Baumalight dealer.
Do Not Allow Riders
• NEVER lift or carry anyone on the Tree spade.
• NEVER use Tree spade as a work platform.
• NEVER allow passengers on the Tree spade.
Lower Operating Speed
• Keep tree spade low and move at slow speeds
on rough or uneven terrain.
6

Avoid Rollover
The equipment may rollover, resulting in death or
serious injury. To help prevent rollover:
• Travel at a slow speed.
• Avoid sharp turns & sudden movement on
slopes.
• Carry tree spade close to the ground.
• Avoid holes, ditches and other obstructions
which may cause equipment to rollover.
• Use caution when operating on slopes and do
not operate on excessively steep slopes.
• Do not exceed load capacity of equipment.
Avoid Powerlines & Underground
Utilities
^ DANGER
Prevent electrocution and/or explosion�
Death or serious injury can result if
equipment comes near or contacts
power lines�
Electrocution can occur without direct
contact�
Contacting a gas line may result in an
explosion�
Have underground utilities located before digging.
In the US or Canada, call 811 (US) or 888-258-
0808 (US and Canada). Also contact any local
utilities that do not participate in the One-Call
service. In countries that do not have a One-Call
service, contact all local utility companies to have
underground utilities located.
Check clearance before raising equipment.
DO NOT leave the operator’s seat if any part of the
equipment contacts electric lines or cables.
Detach Tree Spade Safely
Detach tree spade on a rm and level surface.
Tree spade may fall over if detached on sloping
or soft surface. Be sure people, livestock and pets
are clear of machinery.
Relieve hydraulic pressure before disconnecting
hydraulic hoses. See your skidsteer Operator’s
Manual.
Raised Attachment
^ WARNING
Crushing hazard�
Raised, unsupported tree spade can
fall, resulting in death or serious injury�
Never enter the area under a raised tree
spade�
A raised tree spade can lower unexpectedly,
resulting in death or serious injury.
NEVER enter area under a raised tree spade.
Lower tree spade to ground, engage parking brake,
shut o engine and remove key before servicing.
7

Avoid Loud Noise
^ WARNING
Prolonged exposure to loud noise can
cause impairment or loss of hearing�
Wear a suitable hearing protective
to protect against objectionable or
uncomfortable loud noises�
Hazards From Modifying Equipment
Do not make any alterations to your tree spade.
Altering the equipment may cause unsafe
conditions and may void the manufacturer’s
warranty.
Avoid High Pressure Fluids
^ WARNING
skin�
Hydraulic hoses can fail from age,
damage and exposure�
Use body and face protection while
searching for leaks� A tiny, almost
invisible leak can penetrate the skin,
thereby requiring immediate medical
attention�
Use wood or cardboard to detect
hydraulic leaks, never use your hands�
Escaping uid under pressure can penetrate the
skin causing serious injury.
Prevent the hazard by relieving pressure (See
Skidsteer Operator’s Manual) before connecting
or disconnecting hydraulic hoses. Verify all
connections are tight before applying pressure.
Search for leaks with a piece of cardboard or wood.
Protect hands and body from high pressure uids.
If an accident occurs, see a doctor immediately.
Any uid injected into the skin must be surgically
removed within a few hours or serious infection
may result.
8

^ WARNING
Crushing hazard�
Before performing inspections, service
or maintenance:
•
• Engage parking brake�
•
• Place “Do Not Operate” tag on
control panel�
^ WARNING
Burn hazard�
Hot and high pressure hydraulic oil�
Allow oil to cool before servicing�
2�3 Maintenance Hazards
Before servicing, park machine on a rm and level
surface, remove key, set parking brake and place
a “Do Not Operate” tag on control panel. Read and
understand this manual. If you do not understand
any part of the manual, contact Baumalight at 866-
820-5603.
Always wear face and/or eye protection, safety
shoes, and other protective equipment appropriate
for the job.
Do not make unauthorized modications. Contact
Baumalight at 866-820-5603 before you weld, cut/
drill holes, or make any other modications.
Always use Baumalight replacement parts.
^ WARNING
Moving parts can crush and cut�
Keep clear of moving components�
Follow lockout procedure before
servicing�
^ WARNING
Entanglement hazard�
Keep clear of moving components�
Wear proper protective equipment
appropriate for the job�
9

A. D005262 ^WARNING - P65 warning
information.
WARNING: This product can expose you to chemicals
including 1,3-Butadiene and lead, which are known to the state of
California to cause cancer and birth defects or other reproductive
harm. For more information go to www.P65Warnings.ca.gov.
D005262
B. D005126 ^ WARNING - Pressurized uid
hazard. Pressurized uids can penetrate the
skin. Do not check for leaks with your hands.
Keep back a safe distance when pressurized.
D005126
The two and four panel safety decals are pictorial
and have a yellow background. The panel with a
triangle indicates the potential hazard. The panel
without a triangle indicates how to avoid the
hazard.
If any of the decals are missing, are damaged, or
if you do not understand the decal, please contact
your dealer.
E
B
D
A
CC
3 SAFETY SIGNS
10

C. D005127 ^WARNING - Pinch hazard. Keep
back while machine is operating.
D005127
D. D005125 ^WARNING - Read and understand
safety signs on the machine and operating
instructions in this manual before operating
machine.
D005125
E. D005517 ^WARNING - Remove key before
servicing.
D005517
11

^Keep bystanders, livestock, pets, etc away
from work area.
^ Always wear protective equipment appropriate
for the job.
^Do not operate, work on or around this machine
while under the influence of alcohol, drugs or if
feeling ill.
^Keep clear of moving machinery at all times.
^Stop skid steer engine before leaving operators
area.
^It is your responsibility to operate this equipment
safely. You must be familiar with the equipment
and all safety practices before use.
^ Do not allow untrained or unqualied people to
operate this equipment.
4�2 Attach Tree Spade
Note: Use this procedure to connect to skidsteer
after the initial setup has been performed.
1. Read and follow all safety instructions.
2. Attach tree spade to skidsteer. See Operator’s
Manual.
3. Connect hydraulic hoses. Verify hydraulic
hoses are clear of pinch areas and moving
parts.
4. Move to a clear open area to test functions.
4 OPERATION
4�1 Preparation For Use
^ WARNING
Prevent serious injury�
Verify bystanders are away and operator
is in a safe area to avoid pinching/
crushing�
Spade may move erratically due to air in
the hydraulic system�
^ WARNING
skin�
Use body and face protection while
searching for leaks� A tiny, almost
invisible leak can penetrate the skin,
thereby requiring immediate medical
attention�
Use wood or cardboard to detect
hydraulic leaks, never use your hands�
5. Start skid steer and operate all functions to
ll cylinders with oil. Spade may function
erratically until all air is purged from hydraulic
system.
6. Check operation and verify there are no leaks.
7. Stop skid steer engine and check hydraulic oil
reservoir level. Add hydraulic oil if necessary.
Refer to your skid steer operators manual for
hydraulic oil specication.
12

4�3 Electrical Connections
(If Equipped)
1. Connect electrical harness to connector on
tree spade.
A
B
C
D
E
F
G
A. Blade Hydraulic Cylinder
B. Valve Bank
C. Hinge Cylinder
D. Blade Tower
E. Blade
F. Hose Shield Cover
G. Attachment Plate
4�4 Machine Components
13

E
M
E
R
G
E
N
C
Y
S
T
O
P
N
O
T
A
U
S
SWING
SPADES
SWING
A
E
C
D
F
GB
A. Emergency Stop
B. Right Side Swing
C. Front Right Spade
D. Rear Right Spade
E. Rear Left Spade
F. Front Left Spade
G. Left Side Swing
MTB -245
B
F
E
CD
A
A. Front Left Spade
B. Front Right Spade
C. Left Side Swing
D. Right Side Swing
E. Rear Left Spade
F. Rear Right Spade
14

1. Verify all reectors and Slow Moving Vehicle
(SMV) sign are visible.
2. Raise tree spade slightly o ground.
3. Verify hydraulics are disengaged.
4. Travel at a reasonable and safe speed.
4�6 Transporting
4�5 Pre-Operation Check List
• Verify that tree spade is properly attached to
skidsteer.
• Verify that hydraulic hoses and electrical cable
(if equipped) are properly connected.
• It is operators responsibility to perform
the following checks prior to operation of
equipment.
• Review and understand this manual and
operating unit manual.
• Verify safety decals are installed and
legible. Replace if damaged or missing.
• Verify that all hardware is tight.
• Inspect hoses and ttings for wear, damage
and leaks. Replace damaged or leaking
hoses before use.
• Verify that local utilities have marked all
underground wires, cables and pipelines.
• Refer to operating unit operator’s manual
for prestarting instructions.
4�7 Detach Tree Spade
^ WARNING
Prevent serious injury or death�
1�
2� Engage parking brake�
3� Disconnect hydraulic drive�
4�
1. Park on a level surface.
2. Lower tree spade to the ground.
3. Shut o engine and remove key.
4. Disconnect hydraulic hoses and electrical
harness (if equipped).
5. Detach tree spade from skidsteer. See
Operator’s Manual.
4�8 First Time User Tips
• First, operate all functions in a clear area with
throttle at low idle to get a good feel for the
controls.
• Move the tree spade slowly until you have a
better feel how much the unit can take.
• Each operator must experiment to nd
a technique that works for them in their
application.
^ WARNING
15

4�9 Digging A Tree
^ DANGER
Prevent electrocution and/or explosion�
Death or serious injury can result if
equipment comes near or contacts
power lines�
Electrocution can occur without direct
contact�
Contacting a gas line may result in an
explosion�
Have underground utilities located before digging.
In the US or Canada, call 811 (US) or 888-258-
0808 (US and Canada). Also contact any local
utilities that do not participate in the One-Call
service. In countries that do not have a One-Call
service, contact all local utility companies to have
underground utilities located.
^ WARNING
Prevent serious injury or death�
1�
2� Engage parking brake�
3� Disconnect hydraulic drive�
4�
^ WARNING
Moving parts can crush and cut�
Keep clear of moving components�
NOTICE
Prevent equipment damage�
Never open or close swing hinge with
spades extended�
Never operate spades with swing hinge
open�
1. Attach skid steer to tree spade. See Attach
Tree Spade in this section.
2. Position tree spade close to ground.
3. Open swing hinge(s).
4. Position tree spade so tree is in center of base.
5. Close swing hinge(s).
6. Lower tree spade to ground. Spade should be
level and straight with tree.
It is important to keep tree spade from lifting o
ground during digging process. In hard soil, slightly
retract spades after every downward push to keep
tree spade at on the ground.
7. Extend rear left spade. Slightly retract as
needed to keep frame at on the ground.
8. Extend rear right spade and front middle spade
one at a time. Slightly retract as needed to
keep frame at on the ground.
9. Extend each spade individually until all spades
have reached full depth.
16

10. Lift tree out of ground and tilt tree spade back.
11. Move away from hole.
^ WARNING
Moving parts can crush and cut�
Keep clear of moving components�
Lockout operating unit before leaving
operators seat�
12. Lower tree spade to ground, set parking brake,
stop engine and remove key.
13. Cut any protruding roots.
1. Position tree above hole.
2. Tilt and lower the tree spade so that the tree
ts into the hole.
3. Retract spades.
4. Raise tree spade o ground a few inches.
5. Open swing hinge(s).
6. Back away from the tree.
It is recommended that you basket the tree in the
hole it was removed from. The tree will be more
stable in a hole in a basket than sitting on top of
the ground.
Most baskets are at on the bottom. To get a at
cone, you can slightly retract each spade. You
must remove the dirt tip. This will make the root
ball t the basket.
17

5 SERVICE AND
MAINTENANCE
5�1 Maintenance
^ WARNING
Moving parts can crush and cut�
Keep clear of moving components�
Lockout operating unit before
performing inspections or maintenance�
5�2 Inspections
Check hydraulic hoses and ttings daily for leaks.
Replace hose if worn or damaged.
Inspect the unit for any damage. Repair or replace
parts as needed.
5�3 Lubrication
1. Lower tree spade to ground.
2. Set parking brake, stop engine and remove
key.
3� Every 16 Hours - Pump grease into grease
ttings on each end of swing cylinders (A),
swing pivots (B) and rod end of spade cylinders.
A
B
4� Every 100 Hours - Pump grease into grease
ttings on top end of spade cylinders (C).
C
C
C
C
18

Spade size and the amount of water available
for your landscape should reect your choice of
tree size. An average root system will be about
the same size below ground as the branches are
above ground.
If no care is planned for the planted trees the
root ball should not be bigger than the size of the
spade; if some care is planned for the tree cutting
25% of the roots still leaves a 90% survival rate
and cutting 50% of the roots also leaves a 90%
survival rate if very good care is planned.
If you live in a dry environment you need to provide
more water to ensure fast growth. Fast growing
trees will have a better survival rate then slow
growing trees.
Selection of trees also depends on the desired
eect and the purpose trees will satisfy in the
landscape.
Will they attract birds to the area?
Shade a patio?
Screen an unsightly view?
Enhance the view of the home?
Identify an entrance or exit?
Trees should provide contrast and relief from
surrounding buildings and create seasonal interest
in areas near the home.
6�1 Planting Procedure
Transplanting is not successful until the tree returns
to a normal growth rate. This transplant recovery
period normally takes three years, but may range
from two to eight years. To get the most satisfactory
performance from trees, attention must be given to
planting details. Using quality plants and following
good cultural practices such as watering, pruning,
and fertilizing will not compensate for poor planting
techniques or poor plant selection.
Try to position spade at same angle (right/left)
when digging and planting so the ats on the
blades match, this will leave less air space under
the root ball.
When lowering the rst trees take a close look or
have someone with you to insure root ball is well
centered because if it is released o center the
root ball will drop and tilt and it could damage the
tree roots (it is easy to get a feel for it after planting
a number of trees).
Raise blades one inch each until the root ball
seems lose then extract each blades completely,
if the tree is leaning raise the blade that trunk is
leaning towards rst, this will spin it up a little. If
you are transplanting without baskets do not try to
twist, spin, or move the root ball; just leave it and
within a week try staking the tree if it is tilted.
Use water to settle the soil around the root ball.
Mulch two to four inches deep with woodchips,
bark mulch, or other suitable mulch.
Trees should be pruned to remove broken,
damaged, or dead branches.
6�2 Care For Your Trees
You should consider each of the following as
important in caring for your trees:
• Fertilizer
• Mulching
• Watering
• Pruning
• Staking and guying
• Tree wraps
6 WORKING WITH
TREES
19

6�2�1 Fertilizing
Fertilizing generally is not necessary until the tree
begins recovering from the shock of transplanting
and establishes itself in its new home. This usually
takes at least one year in non-tropical areas. In
tropical and sub-tropical areas, this can take less
than a year to occur. In some circumstances, the
tree care company may recommend fertilizing a
recently planted tree.
6�2�2 Mulching
Mulching is very important for several reasons.
Functionally, mulches discourage weeds from
growing, conserve moisture during drought periods,
and allow better use of water by controlling runo
and increasing water-holding capacity of light,
sandy soils. Mulch also helps maintain a uniform
soil temperature.
A 3-4 inch layer of mulch can add to the aesthetic
value of a garden while protecting the base of trees
from being injured by equipment, such as lawn
mowers. Mulch rings also decrease competition
from lawn grass. Lawn grass, especially when
lush, robs trees of valuable nutrients and moisture.
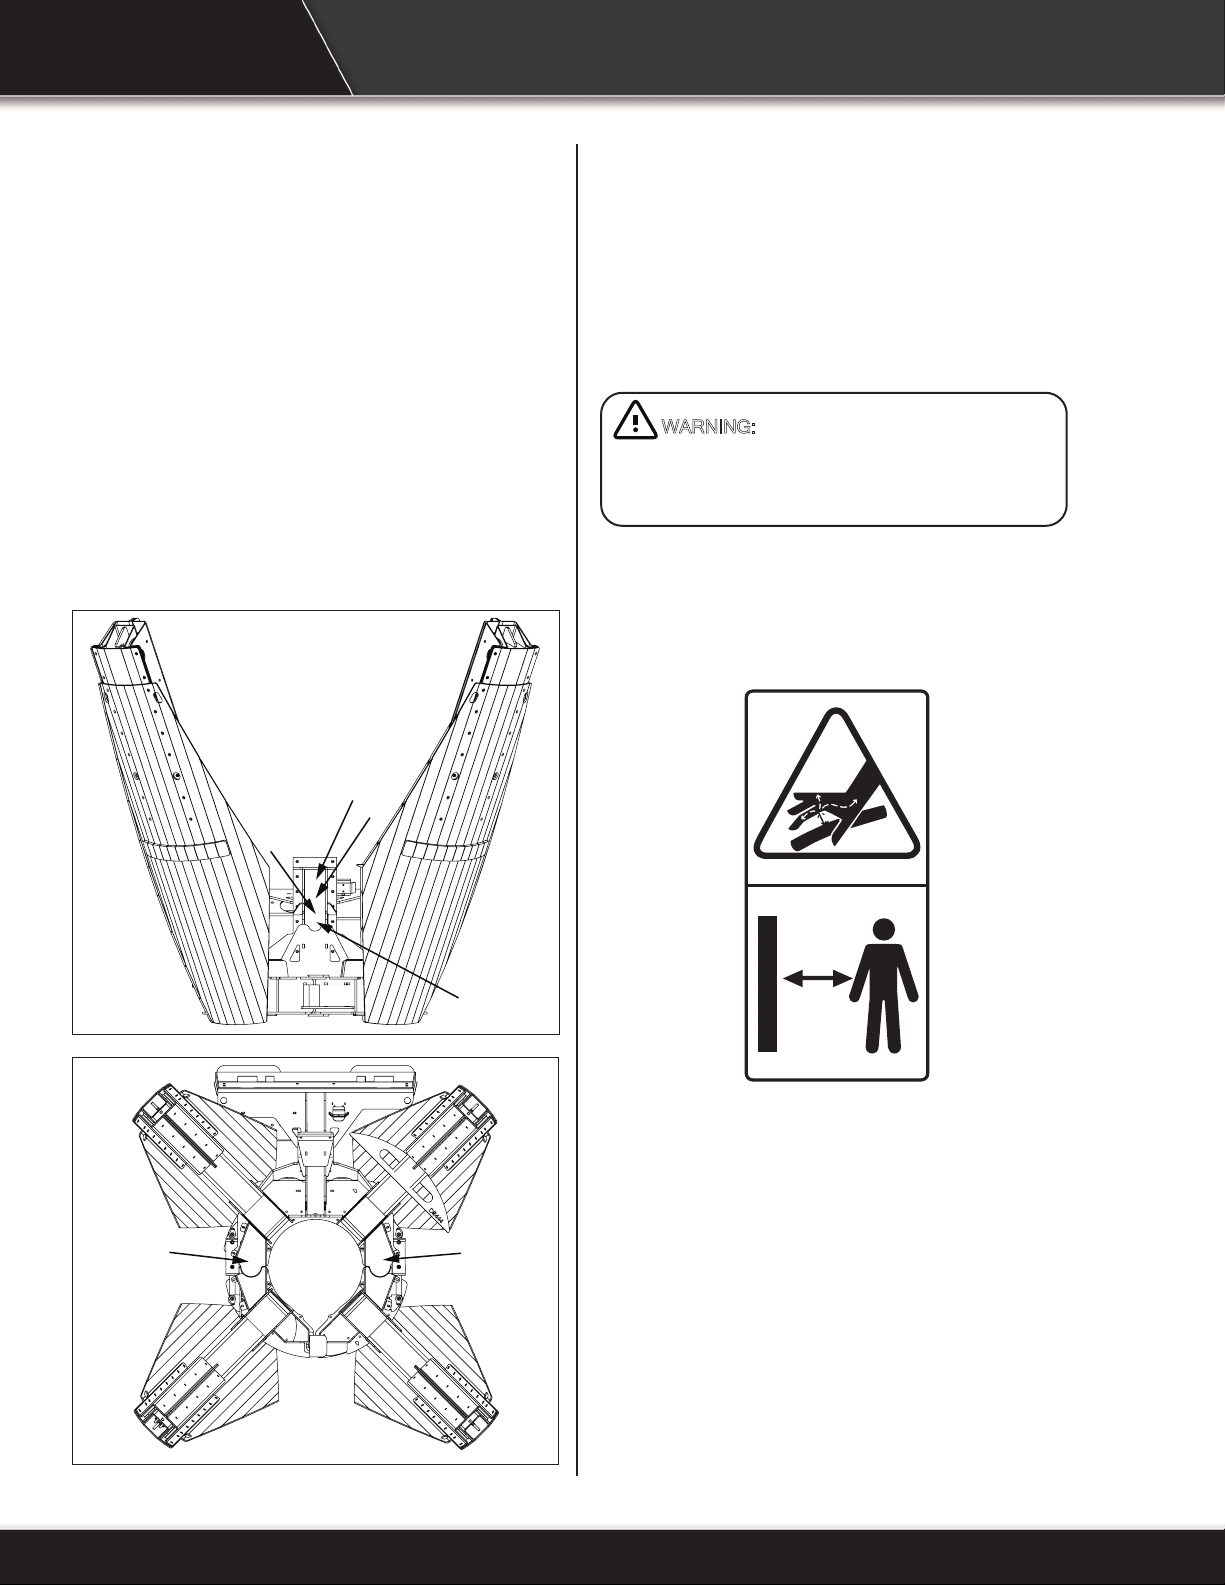
Trees often are wounded by careless use of
yard equipment like lawn mowers, weed whips,
and other trimming equipment. These injuries
cut through important vascular tissue just inside
the bark, which can lead to decay and ultimately
death of the tree. A bed of mulch around the tree
eliminates the need to trim or mow close to the
tree’s base. Extreme care should be taken when
digging up or tilling the soil under a tree. Many
large and small roots will be cut by such digging,
especially if it occurs close to the trunk.
6�2�3 When To Apply
Mulch can be applied just about any time of the
year when trees and shrubs are being planted. The
best time, however, to apply mulch in established
bed areas would be in mid spring when the soil
temperature has warmed up enough for sucient
root growth. If applied earlier, the mulch will keep
the soil temperature lower and root growth could
be delayed.
6�2�4 How To Apply
It should be applied 2 to 3 or 4 inches in depth over
relatively clean, weed-free soils. Do not pile mulch
more than 4 inches. Identify and eradicate the
weeds before the mulch is applied. Keep mulch
pulled 12 inches back from the tree trunk.
6�2�5 Types Of Mulch
Most arborists consider organic mulches as the
most compatible with trees. Many organic materials
can be used as mulch. Bark mulches and wood
chips are the two most commonly used mulches in
most of the country. In the south, pine needles are
included in that list.
There are several inorganic materials used as
mulches. These include weed barriers such as
plastic that is sometimes used to discourage
weeds; however, plastic interferes with the normal
oxygen and water supply to the tree’s roots. When
the plastic is used, a very shallow root system is
created and during drought periods the plants may
not withstand the stress.
It is recommended not to use black plastic
around trees. There are several landscape fabric
“mulches” available that will function the same
as plastic, but allow for normal water and oxygen
exchange. These materials, sometimes called
geotextiles or weed barriers, are placed on bare
soil around trees and shrubs with mulches used on
20
This manual suits for next models
3
Table of contents
Other Baumalight Lawn And Garden Equipment manuals

Baumalight
Baumalight iMS760 User manual

Baumalight
Baumalight UNDERTOW User manual

Baumalight
Baumalight MX530 User manual

Baumalight
Baumalight iMP772 User manual

Baumalight
Baumalight MX230 User manual

Baumalight
Baumalight MS548 User manual

Baumalight
Baumalight ST324 User manual

Baumalight
Baumalight MP572 User manual

Baumalight
Baumalight MS960 User manual

Baumalight
Baumalight DR444 User manual