Baumatic BEC2.1SS User manual
Y 1
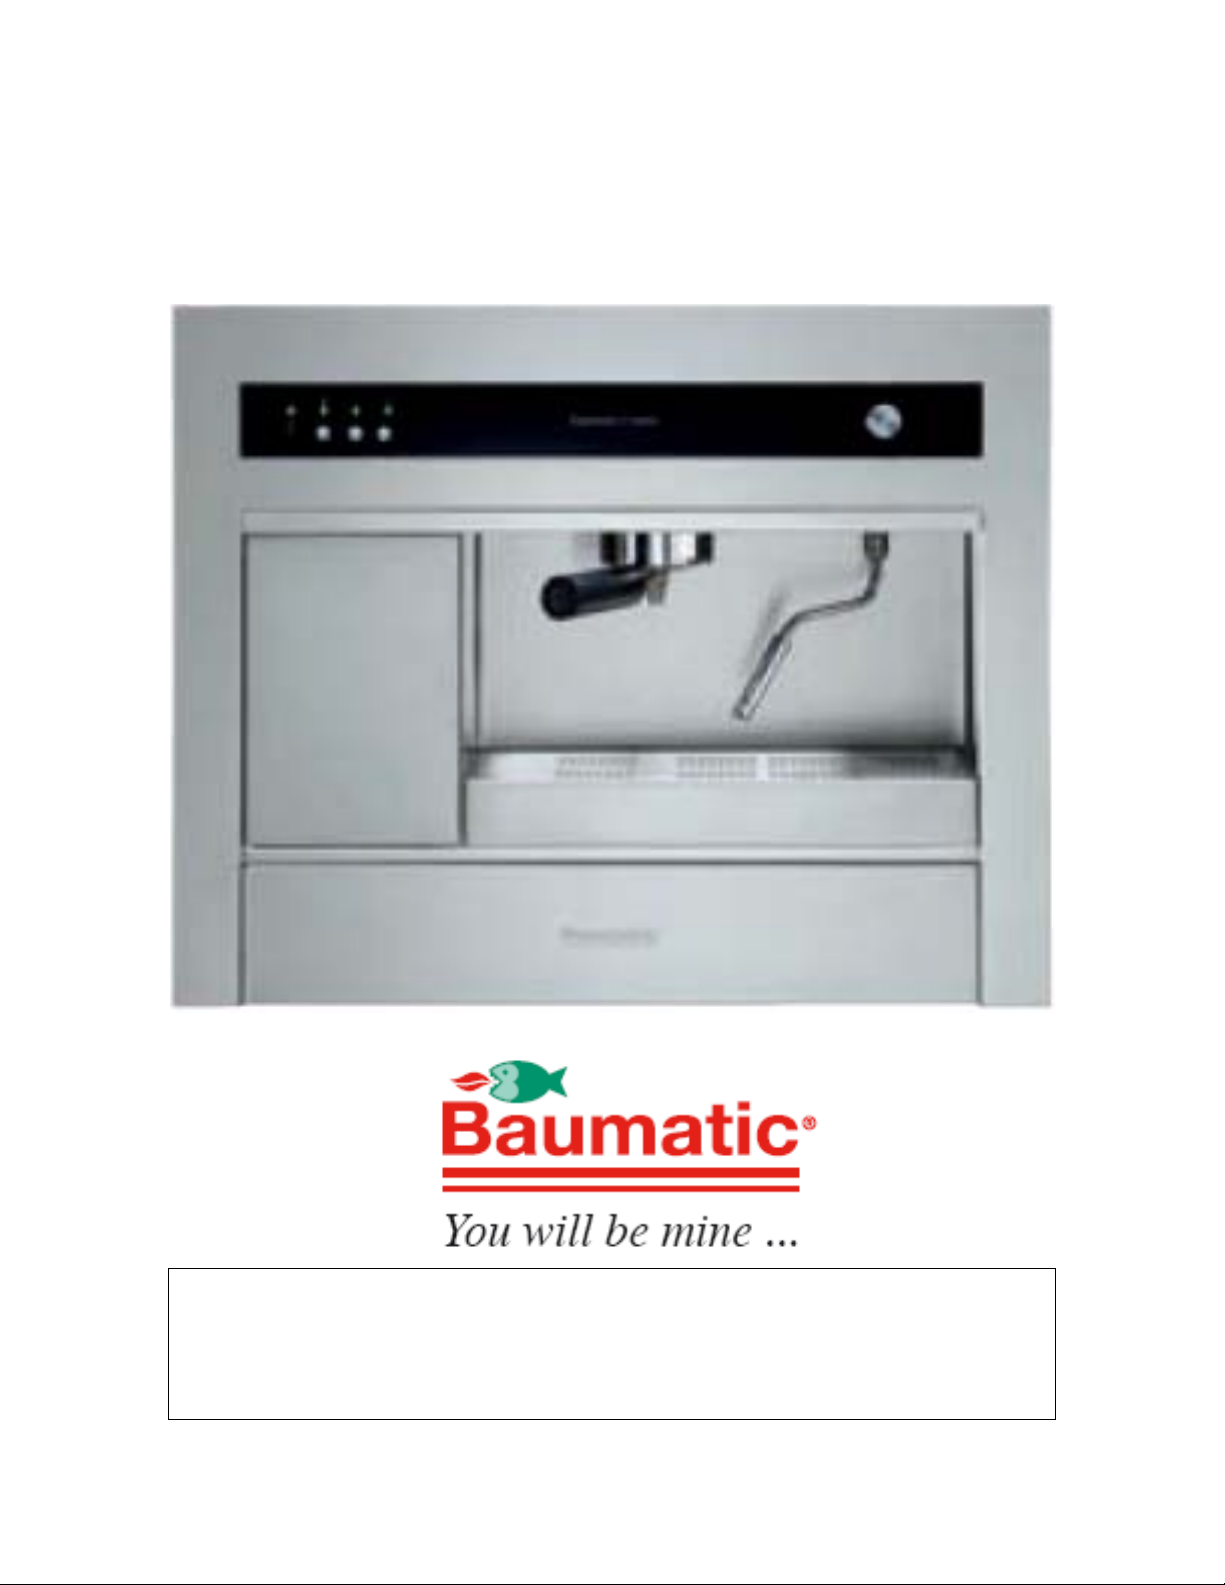
BEC2.1SS
Built in espresso
coffee machine
User Manual for your Baumatic
BEC2.1
Built-in espresso coffee machine
NOTE: This User Instruction Manual contains important
information, including safety & installation points, which will
enable you to get the most out of your appliance. Please keep it
in a safe place so that it is easily available for future reference; for
you or any person not familiar with the operation of the appliance.
DD 09/01/09
2

3
Contents
Environmentalnote 4
IMPORTANT SAFETY INFORMATION 5 – 6
Specifications 7
Product and aperture dimensions 7
Product specifications 7
Standard accessories 7
Technical specifications 8
Description of the coffee machine 9
Standard accessories 10
Controlpanel 10
Using your coffee machine 11
Beforefirstuse 11
Filling the reservoir (manually) 11
Filling the reservoir (automatically) 12 – 13
Dispensinghotwater 13
Adjusting the water fixed time dispensing period 14
Dispensing steam 14
Adjusting the steam fixed time dispensing period 15
The water tank 15 – 16
Adjusting the flow of the water boiler 16
Makingdrinks 16
Connecting a filter holder 16
Using coffee pods 17 – 18
Using ground coffee 18 – 19
Tips on making an espresso 20
Tips on making a cappuccino 20
Method 1 (Using the steam pipe) 20 – 21
Method 2 (Using the froth maker) 21
Tips on making loose leaf tea 22 - 23
Tips on making tea using steam 23
Cleaning and maintenance 23 – 25
Installation 26
Electricalconnection 26
Installing the coffee machine into the kitchen cabinet 27 – 29
Connecting the coffee machine to the mains water supply 30
Troubleshooting 31
Baumatic Ltd. Conditions of guarantee 32
Contactdetails 33

Environmental note
4
oThe packaging materials that Baumatic uses are environmentally
friendly and can be recycled.
all packaging material with due regard for the
environment.
oPlease discard

5
IMPORTANT SAFETY INFORMATION
Your safety is of the utmost importance to Baumatic.
Please make sure that you read this instruction booklet
before attempting to install or use the appliance. If yo
are unsure of any of the information contained i
booklet, pleas
u
n this
e contact the Baumatic Technical
ent.
eneral Information
ousing unit, it
f Baumatic Ltd.
uarantee. The foregoing does not
affect your statutory rights.
Service
arning and safety instructions
e
uring use and retain heat after operation.
hild Safety
appliance and not allowed
se ensure that they are kept under close supervision
at all times.
Departm
G
oThis appliance is designed for domestic household use. It can
ONLY be built into a standard kitchen cabinet or h
should NOT be used as a freestanding appliance.
oThe use of this appliance for any other purpose or in any other
environment without the express agreement o
will invalidate any warranty or liability claim.
oYour new appliance is guaranteed against electrical or
mechanical defects, subject to certain exclusions that are noted
in Baumatic’s Conditions Of G
oRepairs may only be carried out by Baumatic
Engineers or their authorised service agent.
W
oThis appliance complies with all current European safety
legislation. Baumatic do wish to emphasise that this complianc
does not remove the fact that the appliance surfaces will
become hot d
C
oBaumatic strongly recommend that babies and young children
are prevented from being near to the
to touch the appliance at any time.
oIf it is necessary for younger family members to be in the
kitchen, plea

6
eneral Safety
oDo not leave the coffee maker unattended.
come into contact
with areas on the appliance that get hot.
Do not install the appliance next to curtains or soft furnishings.
leaning
coffee machine should be carried out on a
regular basis.
using this appliance and when
following the cleaning procedure.
ted from the
mains before following the cleaning procedure.
cordance
ith the manufacturer’s instructions.
esult of improper
use or installation of this appliance.
must be used by a trained person for domestic purposes only.
G
oDo not allow electrical fittings or cables to
o
C
oCleaning of the
oGreat care should be taken whilst
oIMPORTANT: The appliance must be disconnec
Installation
This appliance must be correctly installed by a
suitably qualified person, strictly in ac
w
oBaumatic Ltd. declines any responsibility for injury or
damage, to person or property, as a r
oThe manufacturer declares that the coffee maker is built using
certified materials and requires the appliance to be installed in
accordance with the standards currently in force. This appliance

7
Specifications
Product Dimensions
Height: 460 mm
Width: 596 mm
Depth: 245 mm
Aperture Dimensions
Height: 450 mm
Width: 600 mm
Depth: (min) 560 mm
on
/steam
2 litres)
tion light
s with saucers
oWater softener
Product specifications
oPush button control operati
Mark resistant coatingo
oChoice of 1 or 2 cup filters
oSuitable for sealed coffee pods or ground coffee
oCoffee regulation (extra strong – normal – weak)
Steamospout for cappuccino, hot chocolate, tea and instant
coffee
Pull-out drawer with aocompartment for cups & saucers and a
dish for coffee waste
oSeparate boiler and pump for coffee making & cappuccino
Can be plumbed in or filled manuallyo
oRemovable water tank (capacity
oEmpty water tank warning light
oPump stop on pump operation
oLED high density illumina
Standard accessories
oFilter holder
o1 x one espresso cup filter
o1 x two espresso cup filter
1 x milk jugo
o2 x espresso cup

8
echnical specifications
oSupply connection d
ontact gap)
oMains supply lead 3 x 1.5mm²
n
he left hand side of the
pliance, which houses the water reservoir.
odel Number ……………………………….
erial Number ……………………………….
…
T
oCoffee pump pressure 15 bar
oSteam pump pressure 2.50 bar
oTotal output 1450 W
oCoffee boiler output 800 W
oSteam boiler output 650 W
oPower supply 230 Vac 50 Hz
13 A (double pole switched fuse
outlet with 3 mm c
For future reference please record the following information which ca
be found on the Rating Plate and the date of purchase which can be
found on your sales invoice. The rating plate for your coffee machine
can be located by opening the small door on t
ap
M
S
Date of Purchase ……………………………

9
escription of the coffee machineD
1) Storage compartment
oor
r nut
le panel
h
4) Water filling switch
2) Water reservoir
3) Water reservoir d
4) Control panel
5) Filter holder ring nut
6) Steam pipe holde
7) Pressing tool
8) Removab
9) Filter
10) Drip tray
11) Operating light
12) ON/OFF switc
13) Inlet hose
connection
1
10
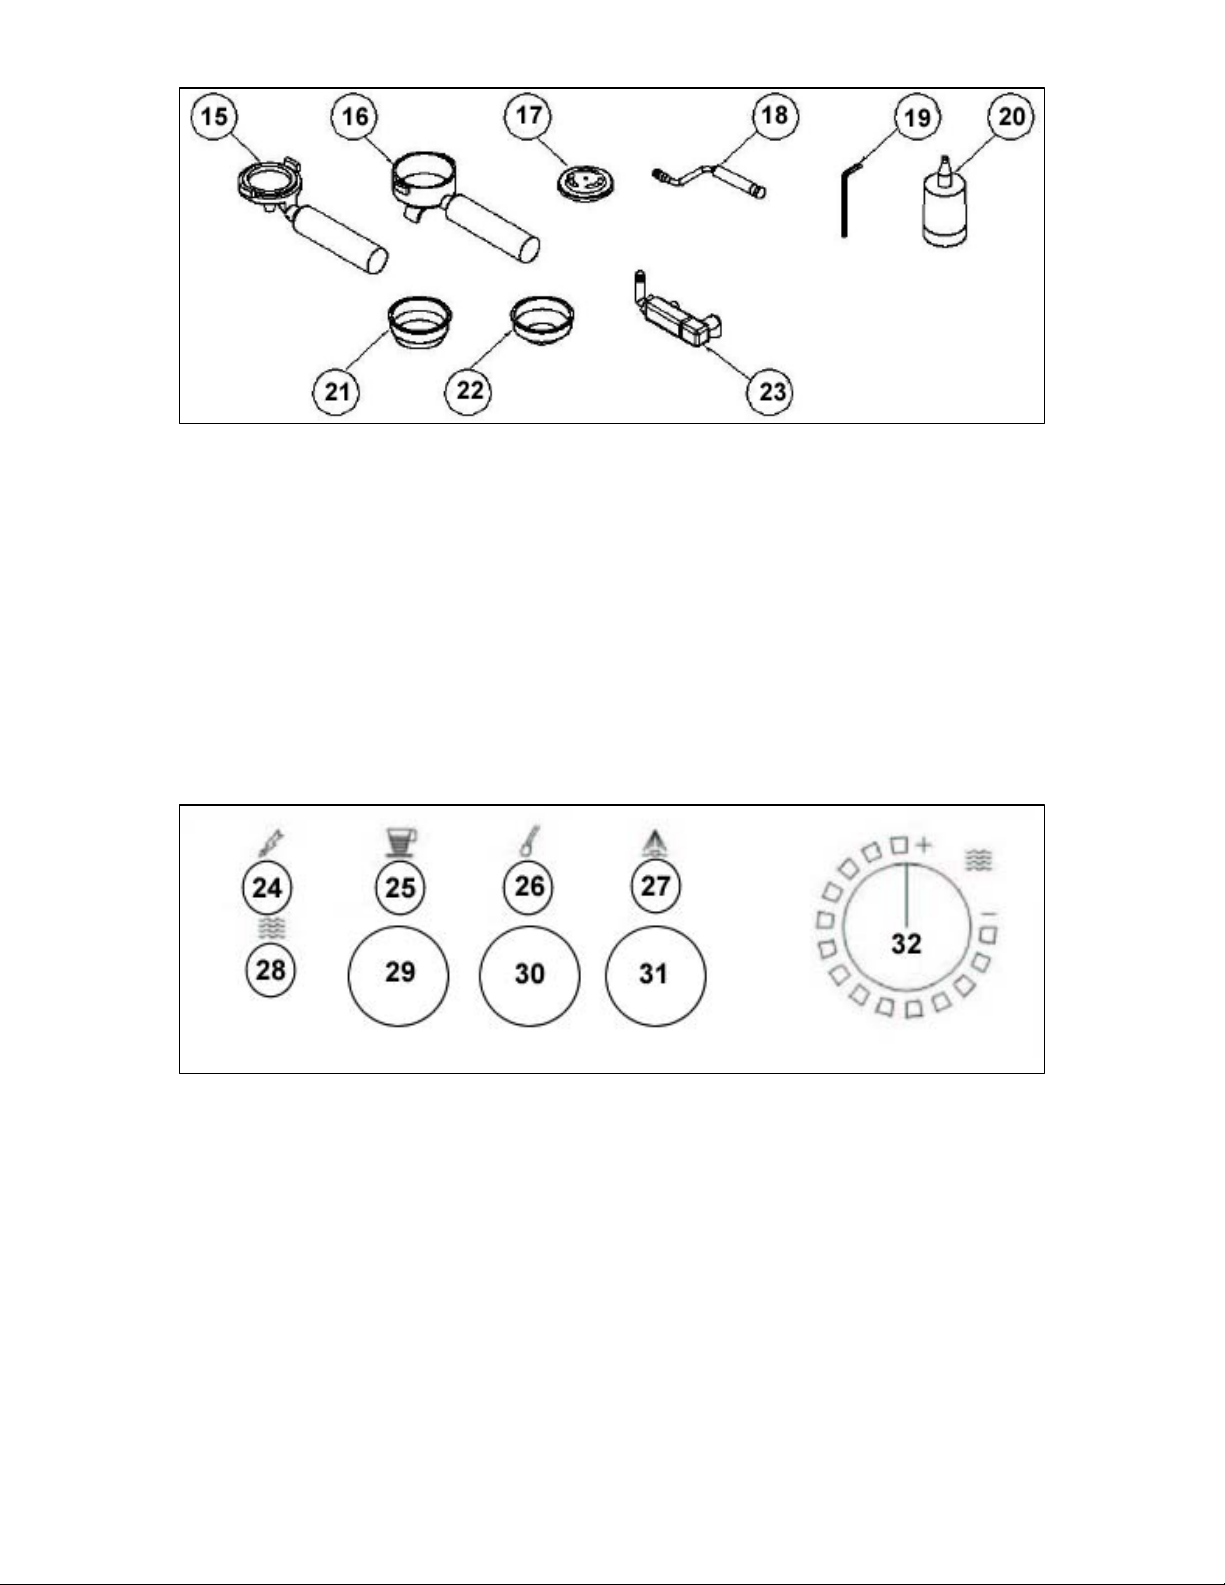
tandard accessories
coffee pods
llation process
er
3) Froth maker
ontrol panel
F button
2) Water flow control knob
S
15) Filter holder for
16) Filter holder
17) Ground coffee adaptor
18) Steam pipe
19) Allen key for insta
20) Water soften
21) 2 cup filter
22) 1 cup filter
2
C
24) ON/OFF neon
25) Water boiler neon
26) Steam boiler neon
27) Steam dispensing neon
28) Water reservoir empty neon
29) Water boiler ON/OFF button
30) Steam boiler ON/OFF button
31) Steam dispensing ON/OF
3
Table of contents
Other Baumatic Coffee Maker manuals


