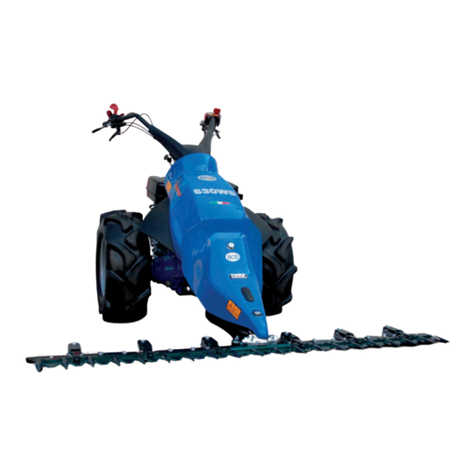
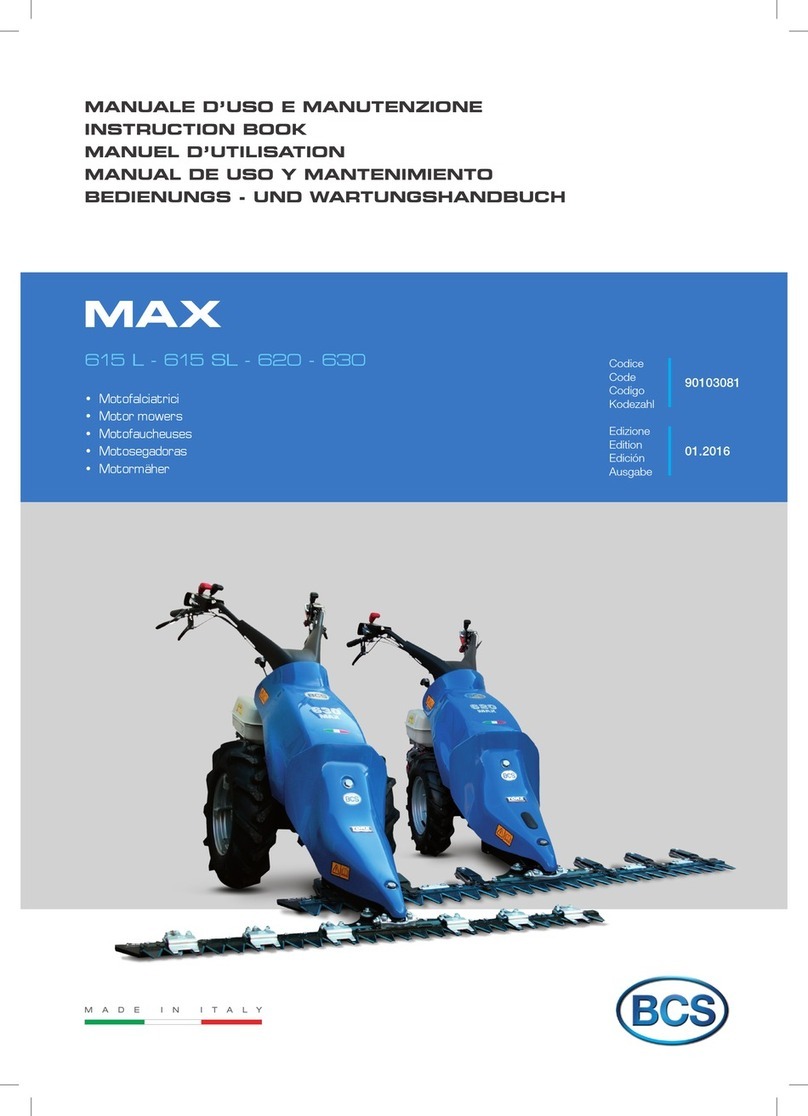
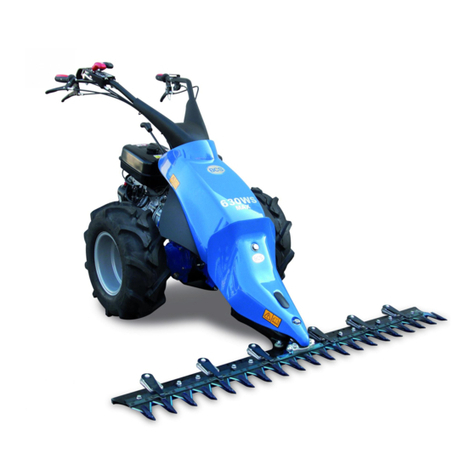
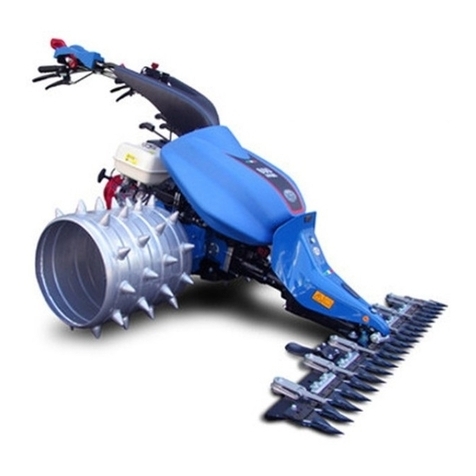
BCS 615L User manual

Operating Instructions
Before commissioning the machine, read operating instructions
and observe warning and safety instructions.
PLEASE ALSO READ ORIGINAL
BCS INSTRUCTION MANUAL
Crusader Power Scythes
Manufactured by BCS S.p.A.
Models 615L ●615SL ●630

BCS Crusader Power Scythes
Page 2 CPS/MAX/0617
No liability will be accepted for any damage caused to persons or property
through failure to observe the operating and safety instructions.
!
IMPORTANT READ CAREFULLY
Contents
Page 3 Safety
Page 4 Controls - 615L
Page 5 Controls - 615SL
Page 6 Controls - 630
Page 7 Assembly Instructions
Page 9 Safety Precautions
Page 10 Operating Hints
Page 11 Starting the Engine
Page 12 Operation
Page 13 Stopping the Engine
Page 14 Blade Holder Adjustment
Page 15 Blade Replacement
Page 16 Replacement of Traction Pin
Page 17 Maintenance Guide
Page 19 Risk Assessment
Page 20 Spare Parts
Page 21 Sound & Vibration Levels
Page 23 Manufacturer Information

BCS Crusader Power Scythes
CPS/MAX/0617 Page 3
Safety
ALWAYS read the original manufacturer’s manual rst
ALWAYS start the engine in the open air
DO NOT smoke when refuelling
DO NOT mix OIL with the fuel
ALWAYS stop the engine before making any adjustments, refuelling, moving or
cleaning, or when the unit is unattended
USE ONLY fuel from containers designed for this purpose - refuel outdoors only and
replace the tank cap securely
IN CASE of petrol spillage move the machine away from the area of spillage and
allow the petrol vapours to dissipate before starting the engine
DO NOT remove any safety guards that are tted
DO NOT touch any moving parts or attempt any maintenance whilst the machine is
running - KEEP HANDS AND FEET AWAY
BEFORE starting work clear the work area of any objects that could damage the
machine
DO NOT allow children or anyone uninstructed to operate the machine - KEEP
ANIMALS AWAY
DO NOT use on slopes or banks of more than 20o
ALWAYS wear suitable clothing to give personal protection including footwear that
offers a good grip
AVOID wearing loose garments that may catch in moving parts
KNOW how to stop the machine in an emergency
NEVER interfere with any control settings on the engine
NEVER select reverse gear with your back to a wall or other immovable object
IF A FAULT develops DO NOT attempt any repair - immediately contact the supplier
from whom the machine was obtained
VISUALLY INSPECT the machine before use - ensure all blades, nuts and bolts are
tight and not worn or damaged and replace blades if necessary
KEEP IN MIND the operator is responsible for accidents or hazards occurring to
people or property

BCS Crusader Power Scythes
Page 4 CPS/MAX/0617
Controls
BCS 615L
Forward / Reverse Lever Engine Stop (OPC) Lever
Throttle Lever
Handlebar Offset
Lever
Wheel Speed
Lever
Handlebar Height
Adjustment Lever
PTO Lever
Clutch Lever
Locking Clip

BCS Crusader Power Scythes
CPS/MAX/0617 Page 5
Controls
Forward / Reverse Lever
Throttle Lever
Handlebar Offset
Lever
Wheel Speed
Lever
Handlebar Height
Adjustment Lever
PTO Lever
Clutch Lever
Locking Clip
Differential
Lever
BCS 615SL
Engine Stop (OPC) Lever

BCS Crusader Power Scythes
Page 6 CPS/MAX/0617
Controls Description
Forward /
Reverse
Lever
Engine Stop (OPC) Lever
Throttle Lever
Handlebar
Offset Lever
Wheel Speed Lever
Handlebar Height
Adjustment Lever
Parking Brake
Lever
Clutch Lever
Locking Clip
BCS 630
Differential Lever
Left Steering
Brake Lever
Right Steering
Brake Lever
PTO Lever

BCS Crusader Power Scythes
CPS/MAX/0617 Page 7
Assembly Instructions
1. Remove the bar from the box and CHECK THE TIGHTNESS
of all bolts and mounting studs.
2. Fittheskidstothetopofthebar(gure2).
3. Fit the drive assembly (A) to the bar (B) using RED
LOCTITE on the two nuts. Ensure washers are tted
correctly(gure3).Ifapplicablechecktheoillevelin
the oil bath.
4. Fitcovermountingbracket(C)todriveunit(gure4).
Ensure locating pin on bracket ts into the lower of
the two holes. Secure the bracket with the nut & bolt
provided. If applicable t the spacers provided under
the front cover
5. Fitplasticprotectioncovertodriveunit(gure4).Nip
the bolt tight at this stage but do not overtighten.
6. Fit bracket (D) to plastic cover.
7. Fit brackets (C) and (D) together. This will normally be
through the bottom set of holes in bracket (D).
8. Tighten all nuts and bolts on the brackets and cover.
9. Read the manual thoroughly before making any
adjustments.
Figure 2
Figure 3
Figure 4
Figure 5
D
C
NO YES

BCS Crusader Power Scythes
Page 8 CPS/MAX/0617
ATTACHING THE BLADE HOLDER
1. Remove the bolt in the lower side of the blade holder
(gure9).
2. Screw the M8 x 20 bolt provided in the upper part of the
bladeholderallthewaydown(gure10).
3. Installthelocknutthatlockstheboltinplace(gure11)
andmountthebladeholderagain(gure12).
4. Adjustthebladeholder(gure13).Seepage6formore
on blade holder adjustment.
It is now possible to attach the cutter bar onto the
ange of the machine.
Figure 10
Figure 11
Figure 12
Figure 13
Assembly Instructions
Figure 9

BCS Crusader Power Scythes
CPS/MAX/0617 Page 9
Safety Precautions
During transportation of the machine, or when it is not in
use,installthebladeguard(A)onthebar(gure14).
Always wear HEAVY GLOVES to protect your hands whilst
working on the equipment.
READ and observe all warning labels on the machine and
implements(gure15).
Always wear appropriate work clothes whilst operating the
machine, always wear safety footwear.
DO NOT USEthemachinenearchildrenoranimals(gure
16).
The machine operator is responsible for any damage to
persons or property.
Always walk with the machine - DO NOT RUN.
NEVER work on slopes of more than 20oand always work
across the face of a slope (side to side), NEVER up and
down. NEVER use the machine on a bank where there is a
possibility of the machine sliding down the slope.
Always disengage the power take-off (PTO) when changing
direction or location of operation.
DO NOT replace the blades or attempt to undertake any
maintenance of the cutter bar while the engine is running.
ONLYqualiedpersonsshouldoperatethemachine.
If any abnormal vibrations occur STOP the engine immediately
and visually inspect the machine and implement for any signs
of damage.
IMPORTANT: Read all machine and implement manuals
thoroughly before using the cutter bar.
Figure 14
Figure 15
Figure 16

BCS Crusader Power Scythes
Page 10 CPS/MAX/0617
Operating Hints
IMPORTANT: Read all machine and implement manuals thoroughly before using the cutter bar.
Always familiarise yourself with the machine’s operation before commencing work.
Best results are obtained with the engine at a low throttle setting, which enables the bar to
cut cleanly and gives less wear and tear on the reciprocating parts, which in turn reduces
maintenance.
NB: If you are working on a slope, always work across the slope - never up or down.
On rough terrain, the bar should be raised by the height adjuster skids to prevent the blades
from digging into the ground.
WARNING: If any abnormal vibrations or sounds occur, STOP the engine immediately and
check the machine and the cutter bar. If you have any concerns contact your supplier.
!
IMPORTANT
NEVER USE MORE THAN ¼ THROTTLE
WHEN THE CUTTER BAR IS OPERATING

BCS Crusader Power Scythes
CPS/MAX/0617 Page 11
Starting the Engine
Check the engine oil level. Top up with 10w/40 oil if necessary.
Check fuel level. Only use unleaded petrol from a clean container.
Never re-fuel when the engine is hot or running.
Leave 1” air space in the fuel tank.
Depress the red Engine Stop (OPC) Lever then pull up the Clutch Lever and secure with the
Locking Clip.
Ensure the Wheel Speed Lever is in neutral ‘O’ position.
Set the Throttle Lever to half.
Turn the fuel tap on the engine to ‘ON’ position, if the engine is cold set the choke lever to ‘ON’
position.
Pull the recoil start handle gently until it engages then give it a good strong pull to start the
engine.
When the engine has started, release the choke lever after a few seconds and return the
Throttle Lever to idle position.

BCS Crusader Power Scythes
Page 12 CPS/MAX/0617
Operation
Use the Handlebar Height Adjustment Lever to set handlebar height.
Pull up the Clutch Lever. This will automatically release the lever Locking Clip.
Ensure the red Forward/Reverse Lever is in the correct position to move forward: if the
handlebars are positioned over the engine then this lever should be in the fully back position.
Engage drive to the cutter bar by using the PTO Lever: if the handlebars are positioned over the
engine then pull the PTO Lever towards you.
Using the Wheel Speed Lever, select 1st gear.
Raise the throttle slightly, release the Clutch Lever gently and fully, keeping the red Engine Stop
(OPC) Lever depressed as the engine will stop if this is released.
Commence work.
IMPORTANT! NEVER USE MORE THAN ¼ THROTTLE WHEN
THE CUTTER BAR IS OPERATING
!

BCS Crusader Power Scythes
CPS/MAX/0617 Page 13
Stopping the Engine
Close the Throttle.
Pull up the Clutch Lever.
Locate the Wheel Speed Lever in neutral position.
Disengage drive to the cutter bar by using the PTO Lever (push the PTO Lever away from you).
Release Clutch Lever.
Release red Engine Stop (OPC) Lever completely.
WARNING: THE EXHAUST COVER MAY BE HOT - DO NOT TOUCH

BCS Crusader Power Scythes
Page 14 CPS/MAX/0617
Blade Holder Adjustment
Loosentheupperlocknut(Aingure17).
Adjust the tension screw (B in gure 18) until the blade
slides freely between the tooth and blade holder without
excessiveslack(gure18).
When the adjustment produces the best motion without
binding,tightentheupperlocknut(Aingure19).
BLADE ADJUSTMENT
Toadjusttheblades,loosenthebladeholder(Cingure
20) and move the blade to the wear blocks (E) operating on
the blade holder and tighten the bolts allowing a little slack.
Figure 17
Figure 18
Figure 19
Figure 20

BCS Crusader Power Scythes
CPS/MAX/0617 Page 15
Blade Replacement
BLADE REPLACEMENT
To replace the blades, loosen the bolts and remove the
bladeholder(gure21).
Ifnecessary,rstloosenthebladeholder(gure22)and
thenremovetheblade(gure23). Figure 21
Figure 22
Figure 23

BCS Crusader Power Scythes
Page 16 CPS/MAX/0617
Replacement of Traction Pin
After every 100 hours of operation check the condition of
thebladecontrolpin(Aingure24)andtheferrule(B).
Ifreplacementisrequiredloosentheblocknut(Cingure
24) then slide out the pin (A) and the ferrule (B) and replace
them with new parts.
Checkthesettingscrew(Gingure25)thatxesthesteel
blade (M) and replace if necessary.
Tighten the screws (V) completely on the steel blade and
tighten each setting screw (G) to the same degree until
almost all the play has been eliminated on the blade control
pin(gure26).
Finally lock them with conical lock nut (D).
Figure 24
Figure 25
Figure 26

BCS Crusader Power Scythes
CPS/MAX/0617 Page 17
Maintenance Guide
CUTTER BAR MAINTENANCE
Before undertaking any maintenance always stop the
engine and remove the spark plug cap.
After every 4 hours of work grease the drive unit at the
lubricationpoints(gure27).
The oil bath control units contain 1 litre of oil and do not
require greasing just periodic checks to ensure proper oil
levels.
To check the oil level of an oil bath drive, remove the
oscillatingsafetydevice(Aingure28) then removethe
oil plug and make sure the oil level is approximately 60mm
below the hole.
Iftheoillevelistoolow,topupwithSAE80W/90oil(gure
29)andgreasetheconnectionbush(gure30).
Ensure the cutter bar blades are clean and sharp at all
times. After each use wash the cutter bar to remove any
grass or soil (gure 31) and check the sharpness of the
blades.
After washing lubricate the blade to avoid oxidation, use an
old paintbrush or similar to smear grease over the cutter
blades.
Check to ensure all nuts and bolts are well fastened,
including those securing the bar to the drive unit and
machineimplement(gure32).
When the machine is not in use always leave the Clutch
Lever pulled in and secured with Locking Clip.
Figure 27
Figure 28
Figure 29
Figure 30
Figure 31
Figure 32

BCS Crusader Power Scythes
Page 18 CPS/MAX/0617
Maintenance Guide
MACHINE MAINTENANCE
For detailed engine maintenance please refer to engine manufacturers manual.
After every hour of operation stop the engine and remove the spark plug cap. Check engine oil
level (recommended oil SAE 10w/40).
Before checking the oil level ensure the machine is level.
Remove the gearbox unit dipstick and ensure the oil reaches the top level mark, if necessary
top up with EP90 gear oil.
Replace the spark plug cap.
OPERATION EVERY
DAY
EVERY
WEEK
EVERY
MONTH
EVERY 6
MONTHS
EVERY 12
MONTHS
Engine Check engine oil level 10w/40
See separate engine manual X X
Gearbox
&
Controls
Check gearbox oil level EP90 X X
Check nuts & bolts X X
Ensure clutch cable has free play X
Check tyre pressure (20psi) X X
Lubricate control cable/linkages X
Check control cable operation X
Check operation of safety devices X
Change gearbox oil EP90 X
Grease gear speed detent ball X X
Scythe
Cutter Bar
Lubricate blades X
Check for loose bolts X
*Pressure washing machines removes lubricating grease as well as dirt. It is imperative all
linkages, especially the gear speed lever detent ball, are kept well greased otherwise they will
becomedifculttooperateandcausedamage.
*DO NOT turn the machine on its side for cleaning.
*Before storing machine always leave the Clutch Lever pulled in and secured with the Locking
Clip to prevent sticking of the clutch plates.
*DO NOT allow maximum engine speed to exceed 3600rpm.

BCS Crusader Power Scythes
CPS/MAX/0617 Page 19
Risk Assessment
HAZARDS RISK LEVEL ACTION NEEDED
Machine tipping over Low Do not use on slopes over 25°. Work across
slopes, never up and down.
Machine running away Low The red Engine Stop (OPC) Lever stops the
machine driving if the operator releases it.
Always check operation before use.
Lacerations High Remove the spark plug cap before carrying
out any maintenance or cleaning. Always wear
gloves when cleaning or lubricating the cutter
bar blades.
Machine reversing and
jamming the operator
against an immoveable
object
High Never reverse the machine with your back to a
wall or similar object.
Burns High Be very careful of a hot exhaust. Turn off the
machine before re-fuelling. Allow 1” air space
in fuel tank.
Flying objects Low Never exceed ¼ throttle when mowing.
Foot injuries High Never let anyone stand in front of the machine
when it is operating. Keep all pets and animals
away.
Handlebar adjustment Low Always set the height and sideways position
before operating the machine – never while it
is moving.

BCS Crusader Power Scythes
Page 20 CPS/MAX/0617
Spare Parts
When ordering spare parts please ensure you provide the
complete part number as listed in the spare parts diagrams
which can be found at www.tracmaster.co.uk/spare-parts
If you need to order replacement blades then it is important
that you quote the number that is engraved on the top
ofeachtooth(gure33)andifnecessary thenumberof
blades on your complete top bar.
The serial number of the implement should also be quoted,
this can be found on a label on the underside of the blue
cowling(Aingure34).
To order parts call our Parts Department on 01444 247689
or email spares@tracmaster.co.uk.
Figure 33
Figure 34
Number Imprinted on Blades:
Scythe Cutter Bar Serial Number:
Number of Blades on Top Bar:
This manual suits for next models
2
Table of contents
Other BCS Lawn Mower manuals