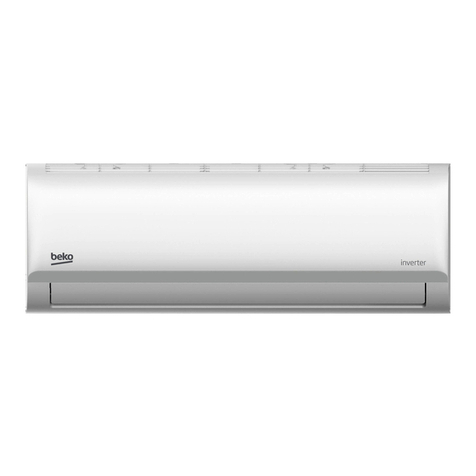
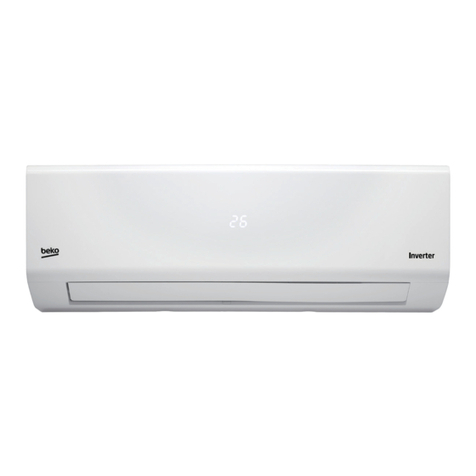
Beko BFYH 500 User manual

BFYH 500 BFYH 501
Split oor-standing air
conditioner
User Manual
EN RU


This product has been produced in environmentally friendly, modern facilities
Complies with the WEEE Regulation. Does not contain PCB.
Please read this user manual rst!
Dear Customer,
Thank you for preferrng a Beko product. We hope that you get the best results
from your product whch has been manufactured wth hgh qualty and state-of-
the-art technology. Therefore, please read ths entre user manual and all other
accompanyng documents carefully before usng the product and keep t as a
reference for future use. If you handover the product to someone else, gve the user
manual as well. Follow all warnngs and nformaton n the user manual.
Meanings of the symbols
Followng symbols are used n the varous secton of ths manual:
C
Important nformaton or
useful hnts about usage.
A
Warnng for hazardous
stuatons wth regard to lfe
and property.
Warnng to actons that must
never perform.
B
Warnng for electrc shock.
Warnng for danger of fre.
Warnng for hot surfaces.

Splt floor-standng ar condtoner / User Manual 3 / 21 EN
1 Instructons to users 4
1.1 Instructons for removal and repars . . . . . . . . . . . . . . . . . . . . . . . . . . . . . . . . . . . . . . . . . . . . . . . . . . . . . . . . . . . . . . . .6
2 The name of each part and ts functon 7
2.1 Indoor unt . . . . . . . . . . . . . . . . . . . . . . . . . . . . . . . . . . . . . . . . . . . . . . . . . . . . . . . . . . . . . . . . . . . . . . . . . . . . . . . . . . . . . . . . . .7
2.2 Outdoor unt . . . . . . . . . . . . . . . . . . . . . . . . . . . . . . . . . . . . . . . . . . . . . . . . . . . . . . . . . . . . . . . . . . . . . . . . . . . . . . . . . . . . . . . .8
2.3 Operaton panel. . . . . . . . . . . . . . . . . . . . . . . . . . . . . . . . . . . . . . . . . . . . . . . . . . . . . . . . . . . . . . . . . . . . . . . . . . . . . . . . . . . . .9
2.4 Dsplay screen 1 . . . . . . . . . . . . . . . . . . . . . . . . . . . . . . . . . . . . . . . . . . . . . . . . . . . . . . . . . . . . . . . . . . . . . . . . . . . . . . . . . . . 10
2.5 Dsplay screen 2. . . . . . . . . . . . . . . . . . . . . . . . . . . . . . . . . . . . . . . . . . . . . . . . . . . . . . . . . . . . . . . . . . . . . . . . . . . . . . . . . . . .11
3 Use of operaton panel 13
3.1 Operaton of mode change between Cool/Dry/Heat/Fan . . . . . . . . . . . . . . . . . . . . . . . . . . . . . . . . . . . . . . . . 13
4 Use of remote controller 14
4.1 Operatng machne n selected modes. . . . . . . . . . . . . . . . . . . . . . . . . . . . . . . . . . . . . . . . . . . . . . . . . . . . . . . . . . . . 15
4.2 Tmer operaton. . . . . . . . . . . . . . . . . . . . . . . . . . . . . . . . . . . . . . . . . . . . . . . . . . . . . . . . . . . . . . . . . . . . . . . . . . . . . . . . . . . 15
4.3 Sleep operaton . . . . . . . . . . . . . . . . . . . . . . . . . . . . . . . . . . . . . . . . . . . . . . . . . . . . . . . . . . . . . . . . . . . . . . . . . . . . . . . . . . . 16
4.4 Replacement of batteres. . . . . . . . . . . . . . . . . . . . . . . . . . . . . . . . . . . . . . . . . . . . . . . . . . . . . . . . . . . . . . . . . . . . . . . . . .17
5 Mantenance 18
5.1 Phenomena dagnoss and treatment . . . . . . . . . . . . . . . . . . . . . . . . . . . . . . . . . . . . . . . . . . . . . . . . . . . . . . . . . . . . 20
Contents

4 / 21 EN Splt floor-standng ar condtoner / User Manual
Please read the manual carefully before usng the ar condtoner so as to ensure the normal
operatons of the unts.
1 Instructons to users
A
Do not open the ar-return grds
or bottom panel of the ndoor
unt durng operatons.
A
Do not put the stcks or other
smlar objects nto the ar nlet
and outlet.
A
I do the
sprayng!
I do dge!
Do not place nsectcdes, pants
or other nflammables near the
nlet or outlet; do not spray such
artcles drectly aganst the
unts.
A
Operate the machne only
under the nomnated voltage
and frequency and wth
correspondng protectve
devces. Never use copper wres
to substtute the fuses, whch
mght lead to operatonal faults
or fre hazards.
A
The groundng termnal of the
unts must be well connected
to the groundng of the power
source.
No!
When cleanng the ar-
condtoner, please do not spray
water on the machne. When
the mcrocomputer parts and
crcuts n the ar-condtoner are
covered wth water, t s possble
to cause falure or electrc shock
dsaster.

Splt floor-standng ar condtoner / User Manual 5 / 21 EN
A
Ar delvery
blocked
Outdoor unt
Indoor unt
Ar nlet
blocked
Do not block the ar nlet and
outlet of the ndoor or outdoor
unts so as to avod possble
negatve mpacts upon the
machne performances or
hazards
C
Re-start the operaton after
power falure. When the power
supply s resumed, the ar
condtoner wll automatcally
enter the standby mode. Press
the On/Off button to restart the
operaton.
A
If the machne s not n use for
long tme, the power source
should be dsconnected for
the sake of safety and energy-
savng.
A
In the case that the breaker s
frequently dsconnected, you
should stop the operaton of
the machne and contact the
dealer or our Co. authorzed
mantenance shop.
When you restart the operaton
after a long perod of non-
operaton, you should carefully
check the ar condtoner and
the wre connecton. If the
electrc wres are damaged
or need to be replaced due to
other reasons, please ask our
Co. after-sale servce person or
the professonal techncans n
the authorzed mantenance
shops to do the replacement
so as to avod possble electrc
shock, overheatng, fre hazards
or other accdents.
1 Instructions to users

6 / 21 EN Splt floor-standng ar condtoner / User Manual
1.1 Instructons for removal and repars
•
If the unt needs to be removed for nstallaton elsewhere or for repars, please contact our company
dealer or authorzed techncans.
•
In case of occurrence of abnormalty (burnng smell, for example), please stop the operaton of the
unt, dsconnect the power and contact our company dealer or authorzed techncans.
1 Instructions to users

Splt floor-standng ar condtoner / User Manual 7 / 21 EN
2.1 Indoor unt
1
2
3
5
4
7
6
1. Up/down air direction guides
For adjustng the vertcal ar delvery
drectons
2. Left/right air swinging fins
For adjustng horzontal ar delvery
drectons
3. Display screen
4. Air-inlet grille
5. Bottom panel
6. Operation panel
7. Air Outlet
2 The name of each part and ts functon

8 / 21 EN Splt floor-standng ar condtoner / User Manual
2 The name of each part and ts functon
2.2 Outdoor unit
Ar nlet
Ar outlet
Ar nlet
Functon feature: Durng closedown of the ar condtoner when t s runnng n refrgeraton
or dehumdfcaton status, the ar condtoner wll not stop supplyng ar mmedately, as the ar
condtoner s performng mould proofng functons. The upper slde plate wll delay for 30 seconds
and then automatcally close.
Features and appearance wll vary. AII the fgures gve a demonstraton to ntroduce the functon.

Splt floor-standng ar condtoner / User Manual 9 / 21 EN
2.3 Operaton panel
2
1
3
4
5
6
7
8
9
1. Dsplay screen
2. On/Off key
Press the key to turn on or turn off the Ar-
condtoner.
3. Mode selection key
Press the key to choose desrable operaton
modes: Auto, Cool, Dry, Heat (Fan).
4.Temp + key
Press the key once to ncrease the set
temperature by 1°C, the hghest temperature
s 32°C.
5. Temp - key
Press the key once to reduce the set
temperature by 1°C, the lowest temperature
s 16°C.
6.Fan speed selection key
Press the key to set your favorte ar flow
rate: Low, Mddle, Hgh.
7. Swing button
Press ths button changes the Up/Down flap
mode: natural flow, swng or fxed wnd.
8.Air flow button
Ths button used for selecton of the left/
rght ar flow drecton, whenever pressed
the n flap wll swng or fx
9.Timer key
Touch the key to set the swtch-on or swtch-
off and the tmer tme.
2 The name of each part and ts functon

10 / 21 EN Splt floor-standng ar condtoner / User Manual
2.4 Dsplay screen 1
1 2
3
4
5
6
7
8
9
10
11
12
13
1. Cool operaton ndcator
2. Dry operation indicator
3. Heat operation indicator
4. Sleep indicator
5. Key lock indicator
6. Room (set) temperature and malfunction
code indicator
7. High speed indicator
8. Swinging wind indicator
9. Middle speed indicator
10. Low speed indicator
11. Fan operation indicator
12. Timer indicator
13. Auto operation indicator
Specfcaton:
•
Usually, the dsplay screen shows only the functon mode and operaton status you choose.
•
When room temperature equals to or s lower than 10°C, the functon of dehumdfyng cannot be
used.
•
When room temperature equals to or s lower than set temperature, the AC unt stops for a perod of
tme to save energy.
•
The AC unt s equpped wth automatc defrostng functon and the heat operaton ndcator on the
dsplay screen flashes when the machne defrosts.
•
The AC unt wth heat pump has auxlary electrc heatng functon, whch wll automatcally turns on
or off accordng to room temperature durng heatng operaton to acheve the best heatng result.
•
If you turn on the machne mmedately after t s turned off, the machne wth tme-lapse startng
functon wll automatcally turns on the machne after 3 mnutes to protect t.
2 The name of each part and ts functon

Splt floor-standng ar condtoner / User Manual 11 / 21 EN
2.5 Dsplay screen 2
1
2
3
4
5
6
7
9
8
10
11
12
13
1. Dry operaton ndcator
2. Heat operation indicator
3. The electric auxiliary heat
4. Key lock indicator
5. Room (set) temperature and malfunction
code indicator
6. High speed indicator
7. Swinging wind indicator
8. Middle speed indicator
9. Low speed indicator
10. Fan operation indicator
11. Timer indicator
12. Auto operation indicator
13. Cool operation indicator
2 The name of each part and ts functon

12 / 21 EN Splt floor-standng ar condtoner / User Manual
Specfcaton:
•
Usually, the dsplay screen shows only the functon mode and operaton status you choose,
•
When room temperature equals to or s lower than 10°C, the functon of dehumdfyng cannot be
used.
•
When room temperature equals to or s lower than set temperature, the AC unt stops for a perod of
tme to save energy.
•
The AC unt s equpped wth automatc defrostng functon and the heat operaton ndcator on the
dsplay screen flashes when the machne defrosts.
•
The AC unt wth heat pump has auxlary electrc heatng functon, whch wll automatcally turns on
or off accordng to room temperature durng heatng operaton to acheve the best heatng result.
•
If you turn on the machne mmedately after t s turned off, the machne wth tme-lapse startng
functon wll automatcally turns on the machne after 3 mnutes to protect t.
2 The name of each part and ts functon

Splt floor-standng ar condtoner / User Manual 13 / 21 EN
3.1 Operaton of mode change between Cool/Dry/Heat/
Fan
1. Press On/Off key.
2. Press Mode key to choose the mode you want.
When you choose Fan mode, the compressor does not work.
3. Press Temp +/- key to set the room temperature you want
The room set temperature range s 16°C-32°C.
4. Press Fan speed key to set desrable ar flow rate.
The fan operates n low speed under the mode of Dry.
5. Press On/Off key once agan to stop.
If you turn on the machne mmedately after t s turned off, the machne wth tme-lapse startng
functon wll automatcally turn on the machne after 3 mnutes to protect t.
C
Note: Adjust the up/down or left/rght ar flow drecton by pressng the Swng or Ar
flow button of remote controller. Please do not adjust the gude blades of ar outlet by
hand drectly, or whch can damage the parts of the machne.
3 Use of operaton panel

14 / 21 EN Splt floor-standng ar condtoner / User Manual
Ths remote controller s the general one of our company. It can be used for many types of our ar-
condtoners. We beg your forgveness that we would not ntroduce the button or ndcator whch s
not applcable for the unts you purchased.
Remote controller 1
1
2
3
4
5
6
7
8
9
10
14
13
12
11
15
16
17
18
Air owFan speed
Turbo CleanLamp
Swing
Mode Temp
On/O
Timer Sleep
Sleep
Lamp
Turbo
Clean
Hold
Auto
Cool
Dry
Heat
Fan
Hold
On
O
4 Use of remote controller
1. Fan speed ndcator
Indcates the set ar rate.
2. Sleep ndcator
Indcates durng sleep operaton.
3. Turbo ndcator
Indcates durng Turbo operaton.
4. Ar flow ndcator
Indcates selected flap mode.
5. Key lock ndcator
6. Set temperature button
Ths button sets the room temperature.
7. Swng button
Ths button changes Up/Down ar flow
drecton: natural flow, swng or fxed wnd.
8. Ar flow button
Ths button used for selecton of the left/
rght ar flow drecton, whenever pressed
the n flap wll swng or fx.
9. Sleep button
Ths button changes to sleep operaton.
10. Hold button
Press ths button to lock or unlock the
keyboard.

Splt floor-standng ar condtoner / User Manual 15 / 21 EN
4.1 Operatng machne n selected modes
1. Pont the remote controller at the unt, press the On/Off button, then press the Mode button, select
the needed mode: Auto, Cool, Dry, Heat (Fan), or Fan.
2. Press the Set temperature button to ncrease or decrease the readngs untl the needed
temperature s dsplayed. The room set temperature range s from 16°C-32°C.
(It would be automatcally set at 25°C and unadjustable n Auto and Dry mode.)
3. Press the Fan speed button to choose the ar rate you want: Low (dsplay ndcates “ ”), Med (dsplay
ndcates “ ”), H (dsplay ndcates “ ”), Auto (dsplay “ ” ndcator flashng).
(It would be automatcally set at low speed and unadjustable n Dry mode.)
4. Press the Swng button to choose the up/down ar flow drecton you want: natural flow (dsplay
ndcates “ ”), swng (dsplay “ ” ndcator flashng), fxed wnd (dsplay ndcates “ ”).Press the Ar
flow button to choose the left/rght ar flow drecton you want: swng or fxed wnd.
(It would be automatcally set at fxed wnd ar flow drecton n Dry mode.)
A
Warning: Please do not adjust the gude blades of ar outlet by hand drectly, or whch
can damage the parts of the machne.
4.2 Tmer operaton
Set turnng off tme
Set the tme for the unt to turn off and when t s tme, the ar condtoner wll automatcally stop
operatng.
4 Use of remote controller
11. Turbo button
This button changes to Turbo operation
(It does not work in Auto, Dry, and Fan
mode.)
12. Tmer button
Ths button s used to set the swtch-on or
swtch-off and the tmer tme.
13. Fan speed button
Ths button set ar rate.
14. On/Off button
Ths button, when pressed starts operaton
and stops when repressed.
15. Operaton mode select button
Ths button changes the operaton mode:
Auto, Cool, Dry, Heat, Fan.
16. Tme ndcator
Indcates tmer tme.
17. Operaton mode ndcator
Indicates selected operation mode.
18. Temperature ndcator
Indcates the set temperature.

16 / 21 EN Splt floor-standng ar condtoner / User Manual
1. Durng the operaton of the ar condtoner, press the Tmer button and the ar condtoner wll enter
the tmed swtch-off mode.
2. Contnually press the Tmer button to set the needed tme for swtchng off the machne. The tmer
can make the settng n the range from 1-24 hours. Every the button s pressed, ndcaton change s
the followng sequence: 1 2 …… 24 cancel (no ndcaton) 1.
3. After the settng of the tmed swtch-off, the dgts shown on the dsplay screen wll go down by
1 for every elapsed hour. The dsplayed dgts ndcate the remanng tme pror to the tmed swtch-
off.
Set turnng on tme
Set the tme for the unt to turn on and when t s tme, the ar condtoner wll automatcally start
operatng.
1. When the ar condtoner s n the standby mode, press the Tmer button and the ar condtoner wll
enter the tmed swtch-on mode.
2. Contnually press the Tmer button to set the needed tme for swtchng on the machne. The tmer
can make the settng n the range from 1-24 hours. Every the button s pressed, ndcaton change s
the followng sequence: 1 2 …… 24 cancel (no ndcaton) 1.
3. After the settng of the tmed swtch-on, the dgts shown on the dsplay screen wll go down by 1 for
every elapsed hour. The dsplayed dgts ndcate the remanng tme pror to the tmed swtch-on.
Releasng procedure
When the ndcaton on dsplay screen s 24 hour, press the Tmer button agan to delete the tmed
mode.
4.3 Sleep operaton
Use ths mode to reduce operaton sound when sleepng, etc.
Press the Sleep button, the ar flow sound from the ndoor unt s decreased.
Press the Sleep button agan can release the mode.
C
Note:
•
Use the sleep mode when you are gong to bed. If ths mode s used n the day, the
capacty s reduced snce the ambent temperature s too hgh. (Cool mode).
•
Durng the operaton of coolng, the room temperature wll be rased gradually by 2°C
hgher than the settng after the machne begns to operate n the sleepng mode.
•
Durng the operaton of heatng mode, the room temperature wll be dropped
gradually 5°C lower than the settng after the machne begns to operate n the
sleepng mode.
4 Use of remote controller

Splt floor-standng ar condtoner / User Manual 17 / 21 EN
4.4 Replacement of batteres
•
When the sgnal from the remote controller becomes weak and the ndoor unt can not receve t
properly; or the ndcatons on the dsplay screen becomes blurred, please slde the back cover and
replace wth two new batteres.
•
The postve and negatve poles must match the nstallaton postons.
•
New batteres of the same type have to be used for replacement.
•
If the remote controller s not to be used for long tme, take out the batteres so as to prevent the
leakage of the electrolyte from damagng the controller.
•
If when the remote controller s at abnormal state, you can take out the batteres on the back cover
to clear off the dsplay.
Slde the back cover
CLK button
RST button
It does not work on ths model.
Unload the back Cover
Remote controller 1 and
Remote controller 5
Remote controller 3
Remote controller 2 and
Remote controller 4
Ths button let computer reset (push
the RST button wth the tp of a ball
pen, etc.)
4 Use of remote controller

18 / 21 EN Splt floor-standng ar condtoner / User Manual
1. Make sure that the power of the ar condtoner s turned off before the mantenance s to
be done.
2. Removal of the filter screen
1. Make sure that the operaton of the ar condtoner s fully stopped.
2. Remove the screws on both top sdes of the bottom panel, hold both top sdes of the bottom
panel, pull out n the drecton of arrow to open the bottom panel.
Bottom
panel
Screws
Pull out
3. The ar flter screen s loaded nsde the panel, take out the ar flter screen.
3. Cleaning of the filter screen
Gently pat the screen or use a vacuum cleaner to do the cleanng. lf too much flth s accumulated
on the screen, a small amount of neutral detergent soluton can be used for the cleanng. After the
cleanng, the screen must be dred n ar and be put back nto place.
C
Note: Do not place the ar flter screen under the exposure of sunlght or near an
over to dry; do not use warm water above 40°C to do the cleanng so as to avod
deformaton.
4.Cleaning of the air conditioner
1. To ensure safety, power must be turned off before dong the cleanng, otherwse, t may cause
electrc shocks.
2. Do not use water to flush the unts.
3. Use a pece of soft dry cloth to clear off the dust on the unts.
5 Mantenance

Splt floor-standng ar condtoner / User Manual 19 / 21 EN
4. Do not use volatle ol, gasolne, dlutng agents or abrasve powder etc. n dong the cleanng.
5. Use household neutral detergent to clean the fngerprnts or ol stans.
5. Prior to operational seasons
1. Check to see f the ar nlets and outlets of the ndoor and outdoor unts are blocked.
2. The protectve cover of the outdoor unt must be removed.
3. Check to see f the power cable and groundng wre are n proper state.
4. Check and confrm that there s any bendng, or rased ends or blockage of the dranage tubes.
5. Make sure that the ar flter screen s properly n place before operatng the machne. If the
machne s operated wth ar flter screen removed, dust and foregn objects wll result n faulty
performances of the ar condtoner.
6.After the operational seasons
1. Turn off the ar condtoner, dsconnect the power source.
2. Make proper mantenance to the ar flter screen and other parts.
3. Please use a plastc sheet to cover the unt to prevent dust or flth from enterng the outdoor unt.
5 Mantenance
This manual suits for next models
1
Table of contents
Languages:
Other Beko Air Conditioner manuals