manuals.online logo
Brands
  1. Home
  2. •
  3. Brands
  4. •
  5. Belkin
  6. •
  7. Switch
  8. •
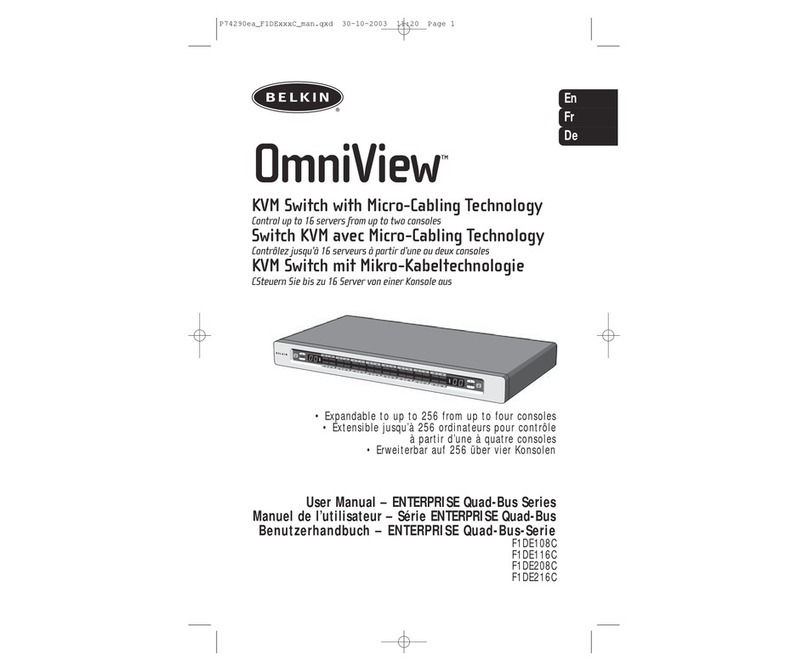
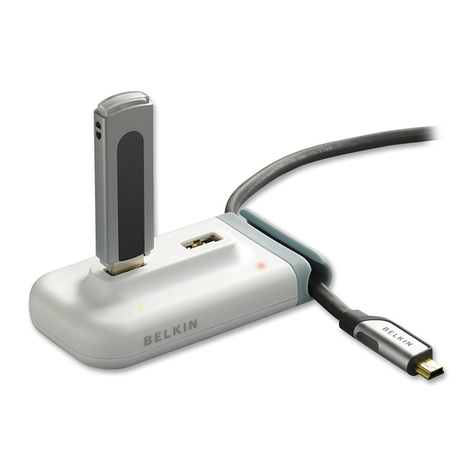
  9. Belkin F1DN102KVM-UNN4 User manual

Belkin F1DN102KVM-UNN4 User manual

Universal 2nd Gen Secure
DP/HDMI to DP/HDMI KVM Switch
User Manual
F1DN102KVM-UNN4 – Universal Secure 2-Port KVM, PP 4.0
F1DN102KVM-UN-4 – Universal Secure 2-Port KVM with CAC, PP 4.0
F1DN104KVM-UNN4 – Universal Secure 4-Port KVM, PP 4.0
F1DN104KVM-UN-4 – Universal Secure 4-Port KVM with CAC, PP 4.0
F1DN202KVM-UNN4 – Universal Secure 2-Port Dual-Head KVM, PP 4.0
F1DN202KVM-UN-4 – Universal Secure 2-Port Dual-Head KVM with CAC, PP 4.0
F1DN204KVM-UNN4 – Universal Secure 4-Port Dual-Head KVM, PP 4.0
F1DN204KVM-UN-4 – Universal Secure 4-Port Dual-Head KVM with CAC, PP 4.0
Document Number -
LNKPG-00674 Rev. B00
This Belkin product is compliant with the
latest NIAP Protection Profile PSD v4.0,
which exceeds Protection Profile PSS v3.0.
i
Belkin®Universal 2nd Gen Secure DP/HDMI to DP/HDMI KVM Switch
TABLE OF CONTENTS
SECTIONS
Table of Contents
Introduction . . . . . . . . . . . . . . . . . . . . . . . . . . . . . . . . . . . . . . . . . . . . . . . . . . . . . . . . . . . . . . . .1
Package Contents ..............................................................1
Safety Precautions.............................................................2
User Guidance & Precautions ..................................................3
Overview ..................................................................4
Security Features ..............................................................4
Tamper Evident Labels ........................................................5
Other Features ................................................................6
Equipment Requirements ......................................................8
System Requirements..........................................................9
Unit Display Diagrams ........................................................10
Specifications.................................................................15
Installation ................................................................17
Pre-Configuration ............................................................ 17
Connection and Installation ...................................................18
Color Coding the Channel Buttons ............................................20
Operating the KVM Switch .................................................21
Common access Card (CaC) Configuration and Operation....................22
Troubleshooting ..........................................................23
Information...............................................................27
Table of Contents SECTIONS 1 2 3 4 5 6 7
1
Belkin®Universal 2nd Gen Secure DP/HDMI to DP/HDMI KVM Switch
INTRODUCTION
SECTIONS
Table of Contents SECTIONS 1 2 3 4 5 6 71
Thank you for purchasing this Belkin Secure DisplayPort/HDMI KVM. This Switch is
designed for use in secure environment installations. The Switch offers safe centralized
control, which prevents unintended data transfer between computers running at
different security levels. The Switch provides the highest security safeguards and
features that meet today’s Information Assurance (IA) computing requirements.
Belkin Universal Secure DisplayPort/HDMI KVM is especially challenging in terms
of security as DisplayPort is a very robust protocol by nature, which is capable of
transferring various types of information, such as USB and Ethernet other than
display. Belkin has developed this unique Secure KVM switch with the highest
possible security in mind, assuring no leakage of information between connected
computers through any channels including DP dedicated channels.
This User Manual provides all the details you’ll need to install and operate your
new Switch, in addition to expert troubleshooting advice— in the unlikely event of
a problem.
Please note: Belkin Secure KVMs cannot be upgraded, serviced or fixed.
Package Contents
Belkin Advanced Secure DisplayPort/HDMI KVM
12V 2.5A DC Power Supply with WW interchangeable mains connectors
QIG (Quick Installation Guide)
Important: This product is equipped with an always-on active anti-tamper system.
Any attempt to open the enclosure may activate the anti-tamper system and render
the unit permanently inoperable. If the unit’s enclosure appears disrupted or if
all the port LEDs flash continuously, please call Belkin Technical Support toll-free
at (800) 282-2355.
Revision
A – Initial Release, TBD-2022
Reporting Belkin Product Security Vulnerability
If you are aware of potential security vulnerability while installing or operating
this product, we encourage you to contact us immediately at the following email
address: gov[email protected]
BACK TO TABLE OF CONTENTS >
2
Belkin®Universal 2nd Gen Secure DP/HDMI to DP/HDMI KVM Switch
INTRODUCTION
SECTIONS
Table of Contents SECTIONS
Safety Precautions
Please read the following safety precautions carefully before using the product:
Before cleaning, disconnect the product from any electrical power supply.
Do not expose the product to excessive humidity or moisture.
Do not store or use for extensive period of time in extreme thermal conditions – it
may shorten product lifetime.
Install the product only on a clean secure surface.
If the product is not used for a long period of time, disconnect it from electrical
power.
If any of the following situations occurs, have the product checked by a qualified
service technician:
Liquid penetrates the product’s case.
The product is exposed to excessive moisture, water or any other liquid.
The product is not working well even after carefully following the instructions
in this user’s manual.
The product has been dropped or is physically damaged.
The product shows obvious signs of breakage or loose internal parts.
In case of external power supply – If power supply overheats, is broken or
damaged, or has a damaged cable.
The product should be stored and used only in temperature and humidity-controlled
environments as defined in the product’s environmental specifications.
Never attempt to open the product enclosure. Any attempt to open the enclosure
will permanently damage the product.
The product contains a non-replaceable internal battery. Never attempt to
replace the battery or open the enclosure.
This product is equipped with an always-on active anti-tampering system. Any
attempt to open the product enclosure will activate the anti-tamper triggers
and render the unit inoperable and warranty void.
1 2 3 4 5 6 71
BACK TO TABLE OF CONTENTS >
3
Belkin®Universal 2nd Gen Secure DP/HDMI to DP/HDMI KVM Switch
INTRODUCTION
SECTIONS
Table of Contents SECTIONS
User Guidance & Precautions
Please read the following User Guidance & Precautions carefully before using
the product:
1. By default, after product power-up, the active channel is #1.
2. The appropriate usage of peripherals (e.g., keyboard, mouse, display, authentication
device) is described in detail in this User Manual’s appropriate sections. Do not
connect any authentication device with an external power source to product.
3. For security reasons products do not support wireless keyboards and mice. In any
case do not connect wireless keyboard/mouse to product.
4. For security reasons products do not support microphone/line-in audio input. In any
case do not connect a microphone to product audio output port, including headsets.
5. Product is equipped with an always-on active anti-tampering system. Any attempt
to open product enclosure will activate the anti-tamper system indicated by all
channel-select LEDs flashing continuously. In this case, product will be inoperable
and warranty void. If product enclosure appears disrupted or if all channel- select
LEDs flash continuously, please remove product from service immediately and
contact technical support.
6. Connecting external USB devices to product CAC port (if equipped):
a. When connecting a USB device that is not qualified or rejected for
security reasons to product’s CAC port, the CAC LED will flash green and
USB device will be inoperable.
b. When connecting a USB device that is undetectable for any reason (e.g. failed
device, non-standard device etc.) to product’s CAC port, the CAC LED will not
illuminate at all and device will be inoperable.
7. Do not connect product to computing devices:
a. That include telecommunication equipment;
b. That include frame grabber video cards;
c. That include special audio processing cards.
8. Product has a remote control port in the back panel labeled “Remote”
9. Important!
Before re-allocating computers to channels, it is mandatory to
power cycle product, keeping it powered OFF for more than 1 minute
.
10. Product log access and administrator configuration options are described in
product Administrator Guide
.
11. If you are aware of any potential security vulnerability while installing or operating
product, please remove product from service immediately and contact us in one of
the ways listed in this manual.
1 2 3 4 5 6 71
BACK TO TABLE OF CONTENTS >
4
Belkin®Universal 2nd Gen Secure DP/HDMI to DP/HDMI KVM Switch
OVERVIEW
SECTIONS
Table of Contents
Security Features
The product is designed, manufactured and delivered in security-controlled environments.
Below is a summary of the main advanced features incorporated in product:
Advanced isolation between computers and shared peripherals
The emulations of keyboard, mouse and display EDID, prevent direct contact
between computers and shared peripherals. Product design achieves maximal
security by keeping the video path separate with keyboard and mouse switched
together, purging the keyboard buffer when switching channels. All these features
contribute to strong isolation between computer interfaces, maintained even when
product is powered off.
Unidirectional data flow: USB, audio and video
Unique hardware architecture components prevent unauthorized data flow, including:
Optical unidirectional data flow diodes in the USB data path that filtrate and
reject unqualified USB devices;
Secure analog audio diodes that prevent audio eavesdropping with no support
for microphone or any other audio-input device;
Video path is kept separate from all other traffic, enforcing unidirectional native
video flow. EDID emulation is done at power up and blocks all EDID/MCCS
writes. For DisplayPort video, filtration of AUX channel exists to reject
unauthorized transactions.
Isolation of power domains
Complete isolation of power domains prevents signaling attacks.
Secure administrator access & log functions
The product incorporates secure administrator access and log functions to provide
auditable trail for all product security events, including battery backup life for anti-
tampering and log functions. Non-reprogrammable firmware prevents the ability to
tamper with product logic. Configuration of front panel LEDs and CAC (if equipped)
are covered in the PP4.0 Admin manual.
Always-on, active anti-tamper system
Active anti-tampering system prevents malicious insertion of hardware implant such
as wireless key-logger inside product enclosure. Any anti-tampering attempt causes
isolation of all computers and peripheral devices rendering product inoperable and
showing clear indications of a tampering event to the user.
Holographic security tamper-evident labels are placed on the enclosure to provide a
clear visual indication if product has been opened or compromised.
Metal enclosure is designed to resist mechanical tampering with all microcontrollers
protected against firmware-read, modification and rewrite.
123 4 5 6 7
BACK TO TABLE OF CONTENTS >
5
Belkin®Universal 2nd Gen Secure DP/HDMI to DP/HDMI KVM Switch
OVERVIEW
SECTIONS
Table of Contents
Tamper Evident Labels
Belkin Secure Switch uses holographic tamper evident labels to
provide visual indications in case of enclosure intrusion attempt.
If for any reason the tamper evident seal is missing, appears
disrupted, or looks different than the example shown here, please
avoid using the product and call Belkin Technical Support at:
(800) 282-2355.
Active Anti-Tampering System
Belkin Secure Switch is equipped with an always-on active
anti-tampering system. If mechanical intrusion is detected
by this system, the Switch will be permanently disabled and
LED will blink continuously.
If product indication tampered state (all LEDs blinking) - please call Technical
Support and avoid using that product
Product Enclosure Warning Label
Belkin Secure Switch has the following warning printed
next to the location of the product Asset Tag and
Tamper Evident labels on product enclosure:
12345678
123 4 5 6 7
BACK TO TABLE OF CONTENTS >
6
Belkin®Universal 2nd Gen Secure DP/HDMI to DP/HDMI KVM Switch
OVERVIEW
SECTIONS
Table of Contents
Other Features
The Belkin Universal Secure DisplayPort/HDMI KVM was designed with the user in
mind for today’s IT environment. Below is a summary of some features incorporated
into the Switch.
Protected Display Information
Protected DDC/EDID emulation prevents software weaknesses that can cause data
leakage while maintaining compatibility with the console display.
USB Device Detection
Storage and other unsafe USB devices are rejected when connected to the Switch.
Only mouse, keyboard, and CAC reader data are passed through.
Secure Packaging
“Tear away” packaging ensures secure delivery of the Switch as it is routed to the end
user. The recyclable packaging also breaks down flat, simplifying the cleanup process.
USB Support
The Switch is compatible with USB technology and supports plug-and-play
connectivity with USB computers, keyboards, mice, and CAC readers.
User Display
The Belkin Universal Secure DisplayPort/HDMI KVM is compatible with the
following types of user displays:
DisplayPort 1.2 or HDMI 2.0 capable display (console connection).
DVI capable displays with cables passive connection cables (see Belkin.com for
details).
Audio Switching
Allows you to share speakers between computers.
123 4 5 6 7
BACK TO TABLE OF CONTENTS >
7
Belkin®Universal 2nd Gen Secure DP/HDMI to DP/HDMI KVM Switch
OVERVIEW
SECTIONS
Table of Contents
Port Coloring
The front panel LEDs can be configured by an administrator to maximize
identification of multiple enclaves. Consult the PP4.0 Admin manual for details.
Port Naming
The included network-name labels can be placed in the area underneath the port-
selector button to facilitate port identification and reduce user switching error.
LED Indicators
Each port button number and port button outline illuminates to indicate that the
console currently controls the corresponding computer. As a port selector is pushed,
the LED number and button outline will light up.
Integrated Mounting Rails
Integrated mounting system for easy under-desk or side-wall mounting.
USB Connectors
High-retention USB connectors keep the USB connections secure and tight,
preventing accidental disconnections.
Increased Reliability
Using a new, advanced anti-tampering battery with an extremely low self-
discharge rate the life expectancy of the switch has been increased dramatically
to over 7 years.
123 4 5 6 7
BACK TO TABLE OF CONTENTS >
8
Belkin®Universal 2nd Gen Secure DP/HDMI to DP/HDMI KVM Switch
OVERVIEW
SECTIONS
Table of Contents
Equipment Requirements
Cables
The Universal SKVM can accommodate DP, HDMI, and DVI PC connections. Belkin
highly recommends you use Belkin DisplayPort, HDMI, or DVI passive conversion/
USB KVM Cable Kits for your Switch to help ensure superior performance.
These cables offer the highest quality possible to ensure optimal data and video
transmission. One Cable Kit is required per connected computer.
Note: The video connectors can accept a DisplayPort or HDMI cable.
Belkin currently available cables:
http://www.belkin.com/us/products/business/cybersecurity-secure-kvm/c/
cables-and-secure-accessories
Note: Due to USB and DisplayPort signal limitations, the cable total length cannot
exceed 10 feet (3.5m), unless a USB extender is used
123 4 5 6 7
BACK TO TABLE OF CONTENTS >
9
Belkin®Universal 2nd Gen Secure DP/HDMI to DP/HDMI KVM Switch
OVERVIEW
SECTIONS
Table of Contents
System Requirements
Operating Systems
Product is compatible with devices running on the following operating systems:
Microsoft®Windows®
Red Hat®, Ubuntu®and other Linux®platforms
Mac OS®X v10.3 and higher.
USB Keyboard console port
The product console USB keyboard port is compatible with Standard USB keyboards.
Notes:
a. Console USB keyboard and mouse ports are switchable, i.e., you can
connect keyboard to mouse port and vice versa. However, for optimal
operation it is recommended to connect USB keyboard to console USB
keyboard port and USB mouse to console USB mouse port.
b. For security reasons products do not support wireless keyboards. In
any case do not connect wireless keyboard to product.
c.
Non-standard keyboards, such as keyboards with integrated USB hubs and
other USB-integrated devices, may not be fully supported due to security
policy. If they are supported, only classical keyboard (HID) operation
will be functional. It is recommended to use standard USB keyboards.
USB Mouse console port
The product console USB mouse port is compatible with standard USB mice.
Notes:
a. Console USB keyboard and mouse ports are switchable, i.e., you can
connect keyboard to mouse port and vice versa. However, for optimal
operation it is recommended to connect USB keyboard to console USB
keyboard port and USB mouse to console USB mouse port.
b. Console USB mouse port supports Standard KVM Extender composite
device having a keyboard/mouse functions.
c. For security reasons products do not support wireless mice. In any case
do not connect wireless mouse to product.
User Display
The console video ports are compatible with DisplayPort1.1/1.2 and HDMI 2.0.
123 4 5 6 7
BACK TO TABLE OF CONTENTS >
F1DN204KVM-UN-4
10
Belkin®Universal 2nd Gen Secure DP/HDMI to DP/HDMI KVM Switch
OVERVIEW
SECTIONS
Table of Contents
Unit Display Diagrams
Unit Display Diagram, front view
(F1DN204KVM-UN-4 model shown)
b ca
e f gd
aActive port
bAudio active (if equipped)
cCAC/DPP active (if equipped)
dChannel Buttons 1-4
eNum Lock
fCaps Lock
gScroll Lock
123 4 5 6 7
BACK TO TABLE OF CONTENTS >
F1DN102KVM-UN-4
11
Belkin®Universal 2nd Gen Secure DP/HDMI to DP/HDMI KVM Switch
OVERVIEW
SECTIONS
Table of Contents
NOTE: The video connectors can accept a Display
Port or HDMI cable.
21 3 64 7 85
11 12 1391410
1RC port 7Computer USB KM port 13 Computer DP/HDMI Ports
2Console USB CAC Reader Port and LED 8Computer CAC USB Port 14 Mounting Track
3Console Audio port 9Mounting Track
4Console USB Keyboard Port 10 DC Power Jack
5Console USB Mouse Port 11 Video Diagnostic LEDs
6Computer Audio port 12 Console DP/HDMI Ports
Unit Display Diagram, back view
(F1DN102KVM-UN-4 model shown)
123 4 5 6 7
BACK TO TABLE OF CONTENTS >
F1DN202KVM-UN-4
12
Belkin®Universal 2nd Gen Secure DP/HDMI to DP/HDMI KVM Switch
OVERVIEW
SECTIONS
Table of Contents 123 4 5 6 7
21 3 64 7 85
11 12 1391410
1RC port 7Computer USB KM port 13 Computer DP/HDMI Ports
2Console USB CAC Reader Port and LED 8Computer CAC USB Port 14 Mounting Track
3Console Audio port 9Mounting Track
4Console USB Keyboard Port 10 DC Power Jack
5Console USB Mouse Port 11 Video Diagnostic LEDs
6Computer Audio port 12 Console DP/HDMI Ports
Unit Display Diagram, back view
(F1DN202KVM-UN-4 model shown) NOTE: The video connectors can accept a Display
Port or HDMI cable.
BACK TO TABLE OF CONTENTS >
F1DN104KVM-UN-4
13
Belkin®Universal 2nd Gen Secure DP/HDMI to DP/HDMI KVM Switch
OVERVIEW
SECTIONS
Table of Contents 123 4 5 6 7
21 3 64 7 85
11 12 1391410
1RC port 7Computer USB KM port 13 Computer DP/HDMI Ports
2Console USB CAC Reader Port and LED 8Computer CAC USB Port 14 Mounting Track
3Console Audio port 9Mounting Track
4Console USB Keyboard Port 10 DC Power Jack
5Console USB Mouse Port 11 Video Diagnostic LEDs
6Computer Audio port 12 Console DP/HDMI Ports
Unit Display Diagram, back view
(F1DN104KVM-UN-4 model shown) NOTE: The video connectors can accept a Display
Port or HDMI cable.
BACK TO TABLE OF CONTENTS >
F1DN204KVM-UN-4
14
Belkin®Universal 2nd Gen Secure DP/HDMI to DP/HDMI KVM Switch
OVERVIEW
SECTIONS
Table of Contents 123 4 5 6 7
21 3 64 7 85
11 12 1391410
1RC port 7Computer USB KM port 13 Computer DP/HDMI Ports
2Console USB CAC Reader Port and LED 8Computer CAC USB Port 14 Mounting Track
3Console Audio port 9Mounting Track
4Console USB Keyboard Port 10 DC Power Jack
5Console USB Mouse Port 11 Video Diagnostic LEDs
6Computer Audio port 12 Console DP/HDMI Ports
Unit Display Diagram, back view
(F1DN204KVM-UN-4 model shown) NOTE: The video connectors can accept a Display
Port or HDMI cable.
BACK TO TABLE OF CONTENTS >
15
Belkin®Universal 2nd Gen Secure DP/HDMI to DP/HDMI KVM Switch
OVERVIEW
SECTIONS
Table of Contents
Specifications
Part No. F1DN102KVM-UNN4
F1DN202KVM-UNN4
F1DN104KVM-UNN4
F1DN204KVM-UNN4
F1DN102KVM-UN-4
F1DN202KVM-UN-4
F1DN104KVM-UN-4
F1DN204KVM-UN-4
Enclosure
Faceplate
Heavy-duty extruded aluminum
enclosure with metal faceplate
Power Requirements 12V DC, 2.5A (maximum) power adapter with
center-pin-positive WW mains
AC Input 100 to 240VAC
No. of Users Supported 1
No. of Computers Supported 2 or 4 by model
No. of monitors per
computer supported
1 or 2 by model
Video supported All Models
Display Port/HDMI capable for all inputs and
outputs
Max Resolution supported HDMI 2.0 and DisplayPort 1.2 ports support
UHD 4K resolutions of up to 3840x2160 pixels
@ 60Hz.
Console Keyboard Port USB Type A female connector
Console Mouse Port USB Type A female connector
Console CAC Input USB Type A
Console Monitor Port 1 or 2 x DP/HDMI Combo female connector
dependant on model
Console Speaker 1/8" (3.5mm) female
CPU Keyboard/Mouse Ports USB Type B
CPU CAC Ports USB Type B
CPU Keyboard/Mouse Ports USB Type B
CPU Audio 1/8" (3.5mm) female
123 4 5 6 7
BACK TO TABLE OF CONTENTS >
16
Belkin®Universal 2nd Gen Secure DP/HDMI to DP/HDMI KVM Switch
OVERVIEW
SECTIONS
Table of Contents
CPU Monitor Ports 1 or 2 x DisplayPort/HDMI 1.2 female connector
dependant on model
Port Selectors 2 or 4
LED Indicators 2 or 4
User Channel Selection Methods Front-panel push buttons
Operating Temp 32° to 104° F (0° to 40° C)
Storage Temp -4° to 140° F (-20° to 60° C)
Humidity 0-80% RH, non-condensing
Dimensions F1DN102KVM-UNN4 and F1DN102KVM-UN-4
12.5 (W) x 1.9 (H) x 6.2 (L) inches / 317.5 (W) x
48.3 (H) x 157.5 (L) mm
F1DN104KVM-UNN4 and F1DN104KVM-UN-4
12.5 (W) x 1.9 (H) x 6.2 (L) inches / 317.5 (W) x
48.3 (H) x 157.5 (L) mm
F1DN202KVM-UNN4 and F1DN202KVM-UN-4
12.5 (W) x 1.9 (H) x 6.2 (L) inches / 317.5 (W) x
48.3 (H) x 157.5 (L) mm
F1DN204KVM-UNN4 and F1DN204KVM-UN-4
12.5 (W) x 2.5 (H) x 6.2 (L) inches / 317.5 (W) x
63.5 (H) x 157.5 (L) mm
Weight F1DN102KVM-UNN4, F1DN102KVM-UN-4
3.9 lbs. (1.77 kg)
F1DN104KVM-UNN4, F1DN104KVM-UN-4
3.9 lbs. (1.77 kg)
F1DN202KVM-UNN4, F1DN202KVM-UN-4
3.9 lbs. (1.77 kg)
F1DN204KVM-UNN4, F1DN204KVM-UN-4
4.85 lbs. (2.2 kg)
Made in Designed in California. Assembled in US with US and
Foreign components.
Product Lifecycle 5 years
Warranty 3 years (extended warranty available)
Security Accreditation Common Criteria Validated To NIAP Protection
Profile PSD Ver. 4.0
123 4 5 6 7
BACK TO TABLE OF CONTENTS >
17
Belkin®Universal 2nd Gen Secure DP/HDMI to DP/HDMI KVM Switch
INSTALL ATION
SECTIONS
Table of Contents 1 2 34 5 6 7
Pre-Configuration
Where to place the Switch:
The enclosure of the Switch is designed for desktop or rack-mount configuration.
Rack-mount brackets are not included with the Switch.
Consider the following when deciding where to place the Switch:
Your proximity to the port selectors on the front of the Switch
The lengths of the cables attached to your keyboard, monitor, and mouse
The location of your computers in relation to your console
The lengths of the cables you use to connect your computers to the Switch
Warning: Avoid placing cables near fluorescent lights, air-conditioning equipment,
or machines that create electrical noise (e.g., vacuum cleaners).
Important:
If the unit’s enclosure appears disrupted or if all channel-select LEDs flash
continuously, please remove product from service immediately and contact
Belkin Technical Support at (800) 282-2355.
1. Do not connect product to computing devices:
a. That are TEMPEST computers;
b. That include telecommunication equipment;
c. That include frame grabber video cards;
d. That include special audio processing cards.
BACK TO TABLE OF CONTENTS >
18
Belkin®Universal 2nd Gen Secure DP/HDMI to DP/HDMI KVM Switch
INSTALL ATION
SECTIONS
Table of Contents
Connection and Installation
Step 1 – Connecting the Console to the Switch
Step 2 – Warning: Before attempting to connect anything to the Switch or your
computers, please ensure that all computer equipment and devices are powered off.
Connect your monitor, keyboard, mouse, and speaker to the rear of the Switch in the
“User Console” section.
Notes:
1. Console USB keyboard and mouse ports are switchable, i.e., you can connect
keyboard to mouse port and vice versa. However, for optimal operation it is
recommended to connect USB keyboard to console USB keyboard port and
USB mouse to console USB mouse port.
2. For security reasons products do not support wireless keyboards. In any case
do not connect wireless keyboard to product.
3. Non-standard keyboards, such as keyboards with integrated USB hubs and
other USB-integrated devices, may not be fully supported due to security
policy. If they are supported, only classical keyboard (HID) operation will be
functional. It is recommended to use standard USB keyboards.
4. Console USB mouse port supports Standard KVM Extender composite
device having keyboard/mouse functions.
Step 3 – Power Up
Step 4 – Turn the monitor on.
4.1
Power up the Belkin Advanced Secure DisplayPort KVM by connecting the power.
The display diagnostic LED should be solid green a few seconds after power
up. This indicates the display EDID information has been captured and secured.
1 2 34 5 6 7
BACK TO TABLE OF CONTENTS >

Other manuals for F1DN102KVM-UNN4

1

This manual suits for next models

7

Other Belkin Switch manuals

Belkin OmniView F1DP101Mea User manual

Belkin

Belkin OmniView F1DP101Mea User manual

Belkin F5L009 - Network USB Hub User manual

Belkin

Belkin F5L009 - Network USB Hub User manual

Belkin OmniView Secure F1DN104U User manual

Belkin

Belkin OmniView Secure F1DN104U User manual

Belkin F5D5141uk5 User manual

Belkin

Belkin F5D5141uk5 User manual

Belkin F1DN108KVM-UN-4 User manual

Belkin

Belkin F1DN108KVM-UN-4 User manual

Belkin OmniView F1DP108G User manual

Belkin

Belkin OmniView F1DP108G User manual

Belkin F1DN104a User manual

Belkin

Belkin F1DN104a User manual

Belkin P75341ej User manual

Belkin

Belkin P75341ej User manual

Belkin Switch2 DVI-D User manual

Belkin

Belkin Switch2 DVI-D User manual

Belkin F4U006 - Travel USB Hub User manual

Belkin

Belkin F4U006 - Travel USB Hub User manual

Belkin BusStation F5U100,  BusStation F5U100-BLU,BusStation FW100-SLV, BusStation... User manual

Belkin

Belkin BusStation F5U100, BusStation F5U100-BLU,BusStation FW100-SLV, BusStation... User manual

Belkin OmniView User manual

Belkin

Belkin OmniView User manual
Belkin OmniView F1DK102P User manual

Belkin

Belkin OmniView F1DK102P User manual

Belkin F1DN102V User manual

Belkin

Belkin F1DN102V User manual

Belkin OmniView F1DE108C User manual

Belkin

Belkin OmniView F1DE108C User manual

Belkin OmniCube User manual

Belkin

Belkin OmniCube User manual

Belkin F1DG102Wuk User manual

Belkin

Belkin F1DG102Wuk User manual

Belkin F1DF102P User manual

Belkin

Belkin F1DF102P User manual

Belkin F5U402-03IN-KIT User manual

Belkin

Belkin F5U402-03IN-KIT User manual

Belkin F1DA116Z User manual

Belkin

Belkin F1DA116Z User manual

Belkin F1DG102U - Flip USB With Audio KVM User manual

Belkin

Belkin F1DG102U - Flip USB With Audio KVM User manual

Belkin F1D201u User manual

Belkin

Belkin F1D201u User manual

Belkin OmniView F1DK102P User manual

Belkin

Belkin OmniView F1DK102P User manual

Belkin OMNIVIEW F1DE108B User manual

Belkin

Belkin OMNIVIEW F1DE108B User manual

Popular Switch manuals by other brands

Dell PowerConnect B-FCXs Getting started guide

Dell

Dell PowerConnect B-FCXs Getting started guide

Muller Paladin 673 831 rf manual

Muller

Muller Paladin 673 831 rf manual

UfE ENS31 Product description

UfE

UfE ENS31 Product description

Panasonic AV-UHS500P operating instructions

Panasonic

Panasonic AV-UHS500P operating instructions

Dwyer Instruments TS2 Series Specifications-installation and operating instructions

Dwyer Instruments

Dwyer Instruments TS2 Series Specifications-installation and operating instructions

Exsys EX-1186HMVS manual

Exsys

Exsys EX-1186HMVS manual

SEKURYX CK4-HP104C quick start guide

SEKURYX

SEKURYX CK4-HP104C quick start guide

DOMUS LINE TOUCH TW installation manual

DOMUS LINE

DOMUS LINE TOUCH TW installation manual

H3C LSQM1TGS24QSA0 user manual

H3C

H3C LSQM1TGS24QSA0 user manual

3Com MSH 1005 user guide

3Com

3Com MSH 1005 user guide

SOtM tX-USBhubEX operating instructions

SOtM

SOtM tX-USBhubEX operating instructions

Alcatel-Lucent 7670 RSP Specifications

Alcatel-Lucent

Alcatel-Lucent 7670 RSP Specifications

HP 316095-B21 - StorageWorks Edge Switch 2/24 installation instructions

HP

HP 316095-B21 - StorageWorks Edge Switch 2/24 installation instructions

H3C S6860 Series installation guide

H3C

H3C S6860 Series installation guide

Ace Plus IC-612-I user manual

Ace Plus

Ace Plus IC-612-I user manual

SMC Networks SMC EZ Switch 10/100/1000 SMCGS8P-Smart Specifications

SMC Networks

SMC Networks SMC EZ Switch 10/100/1000 SMCGS8P-Smart Specifications

Fujitsu XG0440DC Hardware guide

Fujitsu

Fujitsu XG0440DC Hardware guide

Compex SXP2226WM user manual

Compex

Compex SXP2226WM user manual

manuals.online logo
manuals.online logoBrands
  • About & Mission
  • Contact us
  • Privacy Policy
  • Terms and Conditions

Copyright 2025 Manuals.Online. All Rights Reserved.