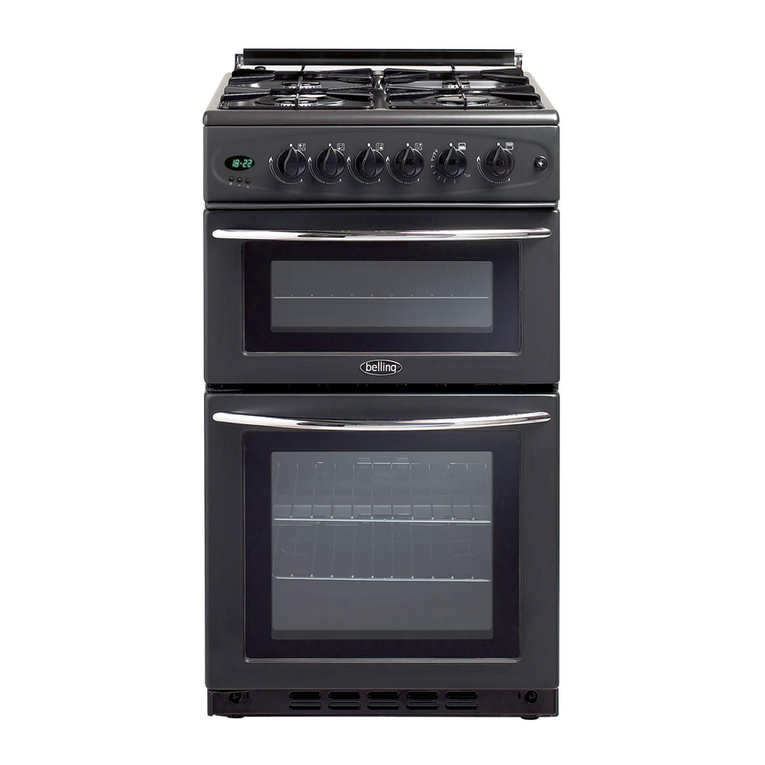
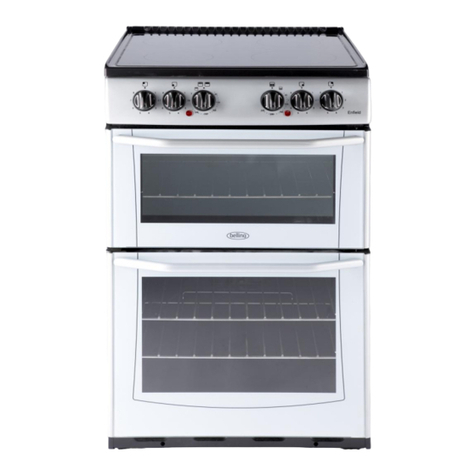
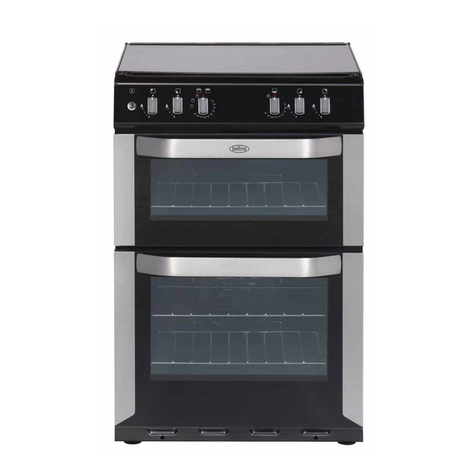
Belling FSG54TC User manual

1
BELLING FSG54TC
SERVICE MANUAL

2
INDEX
PRODUCT IDENTIFICATION PAGE
APPLIANCE RATING PLATE ............................................................. 3
USER GUIDE AND INSTALLATION HANDBOOK
USER GUIDE.......................................................................................... 4-32
INSTALLATION INSTRUCTIONS....................................................... 33-38
WIRING DIAGRAMS............................................................................. 39-39
CUSTOMER CARE................................................................................. 41-44
CONTACT DETAILS............................................................................. 45-45
PARTS LIST FSG54TC......................................................................... 46-58
REPAIR AND MAINTAINANCE
DISASSEMBLY PROCEDURES.......................................................... 59-68
COMPONANT REMOVAL.................................................................. 69-76
TECHNICAL SPECIFICATIONS......................................................... 77-77
FAULTFINDING GUIDES................................................................... 78-81
THIS MANUAL COVERS THE FOLLOWING MODELS :-
FSG54TC

3
PRODUCT IDENTIFICATION
9 10 1 8 4 3 2 8
YEAR MONTH NUMBER OF PRODUCTION
FOR THE MONTH
4 4 4 4 4 0 0 2 8
PRODUCT IDENTIFICATION CODE
It is important that during all service calls the model and serial
numbers are recorded on all paper work.
Appliance rating plate location
The appliance rating plate is located on the right-hand side of the
front frame and also on the rear service panel

Belling
Freestanding Gas AU
082748601 20.10.2010

CONTENTS
Introduction
Before Using
Safety
Using the Hob
Using the Grill
Using the Ovens
Programmer/clock
Cleaning
Installation
Technical
Customer Care
Please keep this handbook for future reference, or for anyone else
who may use the appliance.

OUR WARRANTY
Glen Dimplex Australia
Unit 2, 205 Abbotts Road
Dandenong South
Victoria 31 75
Australia
Ph: 1300 556 816
Fx: 1800 058 900
IMPORTANT NOTICE
Please note the cooling fan tted to this appliance is an integral part of its
safety and functionality. When the appliance is installed care must be taken
that the cooling fans performance is not impeded by any objects coming into
contact with it. (Installation pipes, leads etc) Care must also be taken that
there is sufcient air ow at the rear of the appliance for the cooling fan to
run at its optimum efciency. (Particularly Built In appliances) See clearance
dimensions in the installation section of the booklet. During use the Appli-
ance must never be disconnected from the Mains supply as this will seriously
affect the safety and performance of the appliance, particularly in relation to
surface temperatures becoming hot and gas operated parts not working ef-
ciently. The cooling fan is designed to run on after the control knob has been
switched off to keep the front of the appliance and the controls cool until the
appliance has naturally cooled itself.
If your appliance is covered by the warranty and guarantee, you will not be
billed for work undertaken should your appliance be faulty, terms and condi-
tions do apply, so please read through the literature carefully.
Please ensure that you have available your appliances model number and
serial number, there is a space at the back of this book for recording that
information.
Glen Dimplex New Zealand Pty
38 Harris Road, East Tamaki
Auckland
New Zealand
Ph: 09 274 8265
Fx: 09 274 8472
Should you need it . . . .
Inside the paperwork which has come with this appliance, there is a leaet
and card explaining the terms of our extended warranty and guarantee. In
order to apply for our ve year guarantee, simply ll in the details on the card
and post it off, this will register your appliance.
Should you wish to take out extended warranty, please ll in the details on the
leaet and post this off to:

• Make sure that you have removed all
packaging and wrapping. Some of the
items inside this appliance may have
additional wrapping.
• It is advised that you turn the ovens
and/or grill on for a short while. This
will burn off any residues left from
manufacturing. There may be a smell
which accompanies this process - but
this is nothing to worry about and is
harmless.
• It is recommend that you wash the
oven shelves, baking tray, grillpan and
grillpan trivet before their rst use in
hot soapy water. This will remove the
protective oil coating.
BEFORE USING THE PRODUCT

SAFETY
Caution: This appliance is for cooking
purposes only. It must not be used for
other purposes, for example room heating.
GENERAL
WARNING! -Accesible parts may
become hot during use. To avoid burns,
young children should be kept away from
the appliance.
Children should be supervised to ensure
that they do not play with the appliance.
This appliance is not intended for use by
persons (including children with reduced
physical, sensory or mental capabilities,
or lack of experience and knowledge)
unless they have been given supervision
or instruction concerning use of the
appliance by a person responsible for
their safety.
WARNING:- Servicing should be carried
out only by authorised personnel.
• The appliance must never be
disconnected from the mains supply
during use, as this will seriously
affect the safety and performance,
particularly in relation to surface
temperatures becoming hot and gas
operated parts not working efciently.
The cooling fan (if tted) is designed
to run on after the control knob has
been switched off.
Do not spray aerosols in the vicinity of
this appliance while it is in operation.
Do not store or use ammable liquids or
items in the vicinity of this appliance.
Do not modify this appliance.

SAFETY
OVEN/GRILL
Always take care when removing food
from the oven as the area around the
cavity may be hot.
Always use oven gloves when
handling any utensils that have been
in the oven as they will be hot.
Always make sure that the oven
shelves are resting in the correct
position between two runners. Do not
place the oven shelves on top of the
highest runner, as this is not stable
and can lead to spillage or injury.
Always use the Minute Minder (if
tted) if you are leaving the oven
unattended - this reduces the risk of
food burning.
Do not place items on the door while
it is open.
Do not wrap foil around the oven
shelves or allow foil to block the ue.
Do not drape tea towels near the oven
while it is on; this will cause a re
hazard.
Do not pull heavy items, such as
turkeys or large joints of meat, out
from the oven on the shelf, as they
may overbalance and fall.
Do not use this appliance to heat
anything other than food items and do
not use it for heating the room.

SAFETY
GAS HOB
Always ensure that pan bases are dry
and at before using them on the hob.
Always position pans over the centre
of the heat zone, and turn the handles
to a safe position so they cannot be
knocked or grabbed.
Always use pans which are no smaller
than 100mm (4”), or larger than
250mm (10”).
Always match the size of pan to the
size heat zone – do not use large
pans on small zones or vice versa.
Always make sure that the burner
caps, rings and pansupports are
correctly placed. This will prevent
pans becoming unstable while in use
and ensure an uninterrupted gas ow.
Never use double pans, rim-based
pans, old or misshapen pans, or
any pan that is not stable on a at
surface.
Never leave cooking fat, or oil,
unattended.
Never use commercial simmering
aids, or heat diffusers, as they create
excessive heat and can damage the
surface of the hob.
Never use the hob for any other
purpose than cooking food.
Plastic cooking utensils can melt if
they come into contact with a warm
hob. Never leave them close to, or on
top of the hob.
Never leave any heat zone alight
without a pan covering it. This causes
a re hazard.

SAFETY
Fire Safety Advice
Most kitchen res occur when
people are distracted or leave things
unattended, so remember:
If you’re called away from the cooker - by
the phone or someone at the door, either
take pans off the heat, or switch off your
hob.
Don’t let yourself be distracted while
cooking.
If you do have a re in the kitchen,
don’t take any risks - get everyone
out of your home and call the Fire
Brigade.
If a pan catches re:
1) Don’t move it - it is likely to be
extremely hot
2) Turn off the heat if it’s safe to do so
- but never lean over a pan to reach
the controls
3) If you have a re blanket, put it over
the pan
4) If you have put the re out, leave the
pan to cool completely.
Deep-fat frying presents more
dangers in your kitchen.
1) Never ll a chip pan (or other deep-fat
fryer) more than one-third full of oil
2) Don’t use a re extinguisher on a pan
of oil - the force of the extinguisher
can spread the re and create a
reball.
If you have an electrical re in the
kitchen:
1) Pull the plug out, or switch off the
power at the fuse box - this may be
enough to stop the re immediately
2) Smother the re with a re blanket,
or use a dry powder or carbon dioxide
extinguisher
3) Remember: never use water on an
electrical or cooking oil re.

USING THE HOB - GAS
• Use pans which are large enough to
avoid overows onto the ceramic glass
hob surface.
• As soon as the water boils, turn
the cooking zones down to a lower
setting; this will help prevent pans
boiling over.
• Do not leave an empty pan on a
heating zone.
• Nothing should ever be left lying on
the hob.
• Pans should be placed in the centre of
the heating zone.
• Wipe any spillage as soon as possible.
• Clean the hob top as regularly as
possible, this will prevent any build up
of grease which may be a re hazard.
• Never heat up a sealed tin of food, as
it may explode.
• Do not use the hob surface for
storage.
GAS HOB
Use
• Place your pan onto the pan supports
above the burner you wish to use.
• Push in and turn the selected control
knob to the full on symbol (large
ame).
• If your hob has an ignition button
or switch on the fascia, press it in
until your burner lights. If your hob
has automatic ignition it will spark
automatically when you push in the
control knob.
• Hold the control knob in for 15
seconds then release. If the burner
fails to light within this time, release
the control knob and wait one minute
before attempting to re-ignite.
• To simmer, turn the control knob
to the small ame symbol. This will
ensure that the ame is just large
enough to gently heat the contents of
the pan.
• To turn off, turn the control knob
clockwise to the ‘off’ position.
• Always make sure that your pans are
placed centrally on the burners and do
not allow the ame to extend over the
base of the pan.
• Avoid the use of pans that overhang
the edges of the hotplate.
In the event of a power failure, or the
ignition not working, then a lighted
match or taper can be used to light
the burner.
Energy Saving
• Position pans centrally over the
elements.
• Only heat the amount of liquid you
need.
• Once liquids have been brought to
the boil, reduce the heat setting to a
simmer.
• Consider using a pressure cooker if
possible.
• Vegetables cut into small pieces will
cook more quickly.
• Use a pan which is a close match to
your element size.
• Smaller elements are ideal for
simmering and stewing in smaller
pans, while the larger elements are
ideal for frying and boiling.

LID
The Fold Down Lid
Caution: Glass lids may shatter when
heated. Turn off all the burners before
shutting the lid.
When opening and closing the lid, use the
cooler outer sides of the lid glass.
The lid must be opened fully, so there is
no danger of it closing while the hob is
being used.
The appliance is tted with a safety sys-
tem, which will automatically turn off the
hot plate burners if they are inadvertantly
left on as the lid is closed.
The lid is not intended to be used as a
work surface, as it becomes hot when any
part of the cooker is in use, and the sur-
face may be scratched if items with rough
or sharp surfaces are placed on it.

USING THE GRILL - GAS
Caution: Accessible parts maybe hot
when the grill is used. Young chil-
dren should be kept away.
Ignition
Open the grill door. Push in and turn the
grill control knob anticlockwise to the
“full-on” position. Hold the control knob
in for 15 seconds and press the ignition
switch (if tted), or hold a lighted match
or taper to the burner, until the burner
lights.Do not hold the control knob in for
longer than 15 seconds. If the burner
fails to light within this time, release the
control knob and wait for one minute
before attempting further ignition.
Important: Keep the grill door open
when the grill is on. To turn off, push in
the control knob and turn it clockwise to
the “off” position.
Detachable grill pan handle
Place the handle over the edge of the grill
pan, at the narrow side edges. Slide the
handle to the centre, and locate between
the handle position indicators.
The handle should be removed from
the pan during grilling, to prevent
overheating.
The handle is designed for removing/
inserting the grill pan under the grill when
grilling.
If cleaning the grill pan when it is hot,
use oven gloves to move it. Do not use
the handle to pour hot fats from the grill
pan.
Food for grilling should be positioned
centrally on the trivet.
Preheating
For best cooked results, always preheat
the grill for about 3 minutes.
USING THE GRILL
Caution: Accessible parts may
be hot when the grill is used.
Young children should be kept
away.
Ignition
Important: Keep the grill door open
when the grill is on.
To turn off, push in the control knob
and turn it clockwise to the “off”position.
Detachable grill pan handle
Place the handle over the edge of the
grill pan, at the narrow side edges.
Slide the handle to the centre, and
locate between the handle position
indicators.
The handle should be removed from
the pan during grilling, to prevent
overheating.
The handle is designed for removing /
inserting the grill pan under the grill
when grilling.
If cleaning the grill pan when it is hot,
use oven gloves to move it. Do not use
the handle to pour hot fats from the
grill pan.
Food for grilling should be positioned
centrally on the trivet.
Preheating
For best cooked results, always
preheat the grill for about 3 minutes.
handle
grill pan
grid
handle position
indicators
Open the grill door.
Push in and turn the grill control knob
anticlockwise to the “full-on” position.
Hold the control knob in for 15 seconds
and press the ignition switch (if fitted),
or hold a lighted match or taper to the
burner, until the burner lights.
Do not hold the control knob in for
longer than 15 seconds. If the burner
fails to light within this time, release the
control knob and wait for one minute
before attempting further ignition.

USING THE GRILL - GAS
Aluminium foil
Using aluminium foil to cover the grill
pan, or putting items wrapped in foil
under the grill creates a re hazard.
Using the grill
Push the grill pan towards the back of the
shelf, to position it under the grill.
Variation in grilling can be achieved by
setting the grill between the large and
small ame symbols.
Important: Never operate the grill
between the large ame and the off
position.
The speed of grilling can also be
controlled by selecting a higher or lower
shelf position.
For toasting, and for grilling foods such as
bacon, sausages or steaks,use a higher
shelf position.
For thicker foods such as chops or
chicken joint pieces, use a middle to low
shelf position.
The grill trivet, inside the grill pan, can be
inverted to give a high or low position, or
it may be removed.
When you have nished grilling, check
that the control knob is returned to the
off position.
The cooling fan
When the grill is switched on, you will
hear the cooling fan come on this keeps
the fascia and control knobs of the
appliance cool during grilling. The fan
may continue to operate for a period after
the grill control has been switched off.
During oven use the fan may cycle on
and off. Should any fault occur with the
cooling fan, the appliance will require
servicing. Contact Customer Support.

USING THE GRILL - ELECTRIC (IN A GAS PRODUCT)
Caution: Accessible parts may be
hot when the grill is used - young
children should be kept away.
Open the top oven/grill door. Push in and
turn the top oven/grill control knob clock-
wise to the ‘FULL ON’ position.
To switch off, turn the control knob anti-
clockwise to return it to the off position.
Important: The top oven/grill door must
be fully open when the grill is used.
Preheating
For best cooked results, we recommend
that you preheat the grill for about 3
minutes.
The cooling fan
When the grill is switched on, you will
hear the cooling fan come on this keeps
the fascia and control knobs of the ap-
pliance cool during grilling. The fan may
continue to operate for a period after the
grill control has been switched off.
During oven use the fan may cycle on
and off. Should any fault occur with the
cooling fan, the appliance will require
servicing. Contact Customer Support.

USING THE GRILL - ELECTRIC (IN A GAS PRODUCT)
Detachable grill pan handle
Place the handle over the edge of the grill
pan, at the narrow side edges. Slide the
handle to the centre, and locate between
the handle position.
The handle should be removed from the
pan during grilling, to prevent overheat-
ing. The handle is designed for removing/
inserting the grill pan under the grill when
grilling.
If cleaning the grill pan when it is hot,
use oven gloves to move it. Do not use
the handle to pour hot fats from the grill
pan.
Food for grilling should be positioned
centrally on the trivet.
Using the grill
Push the grill pan towards the back of the
shelf, to position it under the grill.
The speed of grilling can be controlled by
selecting a higher or lower shelf position.
For toasting, and for grilling foods such as
bacon, sausages or steaks, use a higher
shelf position.
For thicker foods such as chops or
chicken joint pieces, use a middle to low
shelf position.
The grill trivet, inside the grill pan, can be
inverted to give a high or low position, or
it may be removed.
The HIGH trivet position is suitable for-
toasting bread.
The LOW trivet position is suitable forgrill-
ing all types of meat & sh.
With the grill trivet removed the food is
placed directly on the base of the grill pan
- eg: when cooking whole sh or brown-
ing dishes such as cauliower cheese.
When you have nished grilling,
check that the control knob is
returned to the off position.
Using aluminium foil
Using aluminium foil to cover the grill
pan, or putting items wrapped in foil un-
der the grill creates a re hazzard.
USING THE GRILL
Detachable grill pan handle Using the grill
Place the handle over the edge of the
grill pan, at the narrow side edges.
Slide the handle to the centre, and
locate between the handle position.
The handle should be removed from
the pan during grilling, to prevent
overheating. The handle is designed
for removing / inserting the grill pan
under the grill when grilling.
If cleaning the grill pan when it is hot,
use oven gloves to move it. Do not
use the handle to pour hot fats from
the grill pan.
Food for grilling should be positioned
centrally on the trivet.
Push the grill pan towards the back of
the shelf, to position it under the grill.
The speed of grilling can be controlled
by selecting a higher or lower shelf
position.
For toasting, and for grilling foods
such as bacon, sausages or steaks,
use a higher shelf position.
For thicker foods such as chops or
chicken joint pieces, use a middle to
low shelf position.
The grill trivet, inside the grill pan, can
be inverted to give a high or low
position, or it may be removed.
The HIGH trivet position is suitable for
toasting bread.
The LOW trivet position is suitable for
grilling all types of meat & fish.
With the grill trivet removed the food is
placed directly on the base of the grill
pan - eg: when cooking whole fish or
browning dishes such as cauliflower
cheese.
When you have finished grilling,
check that the control knob is
returned to the off position.
Using aluminium foil
Using aluminium foil to cover the grill
pan, or putting items wrapped in foil
under the grill creates a fire hazzard.
handle
grill pan
grid
handle position
indicators

USING THE TOP OVEN - GAS
Using the top oven
Ignition
Push in and turn the top oven control
knob anticlockwise to the ‘FULL ON’ posi-
tion. Hold the control knob in, and press
the ignition switch or hold a lighted match
or taper to the burner, until the burner
lights. Hold the control knob in for 15
seconds. Do not hold the control knob in
for longer that 15 seconds. If the burner
fails to light within this time, release the
control knob and wait one minute before
attempting further ignition.
Turn the control knob to the required
setting.
To switch off, return the control knob to
the off position.
Using the top oven
The top oven can be used in the same
way as the main oven, to cook the full
range of dishes, but it is a SECONDARY
oven and there are some differences.
Foods cooked in the top oven should be
in relation to the oven size. Larger dishes,
or food which may rise during cooking,
should be cooked in the main oven.
Large items, wide tins and tall items such
as rich fruit cakes should be cooked in the
main oven to obtain optimum results.
Notes:
As part of the cooking process, hot air
is expelled through a vent at the top of
the oven(s). When opening the oven
door, care should be taken to avoid any
possible contact with potentially hot air,
since this may cause discomfort to people
with sensitive skin. We recommend that
you hold the underneath of the oven door
handle.
Preheating
Always preheat the top oven for 15 min-
utes. However, if the main oven is being
used at the same time, then preheating
may not be necessary. The cooking time
may need to be shortened slightly, or the
cooking temperature adjusted, to allow
for heat transfer from the main oven
to the top oven if both ovens are used
together.
If you are not preheating the oven, the
cooking times in the baking guide may
need to be extended, as they are based
on a preheated oven.
The oven must be preheated when
reheating frozen or chilled foods, and we
recommend preheating for yeast mixtures,
batters, soufés and whisked sponges.
Put the oven shelves in the position re-
quired before preheating the oven.
Oven light
Press the light button on the facia panel.
Zones of heat
The temperature at the centre of the
oven corresponds with the selected
temperature and is slightly higher towards
the top of the oven and slightly lower
towards the oven base.
These zones of heat can be useful as dif-
ferent dishes requiring different tempera-
tures can be cooked at the same time,
when more than one shelf is used.
The temperature at the oven base is suit-
able for cooking baked vegetables, baked
fruit, milk pudding etc, and for warming
bread rolls, soup, coffee, or ovenproof
plates and dishes.
If you nd that over a period of time,
the oven becomes hotter when used at
a particular temperature, the thermostat
may need to be replaced.

USING THE TOP OVEN - GAS
Oven furniture
Baking tray and roasting tins
For best cooked results and even brown-
ing, the maximum size baking trays and
roasting tins that should be used are as
follows;
Baking tray 350mm x 330mm
Roasting tin 370mm x 320mm
Position baking trays and roasting tins on
the middle of the shelves, and leave one
clear shelf position between shelves, to
allow for circulation of heat.
Oven shelves
Extra shelves may be ordered from your
local supplier.
The oven shelf must be positioned with
the upstand at the rear of the oven and
facing upwards.
The top oven shelf helps to ensure even
baking in the top oven. It has a rear de-
ector tted to it, and is not intended for
use in the main oven.
Slow cooking
Make sure that frozen foods are thor-
oughly THAWED before cooking.
Do not slow cook joints of meat or poultry
weighing more than 2¼kg / 4½lb.
Always use the top half of the oven for
slow cooking.
For roasting joints of meat or poultry, and
for pot roasts preheat the oven to 195°
and cook for 30 minutes, then adjust the
oven control to the “S” slow setting for
the remainder of the cooking time.
Slow cooking times will be about three
times as long as conventional cooking
times.

USING THE TOP OVEN - GAS
Top oven baking guide
Baking guide hints
The temperature settings and times given
in the top baking guides are based on
dishes made wit block margarine. If tub
margarine is used, it may be necessary to
reduce the temperature setting.
If a different temperature setting to that
shown in our guide is given in a recipe,
the recipe instruction should be followed.
The cooking times given in the baking
guides are based on a preheated oven.
If you do not preheat the oven, cooking
times should be extended.
Dish Recommended
temperatue
Suggested
shelf
position
Approxiamte
cooking time
(preheated oven)
Scones
Meringues
210
125
top - middle
bottom
10 - 15 mins
2 - 3 hours
Cakes
Small cakes
Whisked sponge
Swiss roll
Victoria sandwich
(2 x 180mm / 7” per
shelf)
Genoese Sponge
(2 x 180mm / 7” per
shelf)
180
180
195
165
180
middle
middle
middle
middle
(side by
side)
middle
15 - 25 mins
20 - 30 mins
10 - 12 mins
20 - 35 mins
25 - 30 mins
Pastry
Rough Puff
Flaky / Puff
Shortcrust
Flan
210
195
195
195
middle
middle
middle
middle
cooking time
depends on
recipe & type
of lling
Biscuits
Shortbread ngers
Nut brownies
Brandy snaps
Flapjacks
Ginger nuts
180
180
165
165
180
middle - top
middle
middle - top
middle - top
middle - top
Table of contents
Other Belling Kitchen Appliance manuals
Belling
Belling FSDF60DOW Firmware update

Belling
Belling E552 Enfield Firmware update

Belling
Belling 100 GDO User manual

Belling
Belling FSE 54 DO User manual

Belling
Belling BEL FSEC50DOPSS Firmware update

Belling
Belling Freestanding Gas HOB Instruction Manual
Belling
Belling G552 Enfield Firmware update

Belling
Belling FS50SO WH Firmware update
Belling
Belling 152A Troubleshooting guide
Belling
Belling FSDF 60 Instruction Manual