Belling GT 755 Guide

GT 755 - GT 756
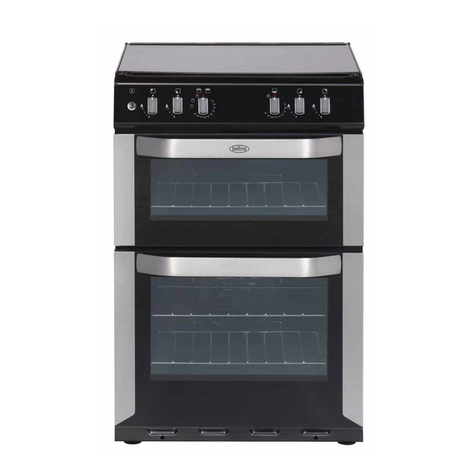
Slot-in Natural Gas Double Cavity Cooker
INSTALLATION AND USER INSTRUCTIONS
Note:
These appliances are supplied for use with the category of gas specified
(Natural Gas I2H) and cannot be converted to any other gas.

Contents
Introduction
............................................................................................................................................
3
Installing Your Cooker
....................................................................................................................
4-8
For your own safety - Never
...............................................................................................................
9
-Always
...............................................................
10
Know your Cooker / Specification
....................................................................................................
11
Using the Timer (GT 756)
.....
12
3 Button LED Clock/Minute Minder
..................................................................................................
12
Minute Minder Operation
...................................................................................................................
13
Know your Control Panel
...................................................................................................................
14
Using the Hob
General Notes on Safety
.......................................................................................................................
14
The Hob Glass Lid / Burner operation / Advice on pan suitability
..............................................
15
Energy Saving Tips
............................................................................................................................
15
Safety Requirements for Deep Fat Frying (IMPORTANT)
.............................................................
1
6
Safety advice in case of a chip pan fire / Choosing your utensils
...............................................
16
Using the Grill
GT 755 & GT 756 Grill Operation
.......................................................................................................
17
Grilling Guidelines / Use of the Grill Pan Handle
............................................................................
18
Using the Ovens
..............................................................
18
Shelf Positions/Use of the Ovens/Oven Lamp Operation (GT 756)
..............................................
19
Temperature Conversion
.................................................................................................................
20
Main Conventional Oven Cooking Guide
..........................................................................................
20
Top Conventional Oven Cooking Guide (GT 756)
...........................................................................
20
Care and Cleaning/Replacing the Oven Lamp
..........................................................................
21-22
Something Wrong With Your Cooker
..............................................................................................
23
Customer Care
.....................................................................................................................
Back Cover
This appliance conforms to the following EEC Directives:
Gas Appliance Directive:-
EN 30
Low Voltage Directive:-
73/23/EEC
93/68/EEC
Electromagnetic Compatibility:-
89/336/EEC
92/31/EEC
93/68/EEC
2

Introduction
Your Belling
Thank you for purchasing a new Belling GT 755 & GT 756 Gas Cooker.
Cooker
It's stylish and practical design will enhance your kitchen and make cooking a
pleasure.
The GT 755 model features a conventional main oven, a grill and a hob with 4
gas burners.
The GT 756 model features a conventional main oven with light, a top conventional
oven/grill, a hob with 4 gas burners and a clock/minute minder.
Even if you have used an electric or gas cooker before, it is important that you
read these instructions thoroughly before starting to cook, paying particular
attention to the installation and safety instructions.
Getting Help
If you have any problems with installing, operating, or cooking with your
Belling Cooker, please check through these instructions thoroughly to make
sure that you have not missed anything. If you still need help, then please
contact (including a daytime telephone number if possible):
Belling Customer Care Centre
Stoney Lane
Prescot
Merseyside
L35 2XW
Tel: 0871 22 22 503
Please quote the cooker model and serial number with all enquiries.
This can be found on the rating plate on the plinth below the main conventional
oven.
WARNING! For your own safety, make sure that these instructions on
installation, use and maintenance are followed.
We advise you to keep these instructions in a safe place for future reference.
If you sell or transfer ownership of this product, please pass on these instructions
to the new owner.
3

Installing your cooker
Unpacking
After unpacking your cooker, make sure that you remove all the
packing from the ovens and grill, and any stickers from the oven
doors and hob.
Examine your cooker. Make sure there is no damage or missing items.
If there is anything damaged or missing, please contact your supplier for advice.
Sitting/Moving
Prior to installation, ensure that the local distribution conditions (nature of the
the Cooker
the Cooker gas and gas pressure) and the adjustment conditions are compatible.
The adjustment conditions for this appliance are stated on the rating label, which
is fitted on the plinth.
This appliance is not designed to be connected to a combustion products
evacuation device. It must be installed and connected in accordance with current
installation regulations. Particular attention should be given to the relevant
requirements regarding ventilation.
Gas
The appliance is factory set for use with Natural Gas ONLY G20 at 20mbar.
installation
It
is not convertible to any other gas.
Gas Safety (Installation and Use) Regulations
It is the law that all gas appliances are installed by competent persons in
accordance with the current edition of the above regulations. It is in your interest and
that of safety to ensure compliance with the law.
In the UK, CORGI registered installers work to safe standards of practice.
This appliance must be installed and connected in accordance with current installation
regulations. Failure to install the cooker correctly could invalidate the warranty liability
claims and could lead to prosecution.
Location
The cooker may be located in a kitchen, kitchen/diner or a bed-sitting room, but not in a
room containing a bath or shower. The cooker must not be installed in a bed-sitting room
of less than 20m
2
.
Levelling
The appliance should be located on a level surface. The front/rear feet can be
adjusted to a maximum height of 910mm as required. To ensure that your appliance
is standing level, adjust the rear feet by turning clockwise or anticlockwise until
the rear of the product is set to the required height. Position the cooker in the
correct location and adjust the front feet by turning clockwise or anticlockwise to
ensure firm contact with the floor. Check the cooker is level using a spirit level
(Not provided). Adjust if necessary.
Provision for
The room containing the cooker should have an air supply in accordance with
Ventilation
current regulations in force.
The room must have an opening window or equivalent; some rooms may also
require a permanent vent. If the room has a volume between 5 and 10m
3
, it will
require an air vent of 50 cm
2
effective area unless it has a door which opens
directly to outside. If the room has a volume of less than 5m
3
, it will require an air
vent of 100 cm
2
effective area. If there are other fuel burning appliances in the
same room, current regulations should be consulted to determine air vent
requirements.
4
Space for
THIS APPLIANCE MUST NOT BE INSTALLED ON A NON-FIXED RAISED
Fixing
BASE.
To ensure that critical air gaps are maintained under the product, we recommend
that this product is mounted on a solid base and that the feet do not sink into any
carpet or soft flooring.
The cooker is designed to slot between standard kitchen units spaced a
minimum 500mm apart. The clearance either side need only be sufficient to
allow the cooker to be withdrawn for servicing.
It can be used with cabinets on either side but for a minimum distance of 400mm
above hotplate level allow a side clearance of 60mm between the appliance
and any wall, partition or tall cupboard. It can also be used in a free standing
position.
Allow a minimum distance of 750mm from the hob surface to the underside of
any overhead combustible surface such as overhanging cabinets.
Your cooker is heavy, so be careful when moving or positioning it. Do not try
to move the cooker by pulling on the doors or handles.
To avoid damage to surrounding units a 10mm gap should be left between
the appliance and the units. If this is not possible, a kit (part number 01 25552 00)
may be ordered from Customer Care which will protect the units.
For models with side opening doors, we recommend a side clearance of 60mm
between the cooker and any side wall to allow the door to be opened fully.
Whatever the position, remember to leave enough room for the cooker to be
pulled out for cleaning and service.
Movement of your cooker is most easily achieved by lifting the front as follows
and pulling forwards. Open the Grill door and the Conventional Oven door
sufficiently to allow a comfortable grip on the underside front edge of the oven
roofs, avoiding any grill elements or oven interior furniture. Take care not to
damage any floor coverings.
If a cooker hood is to be fitted, refer to the manufacturer's instructions regarding
fixing height.
65 mm Min
r
=
750 mm Min
_ 65 mm Min
o.
_ 500 mm Mm
WARNING
The use of a gas cooker results in the production of heat and moisture in the room in which
it is installed. Ensure that the kitchen is well ventilated; keep natural ventilation holes or install
a mechanical ventilation device (mechanical cooker hood)
Prolonged intensive use of the appliance may call for additional ventilation, for example
opening of a window, or more effective ventilation, for example increasing the level of mechanical
ventilation where present.
Connecting to
This appliance is designed not to project in front of standard 600mm
5
This manual suits for next models
1
Table of contents
Other Belling Kitchen Appliance manuals

Belling
Belling Freestanding Gas HOB Instruction Manual

Belling
Belling 152A Troubleshooting guide

Belling
Belling BEL FSEC50DOPSS Firmware update

Belling
Belling FSDF 60 Instruction Manual

Belling
Belling FSDF60DOW Firmware update

Belling
Belling BWC46IB User manual

Belling
Belling FSG54TC User manual

Belling
Belling E552 Enfield Firmware update

Belling
Belling G552 Enfield Firmware update

Belling
Belling Freestanding Electric AU User manual