manuals.online logo
Brands
  1. Home
  2. •
  3. Brands
  4. •
  5. BELLOSTA
  6. •
  7. Bathroom Fixture
  8. •
  9. BELLOSTA Revivre Blue 1211/5A User manual

BELLOSTA Revivre Blue 1211/5A User manual

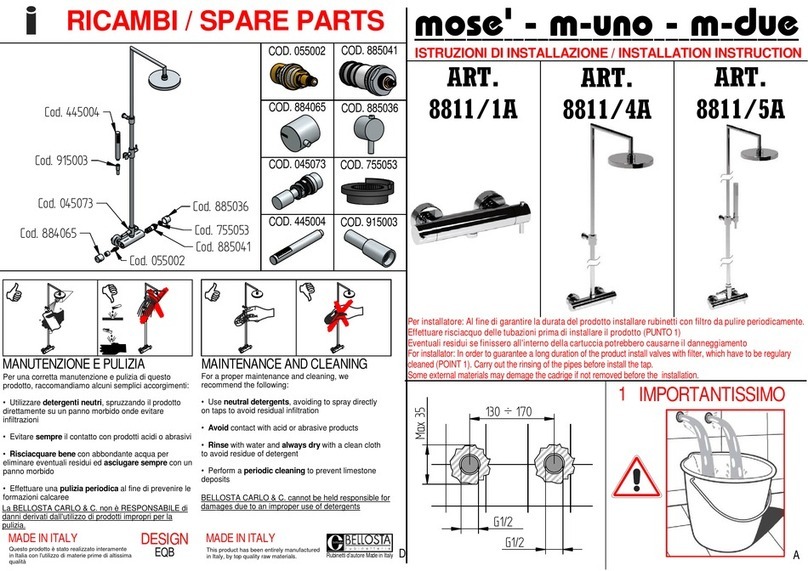
1IMPORTANTISSIMO
RE
V
I
V
RE BLUE
ISTRUZIONI DI INSTALLAZIONE / INSTALLATION INSTRUCTION
A
Perinstallatore: Al fine di garantire la durata del prodotto installare rubinetti con filtro da pulire periodicamente.
Effettuare risciacquo delle tubazioni prima di installare il prodotto (PUNTO1)
Eventuali residui se finissero all'interno della cartuccia potrebbero causarne il danneggiamento
For installator: In order to guarantee a long duration of the product install valves with filter, which have to be regulary
cleaned (POINT 1). Carry out the rinsing of the pipes before install the tap.
Some external materials may demage the cadrige if not removed before the installation.
G1/2
G1/2
130 ÷ 170
Max 35
D
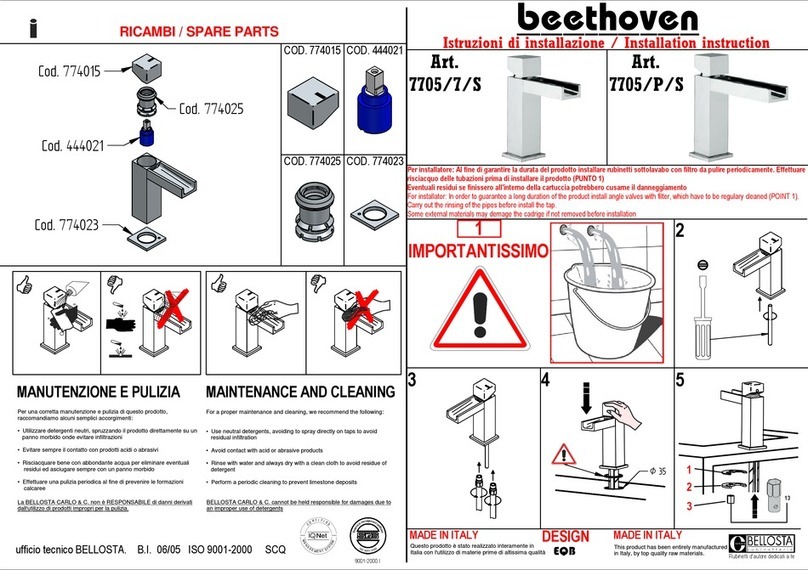
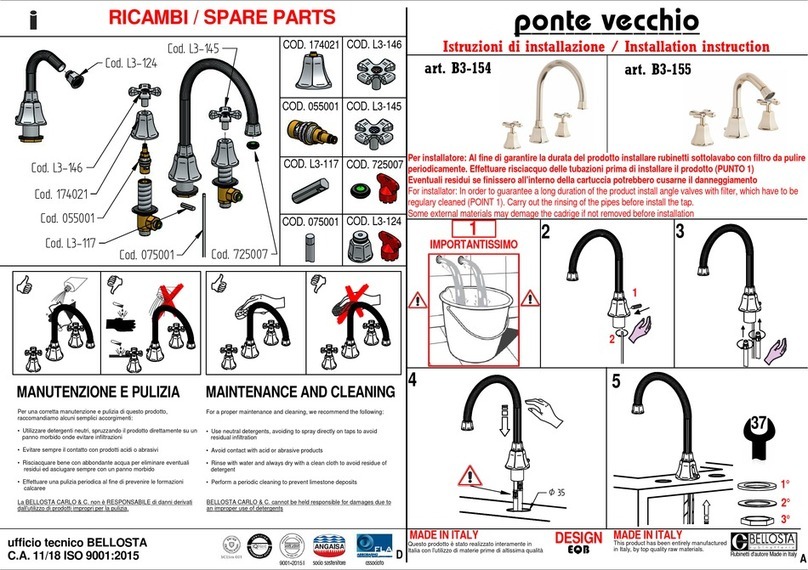
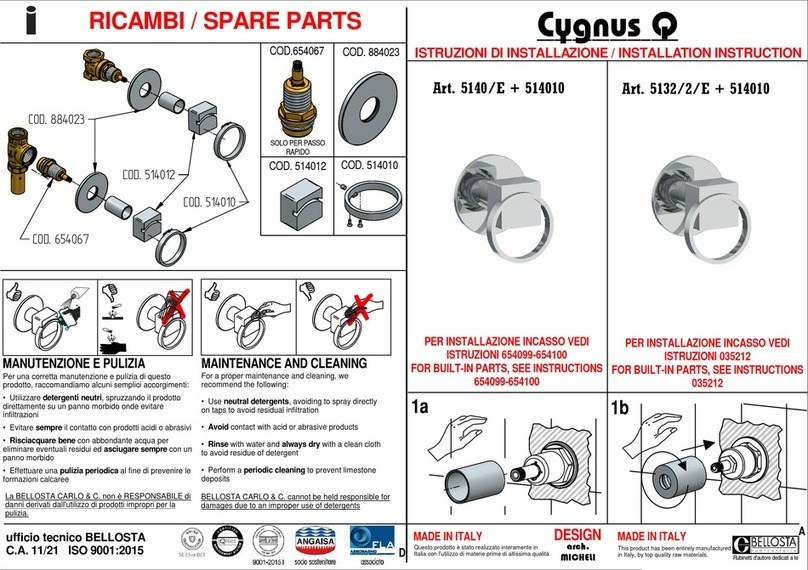
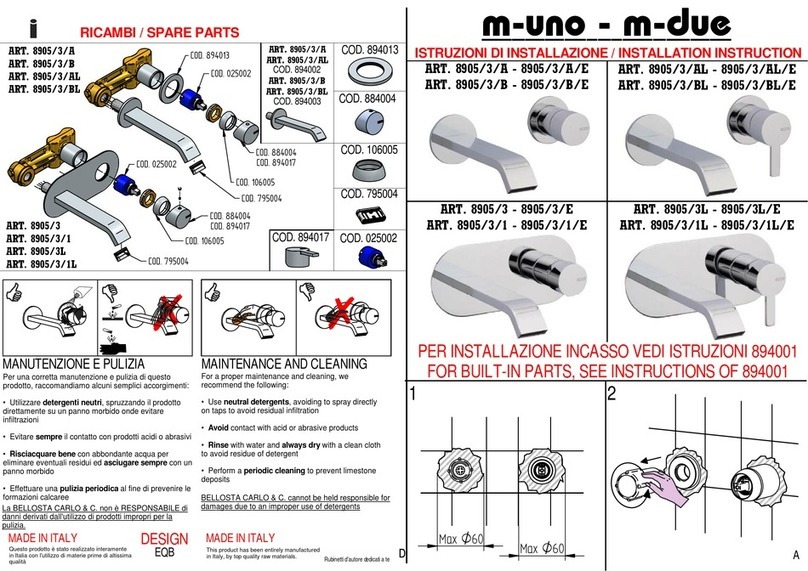
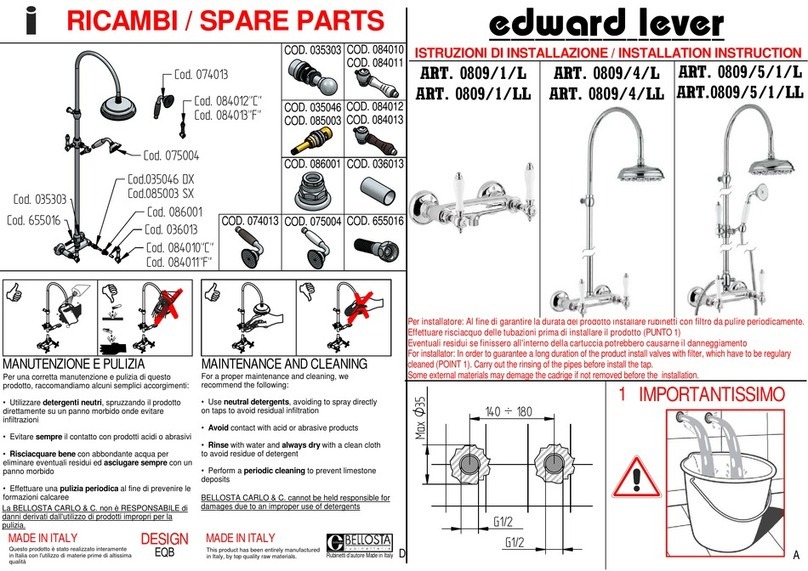
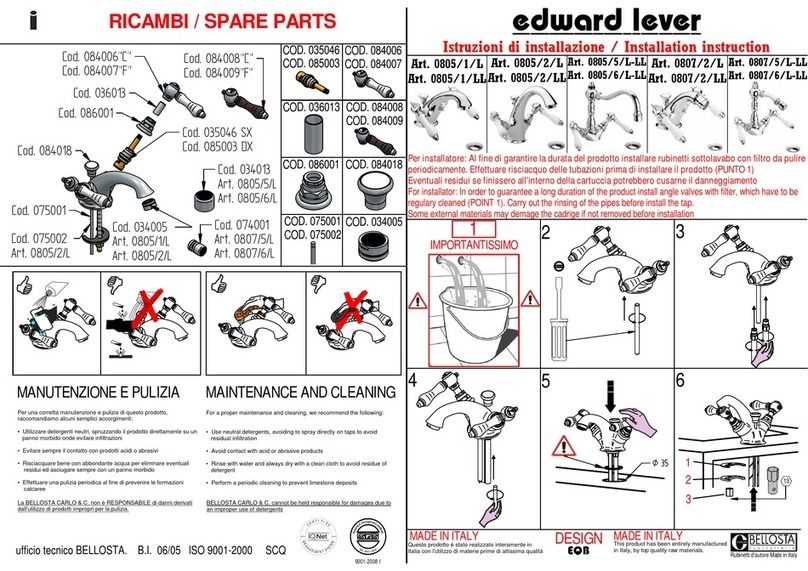
RICAMBI / SPARE PARTS
Per una corretta manutenzione e pulizia di questo
prodotto, raccomandiamo alcuni semplici accorgimenti:
• Utilizzare detergenti neutri, spruzzando il prodotto
direttamente su un panno morbido onde evitare
infiltrazioni
• Evitare sempre il contatto con prodotti acidi o abrasivi
•Risciacquare bene con abbondante acqua per
eliminare eventuali residui ed asciugare sempre con un
panno morbido
• Effettuare una pulizia periodica al fine di prevenire le
formazioni calcaree
For a proper maintenance and cleaning, we
recommend the following:
• Use neutral detergents, avoiding to spray directly
on taps to avoid residual infiltration
•Avoid contact with acid or abrasive products
•Rinse with water and always dry with a clean cloth
to avoid residue of detergent
• Perform a periodic cleaning to prevent limestone
deposits
La BELLOSTA CARLO & C. non è RESPONSABILE di
danni derivati dall'utilizzo di prodotti impropri per la
pulizia.
BELLOSTA CARLO & C. cannot be held responsible for
damages due to an improper use of detergents
MANUTENZIONE E PULIZIA MAINTENANCE AND CLEANING
EQB
DESIGN MADE IN ITALY
This product has been entirely manufactured
in Italy, by top quality raw materials.
Questo prodotto è stato realizzato interamente
in Italia con l'utilizzo di materie prime di altissima
qualità
MADE IN ITALY
Rubinettid'autore Madein Italy
COD. 055002 COD. 885041
COD. 044066
COD. 755053
COD. 885036
COD. 915003
ART.
1211/5A
Cod. 885036
Cod. 755053
Cod. 885041
Cod. 055002
Cod. 445004
Cod. 915003
Cod. 044066
COD. 0445004
SOSTITUZIONE CARTUCCIA / CARTRIDGE REPLACEMENT
Prima di iniziare le operazioni di sostituzione della
cartuccia assicurarsi che l'acqua dell'impianto
principale sia chiusa e che la cartuccia sia svuotata
da residui di acqua.
Before starting replacement of cartridge, ensure that
water systemhas been turned off and empty
remaining water.
C
12
3
DATI TECNICI / TECHNICAL DATA
- Pressione massima di esercizio : 5bar
- Pressione minima senza resistenza : 0.5bar
- Pressione raccomandata : 2-4bar (3ottimale)
- Blocco sicurezza 38°C, tarato in fabbrica a 3bar. Per
pressioni superiori 5bar si raccomanda riduttore di
pressione, in presenza di acqua dura si raccomanda filtro
addolcitore. Per differenze di pressione oltre i 4bar tra
calda e fredda, regolare la temperatura dell'acqua
ruotando l'asta cartuccia in senso orario (fredda) e in
senso antiorario (calda)
PULIZIA/SOSTITUZIONE
CARTUCCIA TERMOSTATICA
Prima di iniziare leoperazioni di sostituzione della cartuccia
assicurarsi che l'acqua dell'impianto principale sia chiusa e che
la cartuccia sia svuotata da residui di acqua.
Before starting replacement of cartridge, ensure that water
system has been turned off and empty remaining water.
THERMOSTAIC VALVE CLEANING
AND REPLACEMENT
- Maximum operating pressure : 5bar
- Minimum pressure without resistance : 0.5bar
- Raccomanded pressure : 2-4bar (3ottimale)
- Safety block 38°C, calibrated in the factory at 3bar. For
pressure over 5bar, is raccomanded the pressure
reducer. For hard water, is raccomanded the lime filter.
For high pressure differences, over 4bar between hot
and cold water, the temperature can be adjusted by
turning the broached pin, anti-clockwise (hot) clockwise
(cold)
12
4
2.5
14
Aiutarsi con uno spillo
per estrarre il tappino
Use pin to extract cap
2
112
2
4
3
17
5A 6
Ø8 1
2
3
7
5B
1
2
8
32

Other BELLOSTA Bathroom Fixture manuals
BELLOSTA Via Dei Condotti B3-117/A User manual

BELLOSTA

BELLOSTA Via Dei Condotti B3-117/A User manual

BELLOSTA Life 0505/3/A/E User manual

BELLOSTA

BELLOSTA Life 0505/3/A/E User manual

BELLOSTA Aperio 2705/R/B/E User manual

BELLOSTA

BELLOSTA Aperio 2705/R/B/E User manual

BELLOSTA via montenapoleone B3-096 User manual

BELLOSTA

BELLOSTA via montenapoleone B3-096 User manual

BELLOSTA ponte vecchio B3-158 User manual

BELLOSTA

BELLOSTA ponte vecchio B3-158 User manual

BELLOSTA Pascal 1010 User manual

BELLOSTA

BELLOSTA Pascal 1010 User manual

BELLOSTA Mose 8801/4A/E User manual

BELLOSTA

BELLOSTA Mose 8801/4A/E User manual

BELLOSTA Electa 5205/R/A User manual

BELLOSTA

BELLOSTA Electa 5205/R/A User manual

BELLOSTA Edward Lever 0800/3/L User manual

BELLOSTA

BELLOSTA Edward Lever 0800/3/L User manual

BELLOSTA Zehn 7505/R/A User manual

BELLOSTA

BELLOSTA Zehn 7505/R/A User manual

BELLOSTA M-Uno 8811/1A User manual

BELLOSTA

BELLOSTA M-Uno 8811/1A User manual

BELLOSTA Like 4612/PQ/E User manual

BELLOSTA

BELLOSTA Like 4612/PQ/E User manual

BELLOSTA 6521/DOM User manual

BELLOSTA

BELLOSTA 6521/DOM User manual

BELLOSTA Edward Lever 0807/L User manual

BELLOSTA

BELLOSTA Edward Lever 0807/L User manual

BELLOSTA Via Dei Condotti B3-119/A User manual

BELLOSTA

BELLOSTA Via Dei Condotti B3-119/A User manual

BELLOSTA Beethoven 7705/3/A User manual

BELLOSTA

BELLOSTA Beethoven 7705/3/A User manual

BELLOSTA Edward 0802/C User manual

BELLOSTA

BELLOSTA Edward 0802/C User manual

BELLOSTA Beethoven 7705/3 User manual

BELLOSTA

BELLOSTA Beethoven 7705/3 User manual
BELLOSTA Bambu 0405/R/B User manual

BELLOSTA

BELLOSTA Bambu 0405/R/B User manual

BELLOSTA Edward 0801/40/26/C User manual

BELLOSTA

BELLOSTA Edward 0801/40/26/C User manual

BELLOSTA romina 1003 User manual

BELLOSTA

BELLOSTA romina 1003 User manual

BELLOSTA Cygnus Q 5105/3/A/E User manual

BELLOSTA

BELLOSTA Cygnus Q 5105/3/A/E User manual

BELLOSTA Edward 0805/3/C User manual

BELLOSTA

BELLOSTA Edward 0805/3/C User manual

BELLOSTA romina 0301/2/C User manual

BELLOSTA

BELLOSTA romina 0301/2/C User manual
Popular Bathroom Fixture manuals by other brands

Crosswater Darby 15-51 installation instructions

Crosswater

Crosswater Darby 15-51 installation instructions

S&P HELI 300 DUO Instructions for assembly and use

S&P

S&P HELI 300 DUO Instructions for assembly and use

Gessi RILIEVO 59106 manual

Gessi

Gessi RILIEVO 59106 manual

Speakman COMMANDER  SC-1210-AF Installation, Maintenance & Operation Instructions

Speakman

Speakman COMMANDER SC-1210-AF Installation, Maintenance & Operation Instructions

Majestic vJUN17 installation guide

Majestic

Majestic vJUN17 installation guide

Franke 2152 00 23 Installation and operating instructions

Franke

Franke 2152 00 23 Installation and operating instructions

Anzzi LLANO SP-AZ046 install guide

Anzzi

Anzzi LLANO SP-AZ046 install guide

Artika Monsoon 2 instruction manual

Artika

Artika Monsoon 2 instruction manual

Ideal-Standard NO-TOUCH IST-R0129SA user manual

Ideal-Standard

Ideal-Standard NO-TOUCH IST-R0129SA user manual

Hewi 950.50.10260 Installation and operating instructions

Hewi

Hewi 950.50.10260 Installation and operating instructions

FROST NOVA2 N1910 FITTING INSTRUCTION

FROST

FROST NOVA2 N1910 FITTING INSTRUCTION

Axor Citterio 180 1jet 28489007 Instructions for use/assembly instructions

Axor

Axor Citterio 180 1jet 28489007 Instructions for use/assembly instructions

Mopedia RP435-6 instruction manual

Mopedia

Mopedia RP435-6 instruction manual

Gerber Versa D462726 Assembly

Gerber

Gerber Versa D462726 Assembly

essential Lily EC1001 manual

essential

essential Lily EC1001 manual

Aqualine SL280 INSTALLATION PROCEDURE

Aqualine

Aqualine SL280 INSTALLATION PROCEDURE

Artweger DYNAMIC 62 Series Assembly instructions

Artweger

Artweger DYNAMIC 62 Series Assembly instructions

Hans Grohe Axor Starck 10111 1 Series installation instructions

Hans Grohe

Hans Grohe Axor Starck 10111 1 Series installation instructions

manuals.online logo
manuals.online logoBrands
  • About & Mission
  • Contact us
  • Privacy Policy
  • Terms and Conditions

Copyright 2025 Manuals.Online. All Rights Reserved.