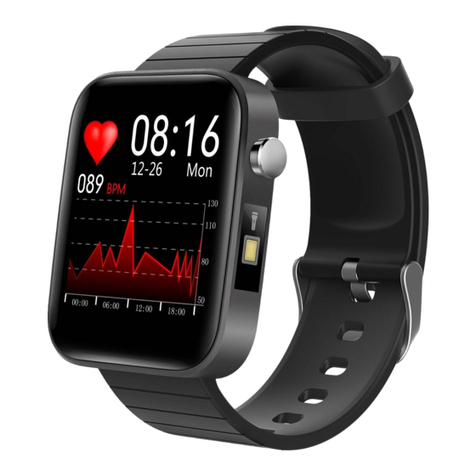
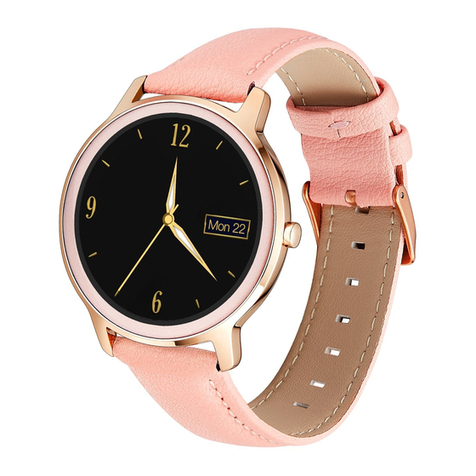
bemi COSMO User manual

INSTRUKCJA OBSŁUGI PL
USER MANUAL EN
BEDIENUNGSANLEITUNG DE
LIETOTĀJA PAMĀCĪBA LV
РУКОВОДСТВО ПОЛЬЗОВАТЕЛЯ RU
KASUTUSJUHEND EE
VARTOTOJO VADOVAS LT
KÄYTTÖOHJE FI
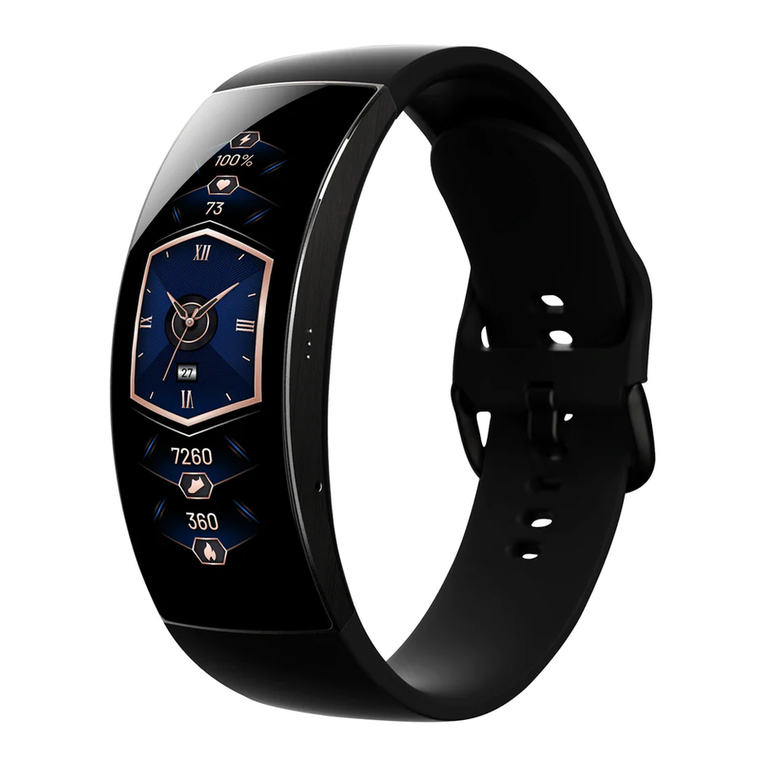
COSMO –smartwatch

1
I N S T R U K C J A O B S Ł U G I PL
Instrukcja dostępna jest na www.bemi-electronics.com/manuals
Elementy urządzenia
1. Ekran
2. Terminal ładowania
3. Czujnik tętna
4. Termometr
5. Przycisk zasilania
Smartwatch model COSMO, w instrukcji nazwany “urządzenie”
Obowiązkowo zapoznaj się z tą instrukcją i kartą gwarancyjną
przed rozpoczęciem korzystania z urządzenia.
Aby uruchomić / wyłączyć urządzenie naciśnij przycisk zasilania
przez 5 sekund.
Przytrzymaj krótko klawisz zasilania aby uśpić / wybudzić ekran.
Konserwacja i użytkowanie
Regularnie czyść urządzenie, zwłaszcza część przylegającą do
skóry, aby było suche. Dostosuj zaciśnięcie paska urządzenia tak
aby zapewnić cyrkulację powietrza. Na nadgarstku, gdzie
noszone jest urządzenie, nie powinno się używać nadmiernych
ilości produktów do pielęgnacji skóry. Jeśli masz alewatcrgię
skórną lub dyskomfort, przestań nosić urządzenie. Nie noś
urządzenia podczas gorącej kąpieli lub prysznica. Nie narażaj
urządzenia na działanie środków czyszczących, środków żrących
oraz innych środków chemicznych. Nie narażaj urządzenia na
działanie wysokich (ponad +50°C) i niskich (poniżej -10°C)
temperatur jak i na nagrzewanie poprzez działanie na przykład
promieni słonecznych lub innego źródła ciepła. Produkt nie jest
przeznaczony dla dzieci i niemowląt, nie należy im go
udostępniać. Uwaga: IP68 oznacza że to urządzenie jest odporne
na jednorazowe zanurzenie w stojącej wodzie na głębokość 1,1
metra na czas do 1 godziny. Narażanie urządzenia na trudniejsze
warunki może spowodować jego uszkodzenia. To urządzenie nie
jest przeznaczone do sportów wodnych, nurkowania i pływania.

2
Ładowanie baterii
Przed rozpoczęciem korzystania z urządzenia należy upewnić się,
że bateria jest naładowana. Do ładowania należy użyć
dostarczonego w zestawie klipsa. Zaleca się użycie zasilacza o
napięciu 5V i natężeniu 1A. Pełne naładowanie urządzenia
zajmuje około 2 godziny. By podłączyć ładowanie należy
postępować zgodnie z poniższymi krokami:
1. Otwórz klips do ładowania i umieść urządzenie w środku. Piny
klipsa ładującego muszą stykać się z pinami w urządzeniu.
2. Zamknij klips do ładowania.
3. Podłącz złącze USB kabla
ładujący do źródła zasilania.
4. Jeśli wszystko jest
prawidłowo na ekranie
wyświetli się grafika
ładowania.
Uwaga: jeżeli urządzenie było
całkowicie rozładowane
grafika ładowania może
wyświetlić się dopiero po kilku
minutach.
Instalacja APP i parowanie z urządzeniem
Produkt jest kompatybilny ze smartfonami z
systemem operacyjnym Android 4.4 oraz iOS
8.0 lub nowszymi, z Bluetooth od wersji 4.0.
Obsługiwany jest przez aplikację "GloryFit"
(dalej zwaną APP), która dostępna jest po

3
zeskanowaniu QRcode po prawej stronie oraz w App Store i
Google Play Store.
Parowanie urządzenia z telefonem przez APP
Podczas parowania telefon powinien być połączony z
Internetem. Upewnij się, że Bluetooth smartfona jest
WŁĄCZONY i jest „Widoczny dla wszystkich pobliskich urządzeń
Bluetooth”
1. Otwórz aplikację GloryFit i kliknij „Device” u dołu ekranu
aplikacji.
2. Kliknij „Add a new device”
3. Następnie dotknij „select device”. APP wyszuka pobliskie
urządzenia.
4. Kliknij nazwę swojego urządzenia na liście urządzeń. APP
sparuje się z urządzeniem.
5. Wybierz „Pair”, aby powiązać urządzenie z aplikacją. Gdy się
powiedzie, nazwa urządzenia pojawi się na górze ekranu
aplikacji.
Połączenie Bluetooth może się rozłączyć w niektórych
okolicznościach, przykładowo gdy: telefon i urządzenie są zbyt
daleko od siebie (więcej niż 10 metrów), między nimi jest ściana,
występują zakłócenia elektromagnetyczne lub radiowe w
otoczeniu, użytkownik w telefonie zamyka APP działającą w tle.
Gdy urządzenie i aplikacja zostaną połączone i sparowane po raz

4
pierwszy, data i godzina zostaną zsynchronizowane z telefonem.
Wprowadzenie do funkcji dostępnych z interfejsu urządzenia
UWAGA: Podczas badania tętna, ciśnienia krwi i tlenu we krwi,
osoba badana powinny pozostać w bezruchu. Wszelkie działania
podczas testu, takie jak jedzenie, mówienie itp. wpłyną na
dokładność pomiaru. Czynniki wpływające na obniżenie
dokładności pomiaru obejmują: tatuaże, blizny, wilgoć, grubość,
mocny pigment i sierść skóry w miejscu pomiaru. Utrzymuj
czujnik tętna w czystości i blisko skóry. Jeśli nosisz go zbyt luźno,
światło czujnika zostanie odsłonięte, co spowoduje niedokładne
wartości pomiaru. Nie patrz bezpośrednio na zielone światło
czujnika. Podczas testu utrzymuj ciało nieaktywne i nie ruszaj się,
w przeciwnym razie czas testu będzie dłuższy lub dane będą
niedokładne. Jeśli występuje duża różnica w zmierzonych
danych, zrób sobie przerwę i przetestuj ponownie. Długotrwały
pomiar może doprowadzić do przegrzania urządzenia. W
przypadku przegrzania wyjmuj urządzenie, aż ostygnie. Zimna
pogoda wpłynie na wyniki pomiaru, należy mierzyć, utrzymując
ciepło. Umieść urządzenie prawidłowo na nadgarstku i wejdź do
menu tętna, aby zmierzyć tętno. Dane dotyczące tętna, ciśnienia
krwi i pomiaru tlenu we krwi służą wyłącznie jako odniesienie i
nie mogą być wykorzystywane jako podstawa aspektów
medycznych.
1.Główny ekran (tarcza zegara)
Menu główne posiada dodatkowe informacje, do których
możemy wejść poprzez przesunięcie ekranu góra/dół lub
prawo/lewo.
Na tarczy zegara przesuń w lewo lub w prawo, aby wejść do
wszystkich dostępnych funkcji. Przesuń w górę, aby wyświetlić
otrzymane powiadomienia. Przesuń palcem w dół, aby wejść do
menu z informacjami o stanie połączenia Bluetooth, poziomie
naładowania baterii, dacie, dniu tygodnia oraz ikonami skrótów
do: trybu nie przeszkadzać, ustawień jasności ekranu, znajdź
telefon, informacje o urządzeniu i ustawienia.

5
1.1.Zmiana tarczy zegara
Aby zmienić tarczę, na ekranie głównym naciśnij i przytrzymaj
ekran, po czym przesuń w lewo lub w prawo aby zmienić tarczę.
A. Urządzenie posiada funkcję ustawienia własnego zdjęcia jako
tła tarczy zegara oraz kolekcję gotowych tarcz do wyboru. Obie
funkcje dostępne sa z poziomu aplikacji Gloryfit. Urządzenie
nalezy połączyć z aplikacja a następnie wejść do menu „Device”
na dole ekranu a następnie „Dash Board” na górze.
B. „Dial center”posiada zestaw gotowych tarcz, przesuwaj do
dołu ekranu aby zobaczyć więcej tarcz.
C. Kliknij na tarczy a następnie wybierz „Synchronous dial” aby
rozpoczać dodanie tarczy w zegarku. Po krótkiej chwili tarcza
pojawi się w zegarku.

6
D. Wybrana tarcza pojawi się w „ My dial”
E. Naciśnij na „Custom dial” aby zaprojektować własną tarczę.
Naciśnij na dostępnej tarczy następnie wybierz własne zdjęcie,
które będzie tłem (z albumu lub zrób zdjęcie aparatem).
Naciśnij YES aby potwierdzić wybór.

7
Wybierz kolor czcionki i naciśnij „Synchro”i potwierdz naciskając
na „Synchronous dial”. Po krótkiej chwili tarcza pojawi się w
zegarku.
Uwaga! Jednorazowo można dodać tylko jedną tarczę.
2. Temperatura Ciała - Pomiar temperatury ciała i powierzchni
skóry.
3. Kroki, kalorie i odległość - będą liczone automatycznie po
rozpoczęciu korzystania z urządzenia. Dane są odświeżane co
określoną liczbą kroków a ich ilość zależy od przebytej odległości
i wersji oprogramowania urządzenia (pomiędzy 3-25 kroków).
Dane te są przybliżone z racji indywidualnych różnic pomiędzy

8
użytkownikami. Aby kroki były odnotowane, ręce podczas
chodzenia powinny poruszać się naturalnie, przykładowo
prowadzenie wózka może nie być odczytane jako krok.
4. Tętno - Mierzy poziom tętna w czasie rzeczywistym.
5. Ciśnienie - Mierzy ciśnienie krwi jako jednorazowy wynik.
6. Tlen we krwi - Mierzy poziom tlenu we krwi jako jednorazowy
wynik.
7.Trening –Dostępne są 24 tryby sportowe.
7.1. Wejdź w funkcję, następnie znajdź odpowiedni rodzaj
aktywności i kliknij aby ją uruchomić.
7.2. Przesuń na ekranie w prawo aby przejść do opcji
wstrzymania lub zakończenia ćwiczenia.
7.3. Gdy czas aktywności jest dłuższy niż 1 minuta, dane można
zapisać. Zbyt krótka sesja może nie zostać zapisana.
Historia zapisu i dodatkowe dane są dostępne w aplikacji.
8. Pogoda –Po podłączeniu urządzenia do aplikacji na
urządzeniu pojawi sie prognoza pogody.
9. Sen –Monitorowanie jakości snu
10. Powiadomienia - Wejdź aby przeglądać otrzymane
powiadomienia.
Uwaga! Aby na urządzeniu otrzymać powiadomienia, najpierw
należy włączyć w aplikacji funkcje otrzymywania SMS /
informacje o przychodzących rozmowach oraz wybrać aplikacje,
z których będą sie pojawiać powiadomienia.
11. Stoper - Kliknij ikonę startu, aby rozpocząć odmierzanie.
12. Minutnik –Wybierz domyślny czas 1/3/5/10/15/30/60
minut lub ustaw własny poprzez naciśnięcie na klawiszu „+”.
13. Znajdź - Gdy urządzenie jest podłączone do aplikacji, kliknij
Znajdź telefon, a w telefonie uruchomi się dźwięk dzwonka.
Przesuń w prawo aby wyłączyć.
14. Muzyka –Podłącz urządzenie do aplikacji. Uruchom
jakąkolwiek aplikację z muzyką. Urządzenie umożliwią
włączenie, pauzę utworu lub jego zmianę na kolejny / poprzedni.
15. Funkcje –Wejdź aby zobaczyc informacje o wersji
oprogramowania i numerze MAC, ustawić poziom jasności,
zresetować lub wyłączyć urządzenie.

9
Uwaga: Urządzenia i danych nim zebranych nie można
wykorzystywać do celów medycznych.
Podstawowe parametry: Typ ekranu: TFT 1,3 cala; sensor tętna,
termometr, pojemność baterii: 150 mAh; poziom ochrony: IP68
Prawidłowa utylizacja produktu. Urządzenia nie
należy wyrzucać do zwykłych pojemników na
odpady komunalne. Aby zapobiec potencjalnym
zagrożeniom dla środowiska i zdrowia ludzkiego
powodowanym nieprawidłową utylizacją
odpadów, należy obowiązkowo przekazać zużyte
urządzenie do wyznaczonego punktu zbiórki sprzętu
elektronicznego lub do miejsca zakupu urządzenia w celu
recyklingu odpadów powstałych ze sprzętu elektronicznego.
Ostrzeżenie: Bateria litowa w środku.
Niniejsze urządzenie, smartwatch model
COSMO, jest zgodne z Dyrektywą Parlamentu
Europejskiego i Rady 2014/53/EU. Kompletna
deklaracja zgodności jest dostępna online pod
linkiem: www.bemi-electronics.com/certificates
Niniejsza instrukcja obsługi nie jest objęta gwarancją, a wygląd
i/lub funkcjonalność oprogramowania zainstalowanego w
urządzeniu może odbiegać od opisanej. Gwarant zastrzega sobie
prawo do modyfikowania instrukcji obsługi w dowolnym
momencie bez uprzedniego powiadamiania
Maksymalne zużycie energii –0,1W; Pobór mocy roboczej –
0,088W; Pobór mocy w trybie czuwania –0,5mW; Częstotliwość
radiowa pracy urządzenia - 2,4 GHz
Producent: Shenzhen Minrek Electronic Ltd.
Adres: C602, 6th Floor, Building C, Hangcheng Road, Huafeng
International Robot Industrial Zone, Xi'xiang, Bao'an, Shenzhen,
Chiny 518126
Wyprodukowano w Chinach

10
U S E R M A N U A L EN
This manual is available at www.bemi-electronics.com/manuals
Product description
1. Screen
2. Charging terminal
3. Heart rate sensor
4. Thermometer
5. Power button
Smart watch model: COSMO, in manual called “device”
It is mandatory to read this manual before start to using the
device.
To turn on / off the device, press the power button for 5
seconds.
Press the power key shortly to sleep / wake up the screen.
Maintaining Equipment
Clean the device regularly, especially part that close to the skin,
to keep it dry. Adjust the tightness of the device belt to ensure
air circulation. On wrist, where wearing device should not use
excessive skin care products. If you have skin allergy or
discomfort, please stop wearing device. Do not wear the device
during a hot bath or shower. Do not expose the device to
cleaning agents, caustic agents or other chemicals. Do not
expose the device to high (over + 50 ° C), low (below -10 ° C)
temperatures or heat due to, for example, sunlight or other heat
source. It may damage the device. The product is not suitable for
children and infants. Note: IP68 means that this device is
resistant to a single immersion in standing water to a depth of
1.1 meters for up to 1 hour. Exposing the device to tougher
conditions can damage it. This device is not intended for water
sports, diving and swimming.

11
Charging
Before start using the device, please make sure the battery is
charged. For charging, please use the provided charging clip. The
recommended power adaptor current is 5V, 1A. It takes about 2
hours to fully charge device, please follow the steps below to
charge.
1. Open charging clip and place device inside. Charging clip pins
must contact with pins in the device.
2. Close charging clip.
3. Connect the charging cable to
the power source using USB
connector.
4. Charging animation will display
on the device screen.
Note: if the device discharged
completely then animation of
charging may appear after a few
minutes.
Downloading APP for Phone and pair with Device
Note: mobile phone must support Android
4.4 or IOs 8.0 or above and Bluetooth 4.0 or
above. Some application functions may be
invisible in older OS versions of the
smartphone. Scan QT code with mobile
phone to download and install APP or

12
search, download and install “GloryFit” APP from App store or
Google Play Store on your smart phone.
Pairing the device with the phone via APP
While pairing, the phone should be connected to the Internet.
Make sure that the smartphone Bluetooth is ENABLE and is
"Visible to all nearby Bluetooth devices"
1. Open the GloryFit application and click "Device”at the bottom
of APP screen.
2. Click on “Add a new device”
3. Then Tap on “Select device”. APP will search for nearby
devices.
4. Click on the name of your device in the device list. APP will pair
with device.
5. Click “Pair” to bind device with APP. When successful, device
name will appear on top of APP screen.
Bluetooth connection between phone and device may
disconnect in some circumstances. The most common of them
are: phone and device are too far from each other (more than 10
meters), there are some walls between them, there are some
magnetic or radio interference in environment, user close the
APP working in background, user click on the one-button
cleaning of the phone. When the device and APP are first time

13
connected and paired, the time and date will be synchronized
with the mobile phone.
Introduction to Function available for Device Interface
NOTE: During test of Heart rate, Blood pressure, tested person
should keep still. Any action during the test like eating, speaking,
etc. will affect the accuracy of the measurement. Factors
affecting the lowering of the accuracy of measurement include:
tattoos, scars, moisture, thickness, strong pigment and hair of
the skin in the place of measurement. Keep the heart rate sensor
clean and close to the skin. If you wear it too loosely, the sensor's
light will be exposed, resulting in inaccurate measurement
values. Do not look directly at the sensor green light. During test,
please keep your body inactive and sit still, otherwise the time
of test will be longer or data will be inaccurate. If there is a big
difference in the measured data, please take a break and test
again. Longtime measurement may lead to overheating of the
device. In case of overheating, please remove device until it cools
down. The cold weather will affect your measurement results,
please measure while keeping warm. Place the device on the
wrist correctly and enter the heart rate menu to measure the
heart rate. The data of Heart rate, blood pressure and blood
oxygen measurement are for reference only and cannot be used
as a basis for medical related aspects.
1.Main screen (clock face)
The main menu has additional information that can be accessed
by moving the screen up / down or right / left.
On the clock face, slide left or right to enter to all available
functions.
Swipe up to view received notifications.
Swipe down to enter to menu with information about bluetooth
connection status, battery level, date, day of the week and
shortcut icons to: do not disturb mode, screen brightness
settings, find phone, device info and settings.

14
1.1. Changing the clock face
To change clock face, press and hold on the screen, then slides
left or right to change clock face.
A. The device has the function of setting your own photo as the
background of the clock face and a collection of ready-made
faces to choose from. Both functions are available from the
Gloryfit APP.
The device should be connected to the application and then
enter the "Device" menu at the bottom of the screen and then
"Dash Board" at the top.
B. Dial center has a set of preset dials, swipe to the bottom of
the screen to see more dials.

15
C. Click on the dial and then select "Synchronous dial" to start
adding the dial on your watch. After a short while, the dial will
appear on the watch.
D. Selected clockface will appear in "My dial".
E. Click on "Custom dial" to design your own clockface then on
the available dial. Choose your own photo as the background
(from album or take new by camera). Click YES to confirm
selection.

16
Select the font color and click "Sync" at the bottom of screen,
then on "Synchronous dial" to confirm. After a short while, the
dial will appear on the watch.
Attention! Only one dial can be added at a time.
2. Temperature –Temperature measurement of body and
surface of skin.
3. Steps - Steps, calories and distance will count automatically
after start of using the device. The data is displayed every
specific number of steps, their amount depends on distance
already walked and device software version (between 1-25

17
steps). These data are approximate due to individual differences
between users. In order for the steps to be recorded, the hands
should move in a natural manner when walking, for example
walking with a stroller may not be read as a step. More data and
settings is available in the APP.
4.Heart rate - Using LED light to measure heart rate and show
status in real time.
5.Blood pressure - It measures blood pressure as a one-time
result.
6. Blood Oxygen - Measures blood oxygen levels as a one-time
result.
7. Sports –24 sport modes available.
7.1. Enter Sports, then find desired sport mode by sliding up or
down. Tap on screen to select and start.
7.2. Slide right on the screen to stop, pause or end exercise.
7.3. When the activity time is longer than 1 minute, the data can
be saved.
History of record and more data is available in the APP.
8. Weather - After connecting the device to the application, the
weather forecast will appear on the device.
9. Sleep –Sleep quality monitoring.
10. Notifications - Enter to view the received notifications.
Attention! In order to receive notifications on the device, you
must first enable the SMS receiving functions / information
about incoming calls and select the applications from which
notifications will appear.
11. Stopwatch - Click the start icon to start timing.
12. Timer - Select the default time of 1/3/5/10/15/30/60
minutes or set your own by pressing the "+" key.
13. Find - When your device is connected to the app, click Find
Phone and your phone will ring. Move right to turn off.
14. Music - Connect your device to the application. Launch any
music app. The device allows you to start, pause a track or
change it to the next / previous one.

18
15. Function - Enter to view information about software version
and MAC number, set brightness level, reset or turn off the
device.
Note: The device and the data collected by it cannot be used for
medical purposes.
Basic Parameters: Screen type: 1,3 inches TFT; Heart rate sensor,
thermometer, battery capacity: 150 mAh; protection level: IP68
Proper disposal of this product. The device cannot
be disposed of together with household waste. To
prevent potential threats to the environment and
human health due to improper disposal of waste,
it is mandatory to take used electronic equipment
to a designated collection point, or to the place
where the product was purchased for the purpose of recycling
electronic waste.
Warning: Lithium battery inside.
This device, smart watch model COSMO, is in
compliance with Directive 2014/53/EU of the
European Parliament and of the Council. The
complete declaration of conformity is available
online at the following link: www.bemi-
electronics.com/certificates
This manual is not covered by the warranty, and the appearance
and/or functionality of the software installed on the device may
be different from the one described. The Guarantor reserves the
right to modify the instruction manual at any time without prior
notice.
Maximum power consumption - 0.1W; Standard power
consumption - 0.088W; Power consumption in standby mode -
0.5mW; Operating Frequency Range of device - 2,4 GHz
Manufacturer: Shenzhen Minrek Electronic Ltd.
Address: C602, 6th Floor, Building C, Hangcheng Road, Huafeng
International Robot Industrial Zone, Xi'xiang, Bao'an, Shenzhen,
China 518126
Made in China

19
BEDIENUNGSANLEITUNG DE
Das Handbuch ist verfügbar unter www.bemi-
electronics.com/manuals
Produktbeschreibung
1. Bildschirm
2. Ladeterminal
3. Herzfrequenzsensor
4. Thermometer
5.Ein-/Aus-Taste
Smartwatch-Modell: COSMO, im Handbuch „Gerät“ genannt Es
ist zwingend erforderlich, dieses Handbuch zu lesen, bevor Sie
das Gerät verwenden.
Um das Gerät ein-/auszuschalten, drücken Sie die Ein-/Aus-Taste
für 5 Sekunden.
Drücken Sie kurz die Ein-/Aus-Taste, um den Bildschirm zu
schlafen / aufzuwecken.
Wartung des Geräts
Gerät regelmäßig reinigen, insbesondere Teile, die sich in der
Nähe der Haut befinden, um sie trocken zu halten. Spannung des
Gerätegurts anpassen, um die Luftzirkulation sicherzustellen.
Am Handgelenk, wo das Tragegerät keine übermäßigen
Hautpflegeprodukte verwenden sollte. Wenn Sie eine
Hautallergie oder Beschwerden haben, bitte aufhören, das Gerät
zu tragen. Gerät nicht während eines heißen Bades oder einer
heißen Dusche tragen. Kein Gerät zu Reinigungsmitteln,
Ätzmitteln oder anderen Chemikalien aussetzen. Kein Gerät zu
hohen (über + 50 ° C), niedrigen (unter -10 ° C) Temperaturen
oder Hitze aussetzen, zum Beispiel Sonnenlicht oder eine andere
Wärmequelle. Dies kann das Gerät beschädigen. Das Produkt ist
nicht für Kinder und Kleinkinder geeignet. Beachten: IP68
bedeutet, dass dieses Gerät bis zu 1 Stunde lang gegen ein
Table of contents
Languages:
Other bemi Watch manuals
