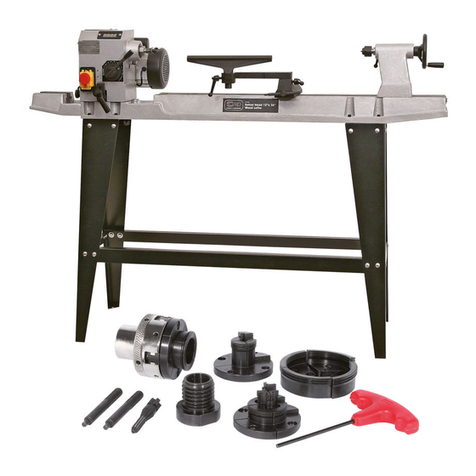
Bench Power Tools WW 10039 User manual

CONGRATULATIONS
WOOD
LATHE
Yw
have
just
purchased
one
of
wr
gowing
famiry
of
Bcnch
Power
Tools.
Exh
is
cn@n
ecred
and
manufactwed
to
the
highcst
smndards
of
quality.
You
will
fine
yow
ncw
Wood
Turning
Lathe
a
very
useful
tool.
It
will
pcrfwm
htwccn
ccnlre
turning
and
fxcpbte
turning,
and
is
especbny
suitcd
lo
hi&
spccd
mndng
and
polishing
of
rmishcd
work.
This
Wood
Turning
tathe
is
a
self-contained
power
tool
mnol
rcquifing
thc
purchsc
of
a
scpcratc
motor.
INSTRUCTION
MANUAL
WI
0039
1
1
I
I3
IL
3
-
I
..-
MAIN
FEATURES
I
1.
SWITCH
7.
TOOLREST
MOLDER
2.
BELT
AND
PULLEY
COVER
8.
TOOLREST
LOCKNUT
3.
FACEPLATE
9.
TAUTOCK
SPINDLE(WITH
BAIL
BEARtNG
CENTRE]
4.
MIVE
CENTRE
XI.
TAILSTOCK
SPINDLE
LOCKNUT
5.
BED
RAILS
n.TAILSTOCK
l2.
TAILSTOCK
LOCKNUT
13.
LATHE
BED

Safety
Rules
For
All
Power
Tools
I.READ
AND
BECOm
FAMILIAR
with
the
entire cpcrating manwl.
2.KEEP
GUARDS
AND
COVER
m
pkc
and
in
working
or&.
3.
ALWAYS
USE
SAFETY
GLASSES.
Also
use
face
or
&st
mask
if
cutting
apcration
is
&sty-
Everymy
cycghsscs
only
bvc
impact rcsistmt
Icnscs;
they
arc not safely
glasses,
4.
KEEP
WORK
AREA
CLEAN.
Cht-
tcrcd
arcas
and
benches
invite
xcidcnts.
5.T)ON'T
FORCE TOOL.
It
wll
db
a
bcttcr
and
safer
job
at the rate for
wkh
it
was
&signed.
work
area
well
illuminetcd.
DO
NOT
USE
in
explosive
atmocrphere(around
paint,
flammable
liquidg,
etc.
).
I8.KEEP
CATLDREN
AWAY.
All
vi-
sitors
should
be
kept
a
safc ktancc
from work
area,
espccblly
while
opn-
ntlng
unit.
X
4.
USE
TFTE
PROPER
TOOT,.
Dm'
t
force
tod
or
attachment
to
do
a
job
fw
which
it
was
not
dcsioncd.
IS.
MA
TNTATN
TOOLS
TN
TOP
CON-
nlTION.Kccp
tools
sharp
ad
clcsn
for
best
and
mfcst
pcrformancc.
Foilaw
ins
truct~ons
for
lubicating
and
changing
xccsso~cs.
6.
hVO1n
ACClnENTAL
STARTING.
1
G.
SECURE
WORK.
Use
clamps
or
a
Makc
sure
switch
is
in
"OFF"
positbn visc
to
hold
work,
whcn
pnciial.
it'
s
bcforc
plugging
in
cord.
mtcr
thn
using
your
hnd
and
prc-
vcnts
round
w
rrrcgrlarly
shaped
pic-
7.
nlSCONNECT
TOOT,S
REFORF,
ccs
from twniw.
SERVICING
and
whm
changing
acccssorics
sueh
as
Ws,
bits,
cutters.
8.
DON'T
OVERREACH.
Kecp
yam
prwcr
footing
and
bbncc
at
all times
For
bst
footing
wwr
rub
sofcd
fo-
otwear.
Kccp floor clear
of
oil, scrap
wood. ctc.
9.
WEAR
PROPER
APPAREL.
Loose
clothing
w jcwclry
may
gct
caught
.in
moving
parts.
Wwr
protcetlvc
hdr
cov-
ering
to
contain
long
hair.
10.
MAKE
WORKSHOP
KIDPROOF
Kccp
workshop locked or
p3dockcd
whcn
not in
usc
and
store thc
key
in
a
safc
localion.
11.
REMOVE
h
IIJUSTTNC:
KEYS
AND
CVRENCHES.
Form
habit
of
chccking
to
scc
that keys and
atlju-
sting wrcnchcs arc
rcmovcd
from
tool
bcforc
turning it
on.
1
2.
AVOln
DANGEROUS
ENVIRO-
NMENT.
Don'
t
usc
power
tools
in
hrn~
or
wct
locations.
Kccp
your
27.
CHECK
DAMAGEn
PARTS.
&f-
arc
furthcr
use
of
thc tool,
a
gurd
or
other
part
tht
is
~kmagcd
shodd
bc
chcckcd
to
ssswo
that
it
will
opcratc
pr~crly
and
pcrform
its
intcndcd
func!ion-ckk
for
alignment
of
mov-
ing
parts,
hcaka~
of
parts,
rnmting,
any
othcr
condtions
that
may
atfcct
its
operations.
A
gmcd
or othcr
part
that
is
hmgcd
should
bc
properly
rcpaicd
or
rcpbccd.
18.
USE
RECOlKMENnEn
ACCES-
SORIES-
Consult
Owner'
s
Maninl.
Use
of
improper acccssmics could
bc
bzarduus.
4
9.
NEVER
STAND
OW
TOOT,.
Injury
could
occur
from
a
tall.
20.
NEVER
IJEAVF:
TOOT,
RUNN-
TNG
ANn
UNcZTTENnEn.
21.
AI,WAYS
REMOVE
CORn
PT,UC
from
elm
triisl
outlct
whcn
sdjusting.
:hm9;ng
prts or
working
on
tool.
CHANGING
SPEEDS:
1.
Turn
the
power
off
st
the
matn
swltch.
2.
Loosen
motor
rnountlng
bolts
under
pulley
cover.
3.
Press
down
on
belt
tenslon
lever
lo
loom
the
belt.
4.
Change
belt
to
the
desIrecl
pulley
steps.
5.
Lift
belt Zenslon
lever
to
tlghten
belt.
6.
Retighten
rnotor
mounting
bolts.
Wood
Turning
Chisels
Each
Wood
Turning
Chisel
is
forged
from
hlgh
carbon
steel,
hardened
and
tampered
to
hold
a
sharp
cutting
edge.
TURNING
BETWEEN
CENTRES
Turning
between
centres
Is
the operation
ot
turning
a
long
workpisce
supported
at
one
end
by
the
dr~ving
centre,
and
by
the
tailslock
centre
at
the other.
MOVING
TA1LS"FOCK
AND
TOOL
RES'lYhe
tallstcck
and
lwlresl
are
held
lo
the
bed
with
lock
nuts
undwmeath
the
bed
ralls.
To
move
them
to
a
new
posltlon,loosen
the
nut
with
the
adjustment
spanner
.slide
the
tallstock
w
toolrest
along
the
bed
end
retighten
the
nut.
The
toolrest
Is
held
In
place
by
the
lockknob.
CHANCING FACEPLATE
AND
DRIVE
CENTRE
The
OdlUstmemt
spanner
has
laws
wh3eh
flt
across
flats
on
the
headstock sptrtdle.
Locate
the
spanner
across
the
flats
end
unsrew
the
faceplate
or
drive
centre
towards
you.

MARKING
THE
CENTKES*raw
we
hes
across
each
end
of
the
workpiece,
from
comer
to
comer.
IM
jum-
h
of
the
timi
will
ba
the
correct
centre.
NEatk
W
mWws
with
an
awl
or
a
drl.
MOUNTING
THE
WORK
BETW-
EEN
CENTR~wew
&ihg
mue
ffom
the
bthe
spin&.
Locate
tfm
point
of
the
rfrivh~
mae
in
the
hob
rnarked
at
ong
end
ol
the
timbw,and
hamner
home
with
a
wooden mallet or
sort
hammer.
POSITIONING
TOOL
REST-The
position
of
the
chisel
and
weratw
Cmt-
ort
is
me
inportant
W
the
actwl
hi
-
ght
ot
the
tool
rest.
Set it
at
cenhe
hei@t
to
be&
with
and
adlust
it
sli~htly
high
or
lower
after
trial
to
wit
the
operation.
MAKTNG
A
BACKING
PIECE-
Usa
a
pie of
1"
(25m)
thick
timber
brwr
ttran
Ihe
&rater
of
the
txepbte.
Screw
the
backing
piece
to
!he
faceplate
usM
w~rews
thr~yh
the
holes
in
the
back
of
the
fxeplete.
Mcunt
the
tacepkte
and
backing
piece mto
ths
btk
spindle
aml
caretully
hnn
dm
timber
untn
it
is
cowle-
tely
circular
and
sfightly
larger
m
&meter
mrm
the
taceplate.
TURNING
THE
TIMBER
TURNING
BETWEEN
CE~~
-Use
a
Owge or
rwnd
nose
chisel
to
MW
the
mbw
m
the
desired
shape.
Hold
the
drisel
turn
against
the
tool
rest.
Use
the
hand
W&mg
the
handla
of
the
chisel
Za
raise
or
lower
the
cutting
p&t,
with
fie
too!
rest
as
a
fulcwn.
when
the
rough
shapa
is
ready
use
dtb
chissls
for
t'inal
Shaping
and
decorative
groov-rn
as
required.
FACEPLATE
TURNING
-;Mount.
the
faceplate
snd
workpiece
to
the
bthe
spinde.
Start
by
turning
the
outsids
of
the
work
t'rst.
Whsnever
possible
bring
the
railstock
up
to
support
tb
workpiece.
Move
the
faitstock
well
clear
when
tumng
the
inside
of
the
work.
Extra
care
must
be
taken
that rhe
chisel
does
not
catch
on
the
work,
particularly when
the
lnslde
turning
is
lono
and
M7fOW.
AIR
EMERY
WHEEL
(NOT
SUP-
PUED)To
ti
the
hbstock
sphdle
with
wrerch
apd
Wtly
screw
the
air
emery
wheel
towarcis
yw.
nlsc
SAN~ER(
NOT
SUPPLIED)
To
fix
the
headstock
spmdle
with
wrbnth
and
tightly
screw
DISC
towards
you.
CHUCK
(NOT
SUPPLIED)
To
tix
the
headstmk
spinrHe
with
wrench
and rightly
screw
the
chuck
towards
you.

Alter
using
ym
chisels
maintain
their
fina
cutting
edge
with
an
olstme,
taking
are
to
keep the
0fic~i~1
aRgbS.
1,
Power
llne
2.
Cwd
clam
3.
Saew
4
Washw
5.
Belt pulley
6.
Locking
screw
7.
Bolt
8.
Washer
9.
Saew
10-
Washw
11.
Protecting
crust
12.
Driving belt
13.
Belt
pulley
14.
Motor
screw
IS.
Washer
16.
Locking
screw
17.
Sc~wv
18. Washer
19.
Ball
bearlng
20.
Bearlng block
21.
Nut
22.
Tml handle
23. Bearlng
blcck
24.
Ball bearing
25.
Washw
26.
Screw
27.
Maln
shaft
28.
Lathe
tlp
29.
Chuck
30.
Power
switch
31.
Washer
32.
33.
Jip
34.
Cap
screw
35.
Tool carrlage
36.
GulUetrack
37.
Tip
38.
Ball
bearlng
39.
Tallst&
40.
Nut
41.
Screw
9x1s
42.
Lodtirg screw
43.
Handwh~l
44.
Screw
d5.
Washer
46.
Brackel
47.
Screw
48.
Washer
49.
Cap
screw
50.
Washer
51.
Spring
washer
52.
Nut
53.
Guide
track plate
54-
Nut
55.
Washw
$6.
Spring
wesher
57.
hl
58.
Lathe
bed
59.
Knob
60.
Guida treck
pIak
61.M
62.
Washer
63.
Spring
washer
64,
Nut
65.
Screw
--
Switch
66.
Screw
67.
Washer
68.
Data plate
69,
Washer
70.
Spring
washer
71,
Nut
72.
Momr
73.
Washer
74.
Sprlng washer
Other Bench Power Tools Lathe manuals

