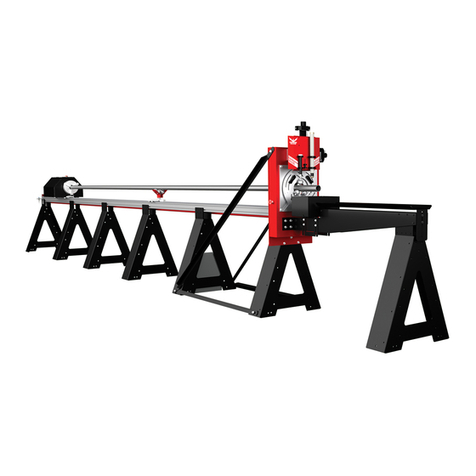
Bend-Tech DRAGON A150 Operating instructions

A150
Part 1 of 1
Maintenance & Troubleshooting
Revision 1 | English ©2020 Bend-Tech LLC

ii Bend-Tech Dragon A150
Troubleshooting Guide
©2020 Bend-Tech LLC
All rights reserved. The information in this manual is subject to change without notice.
Bend-Tech LLC strives to produce the most complete and accurate information regarding
its products. We are constantly working to improve and advance our products to increase
performance, user satisfaction and experience. Bend-Tech LLC assumes no responsibility for
errors or omissions regarding this manual. Bend-Tech LLC assumes no liability for damages
resulting from the use of the information contained in this publication.

iiiBend-Tech Dragon A150 Troubleshooting Guide
Dragon A150
Maintenance & Troubleshooting
Revision 1
English
Original Instructions
September 2020
Bend-Tech, LLC
729 Prospect Ave.
Osceola, WI 54020 USA
(651) 257-8715
www.bend-tech.com

iv Bend-Tech Dragon A150
Troubleshooting Guide
Dragon software is covered by a 2-year maintenance plan from the purchase date of the
Dragon A150 machine. After the 2-year maintenance plan is expired, the Customer can
purchase a maintenance plan. A maintenance plan will ensure the customer always has
the newest version of Dragon software. The maintenance plan is critical to keeping Dragon
software updated with the newest capabilities possible, and is critical to the servicing of the
machine. Bend-Tech, LLC will contact the Customer regarding updates to the maintenance
plan within 1-month of expiration. Contact Bend-Tech Support to ensure software is up to date:
Limited Warranty

vBend-Tech Dragon A150 Troubleshooting Guide
Any questions or concerns regarding this manual can be directed to Bend-Tech, LLC
representatives via the Dragon website, www.bend-tech.com. Click Contact in the menu bar for
communication options and send your comments to the Dragon Customer Service department.
Online Resources
• https://www.youtube.com/user/bendtech2020
• http://www.bend-tech.com/wiki7
• http://www.bend-tech.com
• https://www.facebook.com/2020ssi
• https://www.instagram.com/bend_tech
Customer Service
Congratulations on your purchase of the world’s best CNC plasma tube and pipe cutting
machine, the Dragon A150. Bend-Tech, LLC places great pride in customer satisfaction and it
our support is a key factor in your success.
Contact Us
You can contact Bend-Tech, LLC customer service at 651-257-8715. Our support hours are
mailing address is: Bend-Tech LLC, 729 Prospect Ave., Osceola, WI 54020, U.S.A..
Customer Satisfaction Commitment

vi Bend-Tech Dragon A150
Troubleshooting Guide
This manual contains important statements that are called out from the regular text with an
associated signal word: “Danger,” “Warning,” “Caution,” or “Note.” Each of these signal words
is accompanied by its own icon. These signal words and icons indicate the severity of the
warnings and read the statements before operating the machine.
Denitions & Examples
Danger
Danger indicates a serious condition that could cause severe injury or death to the operator or
bystanders if the instructions are not followed.
Warning
A Warning indicates there is a possibility for minor injury if the instructions are not followed
correctly.
! Danger !
Exceeding the material weight limit of the Dragon A400 can result in serious injury
to the operator and/or bystanders.
! Warning !
Due to the extreme temperatures that result from the plasma cutting process, parts
cooled in water in the parts catcher can still be extremely hot. Always use caution
when handling newly-cut parts.
Warnings
Example
Example

viiBend-Tech Dragon A150 Troubleshooting Guide
Caution
Caution warns the operator that minor injury or machine damage could occur if instructions are
being performed.
Note
! Caution !
the Dragon A400.
Water Cooling system greatly reduces smoke and vapor emitted by the machine.
Bend-Tech recommends use of the Water Cooling system whenever possible.
Example
Example

viii Bend-Tech Dragon A150
Troubleshooting Guide
Glossary
Glossary
A150
Indicates machine with 150-lb weight limit.
Axis
by the Dragon A150.
Bend-Tech 7X
Machine design software - CAD.
BOB
Breakout Board.
Material Support Lifter
The Material Support Lifter supports
material to reduce sag.
Chuck
Located on the Trolley, the Chuck
holds the material so it can be moved
forward, backward and rotated.
Control Box
Connects Dragon Software
Suite to the Dragon A150.
Coolant Tray
Cools cut parts as they are produced.
Drive Belt
The X Motor uses the Drive Belt to
power the Trolley along the Rail.
The Drive Belt is mounted stationary
along the length of the machine.
Drive Belt Pulley
Located on the X Motor, it works in
conjunction with the Drive Belt to
power the Trolley along the Rail.
E-Stop
Emergency stop.
ESS
Ethernet Smooth Stepper (Control Board).
Ethernet
System for connecting multiple
computers via a Local Area Network.
Front Gate
The Gate supports the material at the
front of the machine. It consists of two
sets of self-centering roller jaws.
Gate Lead Screw
Controls operation and
adjustment of the Gate.
Interface
Any particular screen display
generated by Bend-Tech software.
Mach3
Machine driver software.
Parts Catcher
The parts catcher is placed at the front of
the machine to catch parts as they are cut.
Rail
The Rail is the main structure of the Dragon
A400. The Trolley rides on the Rail.
Tail
The Tail is located at the opposite end of
the Head of the machine. The Tail arrives
pre-assembled. The X Axis homing sensor,
Drive Belt Adjustment Block and E-Stop
are located at the Tail of the machine.
Toolhead
Operates the Marker, Engraver and Torch.
Trolley
The Trolley rides on the Rail, and carries
the Chuck forward and backward along
the length of the Rail Support Beam.

ixBend-Tech Dragon A150 Troubleshooting Guide
Contents
Contents
Limited Warranty .....................iv
Customer Service.................... v
Customer Satisfaction
Commitment............................. v
Warnings ..................................vi
Glossary ..................................viii
Contents...................................ix
01
Introduction............................. 13
Introduction ...................... 13
13
How To Send A Support Session ...... 14
02
Cutting Issues......................... 15
Cutting Issues .................... 15
Cut Rotation and Backlash Correction.. 16
Set Screw and Chain Maintenance . 17
Reversing Cut Direction .......... 20
Editing Polyline Resolution ........ 21
Adjusting Torch Position .......... 22
03
Toolhead.................................. 23
Toolhead. . . . . . . . . . . . . . . . . . . . . . . . . 23
Adjusting the Toolhead Trolley ..... 24
Remove the Toolhead............ 24
Toolhead Rail ..................... 25
Leveling The Toolhead Rail ....... 25
Toolhead A Axis Mounting ........... 26
Method 1...................... 26
Method 2...................... 26
A Axis Drive Motor Set Screws. . . . . . . . 27
04
Torch........................................ 29
Torch ........................... 29
Mounting the Torch .............. 30
Routing the Torch Lead .......... 30
Grounding The Torch ............ 31
Setting Torch Dwell Time ............ 32
Torch Relay ...................... 32
05
Engraver.................................. 35
Engraver. . . . . . . . . . . . . . . . . . . . . . . . . 35
06
Marker...................................... 37
Marker .......................... 37
07
Laser........................................ 39
Laser ........................... 39
Control Box Laser Connection ..... 39
Laser Replacement. . . . . . . . . . . . . . 40

xBend-Tech Dragon A150
Troubleshooting Guide
Contents
08
Gate ......................................... 41
Gate ........................... 41
Gate Wear .................... 42
Gate Maintenance .............. 42
Gate Removal.................. 42
09
Trolley...................................... 45
Trolley .......................... 45
Trolley Adjustment ................. 45
Adjusting the Trolley ............. 46
Removing the Trolley Cover ....... 47
X Limit Switch. . . . . . . . . . . . . . . . . . . . . 47
Replacing the X Limit Switch ...... 47
10
Chuck ...................................... 49
Chuck Overview................... 49
Removing and Cleaning
Chuck Jaws ................... 49
Removing The Chuck ............ 50
Cleaning The Chuck ............. 50
11
X and Y Axis Maintenance .... 51
X and Y Axis Maintenance and
Adjustment ....................... 51
Set Screw and Chain Maintenance .... 52
X Gear and Chain Adjustment ..... 52
Backlash Correction................ 53
Additional Trolley Set Screws. . . . . . . . . 54
Chuck Alignment .................. 54
Aligning the Chuck .............. 54
12
Center Support Lift................. 57
Center Support Lift................. 57
Center Support Lift Air Cylinder ....... 58
Center Support Lift Air
Pressure Setting ................ 58
Center Support Lift Actuation Switch 58
13
Control Box............................. 59
Control Box ...................... 59
Accessing The Control Box ....... 59
Main Power Fuse ............... 60
Accessing Control Box Internals.... 60
Gecko Drive LED Lights .......... 60
Gecko Drive Issues. . . . . . . . . . . . . . 60
Gecko Drive Fault Code .......... 60
Adjusting the Gecko Drive ........ 61
Replacing the Gecko Drive........ 61
14
Operator Control Panel.......... 63
Operator Control Panel ............. 63
Reading ESS LED Status Codes...... 63
Ethernet Jack LED Lights ......... 64
Ethernet Cable and Connections ...... 65
Ribbon Cable .................. 65
ESS Failure To Connect .......... 65
Connection Lost While Machine Is
Running ...................... 66

xiBend-Tech Dragon A150 Troubleshooting Guide
Contents
15
Limit Switch Operation .......... 67
Limit Switch Operation ............. 67
Troubleshooting Limit Switches .... 68
Machine Control and Mach3 Indicate
Homing Switch is Triggered ....... 68
X and A Axis Limit Switch Failure...... 69
Replacing The A Axis Limit Switch .. 69
Replacing the X Limit Switch ...... 70
16
Mach3 ...................................... 71
Mach3 Machine Driver Software ...... 71
Installing Warp 9 Utility ........... 71
. 71
Mach3 Lost Communications
While Operating ................ 72
Other Mach3 Errors ................ 73
Invalid Bootloader Signature. . . . . . . 73
CryptoMemory Error ............. 73

xii Bend-Tech Dragon A150
Troubleshooting Guide
Contents

13Bend-Tech Dragon A150 Troubleshooting Guide
Introduction
01
01
Introduction
Introduction
The Dragon A150 Maintenance & Troubleshooting guide contains information intended
to assist the Operator in maintaining proper operation of the machine as well as solving
operational issues that may arise during regular use. This guide addresses typical operations
and procedures to resolve them. Should the User encounter an issue or situation that cannot
be resolved using this guide, or that goes beyond the scope of this guide, please contact
Dragon A150 Manufacturing Dierences
using the most accurate information available. However, there may be information in this guide
a machine or about information contained in this guide, please contact Bend-Tech service:

14 Bend-Tech Dragon A150
Troubleshooting Guide
Introduction
01
How To Send A Support Session
Properly setting up a Support Session with a Bend-Tech Service Technician can be key
to keeping the Dragon A150 up and running. Bend-Tech knows keeping the Dragon A150
performing optimally is critical to our customers’ bottom line. We are more than happy to help,
possible. Many times, if the right information is given, a Service Tech can have a solution ready
before we even pick up the phone.
1.
sending a Support Session, then keep the project open after submitting.
2. In the Bend-Tech Dragon Home interface, click the Help tab, then click Support Session.
3. Fill in Name, Email, Phone, and if you know a Service Tech or have had help with this issue
4. Give a detailed description of the issue in the Description of Problem text box. The more
information given the better our Service Techs can help.
5.
6. Click Submit.

15Bend-Tech Dragon A150 Troubleshooting Guide
Cutting Issues
02
02
Cutting Issues
Cutting Issues
Maintaining the drive systems on the Dragon A150 is critical to achieving accurate cutting,
engraving and marking operations. The machine has numerous chain drives and set screws
that require regular maintenance. The Gate, Trolley and Toolhead also require regular
maintenance to ensure proper operation.
Symptom Cause Corrective Action
Copes/cuts not on same
rotation
Incorrect backlash
Check set screws on X and Y axis;
perform backlash correction in Dragon
software
X axis chain and/or drive
gear set screws
Check X chain tension; check Y chain
tension
Loose set screws Check set screws on all drive gears
Jagged/Wavy Cuts
Rail dirty Clean Rail with penetrating oil and
clean rag
Trolley loose on Rail
Trolley should move smoothly along
the Rail with no play. Adjust Trolley
roller system if necessary
X chain chattering Contact Bend-Tech service regarding
anti-chatter kit
Material too heavy,
causing X or Y motor to
skip steps
Check material weight

16 Bend-Tech Dragon A150
Troubleshooting Guide
Cutting Issues
02
Cut Rotation and Backlash Correction
An operator experiencing cut rotation issues with the Dragon A150 machine may be required to
check set screws and chains to ensure backlash settings are accurate. As a result of daily use,
the machine may experience loose set screws or chains that come out of adjustment. There is
also a Backlash Correction procedure in Bend-Tech Dragon software. Ensuring all set screws
and chains are tight and adjusted, and Backlash Correction is performed in Bend-Tech Dragon
software, will maintain cut rotation accuracy.
Tools Required
• 3mm Allen wrench
•
•
• ½ in. wrench
• ¾ in. wrench (2)
Symptom Cause Corrective Action
Jagged/Wavy Cuts XCable too loose/too tight Check X Cable; adjust tension if
necessary
Incomplete cuts
Machine moving before
Adjust dwell time in Lead In/Out
settings
Y Axis backlash out of
adjustment
Check Y Axis chain and drive sprocket
set screws
Toolhead loose
Toolhead loose on A axis
mount plate Check Toolhead A Axis play
Trolley out of adjustment Check Toolhead trolley play on
Toolhead rail

17Bend-Tech Dragon A150 Troubleshooting Guide
Cutting Issues
02
Set Screw and Chain Maintenance
1.
the Trolley cover.
2.
the X Chain Cable Cover by removing
the two screws.
3.
sprocket, ensure the X Drive Set Screws are tight.
wrench

18 Bend-Tech Dragon A150
Troubleshooting Guide
Cutting Issues
02
4. Using a 3mm Allen wrench, ensure the X
Chain Set Screws are tight.
5. Ensure the chain is tight on the Y gear and
motor. If the Y chain is loose the Operator
will be required to re-tension the chain.
Using a ½ in. wrench, loosen the Y motor
mount bolts on the bottom of the Trolley
just enough to slide the motor and mount to
the outside, tensioning the chain. Holding
tension steady, re-tighten the Y Motor Block
Adjustment Bolts.
6.
Rotation Set Screws are tight.
3mm Allen
wrench

19Bend-Tech Dragon A150 Troubleshooting Guide
Cutting Issues
02
7. Remove the X chain cable pulley cover. Ensure the X chain cable pulley is tight. If the
pulley is not tight, the Operator will be required to tighten the pulley to the proper tension.
tightening the nut and bolt combination by hand. Hold the nut inside the rail with one hand
place a ¾ in. wrench on the nut inside the Rail and, using a second ¾ in. wrench, tighten
the bolt one full turn. Reinstall the X chain cable cover.
8. Ensure tension is set correctly on the X chain
and cable combination. Locate the adjustment
adjustment turnbuckle until it can be turned by hand,
without using the wrench. To set tension, tighten the
turnbuckle by hand as much as possible. Once the
turnbuckle cannot be turned by hand, tighten it one
chain is now set.
9. Reinstall the X gear cover
10.Reinstall the Trolley cover
The X chain cable pulley does not control tension on the X chain. However, it is
important the X chain cable pulley be adjusted properly to ensure consistent tension
on the chain.

20 Bend-Tech Dragon A150
Troubleshooting Guide
Cutting Issues
02
In Bend-Tech Dragon software,
click Machine Library and ensure
the correct machine is chosen
from the Machine List. Click the
Mechanical icon in the menu
at the top of the screen. In the
Backlash Correction box click
the box with the multicolored
diamond-shaped icon. This will
begin the Backlash Correction
procedure. Follow the prompts
on the screen. Do not perform
backlash procedure on the Y Axis.
When the Backlash Correction procedure is complete the machine is ready to run.
Reversing Cut Direction
Bend-Tech has had success maintaining accurate cut rotation by changing the cut direction in
the part design feature. With the Dragon A150 machine, allowing the machine to operate so
it rotates in the same direction throughout the job process eliminates any backlash that can
occur in the chain drive system since the machine is always keeping tension in the system.
1. In Bend-Tech Dragon software, under Create New, click the type of part that will be cut on
the Dragon, such as Straight Part.
2. Select Material, enter a Part Name and Tube Length.
3. Click the Cutting tab. Click Add twice to add a cope to each end of the part.
4. At the top of the main interface, select Edit Flat.
5. Click the Actions tab, under the Actions tab click Edit.
6. Click Reverse Cut. In the part display interface, the software will display the cut direction
with a series of arrows. The default direction will show the cuts moving in the opposite
direction. After clicking Reverse Cut, click on one of the cuts in Edit Flat to reverse its
direction. To ensure most accurate cut rotation on the A150, edit the part so all cuts are in
the same direction.
The part can now be Nested and sent to the machine for production.
Other manuals for DRAGON A150
1
Table of contents
Other Bend-Tech Cutter manuals
