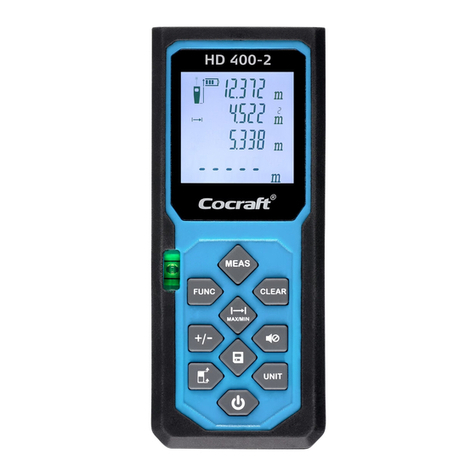
Benetech GM100D User manual

GM100D
GM100DU

CONTENTS
1
1
2
3
4
4
4
4
5
5
6
6
6
6
7
8
8
9
10
11
12
13
13
13
Before use
1. Check-up
2. Introduction
3. Safety instruction
4. Button functions
Operation instructions
1. Start-up & Shut-down
2. Single measuring
3. Continuous measuring
4. Area measuring
5. Volume measuring
6. Indirect measuring-Pythagoras
7. Tilt measuement
8. Auto horizontal measurement
9. Auto height measurement
10. Edit measuring data function
11. Data locking
12. Historical record
13. Data export
Set up
Illustration icons
Measurement steps
Technical specifications
Maintenance and warranty
1. Maintenance
2. Warranty
3. Specific declarations

1
Before use
1. check-up
Thanks for your purchasing our product.
Please read carefully this manual before using this unit and keep it well for future reference.
Unpack the package and check the following components in it. If there is any missing part or incompl-
ete manual, please contact the local dealer.
Laser distance meter-------------1pcs
Pouch-------------------------------- 1pcs
Li-ion battery------------------------1pcs
USB cable---------------------------1pcs
Recharge adaptor-----------------1pcs
Instruction manual-----------------1pcs
2. Introduction
This 100 meter distance meter is of photoelectric type and equipped with 2-inch color screen that prov-
ides you vivid display, powerful interactive function and professional measuring and other auxiliary fun-
ctions with unique private setting-up make your measure more enjoyable. Even in case of absence of
reflecting board, this unit is capable of taking measurement up to 100 meter easily due to its high
precision and interference-free technology. Li-ion battery can set you free from replacing battery frequ-
ently, multi-language interface and USB output give you more convenience in measuring.

2
3. Safety guide
a. Permitted use
Measuring distances
Computing functions, e. g. areas and volumes
Indirect measuring with Pythagorean
Angle measurement
b. Prohibited use
Using the instrument without instruction
Using outside the stated limits
Deactivation of safety systems and removal of explanatory and hazard labels
Opening of the equipment by using tools, as far as not specifically permitted for certain cases
Carrying out modification or conversion of the product
Use after misappropriation
Use of accessories from other manufacturers without the express approval of our technology
Inadequate safeguards at the surveying site
Aiming directly at the sun
Deliberate dazzling of third parties; also in the park
c. Laser classification
This produced a visible laser beam which emerges from the front of the instrument Do not stare
into the laser beam or direct it towards other people unnecessarily. Eyes protection is normally
afforded by aversion responses including the blink reflex.

3
d. Warning
Looking directly into the beam with optical aids (e.g. Binoculars, telescopes) can be hazardous
Precautions: Do not look directly into the beam with optical aids.
e. Caution:
Looking into the laser beam may be hazardous to the eyes
Precautions: Do not look into the laser beam. Make sure the laser is aimed above or below
eye level.
4. Button functions
1 2 3
9
78
12
11
10 6
5
4
1. Area/Volume/ Pythagoras
2. Plus/Go Up
3. Tilt/ triangle
4. Confirmation
5. Go Right
6. Saving/Historical data
7. Power On/Measuring (On/Single/continuous meas)
8. Menu/Power Off
9. Minus/Go Down
10. Reference
11. Go Left
12. Clear/Cancel

4
Operation instructions
1. Start-up & Shut-down
a. Inserting / replacing batteries
Pull up the snap of the battery door to open it and insert the battery included in the package, then
close the door and lock it up.
b. Start-up
Press key to start-up, and directly go to the interface of single measuring.
c. Manual Shut-down
Pressing key for seconds to switches the instrument off.
d. Auto Shut-down
The instrument switches off automatically after three minutes of inactivity.
2. Single Measuring
Press to activate the laser. Press again to trigger the distance measurement. The result is
displayed immediately.
3. Continuous Measuring
Press and hold down key until hear "beep" to activate continuous measurement. User can press
or to stop the function and the values for maximum and minimum distances are shown in the
display as well as the last measured value in the summary line.
4. Area Measuring
Press once, the symbol appears in function filed of display.
Press to take the first distance measurement (e.g. Length).

5
?
1
2
2
1
1
2
3
1
2
3
?
Pythagorean 1
Figure 1
Pythagorean 2
Figure 2
Press again to take the second distance measurement (e.g. width).
The results of length, width, perimeter and area are displayed in the historical data line in order.
5. Volume Measuring:
Press twice, the symbol appears in the function field on the display, and the volume function
activated as well.
Press to take the first length measurement (e.g. Length). Next get the width, then heights, the final
result is displayed in the summary line.
Press UP and DOWN to display additional room information such as ceiling/floor, surface area of the
walls, circumference.
6. Indirect Measuring-Pythagoras:
a. Press three times to activate the function, the symbol appears in the function field on the
display as following to take No. 1, and No. 2 length, the result is displayed on the summary line.
Press to delete any measured length and then press to re-measure. As shown in figure 1.
b. Press four times to activate the function, the symbol display in function field as following
to take No.1,2 and 3 length, the height is displayed on the summary line. Press UP to find additional
information. As shown in figure 2.

6
7. Tilt measurement:
Press button the symbol appears in the function field, press to take the inclination
and the distance.
The inclination sensor measures tilts between 45 .
During the measurement of tilt, the instrument should be held without transverse tilt, as far as possible
within 10 . The accuracy is 0.3 .
8. Auto horizontal measurement:
Press twice, the symbol appears in the functional field. Press button to measure
angel and distance, the summary line displays the result as the direct horizontal distance.
9. Auto height measurement:
Press third times, the symbol appears in the functional field. Press button to take
both sloping sides, the vertical height is displayed in the summary line.
10. Edit Measuring data Function:
Note: this function is only enabled in measurement mode and at least a measured data display in the
screen.
a. Select data:
Press UP and DOWN to select measuring type in measuring process file (left handside of the
screen) , press to locate the corresponding data, the data frame turning yellow indicates the
data has been selected.
b. Re-measure:
When this data was selected, press to re-measure the distance till the result is satisfied. Press
OK or return to measurement interface.

7
c. Adjust measurement result:
When this data was selected, press , the cursor appears in the measurement type field, press
or move the cursor to select the digit of data, and press UP or DOWN to increase or reduce
the value, press OK to save and return to measurement interface, or press to cancel the
modification and return the previous data.
d. Addition / subtraction:
When this data was selected, press UP to the +/- appears in the measurement type field, press
the next measurement is added to the previous, In the same approach, press DOWN , the next
measurement is subtracted from the previous one. Press OK to save and return to measurement
interface, or press cancel the modification and return the previous data.
11. Date locking:
a. Data locking introduction:
usually , the instrument keeps and deletes the measurement data in sequence of first in first out.
The first in value will be deleted if total measurement data reach the maximum storage
(eg.30 records). This function enable user to save data permanently except user deletes it manually
from memory.
b. Lock data in mode of measuring:
When measuring, select data, press , the dialog box pops up, select save button, then
press OK to lock the data, return to measurement interface.
c. Lock/unlock data in Historical record function:
In history data interface, move cursor to navigate the data, then OK to lock it. And press OK again
to unlock the data.
8
12. Historical record:
a. .Historical record review:
Press to call up the function, press UP or DOWN to select the Measurement type, sorting by
which, all of the data record displays.
b. Historical record delete:
Move cursor to select one of measurement type, Press , then OK -
c
UP DOWN OK
d
UP DOWN OK
e
13. Data export
a. In-time export : Connected USB cable with PC, the unit can export data to PC while you are
taking measurement.
b. Export -all : Connect the USB cable with PC properly;
Open the Excel/ Word program and point cursor to the desired from;
Click OK buttom then the historical data will be exported to the file.
c.
press to delete all the histori
cal records belonging to this measurement, type.
. Single record delete:
Press or to browse the record then Press , and press to delete the record.
. Lock and unlock:
Press or to browse the record then repeatedly press to lock and unlock the record.
. View detail record
Press to read detail information of this record, including data type (locked/unlocked) , No. of
order all data, date, time, measurement function, measurement types , corresponding result,
additional information, For example, in function of volume measurement, additional information
such as ceiling/floor area , surface area of the walls , circumference displays.
NOTE: Only 100M(USB) is equipped with function, 100M does not have such function.

9
UP / DOWN / LEFT / RIGHT
OK to
The main menu shows as below:
Press key to main menu as following screen, press to be next
sub-setting function. Press to save and return to previous interface, or press cancel the
modification and return to the previous data.
Set up
TOOLS
SET PERSONAL SET OTHERS

10
Illustration of icons
Level
Timer
Stacking Out
Temperature
Data Export
100m Usb
Bubble
Timer Set
Beep
Measure Unit
Angle Unit
Bright
Offset
Time Format
G-Sensor
Language
Reset
Factory Reset
About Us

11
Measurement Steps
Icon Measurement
Steps
Additional
Information
Red side: measuring
Green side: result
1 2 3
Function
Area Inclination
Measurement
Volume
Auto
Horizontal
Pythagorean 1
Auto
Heights
Pythagorean 2
Triangular
Staking
Out
Icon Measurement
Steps
Additional
Information
Red side: measuring
Green side: result
1 2 3
Function

12
Technical Specifications
Functional
Spec 100M 100M(USB)
Measurement
range 100m
1.5mm
m/in/ft
Class
2 inch full
color screen
YES
YES
YES
YES
YES
Recall last values
Data interface
USB
Buzzer indication
Battery
Battery life
Dust protect/
splash proof
Operating temperature
Storage temperature
Auto power off
Unit size
Weight
30
YES
Li-ion battery
1200mAh
Up to 15000
IP54
0 ~40
-10 ~60
NO
After 3 min
125*55*29mm
137G
(Contain battery)
Functional
Spec 100M 100M(USB)
Stacking out
Accuracy
Measurement
unit
Laser class
Display
Continuous
measurement
Auto horizontal
measurement
Auto height
measurement
Angle
measurement
100m
1.5mm
m/in/ft
Class
2 inch full
color screen
YES
YES
YES
YES
YES
1000
YES
YES
Li-ion battery
1200mAh
Up to 15000
IP54
0 ~40
-10 ~60
After 3 min
125*55*29mm
137G
(Contain battery)

13
Maintenance and warranty
1. Maintenance
a. If there is a icon appears on screen, please charge the unit with the adaptor included in the
package.
b. Take out the battery from the battery door if the unit is supposed not to be used for a long time.
c. The unit may not be turned on properly while in charging, if the battery in unit is not put in use for a
long time or the battery is approaching exhausted. Take it easy and just wait for a while after the unit
being charged for some time.
d. Do not try to dismantle the unit or change structure of the unit without authorization.
e. Use soft and wet cloth to clean the unit, do not use corrosive or volatile cleanser or put the unit
immerged into liquid.
2. Warranty :
a. Read carefully the warranty terms stipulated in the warranty card provided.
b. Any damage resulting from the following situation will set us free from the warranty responsibility:
unauthorized dismantling; mistake storage after purchasing;
mistake operation or abuse of the unit;
unauthorized changing records on the Warranty Card;
failing to provide the purchasing proof.
3. Special declaration:
We preserve the right to change the design of the product and amendment of the manual accordingly
without further notification

Version 100m- EN-00
This manual suits for next models
1
Table of contents
Popular Analytical Instrument manuals by other brands

Insight Vision
Insight Vision IRIS manual

Insight Vision
Insight Vision IRIS Mainline Crawler manual

Goldanalytix
Goldanalytix GOLDSCREENPEN instruction manual

SCA
SCA PLU 367464 instruction manual

Gardner Bender
Gardner Bender WIC-100 instruction manual

Forbest
Forbest 3188 Series Assembling and Operating Instructions