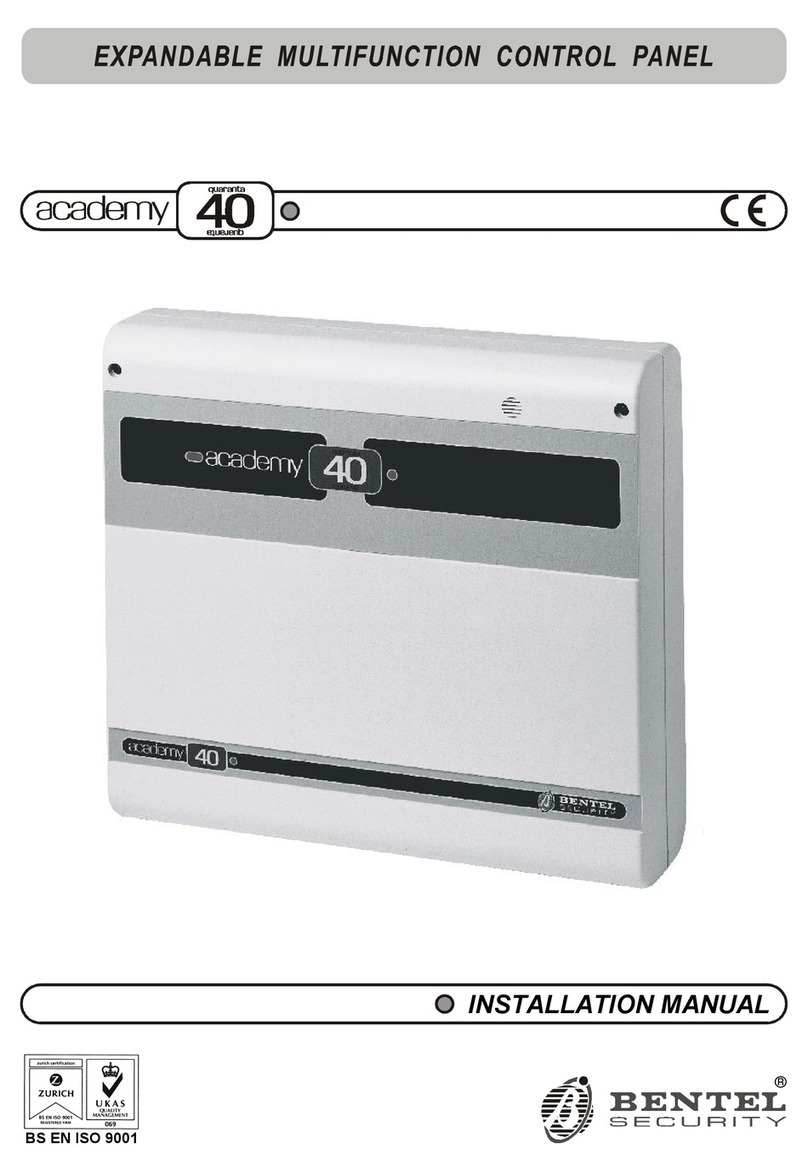
Bentel academy 40 User manual

®
USER MANUAL
BS EN ISO 9001

This Control panel has been developed and manufactured according to the highest standards of qual-
ity, reliability and performance adopted by BENTEL SECURITY srl.
Installation of this Control panel must be duly carried out in accordance with the local laws in
force.
BENTEL SECURITY srl shall not be responsible for damage arising from improper installation or main-
tenance by unauthorized personnel.
Use the Omnia-Academy40 3.0 software release or a successive release to program this Control panel.
Where features and programming procedures apply to Academy40 and Academy40/S the product will be
referred to as the Panel.
Where features and programming procedures apply to one of the appliances in particular the product
name will be specified.
Academy40 and Academy40/S comply with:
Low voltage: EN 60950/1996 + A4/1997
Emission: EN 50081-1/1992
Immunity: EN 50130-4/1995 + A1/1999
Burglar control: CEI 79/2aEd. 1993
Terminal Equipment (TE): TBR 21 -- 1/1998
BENTEL SECURITY srl reserves the right to change the technical specifications of this product with-
out prior notice.

CONTENTS
KEYPAD OPTIONS 5
LEDs . . . . . . . . . . . . . . . . . . . . . . . . . . . . . . 5
Basic options . . . . . . . . . . . . . . . . . . . . . . . . . 6
Global arming request . . . . . . . . . . . . . . . . . . . . . 7
Global disarming request . . . . . . . . . . . . . . . . . . . 7
Type A or B arming request . . . . . . . . . . . . . . . . . . 7
Arming requests . . . . . . . . . . . . . . . . . . . . . . . . 7
View Trouble . . . . . . . . . . . . . . . . . . . . . . . . . 8
User menu options . . . . . . . . . . . . . . . . . . . . . . 9
Alarm reset . . . . . . . . . . . . . . . . . . . . . . . . . . 9
Stop Alarm . . . . . . . . . . . . . . . . . . . . . . . . . . . 9
View buffer . . . . . . . . . . . . . . . . . . . . . . . . . . . 10
Zone status . . . . . . . . . . . . . . . . . . . . . . . . . . 10
Arm / Disarm partitions . . . . . . . . . . . . . . . . . . . . 11
Teleservice request . . . . . . . . . . . . . . . . . . . . . . 11
Enable / Disable Teleservice [En./Dis.Teleser.] . . . . . . . . 11
Enable / Disable Answering machine [En./Dis.Answer.] . . . 11
Output management . . . . . . . . . . . . . . . . . . . . . . 12
Code programming . . . . . . . . . . . . . . . . . . . . . . 12
Clear call queue . . . . . . . . . . . . . . . . . . . . . . . . 12
DIGITAL KEY OPTIONS 13
Digital keys . . . . . . . . . . . . . . . . . . . . . . . . . . 13
Arming Mode Options . . . . . . . . . . . . . . . . . . . . . 14
Global arming . . . . . . . . . . . . . . . . . . . . . . . . . 15
Global disarming . . . . . . . . . . . . . . . . . . . . . . . . 15
Type A arming (Amber) . . . . . . . . . . . . . . . . . . . . 15
Type B arming (green) . . . . . . . . . . . . . . . . . . . . . 15
Stop alarm . . . . . . . . . . . . . . . . . . . . . . . . . . . 15
TELEPHONE OPTIONS 17
Dialler mode access . . . . . . . . . . . . . . . . . . . . . 17
Answer mode access . . . . . . . . . . . . . . . . . . . . . 17
User code PIN (Personal Identification Number) . . . . . 17
Function keys . . . . . . . . . . . . . . . . . . . . . . . . 18
Exit Request . . . . . . . . . . . . . . . . . . . . . . . . . 18
Stop Alarm / On hook . . . . . . . . . . . . . . . . . . . . . 18
Remote listen-in . . . . . . . . . . . . . . . . . . . . . . . . 18
Remote telephone access . . . . . . . . . . . . . . . . . . 18
Check input zone status (All) . . . . . . . . . . . . . . . . . 18
Check input zone status . . . . . . . . . . . . . . . . . . . 18
Disable Output . . . . . . . . . . . . . . . . . . . . . . . . 18
Enable Output . . . . . . . . . . . . . . . . . . . . . . . . . 18
Arm Partition . . . . . . . . . . . . . . . . . . . . . . . . . 19
Global arming . . . . . . . . . . . . . . . . . . . . . . . . . 19
Disarm Partition . . . . . . . . . . . . . . . . . . . . . . . . 19
Global disarming . . . . . . . . . . . . . . . . . . . . . . . 19
Alarm reset . . . . . . . . . . . . . . . . . . . . . . . . . . 19
Deselect Active status . . . . . . . . . . . . . . . . . . . . 19
MEMO Chart . . . . . . . . . . . . . . . . . . . . . . . . . 20
USER NOTES 21
Quick Guide . . . . . . . . . . . . . . . . . . . . . . . . . 23
3

4Expandable multifunction control panel Academy40

KEYPAD OPTIONS
All basic security system options, and the Advanced options provided by this Panel can be programmed and con-
trolled from the keypads.
LEDs Panel status will be shown on the display, and will be indicated by the three LEDs (ICONS) on the keypad.
LEDs The LEDs will indicate the Panel status as follows:
ICON MEANING
OFF: all keypad partitions disarmed
ON:at least one keypad partition armed
OFF: Standby status (no alarm)
ON:alarm on one or more zones
Slow flashing: tamper on one or more zones or on the Panel
Fast flashing: alarm or tamper on one or more zones or on the Panel
OFF: No trouble
ON: Trouble
+Each Keypad can signal Zone alarm or Tamper on the zones of its partitions.
+Open Panel, Unbalanced Tamper line, Tamper on BPI devices and False key on Key reader will generate Tamper
warnings on the LEDs.
Display During standby status the upper row will show the date and time as per programmed format, and the lower row will
show the system status, for example:
18:22 2001/12/23
AADDDD-- x
Automatic
viewing of zones
in Alarm
If a Zone alarm or Tamper event has been logged ( LED ON or flashing), the upper row of the display will show
the zone descriptions in sequential order.
The lower row will provide information on system status.
Characters and
meanings
CHARACTER MEANING
DThe corresponding partition is disarmed. If the Dis flashing, a partition alarm has been
logged.
AThe corresponding partition is armed. If the A is flashing, a partition alarm has been logged.
-The corresponding partition is not a keypad partition.
The lower row will provide Trouble warnings. The icons below the display will indicate the type of trouble:
----Xdirectly above an icon means the coresponding status is active.
#
3 4 5 6 7 8
0ABEXC
ESC
1 2
9PRG
ON
RES
OFF
135 7
246 8
Figure 1 Keypad with flip down
KEYPAD OPTIONS 5

Icons and
meanings
ICON MEANING
Open Panel
Tamper line violation
BPI device tamper
False digital key on Key reader
BPI bus device Trouble
The status of the Teleservice and Answer machine options will be shown to the right of the trouble warning:
----Qdirectly above an icon means the corresponding option is enabled.
Icons and
meanings
ICON MEANING
Teleservice enabled
Answering machine option enabled
The last icon indicates the telephone line status.
above the icon means the Panel has engaged the telephone line.
ICON MEANING
Telephone line engaged
Basic options Five basic options are available from standby status.
Enter a User code PIN (4 to 6 digits) then press the relevant key.
KEY SEQUENCE OPTION
<PIN> Global arming
<PIN> Global disarming
<PIN> Type A arming
<PIN> Type B arming
<PIN> User menu access
View Trouble
All options----except View Trouble----require a User code PIN.
+The selected option will affect the partitions of the User code PIN and keypad in use.
+Request Denied (Empty request) will be signalled by an error beep, and the following message:
ATTENTION!
NOT ENAB.FUNCT.
Empty requests may be due to either the User code or keypad.
For example: the User code is enabled for Global arming on a specific group of partitions that are not keypad par-
titions.
6Expandable multifunction control panel Academy40

nGlobal arming request <PIN> +
This request will arm all the partitions of the User code and keypad in use.
nGlobal disarming request <PIN> +
This request will disarm all the partitions of the User code and keypad in use.
nType A or B arming request <PIN> + or
This request will arm or disarm specific partitions----as per programming.
Each User code can be programmed with Type A and Type B arming configurations. These configurations will de-
termine the User code partitions that will arm or disarm.
For example: a Type A configuration may be:
Partitions 1, 4, 5 to arm
Partitions 2, 3, 6, 7, 8 to disarm
When a Type Aand Type Barming request is made, the Panel will elaborate the programmed configuration and
arm or disarm the partitions of the User code and keypad in use.
+Each keypad can operate its assigned only (keypad partitions).
nArming requests
Before confirming an arming request, the Panel will check for:
ØOpen zones
ØBypassed zones
ØTrouble
If one of these conditions is found the Panel will not arm, and will await further instructions.
Open zone check If zones are currently open (alarm status) the following message will be shown:
Open zones ↓↵
Arm ?
The user will have three options:
Exit:the Panel will not arm
Continue:the Panel will arm
View: a list of the zones in alarm status will be shown.
The upper row will show the zone label and the lower row the alarm or bypassed status.
Use the lower row to bypass / unbypass the zones.
+Refer Zone status for details on the View and Bypass options.
Auto-bypassable
zones If an Auto-bypassable zone is currently open (alarm status) it will be bypassed automatically when the system
arms, and unbypassed when the system disarms.
Bypassed zone
check If a zone is currently bypassed the following message will be shown:
Bypassed zone ↓↵
Arm ?
The user will have three options:
Exit:the Panel will not arm
Continue:the Panel will arm
+If the arming request is confirmed some partitions will have bypassed zones.
View: a list of the zones bypassed status will be shown.
Trouble check If trouble is detected the following message will be shown:
Warn.-Trouble ↵
Arm ?
The user will have two options:
Exit:the Panel will not arm
Continue:the Panel will arm
+Refer to View Trouble for viewing instructions.
KEYPAD OPTIONS 7

Memory reset The memory will reset when the partitions arm.
nView Trouble
The amber LED will go ON to signal Panel trouble.
From standby status:
Press to view the Trouble (Warning) list.
Use or to scroll the list.
Press to exit.
The Trouble Warnings are as follows.
ØWarning fuse +B : board auxiliary power fuse has blown
ØWarn. fuse BPI1 : BPI fuse has blown
ØNo mains : Mains failure---- the Panel will be powered by the battery
ØLow battery : battery needs recharging
ØWarn.pow.troub. : battery trouble or the battery protection fuse has blown
ØWarn.pow.station: remote power station trouble (mains failure, fuses, battery down or not working properly)
8Expandable multifunction control panel Academy40

User menu options <PIN> +
Enter a valid User code PIN then press to access the USER MENU.
A Welcome message will be shown, and it will be possible to select the various User menu options.
+The Welcome message can be disabled by the installer.
Use or to scroll the Options.
Press to select.
USER MENU options:
rAlarm reset
rStop Alarm
rView buffer
rZones status
rArm / Disarm partitions
rPrint buffer (This Panel is UNABLE to operate this option)
rOvertime request (This Panel is UNABLE to operate this option)
rAuto-arm En/Dis. (This Panel is UNABLE to operate this option)
rTeleserv.request
rEn./Dis.Teleser. (Enable / Disable Teleservice)
rEn./Dis.Answer. (Enable / Disable Answering machine)
rOuts management
rCodes programm.
rClear call queue
+The default User code is 0001: only this Code is Available /Active
+The Installer can program the 31 User codes to operate specific partitions, and options. The User menu will show
the User code options only.
+The selected options will affect the partitions of the User code and keypad in use.
+Request Denied will be signalled by an error beep, and an error message (refer to Basic Options).
nAlarm reset
Select this option to delete the zone and partition alarm memories, and force alarm signallers (connected to the alarm
outputs) into standby status.
Before stepping back to the USER MENU the following message will be shown:
Alarm reset
D O N E!
Use the Stop Alarm option to stop the signallers----in the event of persistent Alarm signalling after reset.
The causes of persistent alarms (e.g. faulty sensors) must be traced and dealt with immediately.
nStop Alarm
Select this option to force the alarm signallers (connected to the alarm outputs) into standby status.
The following message will be shown:
ATTENTION!
Stop Alarm
+No new alarms can be generated during this phase.
Press any key to exit.
KEYPAD OPTIONS 9

nView buffer
Select this option to view the event buffer.
Use and to scroll the buffer.
The events will be shown on the second row of the display, as follows:
ØEvent type (e.g. Zone arming request)
ØEvent ID (e.g zone list)
ØAgent (e.g. keypad requesting the action)
ØAgent ID (e.g. User requesting the action)
ØHour, minute, year, month, day
+Some events do not have all five parameters.
Use and . to scroll the event list.
The upper row will show the event number and category, and the lower row will show the event description, as per
the following table.
CATEGORY DESCRIPTION
Type Event type
Zone Zone label
Dev. Device label
Code User code entered
D.Key Digital key used
Agent Agent
Key Key used
Time Instant
Partition Partition label
Id.T. Type ID
nZone status
Select this option to bypass / unbypass the zones of the keypad partitions, or to view their status.
The status of the zones of the keypad partitions will be shown.
Use or to scroll the zone list.
Use or to unbypass / bypass the selected zone.
If the zone is double-balanced----the status may be:
ØStdby (Standby)
ØAlarm
ØShort
ØTamper
Press to step back to the USER MENU.
Press to view open or bypassed status zones of armed keypad partitions.
10 Expandable multifunction control panel Academy40

nArm / Disarm partitions
Select this option to arm / disarm partitions.
The current status of the zone will be shown for example:
North Perimeter
Disarmed ↑↓
Use or to scroll the enabled partitions.
Press or to arm /disarm the selected partition.
Press to confirm the current status.
Press to arm the Panel as per programming.
nTeleservice request
Select this option to request Teleservice (Installer intervention via telephone).
A beep and the following message will confirm request Done:
Teleserv.request
D O N E!
Teleservice requests will stop ongoing telephone calls (Teleservice requests from the user have absolute priority), and
generate a Teleservice call to the installer.
+The installer must be equipped and ready for Teleservice, otherwise, the request will be ignored (refer to the fol-
lowing chapter for further information on Teleservice).
nEnable / Disable Teleservice [En./Dis.Teleser.]
Select this option to enable / disable the Panel for incoming Teleservice calls.
A beep and the following message will confirm request Done:
Teleservice
Disabled
Use or to Enable / Disable Teleservice.
Press to exit.
When the Panel is connected to the Installer PC (via telephone line), and is enabled for Teleservice, the installer
can:
ØView the Panel status: ----Partition status; Alarm memory; Zone bypass; Zone status; Event buffer; Peripheral de-
vice status.
ØChange the Panel status: ----Partition status; Delete the alarm memory; Bypass zones (User code PIN required).
ØChange the Panel parameters: ----all partitions must be disarmed.
The Teleservice option allows fast Installer intervention for trouble that does not require new wiring or pieces. The
installer can check out any anomalies detected by the Panel (blown fuses, low battery, etc.) and work on the system via
PC.
----Qdirectly above the icon means Teleservice is enabled.
nEnable / Disable Answering machine [En./Dis.Answer.]
This option is provided by the OmniaVOX board (optional).
Select this option from the USER MENU to enable / disable the Answering machine----incoming calls will be an-
swered by a Voice message.
A beep and the following message will confirm request Done:
Answering mach.
Disabled
Press or to Enable / Disable the answering machine.
Press to exit.
----Q above the icon means the Answer machine option is enabled, therefore, all the telephone options are
available (refer to TELEPHONE OPTIONS).
KEYPAD OPTIONS 11

nOutput management
Select this option to allow manual status control of one or more outputs. Manual control via keypad will allow the
User to turn duly wired household appliances ON and OFF (e.g. garden sprinklers, outdoor lighting, etc.).
The output list will be shown fist, followed by the list of devices.
Garden lights
ON-Act.OFF-Stdby
Use or to scroll the list.
Press or to Activate / Deactivate the selected output.
+Only outputs programmed as Reserved for manual control can be used for this purpose.
A similar option is available via telephone (refer to TELEPHONE OPTIONS).
nCode programming
This option is available to Master codes only. The Code hierarchy (Masters and Slaves) must be programmed by
the Installer. Master codes can select / deselect the Active status of their Slave codes, and change their PINs.
Active User codes An Active User code can operate its enabled partitions and options only.
If the Active status is deselected the User code will be unable to operate the system.
+The Active status of a Master User code cannot be deselected, therefore, this type of request will be signalled by
an error beep.
PIN A 4 to 6 digit Personal Identification Number (programmed by a Master code User) will identify each User code,
and its enabled options.
How to program User codes:
Step 1 Enter the Master code then select Code programm. option.
A list of the relevant Slave codes will be shown, as below:
John Doe
Active ↑↓
Use or to scroll the list.
Step 2 Press or to select / deselect Active status.
How to change the User code PIN:
Step 1 Press to view the User PIN list.
Step 2 Enter the new PIN----Qwill replace X as the new digits are entered.
John Doe
PIN **XXXX
Step 3 Press to save, or to abandon changes and step back to the Code programming phase.
nClear call queue
Select this option to stop all outgoing event calls, and delete the call queue.
A beep and the following message will confirm request Done:
Clear call queue
D O N E!
The ongoing call will be stopped, and the call queue will be cleared.
Press to exit.
12 Expandable multifunction control panel Academy40

DIGITAL KEY OPTIONS
Digital keys
Digital keys Academy40 can manage 250 different digital keys, and an unlimited number of clones keys (clones of key 250).
Each digital key can be programmed to operate specific partitions only, as per Customer requirements. The digital
keys have a non-volatile memory that stores a random code----selected from 4 billion code combinations, and can
be programmed with a progressive number (1 through 250), and a 16 character label (name).
+Only the Installer can program the digital keys and key readers.
In most models the control button is on the digital key, however, in the Eclipse/Sat model the control button is in-
side the key reader, therefore, the Sat key must be inserted into the Eclipse key reader and pushed slightly in or-
der to scan and select the arming mode.
+ECLIPSE key readers must be at least 5 cm apart.
Multiple
Systems Digital keys can be programmed to operate more than one Academy40 and Omnia system. Different groups of par-
titions can be managed for each Academy40 and Omnia system.
The operating procedures will be the same for each Academy40 and Omnia system.
Key readers Key readers have 3 LEDs (Red, Green and Amber) and a digital key slot.
Each key reader can be programmed with:
----the partitions it can operate (key reader partitions)
----type A arming mode (Amber LED)
----type B arming mode the (Green LED)
a) b)
e)
c)
d)
Figure 2 a) Inseritore senza contatti, da incasso; b) Attivatore senza contatti; c) Inseritore con contatti, da incasso; d) Inseri-
tore con contatti, da parete; e) Attivatore con contatti.
DIGITAL KEY OPTIONS 13

nArming Mode Options
Digital key in key
reader When a digital key is used on a key reader----all the signalling devices----assigned to the digital key and key reader
partitions will stop. If the digital key is programmed to stop calls----the ongoing call will be stopped, and the call
queue will be cleared.
How to scan configurations:
Press the digital key button to scan the 4 configurations of the LEDs.
ØGlobal arming: (Red LED ON) all the partitions----of the digital key and key reader in use----will arm when the digital
key is extracted.
ØGlobal disarming: (all LEDs OFF) all the partitions----of the digital key and key reader in use----will disarm when the
digital key is extracted.
ØA and B type arming: (Amber or Green LED ON) all the partitions----of the digital key and key reader in use----will
arm or disarm (as configured during programming) when the digital key is extracted.
ØStop alarm: all signalling devices (connected to the alarm outputs) of the partitions of the digital key and key
reader in use----will reset to standby status when the digital key is extracted.
The Panel will check the status of the unbypassed and Instant zones----of the partitions to be armed. If violated zones
are found (door or window open), the LED will flash to signal that arming the partitions will generate an alarm.
Exit without changing:
Step 1 Leave the key in the key reader.
Step 2 Press the digital key button for about 4 seconds.
Step 3 Extract the key when the 3 LEDs start flashing.
Disabled digital keys will generate the False Key Event on the key reader. The False Key Event will be signalled
by fast flashing on the 3 LEDs.
No digital key in
key reader When the key reader is empty (no digital key) the LEDs will perform as follows:
Red LED ON----at least one of the key reader partitions is armed
Red LED OFF----all the key reader partitions are disarmed
Amber LED ON----Type A arming mode
Green LED ON----Type B arming mode
The LEDs will indicate the status of the key reader partitions only. The Installer can program the key reader LEDs to
show Panel status at all times, or only in response to a valid digital key (LEDs OFF when the key reader is empty).
+If the configuration of the armed partitions does not match either Type A or B arming mode (for example a key
reader partition has been armed from the keypad) the Amber and Green LED will not go ON.
14 Expandable multifunction control panel Academy40

nGlobal arming
This option will arm all the partitions of the digital key and key reader in use.
Step 1 Insert a valid digital key into any key reader----all 3 LEDs on the key reader will go OFF.
Step 2 Press the digital key button once----the Red LED will go ON to indicate a Global arming request.
Step 3 Extract the digital key----the assigned partitions will arm.
+Flashing on the Red LED signals violation of at least one zone (door or window open), therefore, arming will gen-
erate an alarm.
nGlobal disarming
This option will disarm all the partitions of the digital key and key reader in use.
Step 1 Insert a valid digital key into any key reader----all 3 LEDs will go OFF.
Step 2 Extract the digital key----the assigned partitions will disarm.
nType A arming (Amber)
This option will arm specific partitions and disarm others, as per the programmed configuration.
Step 1 Insert a valid digital key into any key reader----all 3 LEDs will go OFF.
Step 2 Press the digital key button twice----the Amber LED will go ON to indicate a Type A arming request.
Step 3 Extract the digital key----the system will arm with Type A arming configuration.
+Flashing on the Amber LED signals violation of at least one zone (door or window open), therefore, arming
will generate an alarm.
nType B arming (green)
This option will arm specific partitions and disarm others, as per the programmed configuration.
Step 1 Insert a valid digital key into any key reader----all 3 LEDs will go OFF.
Step 2 Press the digital key button three times----the Green LED will go ON to indicate a Type B arming request.
Step 3 Extract the digital key----the system will arm with Type B arming configuration.
+Flashing on the Green LED indicates violation of at least one zone (door or window open), therefore, arming
will generate an alarm.
nStop alarm
To stop an alarm:
Insert a valid digital key into any key reader.
This option will not reset the alarm memories.
+If the digital key is programmed to stop calls----the ongoing call will be interrupted and the call queue will be
cleared.
DIGITAL KEY OPTIONS 15

16 Expandable multifunction control panel Academy40

TELEPHONE OPTIONS
The optional OmniaVOX board will allow the Panel to manage incoming and outgoing telephone calls (DTMF
only).
7 User codes are available for Panel Control via telephone. The installer canenable/disableUsercodeoptions andparti-
tions----aspercustomerrequirements.
There are two ways of accessing Panel Control via telephone:
---- Dialler Mode Access (after receiving a Dialler call);
---- Answer mode access (after calling the Panel).
nDialler mode access
The User can operate the Panel during a Dialler call, as follows.
#Step 1 Enter the User code PIN then press #before the message ends, otherwise, the Panel will end the call.
Step 2 Press the number key of the required option (refer to Function keys).
+If no key is pressed within the programmed timeout (factory default 30 seconds) the Panel will end the call.
Use the #key to cancel mistakes.
nAnswer mode access
The Answering machine Voice message must be recorded by the installer. The Answering machine option must
be enabled.
+The Answering machine option can be enabled / disabled from the keypad (refer to Enable / Disable Answering
machine).
Incoming calls will be answered as follows.
Teleservice
enabled If the Teleservice option is enabled (refer to the Enable / Disable Teleservice), the Panel will:
----answer with an audible signal (high tone)
----wait 4 seconds then play the Voice message
#Step 1 Enter the User code PIN then press #before the message ends, otherwise, the Panel will end the communica-
tion.
Step 2 Press the number key of the required option (refer to Function keys).
+If no key is pressed within the programmed timeout (factory default 30 seconds) the Panel will end the call.
Use the #key to Undo.
Teleservice
disabled If the Teleservice option is disabled (refer to Enable / Disable Teleservice), the Panel will:
----answer with an audible signal (low tone)
----wait 4 seconds then play the Voice message
+Do not enter the User code PIN during the 4 second pause.
#Step 1 Enter the User code PIN then press #before the message ends, otherwise, the Panel will end the communica-
tion.
Step 2 Press the number key of the required option (refer to Function keys).
+If no key is pressed within the programmed timeout (factory default 30 seconds) the Panel will end the call.
Use the #key to Undo.
User code PIN (Personal Identification Number)
Master codes can select / deselect the Active status of their Slave codes, and change their PINs. The User code
PIN allows access to Panel Control via telephone.
+If an invalid User code PIN is entered, or the requested option is not enabled for the User code in question the
Panel will emit an error beep.
TELEPHONE OPTIONS 17

Function keys During Dialler or Answer mode access the keys on the telephone number pad will operate as function keys, as
follows.
nExit Request #
Press #to exit the ongoing request.
The Panel will step back to Enter data status and emit a ready beep.
nStop Alarm / On hook *
Dialler mode access----press *to stop the alarm, end the Dialler call, and clear the Dialler call queue.
Answer mode access----press *to stop the alarm and end the call to the Panel.
nRemote listen-in 1
Press 1to start the remote listen-in phase.
The User will be able to listen to sounds in the protected environment.
Press #to exit this phase.
nRemote telephone access 2
Press 2to start Remote telephone access (2Way communication with persons in the protected environment).
Press #to exit this phase.
+This option can be used for Teleassistance. The elderly will find this option particularly useful, as they can use a
remote-control device (pendant) to send emergency messages----via the Panel----to the Central station. The Cen-
tral station will be able to identify the caller, and communicate with the person via the Panel when the emergency
message ends.
nCheck input zone status (All) 300
Press 300to check the status of all the input zones with Voice messages.
The Panel will play the active messages then step back to Enter data status and emit a ready beep.
+A Standby status message and an Alarm status message can be assigned to each Input.
nCheck input zone status 3??
Press 3then press the two keys that form the identifier number of the required Input zone (refer to the MEMO
Chart).
The following situations may occur:
ØVoice messages assigned to the input:
----the Panel will play the active message then step back to the Enter data status and emit a ready beep.
ØNo Voice messages assigned to the input:
In Standby status----the Panel will emit a beep (high tone), then step back to the Enter data status and emit a
ready beep.
In Alarm status----the Panel will emit 2 beeps (high tone), then step back to the Enter data status and emit a
ready beep.
nDisable Output 4??
Press 4then press the two keys that form the identifier number of the Output to be disabled (refer to the MEMO
Chart).
The panel will disable the Output then step back to Enter data status and emit a ready beep.
+This option applies to outputs that are Reserved for manual control. If the User code is not enabled for this option,
or a non-reserved output is requested the Panel will emit an error beep.
nEnable Output 5??
Press 5then press the two keys that form the identifier number of the Output to be disabled (refer to the MEMO
Chart).
The panel will enable the Output then step back to Enter data status and emit a ready beep.
+This option applies to outputs that are Reserved for manual control. If the User code is not enabled for this option,
or a non-reserved output is requested the Panel will emit an error beep.
18 Expandable multifunction control panel Academy40

nArm Partition 6?
Press 6then press the Partition identifier number key (refer to the MEMO Chart).
The panel will arm the Partition then step back to Enter data status and emit a ready beep.
nGlobal arming 60
Press 60 to arm all the partitions of the User code in question.
The panel will arm the enabled partitions only then step back to Enter data status and emit a ready beep.
nDisarm Partition 7?
Press 7then press the partition identifier number key (refer to the MEMO Chart).
The panel will disarm the Partition then step back to Enter data status and emit a ready beep.
nGlobal disarming 70
Press 70 to disarm all the partitions of the User code in question.
The Panel will disarm the enabled partitions only then step back to Enter data status and emit a ready beep.
nAlarm reset 8
Press 8to reset the alarm memory of the partitions controlled by the entered User code. For the outcome of this
request refer to User menu options.
The Panel will reset the Partition then step back to Enter data status and emit a ready beep.
nDeselect Active status 9
Press 9to deselect the Active status of the entered User code.
The User code will be unable to operate the system until it is reinstated as Active (refer to Code programming).
This security feature allows the User to disable the User code PIN that accessed the system via telephone. In this
way, the system will be protected against illegal use of the User code PIN, in the event interception of the touch
tones.
+If 9is pressed by mistake----press 9again to Undo before the call ends.
TELEPHONE OPTIONS 19

MEMO Chart The Installer must fill in the Telephone Options MEMO Chart (see below) with the descriptions of the inputs, out-
puts and partitions, etc. and provide each User with a copy.
Cut along the dotted line and fold the chart in two (parts A and B back to back) then seal it in a plastic cover.
AREA
Management
OUTPUT
Management
Telephone
Operation
INPUT
Check
Remote Listen-in
Quit Command
Alarm Stop - Disengage
Telephone
Read Input ...
ReadInput...
Disable Output ...
DisableOutput...
Arm Area ...
Arm Area ...
Disarm Area ...
Disarm Area ...
All Areas
Alarm Reset
Enable /Disable PIN
Enable Output ...
EnableOutput...
A
B
20 Expandable multifunction control panel Academy40
Other manuals for academy 40
1
Table of contents
Other Bentel Control Panel manuals
Popular Control Panel manuals by other brands
Texecom
Texecom Premier 24 user guide
INIM Electronics
INIM Electronics PREVIDIA MAX System guide

AUTOTERM
AUTOTERM PU-27 operating manual
Garmin
Garmin GPSMAP 12 3 Series owner's manual
Pentair Pool Products
Pentair Pool Products EasyTouch 8 Installation and user guide

INIM
INIM GameOver SmartLiving 505 Installation and programming manual
