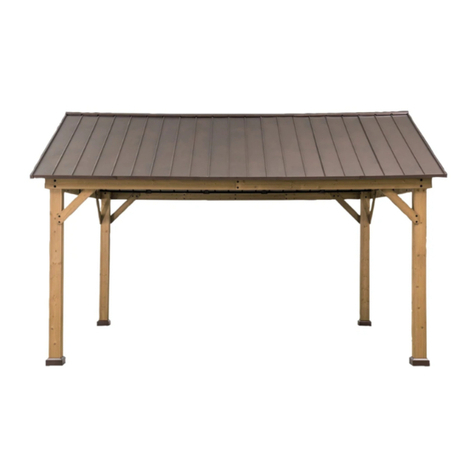
Berkley Jensen 254270 User manual

ARTICLE # 254270
ASSEMBLY INSTRUCTIONS
Note: The pavilion needs to be installed in cooperation with five people.
The following tools are notincluded and needed for assembly:
Drill Tape Measure Hammer Screwdriver Ladder5 people
If you have comments or questions, please contact BJ’s Wholesale Club at 1-800-934-1204.
Carefully check all packaging materials before discarding.
Make sure you have all the parts and hardware as identified on the parts list.
Do not assemble if there are missing pieces.
For any questions, replacement parts or issues about our product,
14’ x 12’
WOOD PAVILION

2/ 32
Warning! To reduce the risk of serious injury, read the following safety instructions before assembling
and using the pavilion.
Caution! Always keep children under close supervision whilethey are using or around this product.
Never leave children unattended.
This product is intended for outdoor use only.
The product should be assembled on a flat stable surface.
Do not assemble the pavilion on unstable surfaces.
Ensure the location and clearance of your pavilion is acceptable.
The pavilion must be anchored with stakes into the ground for added safety. It is recommended that
it should not be permanently attached to a concrete floor or platform.
Arrange the necessary manpower when assembling or moving the product.
Some parts may contain sharp edges. Wear protective gloves and glasses if necessary.
Keep children and pets away while setting up the pavilion.
Check all nuts and bolts periodicallyfor tightness. When required, tighten them again.
Repairing and replacing parts should be done by a qualified technician.
The pavilion is intended for decorative and shade purposes only, and is not designed to withstand
harsh weather, including high winds, rain and snow.
If the product is not being used for long periods of time (e.g. winter), it should be stored in a clean,
dry environment.
Do not put a Liquid Propane or Wood Burning fire pit or fireplace inside the product.
Do not climb or place heavy objects onto the pavilion roof.
Retain the original packaging to store and protect the pavilion during the winter months.
Do not use or enter the pavilion if the following conditions exists
1. Visible movement of supports, roofing panels or a sagging roof.
2. Unusual noise from the pavilion.
3. Deformed roof panels.
4. Damaged or missing bolts/fasteners.
Please check your HOA, Local, and State Governments prior to purchasing and assembling
the pavilion. These local organizations may require permits and specific requirements for installation.
Maintain your instruction manualfor future reference
Warranty: Please retain you receipt for proof of purchase.
I
mportant Safety Instructions

3/ 32
Description Label Part Number Qty Part Image
Post 08 P000200227 4
Arc Support 1 10 P005000200 4
Arc Support 2 11 P005000201 4
Outer Long Left
Beam(Short)01 P000400506 2
Outer Long Right
Beam(Short)02 P000400507 2
Inner Long Middle
Beam 05 P000400510 4
Inner Short Beam
(Short)07 P000400511 4
Outer Long Left
Beam(Long)16 P000400946 2
Outer Long Right
Beam(Long)17 P000400947 2
Inner Short Beam
(Long)18 P000400948 4
Triangular
Support Beam 22 P000601468 4
Triangular Middle
Support Beam 23 P005000439 2
Triangular Frame
Slanting Beam 24 P005000438 4
Base Cover B P006100177 4
Base C P000100338 4
Triangular
Connector 1 C1 P000501250 2
Part List

4/ 32
Triangular
Connector 2 C2 P000501251 2
Triangular
Connector 3C3 P000501252 4
Beam Upper
Connector D P000501253 2
Triangular Upper
Press C4 P002200226 2
Big Roof Beam 1 F3 P000601458 2
Big Roof Beam 2 F4 P000601459 1
Roof Beam
Connector 1 G1 P000501247 2
Roof Beam
Connector 2 G2 P000501248 2
Roof Beam
Connector 3 G3 P000501249 2
Big Roof Middle
Beam H1 P00060209301 8
Middle Beam
Lower Connector I P00050161901 8
Support Tube 1 J1 P005000434 4
Support Tube 2 J2 P005000435 2
Hook P P005800001 1
Big Roof Lower
Tube 1 L5 P00060209401 2
Big Roof Lower
Tube 2 L6 P00060209501 2
Big Roof Lower
Tube 3 L7 P00060209601 2
Big Roof Lower
Tube 4 L8 P00060209701 2
Big Roof Lower
Tube 5 L9 P00060209801 2

5/ 32
Big Roof Side
Tube 1 M3 P000601466 2
Big Roof Side
Tube 2 M4 P000601467 2
Big Roof Small
Beam N1 P000601465 20
Small Beam
Presser O P002200224 8
Roof Cover P2 P00070104001 14
Big Roof Cover 1 R3 P000800257 2
Big Roof Cover 2 R4 P000800258 1
Steel Pin S P005100267 12
Catch T P005600322 2

6/ 32
AA Bolt M10*205 H010010276 8+1
BB Flat Washer M6 H050030001 192+10
CC Screw M5*40 H030050057 80+4
DD Nut M6 H040010004 8+1
EE Screw M5*30 H030050058 124+7
FF Bolt M6*15 H010020011 172+9
GG Bolt M6* 75 H010020024 8+1
HH Bolt M8*35 H010030083 16+1
II Bolt M8*35 H030030010 18+1
KK Bolt M8*25 H010030084 24+2
LL Non-slip Nuts
M10 H040050020 8+1
MM Flat Washer M8 H050030002 78+4
NN Flat Washer
M10 H050030003 24+2
Hardware Pack

7/ 32
OO Screw M10*80 H030010031 8+1
PP Stake Φ8*180 H070010003 8
QQ Bolt M6*35 H010020013 4+1
RR M3 Drill H090990002 2
SS T-Nut
M8*20 H040090005 16+1
UU Non-slip nuts
M8 H040050021 10+1
VV T-Nut
M8*8 H040090004 24+2
WW Bolt M8*50 H010010363 10+1
Z1 Wrench M6 H090010017 2
Z2 Allen Key M8 H090030005 1
Z3 Wrench M8 H090010012 2
Z4 Wrench M10 H090010015 2

8/ 32
1
4X
16X
4X
4X

9/ 32
2
16X
16X
4X
4X
4X

10 / 32
3
16X
16X

11 / 32
4
4X
4X
4X
2X
2X
2X
1X

12 / 32
5
4X
4X
2X
2X
4X
1X

13 / 32
6
80X

14 / 32
7
4X
12X
4X
4X

15 / 32
8
4X
4X
4X
12X

16 / 32
9
d1=d2
16X
16X
32X
4X
4X
Rt
∠
90
Assembly Tip on Step 9:
Please measure to make sure the length of d1 is equal to d2
before moving to next step to ensure a square frame and best
results. Keep the beam at right angles to the post, the post
at right angles to the ground, and keep the beam horizontal.

17 / 32
1877.5
190
190
1877.5
10
2X
36X
2X
2X

18 / 32
11
2X
4X
4X
2X
8X
12X

19 / 32
12
10X
20X
10X

20 / 32
13
2X
8X
16X
2X
2X
2X
8X
1X
Table of contents
Other Berkley Jensen Accessories manuals
