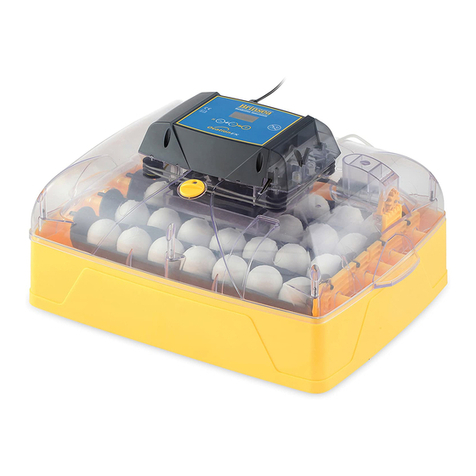
Brinsea Ovation 28 Advance User manual


2
AF36 US Issue 03
Read the instructions before use! Do not cover!
Damaged appliances must not be used.
The appliance and its supply cord must be placed in an indoor area not subject to splashes of water or wet conditions and protected from or out of reach
of animals.
Repairs must be carried out only by a suitably qualified person.
This appliance must not be used, cleaned or maintained by children or persons with reduced physical, sensory or mental capabilities or lack of experience
and knowledge without supervision. Children must not play with the appliance.
Disconnect the incubator from the mains power supply during cleaning. Ensurethat all electrical parts are kept dry.
Please read these instructions carefullybeforesetting up your incubator to achieve best results and keep these instructions safe for future reference.
This document includes recommended procedures for successful hatching but incubation involves the control and manipulation of a large number of factors and in
certain circumstances different procedures may be necessary.
For more detailed information on all aspects of egg incubation including helpful advice on getting best results pleasevisit our website at www.brinsea.com
Your incubator is designed to allow the userto vary the incubation conditions to suit a wide range of species in different ambient conditions and the specificset-up for
every situation is beyond the scope of these instructions.
For more information on incubation and hatching please download our FREEIncubation Handbook:
www.brinsea.com/brochures/BrinseaIncubationHandbook2016.pdf
To register your new Brinsea product please visit www.brinsea.com and follow the link on the right hand si de of the home page to qualify for your free 3 year
guarantee.
Record your appliance serial number here: __________________
3
AF36 US Issue 03
1Setting Up Your Incubator
Unpacking
Part Quantities
Assembly
Location & Installation
2 Product Introduction –Functional Features
3Settings –Control Menu
4Display
5Temperature
6Humidity and Ventilation
7Eggs
8Periodic Incubation Cooling
9Hatching & Cleaning up
10 Specifications
CONTENTS
-
4
5
6
9
10
11
12
14
15
17
18
19
20

4
AF36 US Issue 03
1 SETTING UP YOUR INCUBATOR
UNPACKING
Your incubator has been s upplied in protective
pa ckaging. Please remove a ll ta pe, strapping and
pa cking from the i ncubator a nd parts. Retain the
carton a nd packing materials to enable the unit to
be repacked.
1: Remove the packaging and lift off the top ofthe
incubator.
2: Remove the card packing i nserts a nd elastic
ba nds from inside the i ncubator.
3: Check that the electrical supply matches the
machine’s requirements (ma rked on the technical
la bel inside the cl ear top).
1.
2.

5
AF36 US Issue 03
1
4
2
1 SETTING UP YOUR INCUBATOR
PART QUANTITIES
The di agram s hows a ll the pa rts that have been
supplied to you. Ens ure you ha ve the correct
quantities of each pa rt. If there a re any parts
da maged or missing please contact your retailer or
Brinsea Products (a t the address a t the end of the
document). Damaged appliances must not be used.
1: Top
2:Egg Carriers (4)
3: Link
4: Wa ter Pan Shutter (1)
5: Wa ter Pan Covers (2)
6: Ba s e
7: Ha tching Ma t
3
6
5
7

6
AF36 US Issue 03
1 SETTING UP YOUR INCUBATOR
ASSEMBLY
1: Fit the wa ter pan shutter to the wa ter pan
cover.
2: Place the water pan covers into their positions
in the base.
See section 6 for advice on humidity.
3: Fi t the link into i ts slots ensuring the smooth
side is facing inwards.
2.
1.
3.
Link slots

7
AF36 US Issue 03
1 SETTING UP YOUR INCUBATOR
ASSEMBLY
4: Fi t the egg carriers into the supports. The pegs
must fi t in the sockets.
4.
Detail A
Detail B
Detail A
Detail B

8
AF36 US Issue 03
5.
1 SETTING UP YOUR INCUBATOR
ASSEMBLY
5: Place the top onto the bas e in the correct
orientation. The egg turning motor must sit over
the link. Check the top fits flush all the way around
the base edge.

9
AF36 US Issue 03
1 SETTING UP YOUR INCUBATOR
LOCATION AND INSTALLATION
Your i ncubator will give best results in a heatedroom
free from wide temperature va riations a nd with
generous ventilation –pa rticularly if several
incubators are running at the same ti me.
Ensure that the room temperature ca nnot drop on a
col d night. Ideally thermostatically control the room
at between 68 a nd 77°F (20 and 25°C). Never allow
the room temperature to drop below 59°F (15°C).
Make s ure that the incubator ca nnot be exposed to
di rect sunlight and is used on a flat, l evel surfaced
worktop or table, not on the floor. Please ensure the
incubator is used on a water resistant surface.
Connect the mains ca ble to the incubator lid. Ensure
the connector i s pushed fully home in its socket.
1.
2.

10
AF36 US Issue 03
2 PRODUCT INTRODUCTION
FUNCTIONAL FEATURES
1: Di gi tal Display
2: Control Buttons
3: Adjustable air vent
4: Egg Carriers (4)
5: Wa ter Pan Shutter
1
2
3
4
5

11
AF36 US Issue 03
3 SETTINGS
CONTROL MENU
The diagram on the right i llustrates how to navigate
through the control menu. Look at the key below to
understand what each button doeswhen pressed.
Pres s both buttons to unlock the
menu.
Sel ect the option / return to the menu.
Go forwa rd one s creen / increase the
va lue / display i n Celsius.
Go back one screen / decrease the value /
di s play in Fahrenheit.
INCUBATION TEMPERATURE
Range 20.0 –40.0°C (68.0 –104.0°F).
De fault 37.5°C (99.5°F). See s ection 5.
RELATIVE HUMIDITY
(Manually controlled on Advance product)
HIGH TEMPERATURE ALARM
Ra nge 1.0 –5.0°C (1.8 –9.0°F) above set incubation temperature.
De fault 2.0°C (3.6°F). See s ection 4.
LOW TEMPERATURE ALARM
Ra nge 1.0 –5.0°C (1.8 –9.0°F) bel ow s et incubation temperature.
De fault 3.0°C (5.4°F). See s ection 4.
CELSIUS / FAHRENHEIT DISPLAY
Swi tches all temperature figures between °C a nd °F.
Defa ult °C. See s ection 5.
SAVE
All changes are saved. Return to normal operation screen.
CANCEL
All changes are ignored. Return to normal
opera tion screen.
TURNING MODE
Swi tches the turning s ystem on or off.
Defa ult ON.
TURNING INTERVAL
Sets the delay between turns.
Ra nge 5 –180 minutes.
Defa ult 45 mi nutes.
PERIODIC INCUBATION COOLING
Swi tches heater off for a timed period once every 24 hou rs. Do
not use before day 7 of incubation or whilst hatching.
Ra nge 10 –360 mi nutes. Default - OFF. See section 8.
37.5C
OK -+
TEMP
OK
RH%
OK
T-MODE
OK
TURN INT
OK
ALARM HI
OK
ALARM LO
OK
COOLING
OK
C/F
OK
SAVE
OK
CANCEL
OK
RH 20%
EX ONLY
TURN ON
OK 0 1
MINS 45
OK - +
HI 2.0C
OK -+
LOW 3.0C
OK -+
MINS OFF
OK - +
DISP C
OK C F

12
AF36 US Issue 03
4 DISPLAY
DIGITAL CONTROL SYSTEM
The Ovation Advance control system utilises a highly
accurate, individually cal ibrated s ensor for
temperature. Be ca utious of low cost analogue or
di gital thermometers when comparing them with
the i ncubator display reading.
(FIG 1)
Normal Operation –Temperature, relative humidity and turn system status are continuously displayed.
•The asterisk “*” a djacent to the temperature reading shows when the heater power is on. When warming the asterisk will be
continuously on, once warmed up the asterisk will slowly fl ash as the heater is pulsed to maintain the correct temperature.
When reducing the temperature setting the asterisk may go off, this is normal.
•During periodic incubation cooling (see section 8) the asterisk will be replaced by an arrow: “↓”.
•If turni ng is switched off an “O” flashes at the corner of the display.
•If turni ng is s witched on a l ine “/” s ymbol rotates at the corner of the display.
Changing Settings –The Control Menu allows the various settings to be modified and saved. All settings are retained in the event
of a power cut.
•To access the Control Menu pressthe +a nd –buttons simultaneously to unlock the display. For full details of menu s ettings
pl ease refer to the contents on page 3 a nd view the relevant sections.
Power Loss Display (FIG 1) -- If power has been interrupted due to a power cut (or when first switching on) a “P” is shown
flashing in the corner of the display. Press OK for 2 or more seconds to clear the indicator. If the reason for the power los s is not known
check the power cable connections are secure.
•Once the “P” i ndicator has been cleared, it is advisable to ca ndle eggs a number of ti mes to check for losses.
T*37.5
C
H 35%
P/
T*37.5
C
H 35%
T*37.5C
H 35% P/
Example settings for poultry:
Temperature: 99.5°F (37.5°C)
Humidity: 50-60% RH
Turning interval: 45 minutes (turn off from
day 19 and remove egg carriers)
Cooling: OFF
(Add water to one or both water pans and
adjust vent to achieve desired humidity.)

13
AF36 US Issue 03
4 DISPLAY
(FIG 2)
(FIG 3)
(FIG 4)
(FIG 5)
T*32.1C
H 35% L/
High Temperature Alarm Display (FIG 2) –If the measured temperature inside the incubator goes up by more than the
figure in the ALARM HI screen, the alarm will sound immediately and “H” will be displayed. Press OK to silence the alarm for 30 minutes.
•If the high temperature problem rectifies itself the “H” remains on the display to show this has happened. Press OK to clear the
indicator. Check the incubator is not (and has not been) i n direct s unlight or too near a heat source such a s a room heater. It is
advisable to candle eggs a number of times after thisevent to check for l osses.
Low Temperature Alarm Display (FIG 3) –If the measured temperature inside the incubator goes down by more than the
figure in the ALARM LO screen, after 60 minutes “L” will be displayed and the alarm will sound. Press OK to silence the alarm for 30
minutes.
•If the l ow temperature problem rectifies i tself the “L” remains on the display to s how this has happened. Press OK to clear the
indicator. Check the incubator is not (and has not been) i n a cold draught and that the room temperature has not dropped
significantly. It is advisable to ca ndle eggs a number of times after this event to check for losses.
Low Room Temperature Alarm (FIG 4) –If the calculated room temperature remains too low for optimum results for more
than 1 hour a warning is displayed “-RM” and an alarm will sound. Press OK to silence the alarm for 30 minutes.
•If the l ow temperature problem rectifies itself the “-RM” remains on the display to s how this has happened. Press OK to clear
the i ndicator.
•Check the incubator is not (and has not been) in a cold draught a nd that the room temperature has not dropped significantly. It
is advisable to candle eggs a number of times after this event to check for losses.
High Room Temperature Alarm (FIG 5) –If the calculated room temperature remains too high for optimum results for
more than 1 hour a warning is displayed “+RM” and an alarm will sound. Press OK to silence the alarm for 30 minutes.
•If the high temperature problem rectifies itself the “+RM” remains on the display to s how this has happened. Press OK to clear
the i ndicator.
•Check the incubator is not (and has not been) in direct sunlight or too near a heat s ource such as a room heater. The eggs
thems elves create significant metabolic heating at later stages of incubation and may contribute to this i f roomtemperature is
hi gh. It is advisable to ca ndle eggs a number of times after this event to check for l osses.
T*37.5C
-RM /
T*37.5C
+RM /
T*39.8C
H 35% H/

14
AF36 US Issue 03
5 TEMPERATURE
SETTING THE TEMPERATURE
1. Pres s the - and + buttons
s imultaneously to unlock the
Main Menu.
2. Pres s OK to select the
temperature screen and
adjust as necessary using the
+ a nd –buttons.
3. Pres s OK to return to the
Main Menu and then s croll
down to SAVE. Press OK to
save the changes.
When reducing temperature, the asterisk may go
out while theincubator cools –this is normal. Adjust
temperature wi th ca re –s mall differences have
l a rge e ffects on hatching performance.
CHANGING TO FAHRENHEIT
1. Pres s the - and + buttons
s imultaneously to unlock the
Main Menu.
2. Scrol l to the C/F option and
pres s OK to s el ect the C/F
di s play screen.
3. Pres s the + button to select
°F or the –button to select
°C.
4. Pres s OK to return to the
Main Menu and then scroll
down to s a ve. Pre ss OK to
save the changes.
Please Note: Your incubator will be factory s et for hen eggs, you may wish to a djust the temperature in the menu to suit the types
of eggs you a re i ncubating.
As the incubator warms up and approaches its control s etting the ‘heater on’asterisk “*” wi ll change from continuously on to flashing.
Allow the i ncubator to s tabilise for a t least an h our before adjusting the temperature.
Recommended temperatures: Typical incubation period:
Hens 99.3 –99.6°F 37.4 –37.6°C 21 da ys
Phea sant 99.6 –100.0°F 37.6 –37.8°C 23-27 days
Qua il 99.6 –100.0°F 37.6 –37.8°C 16-23 days
Ducks 99.3 –99.6°F 37.4 –37.6°C 28 da ys
Parrots:
Amazons 98.3 –98.6°F 36.8 –37.0°C 24-29 da ys
Ma caws 98.3 –98.6°F 36.8 –37.0°C 26-28 days
Love bi rds 98.3 –98.6°F 36.8 –37.0°C 22-24 days
African Grey 98.3 –98.6°F 36.8 –37.0°C 28 da ys
Eclectus 98.3 –98.6°F 36.8 –37.0°C 28 da ys
•Devel oping embryos are fairly tolerant of short term temperature drops and the user need not be concerned about cooling
tha t occurs when inspecting eggs. Temperatures above i deal ca n quickly have a s erious detrimental effect on hatch rates and
must be avoided.
•The Ovati on Adva nce has a built-in temperature alarm which warns of high or low temperatures. See s ection 4 for details.

15
AF36 US Issue 03
6 HUMIDITY AND VENTILATION
UNDERSTANDING HUMIDITY
Short term variations in humidity a re not important.
The a verage humidity over the i ncubation period
needs to be near optimum to achieve the ideal
wei ght loss.
Hi gh humidity for the day or two of hatching is also
important. Beware chronic, excessive humidity.
Typical Humidity:
Generally a ccepted incubation RH levels for s pecies groups
in Ovati on 28 i ncubators:
During incubation: Poultry 50-60% RH
Waterfowl 55-65% RH
Parrots 40-50% RH
Hatching: All species 60-65% RH
Typical Weight Loss:
Typical ideal weight losses for species groups:
Poultry 13%
Waterfowl 14%
Parrots 16%
For more specific information on particular species’ requirements check the relevant literature.
Two fa ctors affect incubation humidity: water evaporation within the cabinet (from eggs as well as from additional water) and
levels of ventilation. The water content of the air being drawn through the incubator will also have an effect.
There are two methods available to bird breeders to a chieve correct humidity l evels:
1:Monitor humidity levels and adjust to match published guidelines for different species.
2: Monitor egg weight loss which varies as a direct result of humidity and correct against published weight loss figures
for the species. This is the most reliable method and is recommended –particularly where poor hatch rates are
experienced or if eggs of high value are being incubated.
Eggs lose moisture through their shells and the rate of evaporation depends on the humidity levels around the eggs and
the shell porosity. During incubation eggs need to lose a fixed amount of water which corresponds to a loss in weight
of around 13-16% depending on species. By weighing eggs periodically during incubation it is pos sible to monitor and,
if necessary, correct humidity levels to achieve the correct weight loss.
For more detailed i nformation on all aspects of egg incubation including helpful a dvice on getting best results please visit our
website at www.brinsea.com/brochures/BrinseaIncubationHandbook2016.pdf

16
AF36 US Issue 03
6 HUMIDITY AND VENTILATION
ADJUSTING THE RELATIVE HUMIDITY LEVEL
1:To ma intain a l ow humidity level do not add water
to either of the pans.
To increase humidity, first add water to the water pan
with the sliding shutter and set the sliding water pan
shutter to a chieve the desired humidity level (0 =
lowest to 5 = highest).
To further increase the humidity, a dd wa ter to the
second water pan a nd remove the s liding water pan
shutter from the first water pan a s necessary.
2: To fi ll the wa ter pans take the l id off. Open the
s l iding water pan s hutter i f fitted. Ca refully pour water
into the fill points ensuring you do not fill beyond the
“MAX” (a s s hown i n diagram 2).
Humi dity levels ma y be further i ncreased by placing
strips of evaporating ca rd or cloth into one or more of
the wa ter channels. Eva porating ca rd is a vailable from
Brinsea Products.
HATCHING
In a ll ca ses the humidity for hatchingneeds to be high.
Beca use of the short duration i nvolved wa ter/weight
loss will not be significantly a ffected. High humidity is
ne cessary to prevent membranes drying and hardening
before the hatch fully emerges. Humidity will naturally
increase as the first eggs begin to hatch and internal
membranes begin to dry. This effect i s in addition to
the increased area of wa ter evaporation from the
water channels.
During ha tching the high humidity l evels will fall
dra matically when the lid is opened and will take some
time to build up. Resist the temptation to lift the lid
frequently –leave for a t l east 6 hours between
ins pections.
In practice the minimum and maximum levels of humidity a chievable in an incubator depend upon several factors including the ambient
condi tions in the incubation room. You may need to allow24 hours for humidity to fully s tabilise a fter making changes.
If you cannot achieve the relative humidity level required consider these notes:
Humidity will not go low enough
•Open the adjustable air vent fully to help.
•Slide the water pan shutter to the lowest setting(0).
•Remove all water.
•A l ower l imit will be determined by the moisture content ofthe a mbient air, particularly in warm humid conditions. This can only
be countered by dehumidification of the room air outside the incubator with a proprietary dehumidifier but is ra rely a problem in
pra ctice.
Humidity will not go high enough
•Close the a djustable air vent to its minimums etting to help. Remove the water pan shutter. Fit evaporatingca rd strips avai lable
from Brinsea or your stockist.
Condensation
It i s normal for some condensation to occur on the cooler exposed parts of the clear top. This natural phenomenon is not a hazard or a
probl emfor incubation but may indicate the room is cooler than optimum.
1.
2
.
OPEN
CLOSE
Close the vent to
increase humidity
or open the vent
to decrease
humi dity.
SLIDE TO DECREASE
HUMIDITY
SLIDE TO INCREASE
HUMIDITY
Fill up here

17
AF36 US Issue 03
7 EGGS
SETTING THE TURNING OPTIONS
1. Pres s the - and + buttons
simultaneously to unlock the
Main Menu.
2. Pres s + to scroll to the TURN
0/1 option.
3. Pres s OK to select the turning
mode s creen and us e the +
and –buttons to set to ON or
OFF a s required.
4. Pres s OK to return to the
Main Menu. The TURN INT
option will now be displayed.
Pres s OK to s elect the turn
interval s creen and use the +
and –buttons to set the delay
between turns i n minutes as
required.
5. Pres s OK to return to the
Main Menu and then scroll
down to SAVE. Press OK to
save the changes.
STORING, SETTING AND TURNING EGGS
Ensure that you store eggs in cool, damp conditions. Most species may be safely s tored for up to 14 days before serious reductions in
ha tch rates are likely. Daily turningof stored eggs also helps maintain hatchability.
Di scard cracked, mis-shaped and heavily soiled eggs (if possible). Only wash soiled eggs using a branded egg wash solution such as Brinsea
Incubation Disinfectant Concentrate following the manufacturer’s instructions. It is essential to wash eggs in solution which is significantly
warmer than the egg. Bear in mind that all s olutions will remove the outer cuticle from the egg as well as the dirt and may l eave the egg
a t grea ter risk from bacterial contamination in the future.
The Ovati on 28 Adva nce is designed to accommodate eggs ofdifferent sizes from pheasant to duck eggs or larger/ smaller eggs using the
al ternative egg carrier.
Before setting eggs ensure that the incubator has been running for s everal hours and has stabilised at the correct temperature.
Set the eggs in the egg carriers provided. The eggs need to be set lying flat or with their pointed ends facing down. Switch the turning
s ys tem on. A revolving line symbol “/” s hould be shown i n the corner of the display.
Check the water level every 2 days or so and temperature daily. Candle the eggs after 1/3rd of the incubation period has elapsed to reject
clear, infertile eggs. Remember to s top the turning 2 days before the eggs a re due to hatch.
Pointed ends of eggs facing down
Eggs lying flat

18
AF36 US Issue 03
BACKGROUNDINFORMATION ON PERIODIC COOLING
The precise details of which days and what cooling period each day should be used for best effect are not known. Brinsea have assessed
the a va ilable research a nd s uggest that poultry, wa ter fowl and game bird eggs have a 30 mi nute daily cooling period from day 7 through
to 2 da ys before eggs are due to hatch (the same point that automatic turning would normally be s topped).
COOLING IS NOT RECOMMENDED FOR PARROTS AND BIRDS OF PREY BECAUSE THE RESULTS OF COOLING HAVEN’T YET BEEN
ESTABLISHED. For further details please visit the Brinsea website at www.brinsea.co.uk/cooling
HOW IT WORKS WITH YOUR INCUBATOR
•The periodic cooling feature turns the incubator’s heater and low temperature alarm off for a selectable period but keeps the
fa n running. After the cooling period is complete the incubator reverts to normal temperature and the alarm is automatically
reset.
•Ea ch cooling period s tarts a t approximately the same time each day (24 hours between start times). The first cooling period will
start 24 hours after the incubator was last switched on. If there is a power interruption the 24 hour delay starts again.
•During the coolingperiod the heater asterisk goes off and an arrow “↓” is displayed. When the cooling period ends the asterisk
is shown a nd the i ncubator warms to incubation temperature. The time ta ken to return to i ncubation temperature depends on
the room temperature a nd may ta ke 30 or more minutes.
8 PERIODIC INCUBATION COOLING
SETTING THE COOLING PERIOD
The cooling function is not essential. It’s an optional
feature that may be a djusted for breeders wishing to
experiment. The fa ctory default is s et to “cooling
OFF”. Do not use before day 7 of incubation or whilst
hatching.
1. Pres s the - a nd + buttons
s imultaneously to unlock the Main
Menu.
2. Pres s the + button to s croll to the
cool ing option.
3. Pres s OK to s elect the cooling
screen. Use the + and –buttons to
s elect OFF or 10 to 360 mi nutes of
cooling.
4. Pres s OK to accept the figure and
then s croll to SAVE and press OK
to s a ve the changes.

19
AF36 US Issue 03
9 HATCHING & CLEANING UP
HATCHING
1:If hatching in the Ovation 28: Two days before the
ha tch is due, remove the top, egg carriers and their
li nk. Remove the water pan shutter and water pan
covers.
2: Ins ert the hatching mat, ribbed side up. Re -fit the
water pan covers (wi thout the water pan s hutter)
over the ha tching mat. La y the eggs directly onto the
mat. Don’t re-use hatching ma ts. Replacements are
available from brinsea.co.uk, brinsea.com or your
local stockist (product code AF014).
3:Put the top back on.
4: Turni ng must be s witched to OFF i n the control
menu. Hatching humidity l evels need to be high (see
section 6 above).
When most eggs have hatched (12 to 48 hours after
the fi rst egg hatches) remove the hatchlings to a
brooder. The Brinsea EcoGlow 20 a nd 50 a re idealfor
poultry and wa terfowl etc. The Brinsea TLC-40 and
TLC-50 Brooders a re recommended for exotics.
During hatching the high humidity levels will fall
dra matically when the lid i s lifted and will take some
time to build up. Resist the temptation to open the
incubator frequently –leave for at l east 6 hours
between inspections.
CLEANING UP
IMPORTANT:
DISCONNECT THE INCUBATOR FROM THE MAINS POWER SUPPLY DURING CLEANING.
ENSURE THAT ALL ELECTRICAL PARTS ARE KEPT DRY. DO NOT IMMERSE THE INCUBATOR TOP.
NEVER WASH THE BASE, EGG CARRIERS, COVERS OR CABINET PARTS IN LIQUIDSOVER 120°F (50°C). DO NOT USE A DISHWASHER TO
CLEAN ANY PARTS OF THE INCUBATOR.
Following each hatch in the Ovation 28 Adva nce remove and wash the egg carriers, link and base in Brinsea Incubation Disinfectant Solution
and then rinse thoroughly. Us e a vacuum cleaner and soft brush to remove dust from the fan guard. Wipe all other internal surfaces with
a cloth made damp with the s olution a nd then wipe off wi th a cl oth made damp with clean wa ter. Ensure that the instructions supplied
with the fluid are followed.
If a s eparate hatcher is used the procedure above should s till be followed every two months.
The exterior of the incubator may be cleaned with a damp cloth. Avoid allowing a ny moisture to get i nside electrical housings.
If a fter extended use more thorough cleaning within the top of the appliance is required, please visit www.brinsea.co.uk for information
on how this may be safely performed.
ALWAYS CLEAN THE INCUBATOR BEFORE STORAGE AND ENSURE THATTHE UNIT IS TOTALLY DRY INSIDE AND OUT. ALLOW IT TO RUN FOR
24 HOURS WITH NO WATER INTO ENSURE IT IS THOROUGHLY DRY.
TROUBLE-SHOOTING AND CALIBRATION
In ca s e of failure first check that the mains power s upply i s working and that the mains cable connector is fully engaged in the socket on
the control enclosure.
The digital temperature and humidity display is individually calibrated during manufacture but may be re -calibrated i f required. In the
unlikely event that your hatchingsuccess makes you doubt the temperature or humidity calibration of your machine please contact your
di stributor or Brinsea directly at sales@brinsea.com for further i nformation and advice.

20
AF36 US Issue 03
10 SPECIFICATIONS
OVATION 28 MAXIMUM SETTING CAPACITIES:
Egg s i ze Typical capacity
Qua il 66
Phea sant 57
Hen 28
Duck 28
Goos e 9
Di mensions: 17.6” x 13.1” x 8.8”
(447mm x 332mm x 223mm)
Weight: 6lb 14oz (3.13 Kg)
Power Consumption:
Incubator maximum 60 Watts
(typical average) 30 Watts
El ectrical Supply: 230v 50Hz or 110V 60Hz
(as ordered)
7 hen eggs in hen egg carrier
7 duck eggs in hen egg carrier
19 pheasant eggs in optional large egg carrier
22 quail eggs in optional large egg carrier
The large egg carriers are available from
brinsea.com or your local stockist (product code
AG011).
Brinsea Products Inc., 704 N Dixie Ave.,
Titusville, FL 32796-2017 USA.
Phone (321) 267-7009
Toll Free 1-888-667-7009
Fax (321) 267-6090
e-mail sales@brinsea.com
website www.brinsea.com
Other manuals for Ovation 28 Advance
1
Table of contents
Other Brinsea Accessories manuals

Brinsea
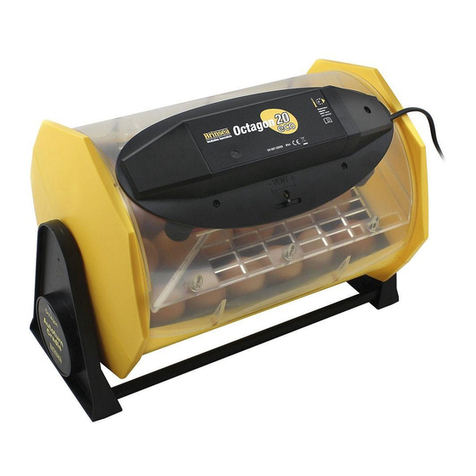
Brinsea Octagon 40 Eco User manual

Brinsea
Brinsea Mini Eco User manual

Brinsea
Brinsea Mini EX User manual

Brinsea
Brinsea Ova-Easy Advance Series II User manual

Brinsea
Brinsea CONTAQ Z6 User manual

Brinsea
Brinsea Maxi II eco User manual

Brinsea
Brinsea Ovation 56 ECO User manual

Brinsea
Brinsea Ovation 28 EX User manual

Brinsea
Brinsea Octagon 20 Eco User manual

Brinsea
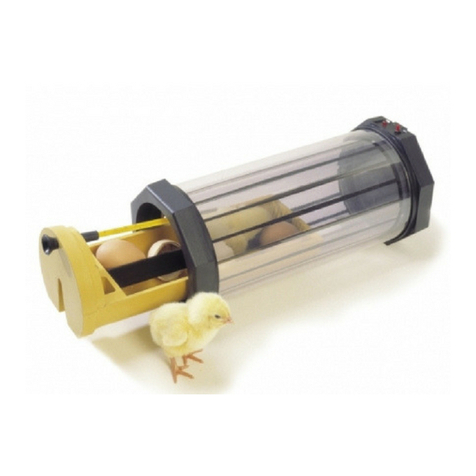
Brinsea TLC-40 Eco User manual