BestPack MSD 22 User manual

MODEL MSD22
SEMI-AUTOMATIC UNIFORM CARTON SEALER
Version 1.9
OPERATION AND PARTS MANUAL
READ ALL INSTRUCTIONS BEFORE OPERATINGTHIS MACHINE
YOUR ONE SOURCE
Manual Sidedrive Dual Mast Carton Sealer (MSD)
OperationManual

YOUR ONE SOURCE
ManualSidedriveDualMastCartonSealer(MSD)
2
TableofContents
TABLE OF CONTENTS
Our Commitment 3
Safety 4
OWNER’SSAFETYRESPONSIBILITY 4
SAFETYPROCEDURES 5
EQUIPMENTSAFETY 6
Machine Overview 8
MACHINEDESCRIPTION&FEATURES 8
MACHINECOMPONENTS 11
MACHINEDIMENSIONS 12
Installation/Setup 14
INSTALLATIONCHECKLIST 14
MACHINEPACKING 14
UNCRATINGPROCEDURES 14
SETUPPROCEDURE 15
Machine Maintenance 17
DAILYPREVENTATIVEMAINTENANCE 18
Troubleshooting 19
Parts Replacement 22
Recommended Spare Parts 23
Drawings and Parts Lists 24
ROLLERBEDASSEMBLY 24
BELTDRIVEASSEMBLY 26
WIDTHDRIVEASSEMBLY 29
MASTASSEMBLY 31
TOPTAPEHEADDRIVEFRAMEASSEMBLY 33
CONTROLPANELDIAGRAM 36
Customer Service Information 38
Warranty 39

YOUR ONE SOURCE
ManualSidedriveDualMastCartonSealer (MSD)
3
We Value Our Customers
This is the BestPack® Packaging Systems equipment you ordered customized to meet your needs.
This quality machine has been set up and tested successfully in the factory with brand name tapes to
ensure your highest level of satisfaction.
If problems do occur when operating this equipment, please refer to the Troubleshooting section
of this manual for help. If this does not resolve the problem and you need a service call or phone
consultation, reference the Customer Service Section of this manual for contact information.
Remember to lockout all energy sources (i.e. power down and shut off air supply) and release stored
energy prior to servicing or moving the machine to prevent injury.
Replacement Parts, Order Form, Warranty Guidelines, and Warranty Registration
Please take note of the following important items in this manual:
- Recommended replacements parts suggested to keep on hand to minimize downtime
- Troubleshooting section listing the most common causes and simple solutions
- Customer Service Information provided for your support
- Parts Order Form for your convenience
- BestPack® 1-Year Warranty Program and Guidelines
- Warranty Registration Form to activate your warranty
We ask that you fill out the Registration Form provided at the back of this manual and send it in to
activate your warranty.
FUTURE COMMODITIES INTERNATIONAL, INC.
BESTPACK® PACKAGING SYSTEMS
10676 FULTON COURT
RANCHO CUCAMONGA, CA 91730-4848
OurCommitment

YOUR ONE SOURCE
ManualSidedriveDualMastCartonSealer (MSD)
4
Safety
OWNER’S SAFETY RESPONSIBILITY
Owners and operators of the MSD22 carton sealer are responsible for maintaining an effective
safety program. This program should be consistent with good management practices and meet all
requirements of applicable laws, regulations, and ordinances. Employees must be aware of and
trained to recognize the specific requirements, precautions, and hazards of the sealing machines.
SAFETY AWARENESS
Careful machine operation is the key to safe job performance. Reasonable care and good judgment
in machine operation contribute to operator safety and safety of others. Failure to follow simple safety
rules and precautions may result in an accident. Always be aware of what is going on in the work
area. Recognize hazardous situations before they become an accident.
HAZARD COMMUNICATION STATEMENT AND PRECAUTIONS
Four indicator signal words appear throughout this manual to call your attention to special information,
operating procedures, and safety precautions as described below.
This indicator draws emphasis to special information about
equipment operation and maintenance procedures.
NOTE:
This indicator specifies special instructions or procedures meant
to prevent damage to the equipment, associated components, or
products.
IMPORTANT:
This indicator signals hazards or unsafe practices that could result in
minor personal injury or property damage.
SCAUTION:
SWARNING:
SDANGER:
To prevent accidental start-up and personal injury during routine
maintenance or when troubleshooting problems, always turn off the
power to the machine first. Then disconnect the machine’s electrical and
compressed air lines from the main supply, and release all stored energy
before commencing work. If the power is not turned off, accidental
startup could result in injury.
This indicator signals hazards or unsafe practices that could result in
severe personal injury or death, if the instructions are not followed.

YOUR ONE SOURCE
ManualSidedriveDualMastCartonSealer (MSD)
5
SAFETY PROCEDURES
1. Operators should read this manual prior to operating or making any adjustments on the machine.
2. Make sure machine power is turned off during the setup procedure while making adjustments to
the machine. Be careful with the driving direction of the conveyer.
3. Machine should not be washed down or subjected to conditions causing moisture condensation
on components and should be used in a dry, relatively clean environment at 40 to 105 degrees
Fahrenheit with dry boxes.
4. To enhance safety, operators should be alert at all times while operating the machine. When
packing products with toxic powders or chemicals, make sure packing area has good ventilation.
5. Remember to lockout all energy sources (i.e. power down and shut off air supply) and release
stored energy prior to servicing or moving the machine to prevent injury.
CAUTION LABELS
1. This label shows the entry point of the boxes. [Fig 1-1]
2. This label shows the direction of the crank handle. [Fig 1-2]
3. This label shows that that this area contains electrical components. Only authorized personnel
are allowed to access these components. [Fig 1-3]
4. Warning label cautions to keep hands out of this area due to a moving part. [Fig 1-4]
5. Warning label cautions potential electrical shock. Unplug power before servicing the machine.
[Fig 1-5]
6. Warning label cautions to keep hands out of this area because it contains a sharp knife. [Fig 1-6]
Safety
Fig 1-1 Fig 1-2
Fig 1-3 Fig 1-4 Fig 1-5 Fig 1-6

YOUR ONE SOURCE
ManualSidedriveDualMastCartonSealer (MSD)
6
EQUIPMENT SAFETY
1. Do not alter, deface, or remove factory installed information signs that are attached to the
equipment. If an information sign is damaged, replace it as soon as possible.
2. Never climb or work on equipment while it is operating nor allow anyone else.
3. Inspect all equipment components before each operation shift for damaged parts or parts
suspected of sustaining damage. Repair or replace any damaged or defective components
before starting or operating the equipment.
4. Before starting or operating equipment, perform a walk-around inspection of the workplace and
the equipment. Make sure that no workers, tools, parts, or foreign objects are in, on, under, or
around the equipment.
5. Do not operate equipment if safety gates are not in place. Check safety gates and other safety
devices for proper installation and safe working condition.
6. Before starting equipment make sure that all personnel or visitors know that the equipment is
going to be started.
7. When starting equipment, follow the manufacturer’s recommended starting sequence.
8. Do not allow anyone to start or operate any equipment unless they have been trained in safe
operating procedures.
9. Never leave equipment controls unattended. Either have a qualified operator relieve you or
turn equipment off if you must leave your workstation.
10.When starting up equipment and while equipment is operating, be alert for improper readings,
visual defects, abnormal odors, or unusual noises. These can be an indication of an
equipment problem or warning of a possible hazard. At the onset of any of these conditions,
immediately shut down the machinery following proper shutdown procedures.
11.Do NOT inspect, maintain, adjust, repair, or move the equipment until LOCKOUT procedures
are implemented by trained, authorized personnel in accordance with state and federal laws.
Authorized persons must shut down the power supply, shut down all energy sources, block
moving parts, and release all stored energy to prevent injury.
12.Perform all equipment inspection, maintenance, lubrication, and adjustment procedures with
caution and comply with manufacturer’s recommended procedures.
Safety

YOUR ONE SOURCE
ManualSidedriveDualMastCartonSealer (MSD)
7
Safety
ELECTRICAL SAFETY
1. Allow only qualified electricians or electronic technicians to work on electrical components or
controls.
2. Always assume that an electrical circuit is “live” until proven otherwise by proper testing
conducted by an authorized person.
3. Repair or replace frayed, cut, broken, or damaged electrical wires, cables, and connectors.
4. Check that electrical ground wires, motor plugs, and power cable connections are properly and
securely connected before starting any equipment.
5. Know all locations of main electrical shut-off boxes in case of an emergency.
YOUR ONE SOURCE
ManualSidedriveDualMastCartonSealer (MSD)
8
MachineOverview
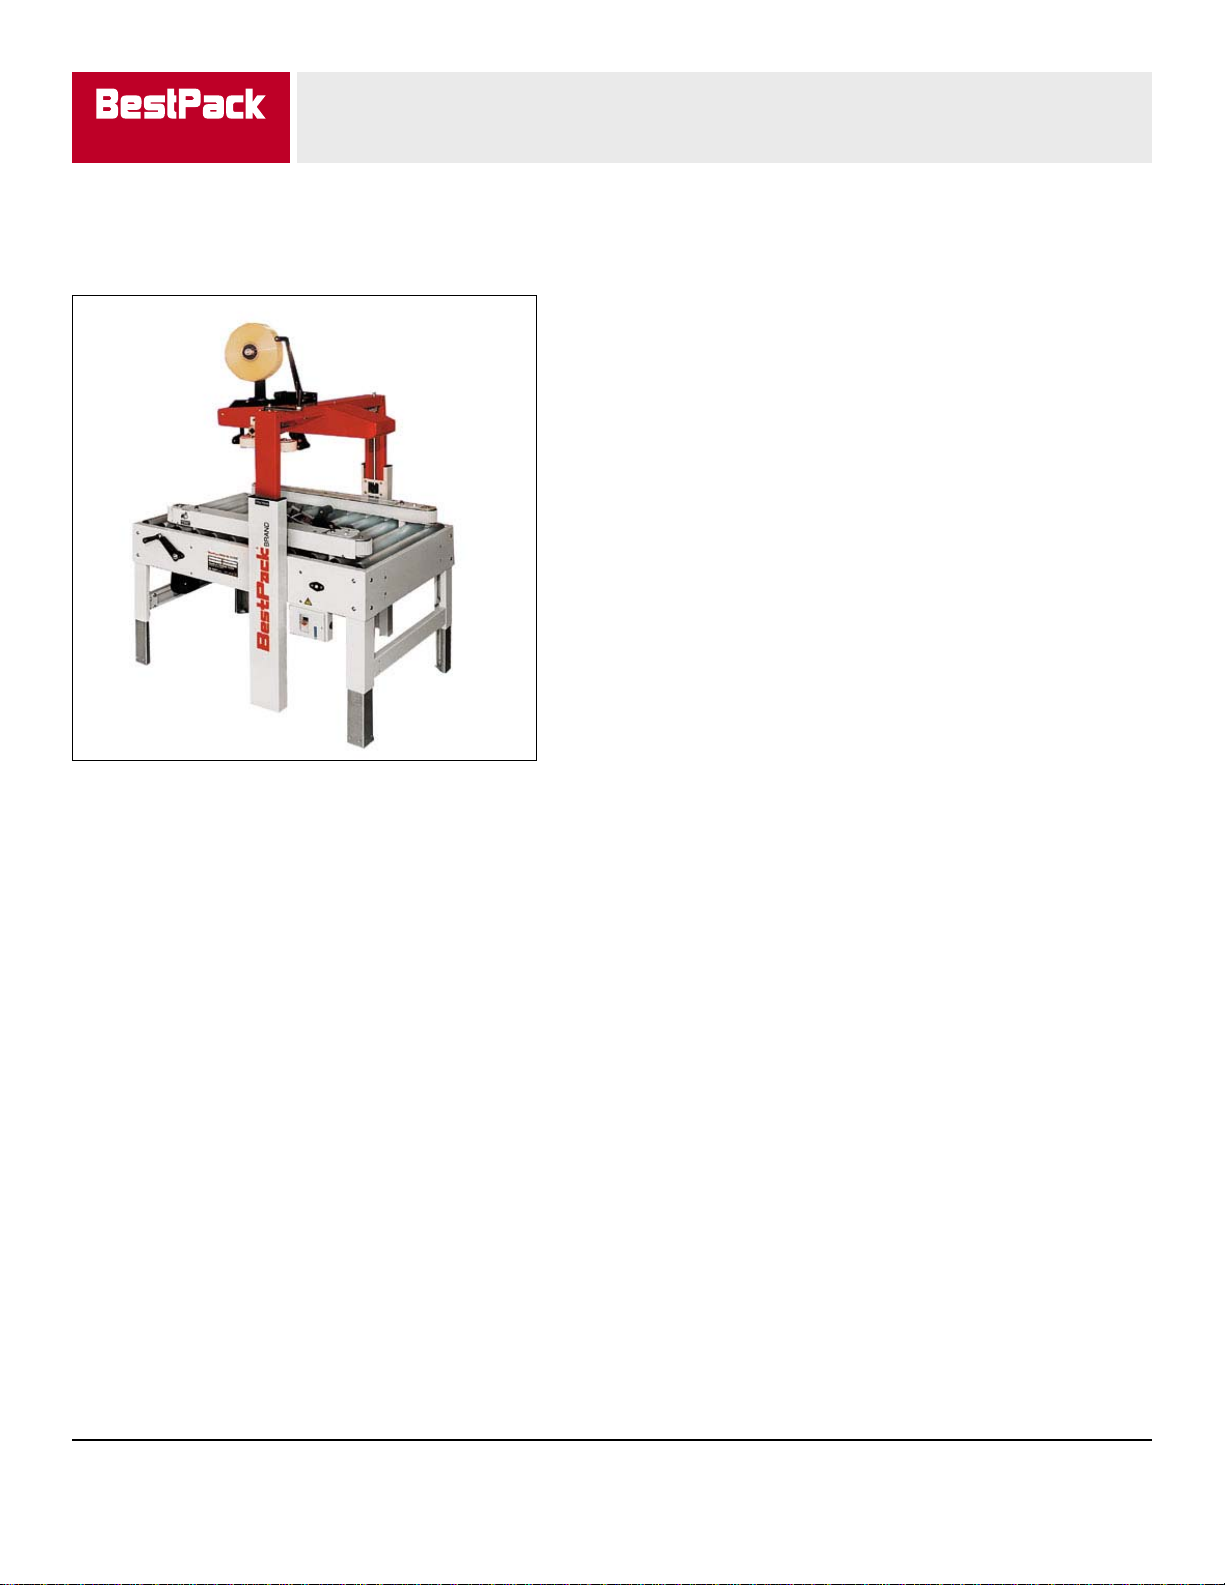
The BestPack® MSD Semi-Automatic
Uniform Carton Sealer is our most
popular top of the line operator-fed and
adjustable carton sealing machine,
designed to cater to the needs of light-
to-heavy duty uniform carton closure
applications.
Incorporate our exclusive pop out
pressure sensitive “High Speed” tape
heads with patented tab adjustment, and
the dual (telescopic) masts allow for an
extra 4” carton height extension on the
upper assembly.
MACHINE DESCRIPTION & FEATURES
•Two Side Belts
•Telescopic Mast Design
•Extra 4” Carton Height Adjustment controls conveniently located on both sides of machine
•Adjustable Bed Height 25.3” to 30.00”
•Width/Height Adjustment either side of machine
•Exclusive 4 roller top compression
•Tape Roll Lengths: 1000 yd., 1500 yd., 2000 yd.
•Heavy Duty Frame
•UL Approved Electrical Parts
•Designed for uniform applications
•Capable of Interchanging 2” or 3” Tape Heads
•Electrical ON/OFF box can be mounted on either side of machine

YOUR ONE SOURCE
ManualSidedriveDualMastCartonSealer (MSD)
9
optional features
• Spare Parts Kit
• High Speed Motor Upgrade (Up to 125 ft./mm.)
• Motorized Height and/or Width Adjustment
• Interlock Safety Gates
• Stainless Steel
machine specifications
• Power Requirements: 110 Volts 60 Hz
• Speed: Up to 40 cartons/minute
• Tape Head: Standard: 2”, Available: 3”
• Shipping Weight: 342 - 550 lbs
MachineOverview
standard features
• Exclusive Pop-out pressure sensitive “high speed” tape
head with patented tab adjustment and noise reduction arm
• Tool Kit
• Operation Manual
- Dual Top & Bottom Side Drive Belts
o Equipped with “V” Guide for positive tracking
and longer belt life
o Idler Rollers behind belts reduce friction
o Changed quickly and easily, reducing
downtime
- Telescopic Mast Design
- Extra 4” carton height adjustment available on upper
assembly
- Adjustable Bed Height 24.5” to 31.25”
- Width/Height Adjustment either side of machine
- Exclusive 4 rollers Top Compression Unit
o Compresses top major flaps together
o Aligns each box for precise tape positioning
o Ensures a tight, secure seal
- Manual Adjusting Dual Side Guides
- Removable/Interchangeable Top/BottomTape Heads
o 2” or 3” tape heads are possible
o Lifts out easily/threads easily; No tools required
o Minimizes downtime due to faster roll changes
o Tape roll lengths: 1000 yd., 1500 yd., 2000 yd.
- Tape Tab Length Adjustment
o Adjusts from 2 3/8” to 3”
o No additional parts required
o Changes can be made in minutes
- Tape Tension Adjustment Knob
o Prevents tape overrun
o Provides a more consistent tape application
- Tension Optimizing Arm
o Smooth, consistent unwind
o Minimizes unwind noise
o Reduces the amount of tension adjustment
required for optimum performance
o Capable of running all adhesives
o Reduces possibility of tape stretching and
breaking
- Brush Wipe Down System
o Positively wipes tape overlap to bottom side of
box and is removable
- Designed for Uniform Applications
- Heavy Duty Frame; UL Approved Electrical Parts
- Electrical ON/OFF box can be mounted on either side
of machine
major features

YOUR ONE SOURCE
ManualSidedriveDualMastCartonSealer (MSD)
10
series comparison table
* All specifications capable of customization
Model Machine Size Carton Range Cartons/Min. Shipping
Weight (lbs.)
MS 20-2
2”TapeHead 39.4” x 28.5” x 35.0” (6.0”-U) x (4.25”** - 20.5”) Up to 40 263
MS 20-3
3”TapeHead 39.4” x 28.5” x 35.0” (6.0”-U) x (5.25”** - 20.5”) Up to 40 263
MSD 22-2
2”TapeHead 39.4” x 32.8” x 55.5” (6.0”-U) x (4.25”** - 20.5”) x (3.25”- 20.5”) Up to40 342
MSD 22-3
3”TapeHead 39.4” x 32.8” x 55.5” (6.0”-U) x (5.25”** - 20.5”) x (3.25”-20.5”) Upto40 342
MSD 23-2
2”TapeHead 46.3” x 36.0” x 65.5” (6.0”-U) x (4.25”** - 20.5”) x (3.9”-30.0”) Up to40 390
MSD 23-3
3“TapeHead 46.3” x 36.0” x 65.5” (6.0”-U) x (5.25”**-20.5”) x (3.9”-30.0”) Upto 40 390
MSD32-2
2”TapeHead 39.4” x 43.8” x 55.5” (6.0”-U) x (4.5”-30.0”) x (3.9”-20.5”) Up to25 550
MSD32-3
3”TapeHead 39.4” x 43.8” x 55.5” (6.0”-U) x (5.5”-30.0”) x (3.9”-20.5”) Up to25 550
carton specifications
Style: 1 Piece, Regular Slotted Container (RSC)
Construction: 125 to 300 Single or Double Wall
Content Weight: 4 lb. to 95 lb.
MachineOverview
operating conditions
• Use in a dry, relatively clean environment at 40° to 105° Fahrenheit (5 to 40 Celsius) with dry boxes.
• Machine should not be washed down or subjected to conditions causing moisture condensation on
components and should be used in a dry, relatively clean environment at 40 to 105 degrees Fahrenheit
with dry boxes.

YOUR ONE SOURCE
ManualSidedriveDualMastCartonSealer (MSD)
11
MajorComponents
MAJOR COMPONENTS
BOTTOM
TAPE HEAD
MAST ASSEMBLY
UPPER TAPE HEAD
WIDTH ASSEMBLY
ROLLER BED ASSEMBLY
BELT DRIVE
ASSEMBLY

YOUR ONE SOURCE
ManualSidedriveDualMastCartonSealer (MSD)
12
MACHINE DIMENSIONS
Dimensions

YOUR ONE SOURCE
ManualSidedriveDualMastCartonSealer (MSD)
13
ElectricalDiagram
ELECTRICAL DIAGRAM
FUSE 10A
SR
S
R
MS1
1
23
MOTOR
MOTOR
MB
4
C16UF250VAC
C16UF250VAC
POWER LAMP
R
R
STOP START
MS1
78MS1
4-6A
9S
TERMINAL:
AC110 V 12 3124RS
MA MB POWER
W:MANUALS/ELECDIAMSD
1
2
MA

YOUR ONE SOURCE
ManualSidedriveDualMastCartonSealer (MSD)
14
Installation/Setup
INSTALLATION CHECKLIST
Power: 1PH 110/220vac 50/60Hz or 3PH 220VAC 50/60Hz
Voltage fluctuation range: 95% - 105%
Temperature: 40 degrees to 105 degrees Fahrenheit
Relative humidity: 30% to 80% RH
Noise Level: 70 DECIBELS
MACHINE PACKING
The machine is secured on a pallet, wrapped with bubble wrap, covered with double wall corrugated
box, then secured onto the pallet with two plastic straps.
UNCRATING PROCEDURES
1. Position the crate in a large, uncluttered area to unpack the machine.
2. Lift and remove the corrugated box.
3. Remove the bubble wrap.
4. Remove the shipping anchors on the four legs.
5. Lift the machine from the pallet using properly rated cord.
6. If the casters are attached, the machine can be moved manually and rolled to the proper
location.

YOUR ONE SOURCE
ManualSidedriveDualMastCartonSealer (MSD)
15
Installation/Setup
SETUP PROCEDURE
It is important that the MSD22 series be setup and operated with the product prior to being subjected
to the production environment where time for setup, adjustment, and operator training is usually
limited.
CAUTION: Make sure machine power is turned off. Be careful with the driving direction of the
conveyer.
HEIGHT ADJUSTMENT: Once both tape heads are loaded with tape, the upper tape head can
be positioned for the box height being sealed by means of the height adjustment crank. Turn (H)
clockwise to decrease height or counter-clockwise to increase height. [Fig 2-1]
BOX SIZE SETUP: Place a closed box under the top drive frame. Lower the frame until all flaps are
fully closed. Align the box top flap center seam with the center of the frame. [Fig 2-2]
FIGURE 2-1 FIGURE 2-2

YOUR ONE SOURCE
ManualSidedriveDualMastCartonSealer (MSD)
16
Installation/Setup
WIDTH ADJUSTMENT CRANK: Turn the handle (W) clockwise for narrow and smaller packages;
turn the handle counter-clockwise for wider and larger packages. [Fig 2-3]
COMPRESSION ROLLERS: Adjust the compression rollers against the top edge of the box and
tighten the knobs to secure them in the operating position. [Fig 2-4]
FRAME ADJUSTMENT: Turn electrical switch to the “ON” position to start the drive belts. Move the
box forward under the top tape head frame until taken away by the drive belts. If the box is hard to
move or is crushed, raise the frame slightly to decrease pressure. If the box movement is erratic or
stops under the frame, lower the frame slightly to add more pressure between the box and the drive
belts.
FIGURE 2-3 FIGURE 2-4
CAUTION: If drive belts are allowed to slip on
the box. Excessive belt wear will occur.

YOUR ONE SOURCE
ManualSidedriveDualMastCartonSealer (MSD)
17
MachineMaintenance
LUBRICATION
It is important to lubricate all moving parts on the machine to keep it in top operating condition.
Lubricate the following areas with grease or oil (as indicated) every two months.
LUBRICATE THE FOLLOWING:
1. Chain drive mechanism for width adjustment. GREASE [Fig 3-2]
2. Spindle screw mechanism for width adjustment. GREASE [Fig 3-2]
3. Chain drive mechanism for height adjustment. GREASE [Fig 3-1]
4. Spindle screw mechanism for height adjustment. GREASE [Fig 3-1]
5. Sprocket for spindle screw mechanism for width adjustment. OIL [Fig 3-2]
GREASE
POINTS
INDICATED GREASE POINTS
3

YOUR ONE SOURCE
ManualSidedriveDualMastCartonSealer (MSD)
18
DAILY PREVENTATIVE MAINTENANCE
MachineMaintenance
Two-Minute Maintenance (after every shift)
In order to maintain your BestPack®carton sealer in top operating condition, please take two minutes
after every shift change to perform the following maintenance procedure.
1. Clean the Machine
a. Blow the machine down with dry air paying special attention to all moving parts.
2. Clean the Blade
a. Wipe down the cutting blades with a clean rag making sure to remove any glue and
plastic film that may have adhered to the blade.
(i) For stubborn accumulation, spray some solvent; i.e., WD-40 or Zylene, onto a
rag to wipe the blade clean.
CAUTION ! Do NOT get WD-40 on the rubber rollers. Do NOT
use any hard objects to scrape accumulation from the
blade as it could damage the blade.
b. Wipe a thin layer of Vaseline onto the blade as your last cleaning step.
3. Water Reservoir (applicable if the machine uses air)
a. If your carton sealer uses air, check for moisture build-up in the water reservoir.
b. If there is water in the reservoir, bleed off any moisture that has accumulated in the
water reservoir of the air regulator by pushing the button located at the bottom of the
glass container on the main regulator.
IMPORTANT SAFETY REMINDER! Remember to lockout all energy sources (i.e. power down and
shut off air supply) and release stored energy prior to servicing or moving the machine to prevent
injury

YOUR ONE SOURCE
ManualSidedriveDualMastCartonSealer (MSD)
19
Troubleshooting
TROUBLESHOOTING
Review SETUP PROCEDURE to ensure setup is correct. If correct, the troubleshooting chart below
lists possible problems, causes, corrections, and reference guide.
PROBLEM POSSIBLE CAUSES CORRECTION
1. Drive belts do not
convey boxes Narrow boxes
Check machine specifications. Boxes
are narrower than recommended causing
slippage and premature belt wear.
Worn drive belts Replace drive belts
Top flap compression rollers
in too tight Readjust compression rollers
Top tape head does not
apply enough pressure
Adjust the box height adjustment with the
crank
2. Drive belts do not
turn
Worn bearings, gears, or
driving shaft Replace ball bearing, gears, or driving shaft
Drive belt tension too loose Adjust belt tension screw
Electrical disconnect Check power and electrical plug
Motor not running Check the fuse, capacitor, and setting of
thermal relay
3. Drive belts break Worn belt Replace belt
4. Light boxes tip
back on exit
Top drive frame down too
far Carefully adjust top drive frame
5. Squeaking noise
as boxes pass
through machine
Dry compression rollers Lubricate compression rollers
Driving pulleys Lubricate plastic and aluminum pulleys and
replace, if defective
* Denotes to reference your tape head manual

YOUR ONE SOURCE
ManualSidedriveDualMastCartonSealer (MSD)
20
Troubleshooting
PROBLEM POSSIBLE CAUSE CORRECTION
6. Tape not centered
on box Tape drum not centered Reposition tape drum *
Top compression rollers not
aligned with the tape head
Align the left and right compression roller to
the tape head *
Box flaps not of equal
length
Check box specifications and adjust
accordingly
7. Blade does not cut
tape, or tape end is
jagged or shredded
Blade is dull and/or has
broken teeth Replace blade *
Tape tension is insufficient Increase tape tension by adjusting the
mandrel wheel *
Adhesive has build-up on
blade Clean and adjust the blade *
Blade not positioned
properly
Check that the blade is bottomed out against
the mounting bolts *
Blade is dirty Clean blade and lubricate the oiler pad on the
blade guard *
Blade in backwards Mount the blade so that the beveled edge is
away from the entrance end of the head *
Blade spring guard Replace the defective spring
TROUBLESHOOTING (cont’d)
This manual suits for next models
8
Table of contents
Other BestPack Food Saver manuals


