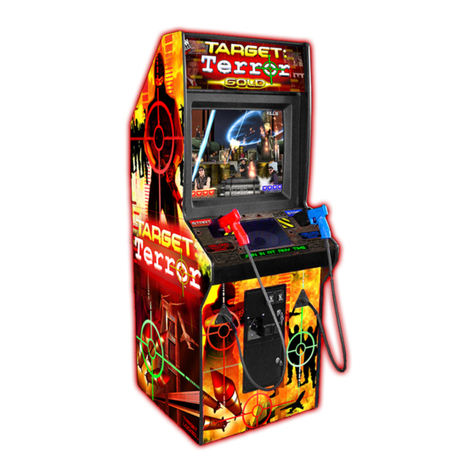
Betson RAW THRILLS TERROR User manual

Target: Terror .Copyright 2005 .Raw Thrills Inc .All rights reserved.

Target: Terror .Copyright 2005 .Raw Thrills Inc .All rights reserved.
OPERATORS
MANUAL
MODEL TARGET: TERROR_27US & TARGET: TERROR_27EX
MODEL TARGET: TERROR_39US & TARGET: TERROR_39EX
•Failure to operate this machine could result in malfunction or accident, so please read
this manual carefully before commencing operation. Be sure to operate the machine as
described in this manual.
•Keep this manual available and ready for use when necessary.
•If the machine fails to function correctly, immediately turn off the machine and contact
your local distributor. ( 60 Day Warranty, from date of purchase )

Target: Terror .Copyright 2005 .Raw Thrills Inc .All rights reserved.
Target: Terror
For Parts or Service contact your local Distributor or:
Betson Enterprises
303 Paterson Plank Road
Carlstadt, New Jersey
Main Phone: (201) 438-1300
Toll Free Phone: (800) 524-2343
Part Phone: (800) 828-2048
•CAUTION:•
•The specifications of this product are subject to change without notice for reasons such as
performance
•The content of this game, its main devices and design are protected under each federal law
concerning patent, copyright and other intellectual properties.
•Unauthorized reproduction of this document or any of its contents is strictly forbidden.
Safety Instructions
Safety instructions apply to operators and service personnel. Read these instructions before preparing
the video game machine for play. Other safety instructions appear throughout this manual.
WARNING: TRANSPORTING THE VIDEO GAME MACHINE (VGM).The VGM contains glass and
fragile electronic devices. Use appropriate care when transporting .Avoid rough handling when moving
theVGM.
WARNING: DISCONNECT POWER.Always turn the power OFF and unplug the VGM before attempting
service or adjustments unless otherwise instructed. Installing or repairing components with the power
switched ON can damage the components an void warranty.

Target: Terror .Copyright 2005 .Raw Thrills Inc .All rights reserved.
WARNING: GROUND GAMES.Avoid electrical shock! Do not plug in the VGM until you have
inspected and properly grounded it. Only plug into a grounded, three-wire outlet. Do not use a
“cheater” plug, or cut off the ground pin on the line cord.
WARNING: AVOID ELECTRICAL SHOCKS.This VGM does not utilize an isolation transformer.
Internal cabinetAC is not isolated from the external AC line.
WARNING: HANDLE FLOURESCENT TUBE AND CRT WITH CARE.If you drop a fluorescent
tube or CRT and it breaks, it will implode! Shattered glass can fly eight feet or more from the
implosion.
WARNING: CHECK POWER SELECTOR, LAMP.Set the 115/230 VAC selector switch on the
power supply for the correct line voltage on the installation site. Verify that the lamps are also rated
for the proper line voltage.
WARNING: USE PROPER FUSE.Avoid electrical shock! Replacement fuses must be identically
rated to the original fuse!
WARNING: ATTACH CONNECTORS PROPERLY.Be sure all connectors mate properly. If
connectors do not slip in easily, do not force them. Connectors are often keyed and only connect
one way. Check for correct orientation.
WARNING: USE EXTREME CARE WHEN HANDLING PC.The PC contains sensitive
components such as a hard drive. Do not handle roughly. Call your distributor before servicing PC
internal components.Ask about warranty information as it relates to the PC.

Target: Terror .Copyright 2005 .Raw Thrills Inc .All rights reserved.
WARNING: HAZARD TO EPILEPTICS.Avery small portion of the population has a condition which may
cause them to experience epileptic seizures or have momentary loss of consciousness when viewing
certain kinds of flashing lights or patterns that are present in our daily environment. These persons may
experience seizures while watching some kinds of television pictures or playing certain video games.
Peoples who have not had any previous seizures may nonetheless have an undetected epileptic
condition
If you or anyone in your family has experienced symptoms linked to an epileptic condition (e.g., seizures
or loss of awareness), immediately consult your physician before using any video games.
We recommend that parents observe their children while they play video games. If you or your child
experience the following symptoms: dizziness, altered vision, eye or muscle twitching, involuntary
movements, loss of awareness, disorientation, or convulsions, DISCONTINUE USE IMMEDIATELY and
consult your physician.
TARGET: TERROR_27US TARGET: TERROR_39US
TARGET: TERROR_27EX TARGET: TERROR_39EX

Target: Terror .Copyright 2005 .Raw Thrills Inc .All rights reserved.
Table of Contents
SECTION 1: PRODUCT SPECIFICATION…………….6
SECTION 2: INSTALLATIONAND INSPECTION…….7
SECTION 3 SET UPAND TEST MENU………….……8-16
SECTION 4: TROUBLESHOOTING GUIDE…………..17
SECTION 5: PARTS……………………………………….18
APPENDIX A: HARD DRIVE RECOVERY……………..19
APPENDIX B: POWER MANAGEMENT
SETTING (BIOS)…………………………20
APPENDIX C: BASIC DISPLAYADJUSTMENTS……..21
APPENDIX D: VIOLENCE LEVEL SETTING……………22
APPENDIX E: CABINET WIRE DIAGRAM………………23-24

Target: Terror .Copyright 2005 .Raw Thrills Inc .All rights reserved.
SECTION 1: PRODUCT SPECIFICATIONS
OPERATING REQUIREMENTS
MODEL ELECTRICAL POWER
Target: Terror_27US & Target: Terror_39US 120VAC @ 60 Hz, 5 amps
Target: Terror_27EX & Target: Terror_39EX 240VAC @ 50Hz, 2.5 amps
TEMPERATURE
32° F to 100°F
(0°C to 38°C)
HUMIDITY
Not to exceed 95% relative humidity.
27 INCH MODEL CABINET DIMENSIONS
Height = 74. 3/4 inches ( 1.898 Meters )
Depth = 34 1/4 inches ( 0.869 Meters )
Width = 29 3/8 inches ( 0.746 Meters)
27 INCH MODEL CABINET WEIGHT
Weight = 337 lbs. ( 152.86 KG )
39 INCH MODEL MONITOR CABINET DIMENSIONS
Height = 85 inches ( 2.159 Meters )
Depth = 38 1/2 inches ( 0.978 Meters )
Width = 39 1/4 inches ( 0.997 Meters)
39 INCH MODEL GUN CABINET DIMENSIONS
Height = 45 3/4 inches ( 1.162 Meters )
Depth = 36 1/4 inches ( 0.921 Meters )
Width = 35 1/2 inches ( 0.902 Meters)
39 INCH MODEL MONITOR CABINET WEIGHT
Weight = 500 lbs. ( 226.79 KG )
39 INCH MODEL GUN CABINET WEIGHT
Weight = 200 lbs. ( 90.72 KG )

Target: Terror .Copyright 2005 .Raw Thrills Inc .All rights reserved.
SECTION 2: INSTALLATION AND INSPECTION
WARNING: Use extreme care when moving or servicing the game cabinet. Don’t plug in the
game until you have read this manual.
Please check the following after the game after the game has been removed from its shipping
crate and placed in a suitable play or service area.
1. Make sure that the game cabinet is level. Adjust the casters as needed. This should be
done by two individuals.
2. Check the AC line cord for any visible signs of damage to the plug or line cord
insulation.
3. Check for possible shipping damage to the following:
· Gun assembly: left/right guns, holsters, and cable.
· Cabinet glass: marquee and monitor.
· Cabinet backdoor.
· Cabinet coin door.
· Cabinet decals.
4. Remove the coin door key from the coin return chute.
5. Open the top coin door and locate the key for the backdoor and the cashbox.(Skip to
Step 11 for 27 inch Models).
6. Locate hardware kit.
7. Remove (3) wood screws from top cover of monitor cabinet mating block to gain access
to wire connections for gun cabinet.
8. Make necessary electrical connections (4 connectors).
9. Use ¾ inch(20mm) hex bolts from hardware kit to secure monitor cabinet to gun
cabinet.
10. Replace top cover to monitor cabinet mating block.
11. Plug the game line cord into an AC receptacle.
12. Locate the game AC main switch to the bottom left side on back of the game cabinet.
13. Turn the switch to the ON position.
14. The game attract feature will begin after the game is finished loading- approximately 1
minute.
15. Proceed to Section 3 of this document for game setup and verify proper operation.

Target: Terror .Copyright 2005 .Raw Thrills Inc .All rights reserved.
SECTION 3: SETUP AND TEST MENU
Locate the Service Button Panel. It is mounted
inside the coin door area on top of the cash box
metal housing. Press the TEST button to
access the Test Menu.
Service Button Panel
The gun can also be used to perform the above functions. Shoot the menu item to Select and
shoot twice to Enter. Selected item is highlighted.
SERVICE TEST
nottuBnoitcA
nottuBtratStfeL,ecivreSsnoitpO/uneMhguorhTelcyC
nottuBthgiR,tseTmetIretnE

Target: Terror .Copyright 2005 .Raw Thrills Inc .All rights reserved.
SECTION 3.1: MAIN MENU
The Main Menu appears when the TEST button is pressed.
SECTION 3.2: GAME SETTINGS
From the Main Menu, select Game Settings and Enter to view options.
LAMRONLAMRONECITSUJECITSUJ
YTLUCIFFID )tsedraH(01-)tseisaE(1)4(reisaE)tsedraH(01-)tseisaE(1
)
5(muideM
EFILLAITINI STIH6-1STIH5STIH6-1STIH5
EFILMUMIXAM STIH6-1STIH6STIH6-1STIH6
Default Settings Default Settings

Target: Terror .Copyright 2005 .Raw Thrills Inc .All rights reserved.
SECTION 3.2.1: MORE OPTIONS
From the Game Settings menu, select More Options and enter to view more options. Return to Game
Settings by selecting Previous Options. Return to the Main Menu by selecting EXIT.
Default Settings
TCARTTAGNIRUDYALPEMAG delbanE-delbasiDdelbanE
LEVELECNELOIV lebaLwolleY,)5-1(lebaLdeR5VLlebaLdeR
HTGNELEMAN
EROCSHGIH sretcarahC6-3sretcarahC6

Target: Terror .Copyright 2005 .Raw Thrills Inc .All rights reserved.
SECTION 3.3: PRICING OPTIONS
Select Pricing Options from the Main Menu and enter to view options.
SECTION 3.3.1: CHUTE SETUP AND BONUS UNITS
From the Pricing Options menu, select and enter Chute Setup and Bonus Units to view options.
Select Exit twice to return to the Main Menu.
YALPEERF NO-FFO FFO
TINUYRATENOM ycnerruCtceleS sralloD
SLAUQETINUENO tinUtceleS $52.0
TRATSRALUGER STINU01-1 )$
05.0(STINU2
EUNITNOC.GER STINU01-1 )$05.0(STINU2
TRATSECITSUJ STINU01-1 )$05.0(STINU2
EUNITNOCECITSUJ STINU01
-1 )$05.0(STINU2
STIDERCXAM 002-01)STINU001(stiderC05
Default Settings
Customize individual chute and
bill validator values
independently. Select from 1-10
units.
Reward volume purchase by
setting bonus to purchase ratio.

Target: Terror .Copyright 2005 .Raw Thrills Inc .All rights reserved.
SECTION 3.4: SWITCH TES
From the Main Menu select and enter Switch Test. Verify proper switch input function using this menu.
Each switch activated will be indicated on the test screen in yellow text and will be accompanied by a
switch active sound indicator.
Press and hold the Test Button for three seconds to return to the Main Menu.
SECTION 3.5: GUN CALIBRATION
From the Main Menu, select and enter Gun Calibration screen. Follow the instruction as it appears on
the screen. Press Left Start or Service to accept gun calibration. If gun calibration is unsuccessful,
game automatically returns to calibration screen. If successful, a verification screen will appear. Move
the cross hair about the screen to verify proper gun calibration.

Target: Terror .Copyright 2005 .Raw Thrills Inc .All rights reserved.
SECTION 3.6: WATCHDOG TEST
From the Main Menu, select and enter Watchdog Test. Test will begin automatically and will reset the
CPU if successful.An error message will appear if the test fails.
SECTION 3.7: COIN METER TEST
From the Main Menu,select and enter the Coin Meter Test. Press the Service button to advance
mechanical coin meter. Press Test or Start to return to exit.
SECTION 3.8: AUDIO/VIDEO OPTIONS
From the Main Menu, select and enter Audio/Video Options. Select Increase or Decrease to change
volume setting.

Target: Terror .Copyright 2005 .Raw Thrills Inc .All rights reserved.
SECTION 3.8.1: COLOR BARS AND PURITY
From the Audio/Video Options menu, select and enter Color Bars & Purity. Verify correct color and
purity for Red, Blue and Green screens.
SECTION 3.8.2: CONVERGENCE TEST
From the Audio/Video Options menu, select and enter Convergence Test. Verify proper screen
contrast and size.
SECTION 3.9: VIEW AUDITS
From the Main Menu, select and enter View Audits. Press SERVICE or LEFT PLAYER START to cycle
through Audit Page 1 to 4.
Audit Page 1:

Target: Terror .Copyright 2005 .Raw Thrills Inc .All rights reserved.
Audit Page 2:
Audit Page 3:
Audit Page 4:

Target: Terror .Copyright 2005 .Raw Thrills Inc .All rights reserved.
SECTION 3.10 OTHER OPTIONS
From the Main Menu, select and enter Other Options.
NOITPONOITPIRCSED
erocShgiHraelCelbaTerocShgiHraelC
raelCSHotuA raelCSHerofeBsemaGforebmuNteS
tiderCraelCsti
derCemaGgnitsixEraelC
stiduAraelCelbaTyrotsiHemaGllAraelC
tluafeDyrotcaFerotseR sgnitteStluafeDyrotcaFtce
leS
kcehCytirgetnIksiDmrofrePtseTevirDdraHmrofreP
yppolFottiduAtropxEA/N
tolipotuAtseTnI-nruB/yalPemaGotuA

Target: Terror .Copyright 2005 .Raw Thrills Inc .All rights reserved.
SECTION 4: TROUBLESHOOTING GUIDE
MELBORPESUACELBISSOP NOITULOS
.purewoptonlliwemaG .nideggulptonemaG .elcatpecerotniemaggulP
.nodenruttonema
GhctiwsrewopniamNOnruT
nwolbsiesufemaG .esufemagkcehC
.elcatpecerotrewopoN .elcatpecerderewopotniemaggulP
FFOsihctiwsrewopCP .NOhctiwsrewopCPnruT
.gnorwtesSOIBCP .BxidneppAeeS
egasseMlangiSoN .erucestonelbacoediV .rotcennocoediverucesdnakcehC
.NOdenruttonCP .CPotrewopNOnruT
.yalpsidoedivoN .yalpsidoedivotrewopoN .yalp
sidoedivotrewopkcehC
.purewoptonlliwemaGees
.dnuosoN .detcennoctonelbacoiduA .noitcennocelbacoiduakcehC
.d
etcennoctonrekaepS .noitcennocrekaepskcehC
gnissiMdraoBO/I .detcennoctonrotcennocBSU .draobO/IotCPmorfrot
cennocBSUkcehC
.
AxidneppAees-yrevoceRevirDdraHmrofreP
.daoltonlliwemaG .dellatsnievirDdraHweN mrofreP.emaggniggulp-nuybe
lcycrewoP .AxidneppAees-yrevoceRevirDdraH
.detpurrocatadevirDdraH .launamsihtfoAxidneppAotrefeR
rognirets
igertonnuG .ylroopsnoitcnuf .noitarbilacnugdaB .nugetarbilaC
.sneldegamad/ytriD .snelecalperronaelC
.draobc
itponugdaB .draobcitponugecalpeR
.detcennoctonnuG .noitcennocnugkcehC
.nugdaB .nugecalpeR
.ytridssalGrotino
M.ssalgrotinomnaelC
tnemtsujdafotuoyalpsiD .CxidneppAotrefeR.erutciptsujdA
.steseremaG .egatlovCDwoL )V21+
,V5+(egatlovreporprofkcehC
.gnitargnorwsipmalrooD .spmaltlov5ylnoesU
.hgihootsierutarepmetCP/tenibaC dnag
ninoitcnuferasnafdnastnevtahtkcehC .detcurtsboton
.detpurrocatadevirDdraH .launamsihtfoAxidneppAotrefeR
Warning: Do not connect or disconnect any cables or connectors on this game with the power on

Target: Terror .Copyright 2005 .Raw Thrills Inc .All rights reserved.
SECTION 5: PARTS
NOITPIRCSEDTRAP REBMUNTRAP
SCIHPARGEEUQRAM72 200-00-00-10-1-1
LACEDEDISTFEL72 300-00-00-10-1-1
LACEDEDISTHG
IR72 400-00-00-10-1-1
LACEDLENAPLORTNOC72 500-00-00-10-1-1
LACEDTENIBACTNORF72 600-00-00-10-1-1
SSALGEEUQRA
M72 700-00-00-10-1-1
MIRTEEUQRAM72 800-00-00-10-1-1
YSSAROTINOM72 900-00-00-10-1-1
LEZEBROTINOM72 010-00-00-
10-1-1
SSALGROTINOM72 110-00-00-10-1-1
MIRTSSALGROTINOM72 210-00-00-10-1-1
ELUDOMYRTNEREWOP 310-00-00-10-1-
1
DROCREWOP 410-00-00-10-1-1
RELEVELGEL 510-00-00-10-1-1
RETSAC 610-00-00-10-1-1
LNPNOTTUBECIVRES/WROODNIOC 7
10-00-00-10-1-1
.YSSANUGDER 810-00-00-10-1-1
.YSSANUGEULB 910-00-00-10-1-1
RETSLOH 020-00-00-10-1-1
HCTIWS 12
0-00-00-10-1-1
NOTTUBDER 220-00-00-10-1-1
NOTTUBEULB 320-00-00-10-1-1
LLIRGREKAEPS 420-00-00-10-1-1
REKAEPSM
HO8-49X6 520-00-00-10-1-1
SSENRAH 620-00-00-10-1-1
).tf3,mm5.3(ELBACOIDUA 720-00-00-10-1-1
SWERCSBMUHT/W.tf
6M/MELBACAGV 820-00-00-10-1-1
FLEHSGNITNUOMCP 230-00-00-10-1-1
.tf6ELBACBSU 330-00-00-10-1-1
YSSA.BUSROODKC
AB 000-00-10-10-1-1
YSSA.BUSTHGILEEUQRAM 000-00-20-10-1-1
ELUDOMTNECSERUOLF 100-00-20-10-1-1
BLUBTNECSERUOL
F 200-00-20-10-1-1
YSSARETUPMOC 000-00-00-20-1-1
YSSADRAOBO/I 000-00-00-30-1-1
KSIDDVDEROTSER 210-00-00-20-1
-1
PSAHYTIRUCES 310-00-00-20-1-1
SCIHPARGEEUQRAM93 200-00-00-10-2-1
LACEDTENIBACNUGEDISTFEL93 300-00-00-10-
2-1
LACEDTENIBACNUGEDISTHGIR93 400-00-00-10-1-1
LACEDLENAPLORTNOC93 500-00-00-10-2-1
SSALGEEUQRAM93 700-00-
00-10-2-1
YSSAROTINOM93 900-00-00-10-2-1
LEZEBROTINOM93 010-00-00-10-2-1

Target: Terror .Copyright 2005 .Raw Thrills Inc .All rights reserved.
Appendix A: Hard Drive Recovery
The following are some symptoms which may indicate a possible bad hard drive:
· Hard Drive Test reports “bad” or “missing” files. Please refer to Section 4 of the manual.
· The game fails to finish loading.
· A boot error is reported after game is power cycled or reset.
· The game is looking for a boot CD to be inserted.
· Erratic game play or attract mode.
Note: It is important that the USB cable from pc and power is connected to the I/O board
before you proceed.
Hard Drive Recovery Procedure:
1. Open the coin door to access the pc.
2. Press the button on the DVD drive to open DVD tray.
3. Carefully insert the recovery disk into the tray.
4. Press the button on the DVD drive to close the DVD tray.
5. Turn OFF the pc by pressing the power button once.
6. Turn ON the pc by pressing the power button once.
7. Disk recovery process will begin automatically.
8. A message at the top of the screen will prompt you to remove the disk when process
is over. Press the DVD drive button to open tray. Remove the recovery disk and store
safely.
9. Turn OFF the pc by pressing the power button once.
10. Turn ON the pc by pressing the power button once.
Note: Do not interrupt power or reset the game during the following process!
11. The game will begin to initialize and load. It will typically take about five minutes to
complete.
12. The hard drive recovery process is complete when the game enters attract mode.
13. Proceed with gun calibration and make necessary game adjustments. Please refer to
Section 3.5 of this manual.
— End of Procedure—
NOTE: Fast and the Furious is shipped with a recovery CD (Compact Disc). Hard drives
have been known to occasionally fail for many reasons. Follow the procedure below to
restore data on the hard drive if adisk failure should occur. Use extreme care when
performing the following procedure and avoid roughhandling of pc or CD. Please check the
Troubleshooting Guide section of this document. Have therecovery CD ready before you
begin.
This manual suits for next models
4
Table of contents
Other Betson Arcade Game Machine manuals
Popular Arcade Game Machine manuals by other brands
Magic Play
Magic Play Ninja Challenge Operation manual
BMI Gaming
BMI Gaming SideShow 1889 Installation and Maintenance
HomingGame
HomingGame Key Master 2017 manual
Raw Thrills
Raw Thrills PAC-MAN TICKET MANIA Service bulletin
MD SPORTS
MD SPORTS AC208Y19014 Assembly instructions
MD SPORTS
MD SPORTS ARC108_147M Assembly instructions

