Bibene D3-1 User manual

D3-1 Two-way Digital Keypad Alarm System
User Manual

Foreword
I. Introduction
Thanks for purchasing BIBENE D3-1 alarm system.
Please read this user manual carefully before use, we will
update this manual on a regular basis in accordance with
the addition or upgrade of the product features. If you
need any assistance, please contact our support team,
we will contact you within 24 hours.
Customer Service Email Address:
lhxing@hotmail.com
Warm Tip:
Customers who have purchased before: Can start and
focus on chapter 5(Quick Start by Easy Testing) &
chapter 6 ( Zone Features Introduction)
Freshman: Please follow the step start from chapter 1

Table of Contents
1.Product Features-------------------------------------
2. Operating Principle---------------------------------
3.Check Kit Accessory--------------------------------
4. Button Introduction --------------------------------
4.1 Main panel Button--------------------------------
4.1.1 ARM:---------------------------------------------
4.1.2 DISARM: ----------------------------------------
4.1.3 Away Home Mode------------------------------
4.1.4 At Home Mode:---------------------------------
4.1.5 Chime/alarm Switch---------------------------
4.2 Remote Control Button--------------------------
4.3 PIR Motion Sensor Button----------------------
4.4 Door/window Sensor ---------------------------
5. Quick Start by Easy Testing-----------------------
5.1 Check Zone for Door/Window Sensor---------
6. Zone Features Introduction-----------------------
6.1 Features of 4 Modes Zones-------------------
6.2 List of zone feature setting:---------------------
6.3 Zone Features Setting---------------------------
7.Expand more accessory----------------------------
7.1 Add Remote Control------------------------------
7.2 Delete Remote Control--------------------------
7.3 Add Door/window Sensors----------------------
7.4 Delete Door/window Sensors------------------
7.5 Add PIR Motion Sensor -------------------------
7.6 Delete PIR Motion Sensors---------------------
8. Installation--------------------------------------------
8.1 Main Panel Installation-------------------------
8.2 Door/window Sensor installation--------------
8.3 PIR Motion Sensor installation----------------
9. Change Dis-arm Password -----------------------
10.Low Battery Prompt--------------------------------
11.Restore Factory Setting---------------------------
12. DIY Solution Q & A---------------------------------
12.1 Tommy’s Office---------------------------------
12.2 Jenny’s Cute Cafe------------------------------
12.3 Molly’s Home------------------------------------
13.Product Specification-----------------------------
13.1 Main Panel---------------------------------------
13.2 PIR Motion Sensor:-----------------------------
13.3 Door / Window Sensor:-------------------------
13.4 Wireless Remote Control:---------------------
14.Terms of Warranty ---------------------------------
1
1
1
2
2
2
3
3
3
4
4
5
6
6
6
8
8
8
9
10
10
11
11
12
13
14
14
14
14
15
18
18
18
19
19
20
20
21
21
21
21
22
22

1. Product Features
1)Main Panel works as stand alone alarm
2)Easy One-button Operation
3)4 zones for DIY home security system
4 ) W h e n t r i g g e r a l a r m s , t h e L E D i n d i c a t o r o f
correspondent zone will flash to warn you the exact
alarm area
5)More safer to disarm by 4-Digital password on keypad
6)Away & home modes to set arming delay/arming
7)Support to put magnet on the left/right side of the main
panel
8)Chime/alarm switch for ring tone selection
9)Stylish design fits home decoration
10)Expandable to pair up to 10 remotes, and each zone
could add up to 10 sensors.
2. Operating Principle
Professional DIY Security Alarm System:
Built-in Magnetic Contact Sensor & PIR motion sensor
which can detect any forceful break-in and activate the
alarm to deter potential intruders and alerts neighbors.
The LED indicator of corresponding alarm zone flashes to
warn you the exact alarm area too.
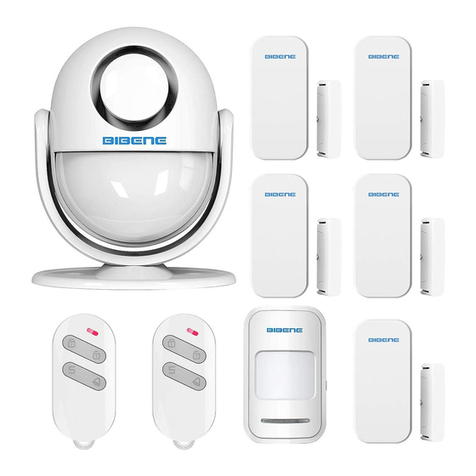
3. Check Kit Accessory
D3-1 Kit includes:
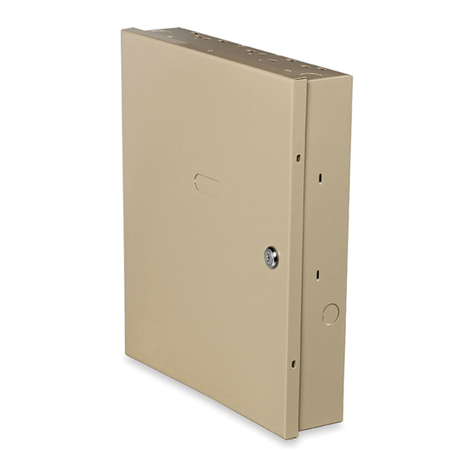
1x Main Panel
4x Door/window Sensors
1x Remote Control
1x User Manual
All battery and Adhesive tape
4. Button Introduction
4.1 Main panel Button
4.1.1 ARM:
Short Press on button on panel, the 4 LED indicators
of the panel will flash one time and beep once.
1 2

4.1.2 DISARM:
Enter the default password 1234 on keypad, the 4 LED
indicator of Panel will flash twice and beep twice. (3 beep
sounds indicates entering wrong password)
4.1.3 Away Home Mode: Arm delay & Alarm delay for
30seconds (Only work for Main panel)
-When you arm, the Main panel indicator will flash every
second for 30seconds,then the main panel will emit a
beep sound to notice you arm successfully. And when
trigger alarm, the main panel will also delay 30seconds to
alarm. This mode is great for you to arm when you are
about to leave home without any alarms to annoy you.
4.1.4 At Home Mode: Arm directly and alarm directly
when trigger alarm.
(Only work for Main panel)
4.1.5 Chime/alarm Switch (Only work for main panel)
Choose Chime or alarm sound for main panel.
4.2 Remote Control Button
3 4

Ar m Del a y (A f te r p re s s, w il l arm a ft e r
30seconds)
Disarm directly after press
Arm Directly after press
SOS: Alarm directly after press(4 LED indicator
flash)
4.3 PIR Motion Sensor Button Instruction
4.4 Door/window Sensor Instruction
5. Quick Start by Easy Testing
We have paired all the sensors to main panel already.
Just do a easy testing to check the corresponding Zone
for each PIR motion or Door sensor. Then you can install
& DIY different features for each Zone for your home
security system.
5.1 Check Zone for Door/Window Sensor :
1) Power on the Main panel: The battery are already
loaded with a film, Just take off the film to power on the
main panel.
2)Put the transmitter tightly close to magnet (Make sure
the triangle marks are close to each other)
5 6

3) Press on main panel to ARM.
4) Separate the transmitter and magnet over than 2CM, it
will trigger alarm
5) W he n a la r m is t r ig g er e d, t he LE D ind i ca t or o f
corresponding alarm zone will flash to make you quick
distinguish
6. Zone Features Introduction
6.1 Features of 4 Mode Zones
Please Note:
Zone Features & Setting is only applicable to door sensor
or PIR motion Accessory, not applicable to main panel.
Ordinary Zone:
When trigger alarm,the main panel will emit siren sound
on the status of Arming, NO alarm sound when under
disarming status.
Doorbell Zone:
When trigger alarm, the main panel will always emit
doorbell sound no matter under arm or disarm status.
Emergency Zone:
When trigger alarm, the main panel will emit siren sound
no matter under arm or disarm status.
Welcome Zone:
When trigger alarm, the main panel will emit siren sound
on arming status,and emit doorbell sound on disarming
status.
6.2 List of zone feature setting:
7 8

Zone
Zone1
Zone2
Zone3
Zone4
Method Prompt Zone Mode Arm Delay
or not Done
Long press
& [1]
simultaneously
LED indicator
of Zone 1 keeps
flashing
6.3 Zone Features Setting
1) Long press on button and digit [1] on the main
panel simultaneously, the LED indicator of zone 1 will
keep flashing, that means entering the setting process of
the zone1 mode.
2) Then short Press the corresponding digital number
according to the mode you need ( Ordinary Mode is 1,
Emergency mode is 2, Doorbell mode is 3, Welcome
Mode is 4)
3) Then short press the corresponding digital number to
choose arm delay or not ( press 1 for No arming delay ,
press 2 for arm delay for 30seconds )
4)After above setting done, the main panel will emit a
long beep sound. Means Setting Done.
1. Ordinary
2. Emergency
3. Doorbell
Welcome
1.No Arming
delay
2.Arm delay
for30seconds
Long
Beep
sound
indicates
set
success
fully.
Then
short
press to
quit
setting.
Long press
& [2]
simultaneously
Long press
& [3]
simultaneously
Long press
& [4]
simultaneously
LED indicator
of Zone 2 keeps
flashing
LED indicator
of Zone 3 keeps
flashing
LED indicator
of Zone 4 keeps
flashing
1. Ordinary
2. Emergency
3. Doorbell
Welcome
1. Ordinary
2. Emergency
3. Doorbell
Welcome
1. Ordinary
2. Emergency
3. Doorbell
Welcome
1.No Arming
delay
2.Arm delay
for30seconds
1.No Arming
delay
2.Arm delay
for30seconds
1.No Arming
delay
2.Arm delay
for30seconds
5) Finally press button to quit setting process.Done.
Note:
Same steps to set features for zone 2, zone 3, zone 4.
7.Expand more accessory
Please Note:
-It only allows to add/delete sensors on status of
Disarming. Otherwise it will emit 3 beep prompt
tone to notice you incorrect operation.
-During learning, the short press or no operation will
cause quitting learning status.
7.1 Add Remote Control
1) Long press the button on main panel, the 4 LED
indicator light on, means the main panel is under learning
status.
2) Press any key on remote control.The main panel LED
indicator flash 2times with 2 beep sound!
3) Press on main panel to quit setting. Done!
Note:
-If LED indicator flashes only 1time & with 1 beep sound,
means this remote control repeated.
- I f L E D i n d i c a t o r fl a s h e s 3 t i m e s & w i t h 3 b e e p
sound,means this remote control are already added to
limitation(10pcs)
-The main panel can expand remote control up to
10 pcs.W hen main panel is on learni ng status ,just
continue to press any button on remote control 2,3...10.
9 10

7.2 Delete Remote Control
1) Long press the button on main panel, till the 4 LED
indicator light on, indicates the main panel is under
learning status.
2) Release pressing.
3) Again long press the button on main panel, the 4
LED indicator flash 4times & with 4 Beep sounds.Done!
7.3 Add Door/window Sensors
Add Door/Window Sensor for Zone 1
1) Long press 【1】 button, No.1 LED indicator of main
panel is on, indicates the main panel is under learning
status.
2) Put the magnet tightly close to transmitter firstly,then
move the magnet away (at least 2cm far away), then put it
close to transmitter again.The No.1 LED indicator will
fl a s h 2 t i m e & d o o r s e n s o r e m i t s 2 t i m e s b e e p
sound,means bi n d i n g s u c c e s sf u l l y.(If only 1 beep
so u n d,indicat e s lea r ning repeated; if 3t i mes be ep
sounds,means sensors are added to limitation 10pcs
already)
3) Press Press button to quit setting. Done.
Tips: Same step applicable to set forzone2,zone3,zone4.
7.4 Delete Door/window Sensors
1) Long press 【1】 button on main panel, No.1 LED
indicator of main panel will be on, means the main panel
is under learning status.
2) Release press
3) Again long Press 【1】 button again, the main panel
indicator will flash 4times & with 4times beep sounds.All
the sensors in Zone 1 are deleted.
Tips: All above steps are applies for ZONE 2,ZONE 3,
ZONE4.
11 12

7.5 Add PIR Motion Sensor
1)Long press 【1】 button, No.1 LED indicator of main
panel is on, indicates the main panel is under learning
status.
2) Place PIR motion detection lens face to you .The No.1
LED indicator will flash 2time & door sensor emits 2times
beep sound,means binding successfully.If only 1 beep
so u n d,indicat e s lea r ning repeated; if 3t i mes be ep
sounds,means sensors are added to limitation 10pcs
already (For PIR motion detector adding,just put PIR
detector face to you,it will binding successfully.)
3) Press Press button to quit setting. Done.
7.6 Delete PIR Motion Sensors
1) Long press 【1】 button on main panel, No.1 LED
indicator of main panel will be on, means the main panel
is under learning status.
2) Release press
3) Again long Press 【1】 button again, the main panel
indicator will flash 4times & with 4times beep sounds.All
the sensors in Zone 1 are deleted.
Tips: All above steps are applies for ZONE 2,ZONE 3,
ZONE4.
8. Installation
Please Note:
-Avoid installing outside where easily to be destroyed
-Avoid installing closed to magnetic sources,such as
heaters, air conditioner,microwave oven which may
cause false triggering.
8.1 Main Panel Installation
Make sure the contact works properly before installing it.
1) Main panel supports the magnet to be placed both the
left and right side of main panel.Make sure the main
panel is close to magnet.
2) Paste the main panel and magnet separately on doors
or windows or any other open/close places with provided
double-sided tapes.
3) Done! Once the transmitter and magnet is separated
around 2cm by intruder ,the LED light in transmitter will
be on in Red. Alarm will be activated.
8.2 Door/window Sensor installation
Make sure the contact works properly before installing it.
4) There are triangle marks on the side of the transmitter
13 14

and magnet.Make sure the triangle marks is close to
each other.
5) Paste the transmitter and magnet separately on doors
or windows or any other open/close places with provided
double-sided tapes.
6) Done! Once the transmitter and magnet is separated
around 2cm by intruder ,the LED light in transmitter will
be on in Red. Alarm will be activated.
8.3 PIR Motion Sensor installation
Make sure the contact works properly before installing it.
1). Choose a suitable place for installation.
2) Fix the sensor
Fix the installation bracket on the wall with screws, then
fit the groove at the back of the sensor on the bracket.
You can adjust bracket angle to achieve the best
detection effect.
15 16

3) Mount the PIR sensor in proper angle.
It’s recommended to mount it at height of 2.2m from
ground, and to be install LED
indoors in a corner as far as possible in order to obtain
the ideal detection range.
The sensitivity is optimal when the walk direction is
vertical to the infrared direction.Choose the best location
and angle according to the actual situation.
4) Pair sensor Installation Notices
-Avoid infrared detectors facing to glass windows or
doors;
Strong light will interferes with detection sensitivity.
What’s more, complicated situation such as traffic
flow,stream of people also should be avoided.
-Avoid infrared detectors facing to or close to heat/cold
sources
Heat/Cold sources, such as heaters, air
conditioner,microwave oven which may cause false
triggering.
-Avoid two PIR sensors placed in the same space.
There will be interference phenomenon caused by trigger
at the same time if several sensors install LED in same
place
-Avoid installing infrared detector at outside, and it’s only
for indoor use.
9. Change Disarm Password
1) Remove the battery of main panel
2) Keep Long pressing any digital number (except
000button) without release until battery are re-load & 6
times beep sounds & 2 times beep sounds emits,Then
release pressing. Now the 4 LED indicates are on.
Set 4 digital password (Every pressing on digital number
along with LED indicator flash 1time accordingly when
you are setting password ,if set password incorrectly or
l o n g i n t e r v a l , t h e m a i n p a n e l w i l l q u i t s e t t i n g
automatically. Then you need to re-set password)
3) Shot press to quit.Done.
10.Low Battery Prompt
When battery is in low power, the sound of main panel
becomes weaker and trail off, LED indicator becomes
weaker,either
11.Restore Factory Setting
17 18

1) Remove the battery of main panel
2) Keep Long pressing without release until battery
are re-load & 10 times beep sounds firstly & 4 times beep
sounds emits again,Then release pressing. Done.
Note:
After Restore factory Setting, all sensors including
remote control are all deleted. The main panel is on
disarming status.
12. FAQ
12.1 Tommy’s Office
Tom:
I install LED 1 pair Door sensor for zone 1 where is my
office back door. I hope it will alarm immediately if
someone opens after i arm the system. And keeps it silent
after i disarm it. How to set zone 1 features?
LOVLOY Answer:
Set Zone1 to be Ordinary Mode.
1) Long press & key [1] immediately, then the LED
indicator of zone 1 on main panel will keep flashing,
means entering the process of setting of zone1.
2) Short press key [1] which means you choosed mode 1-
ordinary mode
3) Then short press key [1] which means you choosed no
arming delay
4) The main panel will emit a long beep sound that
indicates your setting is done.
5) Finally press to quit setting.
12.2 Jenny’s Cute Cafe
Jenny:
I run a small caf downtown.There are 2 important place,
Zone 1 is the warehouse back door which i never open,so
i hope it will alarm no matter i arm or disarm the system
when someone break in there. And the second important
area is the entrance of my caf(Zone2). While i am at the
work(Disarm), I it would prompt me with doorbell tone
when customer came in. While i go off work (Arm),it will
alarm with siren when some one break in . How to set ?
LOVLOY Answer:
Set Zone1 to be emergency Mode:
Long press & key [1] + short press key [2] + short
press key [1] + to quit.
Set Zone 2 to be Welcome Mode.
Long press & key [2] + short press key [4] + short
press key [1 or 2] + to quit
12.3 Molly’s Home
Molly:
I’m a housewife, i stay at home most of the time. The
balcony is my zone3, i need it alarm delay 30seconds
after arming, and keep silent after disarming. The gate is
my zone 4, i need it to be alarm with doorbell sound no
matter in the status of arm/disarm.How to set zone 3 and
zone 4 features?
19 20

LOVLOY Answer:
Set your Zone3 to be “ordinary mode” by : Long
press & [3] + [1]+[2]+.
Set your zone4 to be doorbell mode by: Long press &
[4] + [3]+[1]+ Done.
13. Specifications
13.1 Main Panel:
Main panel is the heart of system that is responsible for
receiving and processing signal from sensors.When
alarm is activated,the sound from internal siren of panel
will deter intruder. .
Power Supply:DC 5V
Backup Battery: 3*AAA battery ( included) that support to
work around 10hours,Standby 82hrs.
Internal Siren Volume: 120 dB
Frequency:433MHz
13.2 PIR Motion Sensor:
The motion detector is able to detect the temperature and
movement of human body.Protect any place of your
house that can't be cover by contact access sensor,
without opening door or window.
Installation Mode :Wall mounted by bracket
Operating voltage: 4.5V
Transmitting Freq.: 433MHz
Transmitting Distance: minimum 100m
Detecting Coverage:8M,110degree field of view
Installation Height: around 2.2m
Battery:3*AAA battery(included)
Battery lifetime: 10000 times. Would last for 6months if
trigger 55times everyday
13.3 Door / Window Sensor:
Easily monitor opening of doors and windows and any
other open/close places.Once opened, the transmitter
and magnet will be separated and triger alarm
Power Supply:23A 12V Alkaline(Included)
Transmitting Distance: minimum 100m
Installation:≤15mm between 2 parts.
Battery lifetime: 3600times.Would last for 6month if
trigger 20times everyday.
13.4 Wireless Remote Control:
With remote control,you can set arm/arm
delay/disarm/SOS quickly.
Power Supply:CR2032 battery(included)
Works at a range of around 80meter
Operation Freq: 433MHz
Battery lifetime: 180000. Would last for 12months.
14.Terms of Warranty
14.1 One year warranty applies to the whole system and
accessory from purchasing time. The warranty doesn’t
apply when incorrect or improper use.
14.2 We make every effort to offer our customer with best
product & after service. If you need any
assistance,please feel free to contact us by:
21 22
Table of contents
Other Bibene Security System manuals

