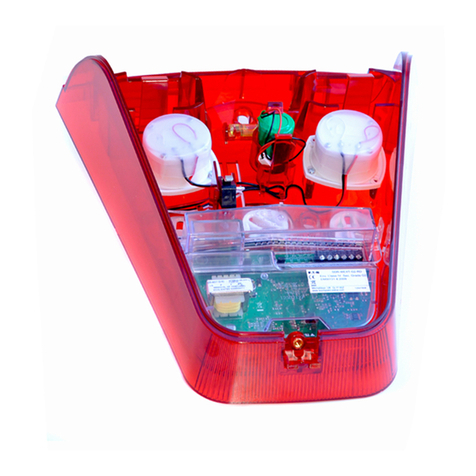
Bibene WP7 User manual

WP7 WIFI Wireless Security Alarm System Kit
User Manual

Thanks for purchasing WP7 WIFI alarm system. The system is already paired
out of box, customers can directly mount it on when they get it! For people who
wants to add up more sensors and wants to know more, please follow the
instrucon.
Foreword Product Features
WIFI Wireless Alarm System
Friendly APP for both IOS/Android System
Expandable up to 8 Sensors
DIY Home Security Alarm System, No Monthly Fee
Instant Push Noficaon for Real-me Alert
Support Auto Arm/Disarm
Backup Baery for Standing by up to 8 Hours
Support 2.4G WIFI Wireless Network
5 Levels Volume 0 -120dB
5 Ring Tones for Selecon
Support Delay Arm/Disarm

Table of Contents
1. Overview of the Main Panel
2. Overview of the Accessories
3.Before Installation
4.APP Operation
4.1 Download App
4.2 Register Account
4.3 WI-FI Configuration
5. APP Function Introduction
5.1 Interface Overview
5.2 Setting Overview
5.3 Panel Setup
5.4 Add and Delete Accessories
5.4.1 Add /Delete Remote
5.4.2 Operate Door/window Sensor
5.4.3 Door/window Sensor Installation
5.4.4 Operate PIR Motion Sensor
5.4.5 PIR Sensor Installation
5.4.6 PIR Sensor Installation Notices
6.Restore to Factory Setting
7.Trouble Shooting
8.Specifications
8.1 WP7 Alarm Main Panel:
8.2 PIR Motion Sensor
8.3 Wireless Door / Window Sensor
8.4 Wireless Remote Control
8.5 Battery Lifetime
9. Terms of Warranty
10.Alexa Control
.................................................
...............................................
..............................................................
....................................................................
....................................................................
................................................................
.............................................................
.................................................
.............................................................
...............................................................
.....................................................................
................................................
........................................................
............................................
........................................
.................................................
......................................................
...........................................
..................................................
................................................................
...................................................................
.......................................................
.............................................................
.............................................
.....................................................
................................................................
............................................................
...................................................................
1
2
2
2
2
3
4
7
7
8
9
10
11
11
14
15
16
18
20
20
21
21
21
21
21
22
22
22

1. Overview of the Main Panel
Volume Buon
Arm/Disarm Buon
Music Buon
Baery Compartment
Micro U SB Jack
Short Press to Change the Volume (0-120db)
Short Press to Arm or Disarm
(Arm: Blue LED Flashes Once / Disarm:
Blue LED Flashes twice)
Short Press to Change the Ring Tones (5 Opons)
3 AAA Baeries Included for Back up
DC 5V/1A for Panel Power
LED Indication
Please Note: When under Wi-Fi disconnected armed status, the system will
alert when detecng moon, but no push noficaon to your phone.
Panel State
Arm
Disarm
Alarming Alert
WIF I Connected
Blue LED Flashes Once
Blue LED Flashes Twice
Blue LED Keep Flashing
WIF I Disconnected
Red LED Flashes Once
Red LED Flashes Twice
Red LED Keep Flashing
Status
Power On
WIF I Connecon
Restore Factory Defaults
LED Indicator
LED Flashes Purple
LED Flashes Red (Successfully Connected Flashes Blue)
Press and Hold Music Buon, then Power on the Main
Panel, Blue LED Flashes 10 Times then Release The Buon
1. Volume Buon
2. Arm/Disarm Buon
3. Music Buon
4. Baery
Compartment
5. Micro
USB Jack
2. Overview of the Accessories
Please Note: All these accessories can purchase in our store.
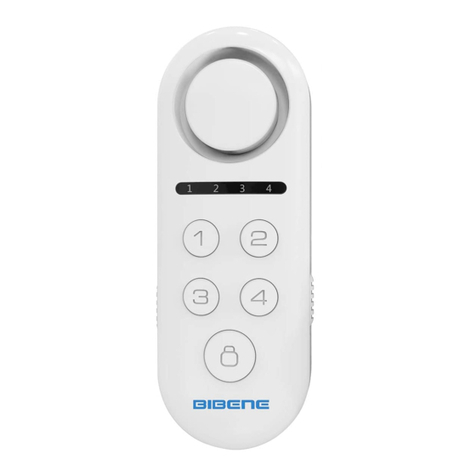
PIR Moon Detector Door/ Window Sensor Remote Controller
3.Before Installation
Wp7 Smart Security Alarm has paired to each sensor when out of box.
Customer can plug and use the alarm with no need to pair the sensor again. If
customer wants to add more sensor or the paired sensor doesn’t work, he can
follow step 5.4.2 Pairing your Sensor and Receiver to add or delete sensor.
Please Note: Please always keep the panel under in charge status, as low
baeries will effect noficaon receiving. Though the panel can power on by
backup baeries, we suggested our customer only use it on emergency.
4.APP Operation
4.1 Download App:
Search keyword“WP7”in App store or Google Play. Download and install the
App.
1 2

Warm Tips: Tap “Allow” to allow receiving noficaon from “WP7” in your
phone.
P7
4.2 Register Account
Register one account if you are first me to use the APP. Take Email register as
example:
1) Click Sign Up and then type your Email address and password, then click
“Confirm”, register finished.
2) Once finished registraon, it will send a registraon confirmaon e-mail to
your mail box .
4.3 WI-FI Configuraon
Step 1: Make sure your main panel is power on, LED will flash purple when
power on.
43
wp7

Step 2: Make sure your phone is connected to your WIFI network
Important: WP7 doesn’t support WIFI of 5Ghz band. If your WIFI router is dual
band(5Ghz and 2Ghz), please make sure to connect with the 2Ghz. Meanwhile,
WP7 works with most of router, like TP-Link, if you cannot connect WP7 into
your WIFI, please contact us with your router brand, thanks.
Step 3: Aer account registraon,you will enter into device list. Click “+”,
choose “WP7”.
Step 4: Long pressing the “Music” & “ Volume” buon on main panel
simultaneously, the red light will flash. Click “Next Step” to enter WIF I
Password, then click “ ” to enter configuraon process, the APP will start the √
60 seconds of countdown.
Step 5: Aer countdown or while countdown, the main panel will flash blue,
indicated that the WP7 is successfully connected to your WIFI. Go back to the
front page, the device will under “LAN UNBOUND DEVICE”, click the device
then it will change into “ONLINE DEVICE”.
5 6
7
7
7
7

5. APP Funcon Introducon
5.1 Interface Overview
5.2 Seng Overview
Tap "Seng" into the alarm panel seng menu.
Tap “Device” icon, all
devices will displayed here.
Tap “Noce” icon, check all
your alarm record.
Tap “Me” icon, modify account
password or sign out.
Tap “Arm” icon, the sensors
synchronized with the alarm
panel will be armed.
Tap "Dis-arm" icon, the sensors
synchronized with alarm panel
will be disarmed.
Panel baery volume display.
Tap "Sensor" icon to add or
delete senors and set up zones.
Tap "Remote" icon to add or
delete remotes.
Tap “Clock” icon to set up
the alarm me.
Tap “Arm Timing” icon to
set up the auto Arm/
Disarm me.
Tap “Arm Delay” icon to set
up the delay me from 0-255
seconds.
Tap “MIPC” to download
MIP C APP and connect to
the camera, customer
should purchase MIPC first.
Not opened funcon
Tape“<”back to device menu.
Tape "Seng" for alarm
panel sengs
Icon Descripon
Icon Descripon
Device Name Click to change your own device name
Icon Descripon
Password
Volume
Alarm Tone
Baery Power
LED
Panel Time
Alarming Time(s)
Language
Power ON
Power OFF
Arm Noce
Disarm Noce
SOS Alarm Noce
APP Noce
Low Baery Noce
Device Version
Default password is 1234, click to change the new one. Share
the password to your family so that they can enter this system.
Change the volume from 0-120db
Click to change the alarm tone (5 opons)
DC Power/ Baery Powered Available
Click to turn on/off the LED indicator
Adjusted according to the network me
Adjustable from 0 to 300 seconds
Adjustable from English to Chinese
Click to receive power on noficaon
Click to receive power off noficaon
Click to receive arm noficaon
Click to receive disarm noficaon
Click to receive SOS noficaon
Click to receive APP noficaon
Click to receive low baery noficaon
Please update your APP version occasionally for more funcon
7 8
7
7
7
77
7

5.3 Panel Setup
1) Arm Timing (Auto Arm/Disarm)
Tap "Arm Timing" to setup the auto arm/disarm ming funcon. Customer can
setup the repeat me from Monday to Sunday(1-7).
Please Note: Dark blue means repeat acve, light blue means repeat inacve.
If you wan to test the auto arming funcon, please set up the tesng me
aer the current me, otherwise, it will alarm the next day.
Acve:
Inacve:
2) Clock (Alarm Clock Funcon)
Tap "Clock" to setup the alarm me, also can be repeat seng from Monday to
Sunday. Only available to set up 2 alarm clocks.
5.4 Add and Delete Accessories
Important: Please keep panel under "Disarm" status when you add accessories.
Rc352 remote control is delicate and easy to carry. It can be aached to your
key ring, or put into your pockets or purses. When you are about to exit or enter
the house, you can use the remote control to arm or disarm the system. Or
press SOS buon to acvate the alarm immediately.
Overview
Disarm
Volume Switch
Arm
SOS
9 10
7
7
7
7
7
7

5.4.1 Add /Delete Remote
Tap "Remotes" to enter adding remote page. Click “Add”, then the main panel
will BEEP ONCE, then click any buon on the remote, the main panel will BEEP
Three Times means successfully added. The APP will change from ADD to DEL.
Click “Del” to delete remotes.
Please Note: ONLY AVAILABLE TO ADD UP 4 REMOTES. Customer can choose
to receive the noficaon of the remote by open/close the buon.
5.4.2 Operate Door/window Sensor
The contact sensor contains a transmier and a magnet,which can be mounted
on a door, window or any entry places can be opened or closed. When the
transmier and magnet are separated, the contact sensor will send a signal to
the control panel and the panel will trigger an alarm.
Add /Delete Door/window Sensor
1.There are triangle marks on the side of the transmier and magnet. Make
sure the triangle marks is close to each other at the first step.
11 12
Magnet
LED Indicator
Transmier
Overview
7
7
77

2.Tap "Sensors" to enter adding sensor page. Click “Add”, then the main panel
will BEEP ONCE, then separate the magnet from transmier around 2cm, LED
light in transmier will flash in Red. The main panel will BEEP Three Times
means successfully added. APP will change from ADD to DEL. Click “Del” to
delete sensors.
Important: Sensor 8 is our EMERGENCY SENSOR, when you added sensor into
sensor 8, it keeps working even under disarmed status. Customer should
separately turn off the buon on the APP if he/she don’t want to be disturbed.
The Panel PIR choice is for our main panel, if you turn on this secon, the main
panel can also use as a moon detector.
5.4.3 Door/window Sensor Installaon
Make sure the contact works properly before installing it. There are triangle
marks on the side of the transmier and magnet. Make sure the triangle marks
is close to each other. Once the transmier and magnet is separated around
2cm by intruder,the LED light in transmier will flash in Red. Alarm will be
acvated.
Paste the transmier and magnet on doors and windows or any other
open/close places with provided double-sided tapes.
13 14
7
7
77

Detecon Lens
LED Indicator
5.4.4 Operate PIR Moon Sensor
With intelligent processing technology, the detector can detect infrared rays
released from human body, and idenfy interfering signals and human
movement signals, thus prevenng false alarm.Being able to detect human
movement within 8m space, suitable for installaon in any place of your house
that can't be cover by contact access sensor,without opening door or window.
Add Door/window Sensor
Tap "Sensors" to enter adding sensor page. Click “Add”, then the main panel
will BEEP ONCE, then wave your hand before the moon sensor to trigger the
sensor, LED light of the sensor will flash in Red. The main panel will BEEP Three
Times means successfully added. APP will change from ADD to DEL. Click “Del”
to delete sensors.
5.4.5 PIR Sensor Installaon
Make sure the PIR Sensor works properly before installing it.
1. Choose a suitable place for installaon.
15 16
Overview
7
7
77

2. Fix the sensor
Fix the installaon bracket on the wall with screws, then fit the groove at the
back of the sensor on the bracket. You can adjust bracket angle to achieve the
best detecon effect.
3. Mount the PIR sensor in proper angle.
It's recommended to mount it at height of 2.2m from ground, and to be
installed indoors in a corner as far as possible in order to obtain the ideal
detecon range. The sensivity is opmal when the walk direcon is vercal to
the infrared direcon. Choose the best locaon and angle according to the
actual situaon.
5.4.6 PIR Sensor Installaon Noces
Please pay aenon on below issues when installaon:
1. Avoid infrared detectors facing to glass windows or doors;
Strong light will interferes with detecon sensivity. What's more, complicated
situaon such as traffic flow,stream of people also should be avoided.
17 18

2. Avoid infrared detectors facing to or close to heat/cold sources;
Heat/Cold sources, such as heaters, air condioner, microwave oven which
may cause false triggering.
3. Avoid two PIR sensors placed in the same space.
There will be interference phenomenon caused by trigger at the same me if
several sensors installed in same place.
4.Avoid installing infrared detector at outside, and it's only for indoor use.
6.Restore to Factory Setting
Operaon steps:
1)Cut off the power of main panel: Plug out both AC adaptor and the backup
AAA baery
2)Reboot the main panel: Long press and hold & buon to open the host,
LED light on the host will flash 10 mes with 4 beep sound at the same. Then
the Red lights flash rapidly,Done!
Note: Restoring factory seng only works on host parameter, it doesn’t effect
all accessory seng or alarm recording.
7.Trouble Shooting
Queson
Why I cannot setup
the auto arm me?
Why my moon sensor
keep alarming even I
disarmed the system?
Why my remote doesn’t
work aer using a while?
Why I cannot receive
the noficaon?
Answer
Customer should set up the auto arm or
disarm me aer current me, otherwise,
it will arm or disarm the me next day.
Please check the sensor adding page,
did you out your sensor into Emergency
sensor(Sensor 8)? If so, the sensor will
keep alarming even disarmed.
Please change the baery and try.
Please open the receive noficaon
buon on your phone, and please
check the seng page, does it open all
the noficaon receiving buon. Usually
you will receive noficaon in 5s, if not,
please restore the main panel and connect
again.
19 20

8.Specifications
8.1 WP6 Alarm Main Panel:
Main panel is the heart of system that is responsible for receiving and
processing signal from sensors.When alarm is acvated,the sound from
internal siren of panel will deter intruder. Meanwhile, it will send push
noficaon to your smartphone .You can arm/disarm on main panel or
applicaon directly.
Power Supply:DC 5V 1A
Backup Baery: 3*AAA baery ( included) that support to work 5-6hours
Internal Siren Volume: 0 - 120 dB
Network: 2.4G WIFI
Frequency:433MHz
8.2 PIR Moon Sensor:
The moon detector is able to detect the temperature and movement of
human body.Protect any place of your house that can't be cover by contact
access sensor, without opening door or window.
Installaon Mode :Wall mounted by bracket
Operang voltage: 4.5V
Transming Freq.: 433MHz
Transming Distance: minimum 100m
Detecng Coverage:8M,110degree field of view
Installaon Height: around 2.2m
Baery:3*AAA baery(included)
8.3 Wireless Door / Window Sensor:
Easily monitor opening of doors and windows and any other open/close
places.Once opened, the transmier and magnet will be separated and trigger
alarm
Power Supply:23A 12V Alkaline(Included)
Transming Distance: minimum 100m
Installaon:≤15mm between 2 parts.
8.4 Wireless Remote Control:
With remote control,you can set arm/disarm or stay at home arm mode,and
make emergency alarm.
Power Supply:CR2032 baery(included)
Works at a range of around 80meter
Operaon Freq: 433MHz
8.5 Baery Lifeme:
PIR Detector sensor: 10000 mes. Would last for 6months if trigger 55mes
everyday
Door/Window Sensor:3600mes.Would last for 6month if trigger 20mes
everyday.
Remote control: 180000. Would last for 12months.
9. Terms of Warranty
One year warranty applies to the whole system and accessory from purchasing
me. The warranty doesn’t apply when incorrect or improper use.
10.Alexa Control
Foreword:
BIBENE WP7 works with Alexa, once you have added to WP7(Skills Name) into
Alexa, you can Arm/Disarm your WP7 alarm system anywhere with your
IOS/Android Smartphone or tablet.
You have to acvate them in a specific way:
1.Alexa,tell smart penguin arm
2.Alexa,tell smart penguin disArm with PIN CODE XXXX
3.Alexa,tell smart penguin to arm
4.Alexa,tell smart penguin to disArm using PIN CODE XXXX
For example, "Alexa, Tell smart Penguin to disarm."
Prepare Before Use:
Please download Alexa free App in your smartphone first and make sure the
Echo have connected with Wi-Fi already.
Add WP7 from Skills into Echo:
Step1: Login in Alexa.
21 22

Step2:Click “Skills” and go to home page.
Step3:Search for “WP7” and Enable the App binding.
Step4: Please sign in with your WP7 App account and password you have
registered already.
23 24
7
7
7
7
“Alexa, tell smart penguin to arm”
“Alexa, tell smart penguin to arm”

Step5:Please click “Yes and Go to Set PIN”.
Step6: Setup a 4 digits PIN code. (Only Digits is acceptable)
Delete the WP7 Skill.
Enter “Your Skill” and “disable Skill” to delete.
25 26
7
7
7
“Alexa, tell smart penguin to arm”
Table of contents
Other Bibene Security System manuals
