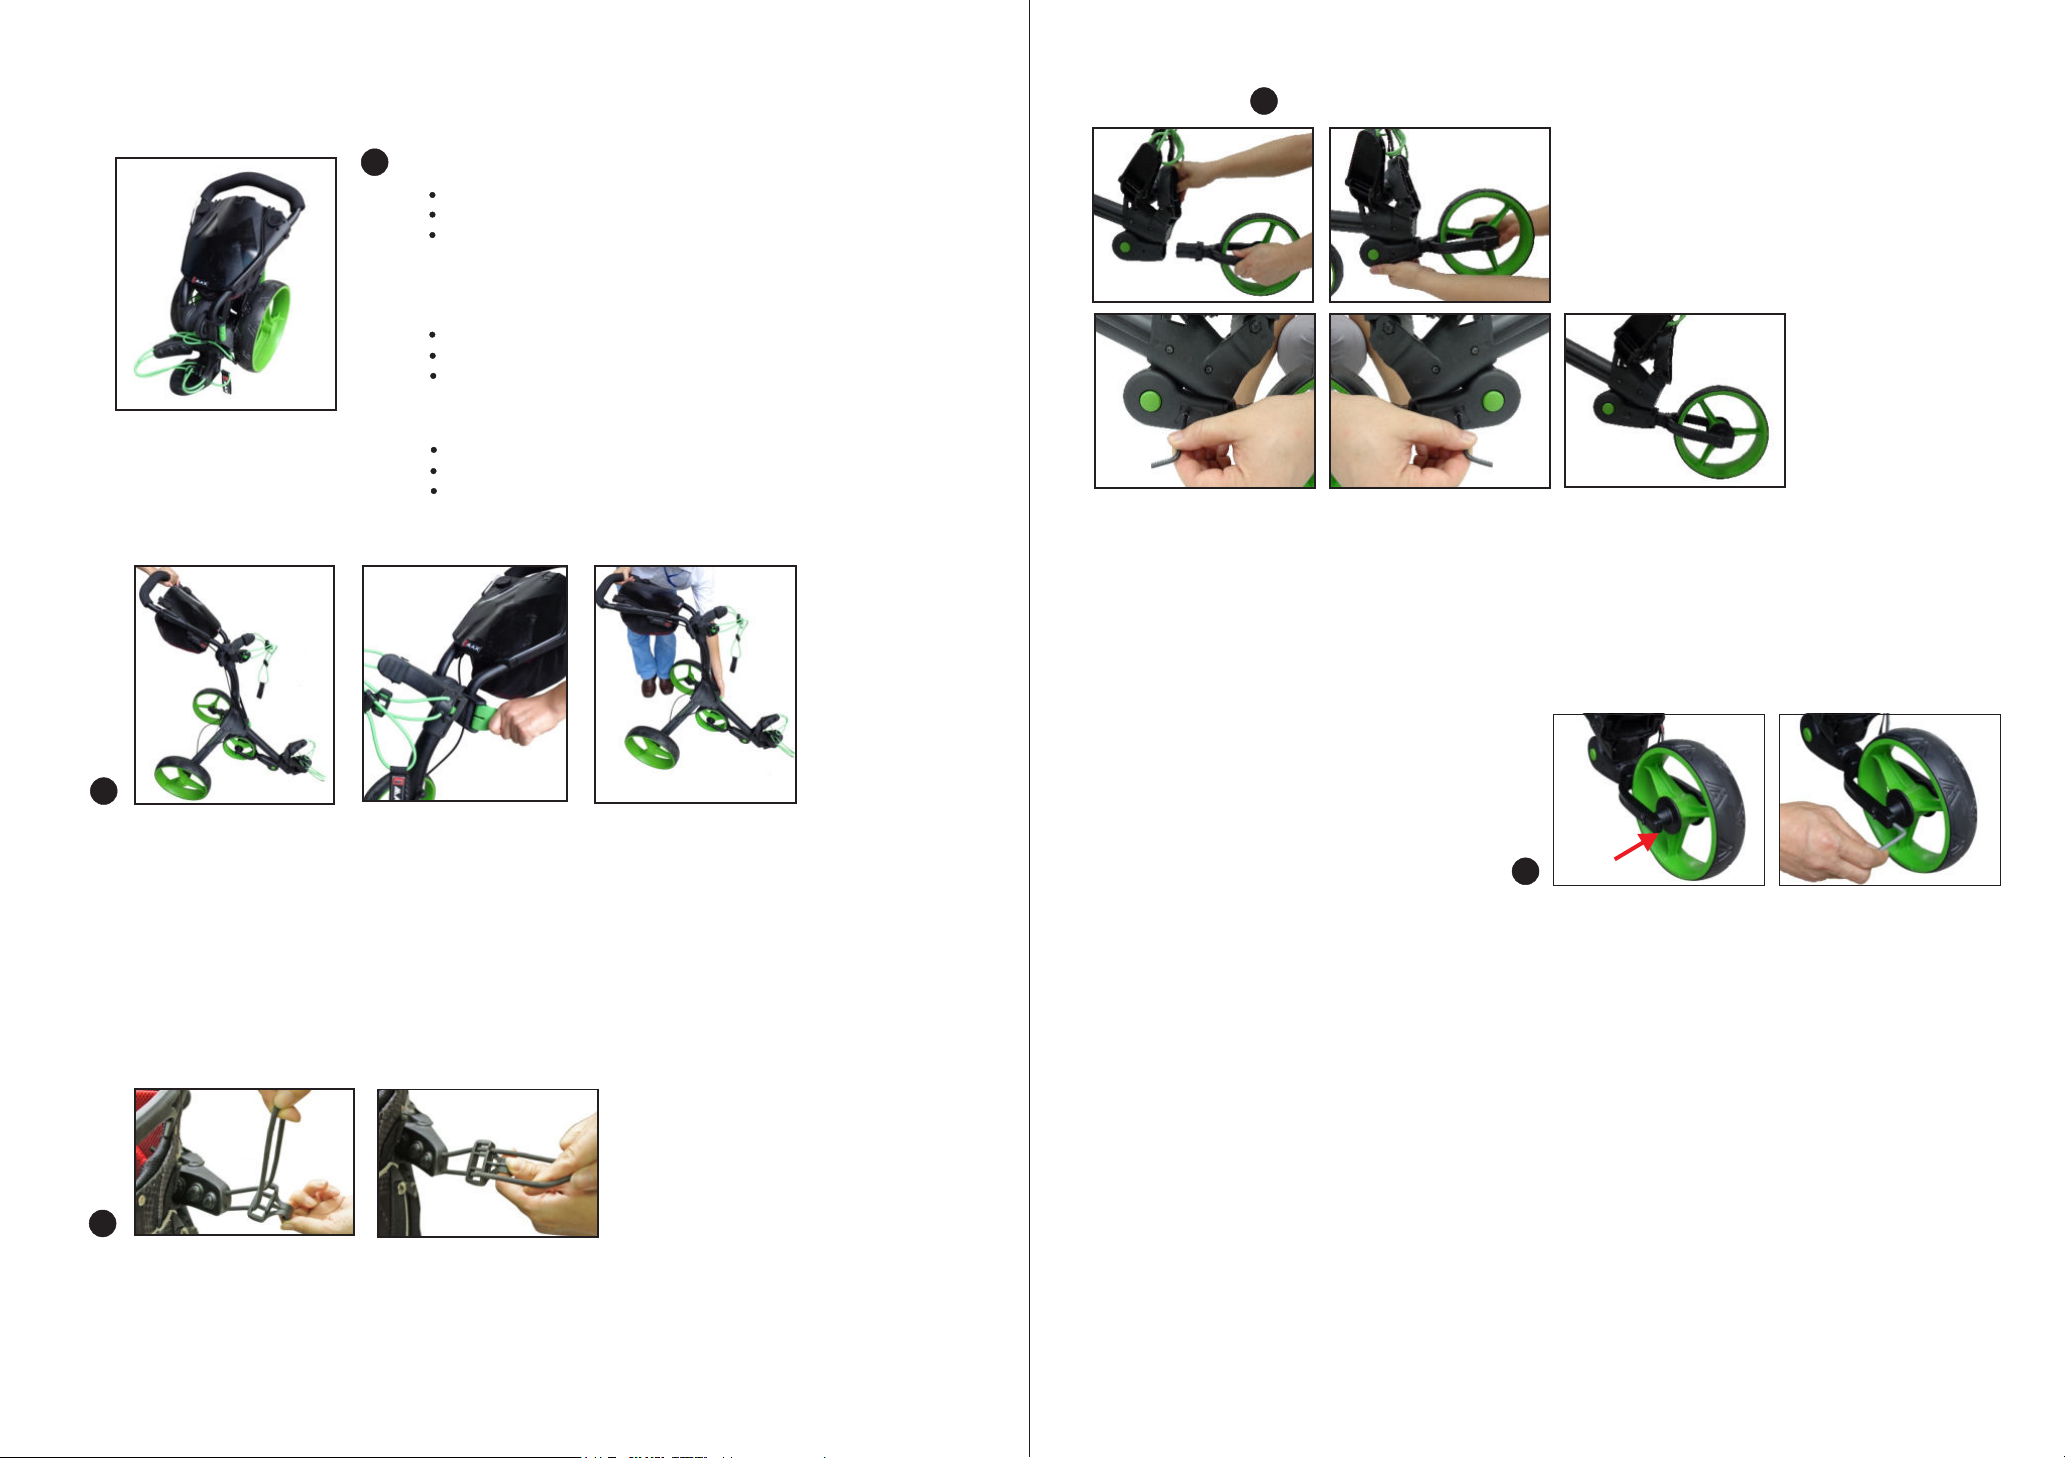
CBAssembling Your New IQ+ CartErstbenutzung und Zusammenbau Ihres TrolleysComment assembler votre nouveau chariot IQ+Front wheelVorderradRoue avantPatent PendingEn Instance de Brevet245A1Remove cart from the box and check that the following items are included: Cart frame with front wheel attached One pair of rear wheels A small Allen Wrench for adjusting the front wheel. Allen Wrench is inside the scorecard holderNehmen Sie das Cart aus der Box und überprüfen Sie, ob die Teile vollständig sind.Cartrahmen inklusive montiertem Vorderrad 1 Paar Haupträder1 kleiner Inbusschlüssel, zur Einstellung des FrontradesSortez le chariot de la boîte et vérifiez si les pièces suivantes sont inclues : Cadre du chariot avec roue avant Deux roues arrières Une petite clef Allen pour ajuster la roue avant La clef Allen est située à l'intérieur du support pour carte de pointageAB3ABRelease the cord and adjust the buckle to required position.(A)Clip the cord to the buckle.(B)Lösen Sie den Gurt und stellen Sie die Schnalle auf die gewünschte Position.(A)Fixieren Sie anschließend den Gurt wieder an der Schnalle.(B)Relâchez le cordon et ajustez la boucle en position voulue.(A)Fixez le cordon à l'ouverture de la boucle.(B)ABCEFront Wheel Adjustment MechanismEinstellen des VorderradAjuster la Roue AvantMécanisme d'Ajustement de la Roue Avant To unfold the cart, lift up on the handle. The cart will unfold and lock automatically into place (A).Lift up on the handle frame lock (B) to adjust the handle into your desired position.To fold the cart, simply press the button (C) and move the handle forward.Nehmen Sie das Cart und falten Sie es durch das gleichzeitige Ziehen und Kippen des Griffes auseinander. Die Arretierung erfolgt automatisch (A).Klappen Sie den Handgriff so auf, dass er sich ergonomisch Ihrer Körpergröße optimal anpasst (B).Um das Cart zusammenzufalten, drücken Sie den Knopf (C).Pour ouvrir le chariot, relevez la poignée. Le chariot s'ouvrira et se verrouillera automatiquement (A). Relevez la poignée de verrouillage du cadre (B) pour ajuster la poignée à la position désirée. Pour plier le chariot, appuyez simplement sur le bouton(C)et déplacez la poignée vers l'avant.If your cart does not track straight you can easily align the wheel by the steps below:1) Standing in front of the cart, locate the 2 alignment screws in the front tips of each fork leg (A).2) Using the allen wrench provided, turn the alignment screw to direct the wheels as needed (B).(see below)** If your cart pulls to the left, tighten the right screw by turning it clockwise. If it pulls to the right, tighten the left screw.*** If you find the screw too tight to fully adjust the wheel as desired, loosen both screws to their stopping point and begin the process again. This will allow for a full range of adjustment. Sollte Ihr Trolley nicht geradlinig laufen, korrigieren Sie das Vorderrad wie folgt:1) Stellen Sie sich vor das Cart und lokalisieren Sie die 2 Einstellungsschrauben beidseitig am vorderen Ende der Radgabel (A)2) Verwenden Sie den beigelegten Inbusschlüssel, um die Einstellungsschrauben so einzustellen, dass das Cart gerade läuft (B)** Wenn Ihr Cart nach links zieht, ziehen Sie die rechte Schraube im Uhrzeigersinn an. Wenn es nach rechts zieht, ziehen Sie die linke Schraube an*** Wenn die 2 Schrauben zu fest angezogen sind, um das Rad einzustellen, lockern Sie beide Schrauben bis zum Anschlag und starten Sie die Einstellung erneut. Dies erlaubt Ihnen einen weiten Bereich der Nachjustierung.Si votre chariot dévie, vous pouvez facilement aligner la roue en suivant les étapes suivantes :1) En vous plaçant devant le chariot, localisez les deux vis d'alignement au bout de chaque montant de roue (A).2) En utilisant la clef Allen fournie, tournez la vis d'alignement pour diriger la roue selon la direction voulue (B). (Voir ci-dessous)** Si votre chariot dévie vers la gauche, resserrez la vis du côté droit en la tournant dans le sens des aiguilles d'une montre. Si le chariot dévie vers la droite, resserrez la vis du côté gauche.*** Si vous trouvez qu'une des vis est trop serrée pour ajuster entièrement la roue, dévissez complètement les deux vis et recommencez le processus à nouveau. Ceci permettra plusieurs possibilités d'ajustement. D1) Align the front wheel and the bottom of trolley.(A)2) Insert the front wheel into the open position.(B)3) Use allen wrench & screws to fix the front wheel on both sides.(C, D & E) 1) Alignez la roue avant et le bas du chariot.(A)2) Insérez la roue avant dans l’ouverture.(B)3) Vissez la roue avant des deux côtés avec une clé Allen.(C, D & E)1) Stellen Sie das Vorderrad sowie die Unterseite des Trolleys in die richtige Position (A)2) Setzen Sie das Vorderrad in die dafür vorgesehene Öffnung (B)3) Fixieren Sie das Vorderrad an den Schrauben an beiden Seiten (C, D & E) mit Hilfe des Inbusschlüssels


