Bimar PCE1 User manual

Copies of the I/B. Please reproduce them without any
changes except under special instruction from Bimar
(Italy). The pages must be reproduced and folded in
order to obtain a booklet A5 (+/- 148.5 mm width x 210
mm height). When folding, make sure you keep the good
numbering when you turn the pages of the I/B. Don’t
change the page numbering. Keep the language
integrity.
1/24
Assembly page 1/24
Fax +32 030 9904733
LIBRETTO ISTRUZIONI
NOTICE D'INSTRUCTIONS
INSTRUCTION BOOKLET
BEDIENUNGSANLEITUNG
MANUAL DE INSTRUCCIONES
CIOTOLA ELETTRONICA
ELECTRONIC BOWL
ELEKTRONISCHER NAPF
BOL ÉLECTRONIQUE
ESCUDILLA ELECTRÓNICA
type PCE1 (mod. PF-05)

Copies of the I/B. Please reproduce them without any
changes except under special instruction from Bimar
(Italy). The pages must be reproduced and folded in
order to obtain a booklet A5 (+/- 148.5 mm width x 210
mm height). When folding, make sure you keep the good
numbering when you turn the pages of the I/B. Don’t
change the page numbering. Keep the language
integrity.
2/24
Assembly page 2/24
Fax +32 030 9904733
Q
uesto simbolo vi invita a leggere attentamente queste istruzioni prima dell’uso
dell’apparecchio, ed eventualmente informare terzi, se necessario. Conservare il
libretto per ulteriori consultazioni e per l’intera durata di vita dell’apparecchio. Se
nella lettura di queste istruzioni d’uso alcune parti risultassero difficili nella
comprensione o se sorgessero dubbi, prima di utilizzare il prodotto contattare
l’azienda all’indirizzo scritto in ultima pagina.
Questo simbolo indica: Attenzione: istruzioni e avvertenze per un impiego sicuro.
AVVERTENZE
•Questo apparecchio è destinato esclusivamente per animali di compagnia (quali cani, gatti o altri
di specie e taglia simili), per contenere cibo: gli alimenti sono contenuti nella ciotola divisa in 4
settori (uno per ogni pasto), e possono essere sia secchi che umidi; tramite l’apposito adattatore è
possibile lasciare il cibo nella confezione se questo è nella comune vaschetta da (78x80)mm.
Tramite l’apposito pannello comandi è possibile programmare la distribuzione dei 4 pasti. Ogni
altro uso è da considerarsi improprio e pericoloso. Il costruttore non potrà essere ritenuto
responsabile di eventuali danni derivanti da uso improprio, erroneo e irresponsabile e/o da
riparazioni effettuate da personale non qualificato.
•Non utilizzare l’apparecchio in ambienti esterni (all’aperto).
•Usare l’apparecchio completo degli accessori in dotazione, non usare accessori diversi: può essere
pericoloso per l’animale e possono danneggiare l’apparecchio. Verificare prima di ogni uso il
buono stato dell’apparecchio e dei suoi elementi: in caso di dubbio rivolgersi ad un centro
assistenza autorizzato e accertarsi che i ricambi forniti siano originali.
•Questo apparecchio deve essere utilizzato solo con n.4 batterie tipo C (non incluse).
Raccomandiamo di sostituire contemporaneamente tutte le batterie. Non mischiare batterie già
utilizzate e batterie nuove. Utilizzare batterie nuove alcaline.
•Non riempire eccessivamente alimenti secchi negli scomparti della ciotola (max: 500ml), e
comunque i cibi non possono oltrepassare il bordo.
•In caso di caduta o cattivo funzionamento, spegnere l’apparecchio. Verificare che nessuna parte sia
danneggiata, e dopo questi accertamenti accenderlo: in caso di dubbio rivolgersi a personale
professionalmente qualificato.
•Non spostare l’apparecchio quando è in funzione.
•L'utilizzatore deve verificare periodicamente l’apparecchio; al fine di non compromettere la salute
dell’animale. Gli animali non devono giocare con l’apparecchio.
•L’apparecchio può essere predisposto da persone con ridotte capacità fisiche, sensoriali o mentali o
con mancanza di esperienza e di conoscenza, se sono sorvegliate oppure se hanno ricevuto
istruzioni riguardo l’utilizzo in sicurezza dell’apparecchio anche per l’animale e se ne hanno capito
i pericoli implicati.
•Ibambini non devono utilizzare l’apparecchio come gioco.
•Non lasciare l’apparecchio esposto agli agenti atmosferici (sole, pioggia, ecc.).

Copies of the I/B. Please reproduce them without any
changes except under special instruction from Bimar
(Italy). The pages must be reproduced and folded in
order to obtain a booklet A5 (+/- 148.5 mm width x 210
mm height). When folding, make sure you keep the good
numbering when you turn the pages of the I/B. Don’t
change the page numbering. Keep the language
integrity.
3/24
Assembly page 3/24
Fax +32 030 9904733
INSTALLAZIONE
•Dopo aver tolto l’imballaggio, assicurarsi dell’integrità dell’apparecchio; in caso di dubbio non
utilizzarlo e rivolgersi a personale professionalmente qualificato. Gli elementi di imballaggio
(sacchetti in plastica, polistirolo espanso, chiodi, ecc.) non devono essere lasciati alla portata di
mano di bambini in quanto potenziali fonti di pericolo; smaltirli secondo le norme vigenti.
•Prima di ogni utilizzo verificare che l’apparecchio sia in buono stato: in caso di dubbio rivolgersi a
personale professionalmente qualificato.
•La superficie d’appoggio deve essere stabile, ampia (sono da escludere mensole), non in pendenza
(in quanto l’apparecchio potrebbe ribaltarsi).
•Posizionare l’apparecchio lontano da fonti di calore (stufe, termoventilatori), tende, tappezzerie,
apparecchi elettrici (come computer, strumenti di precisione, ecc..), o mobili delicati che
potrebbero venire danneggiati. La superficie d’appoggio non deve deteriorarsi al contatto dei cibi.
•Assicurarsi che l’apparecchio funzioni correttamente: nel caso contrario spegnere l’apparecchio e
farlo controllare da personale professionalmente qualificato.
•Al primo utilizzo è necessario pulirle e lavare le ciotole: vedi paragrafo “Pulizia e Manutenzione”.
•In caso di guasto o cattivo funzionamento spegnere l’apparecchio e farlo controllare da personale
professionalmente qualificato; le riparazioni effettuate da personale non qualificato possono essere
pericolose e fanno decadere la garanzia.
FUNZIONAMENTO
L’apparecchio è composto dai seguenti elementi:
-Base (F), con due sedi per batterie ed interruttore principale ON/OFF sul fondo;pannello
elettronico (L): che permette la programmazione dei pasti, impostazione dell’ora, la
registrazione e la diffusione vocale di richiamo al momento di erogazione del pasti, e include il
led “LO BATT” che si accende quando le batterie sono da sostituire
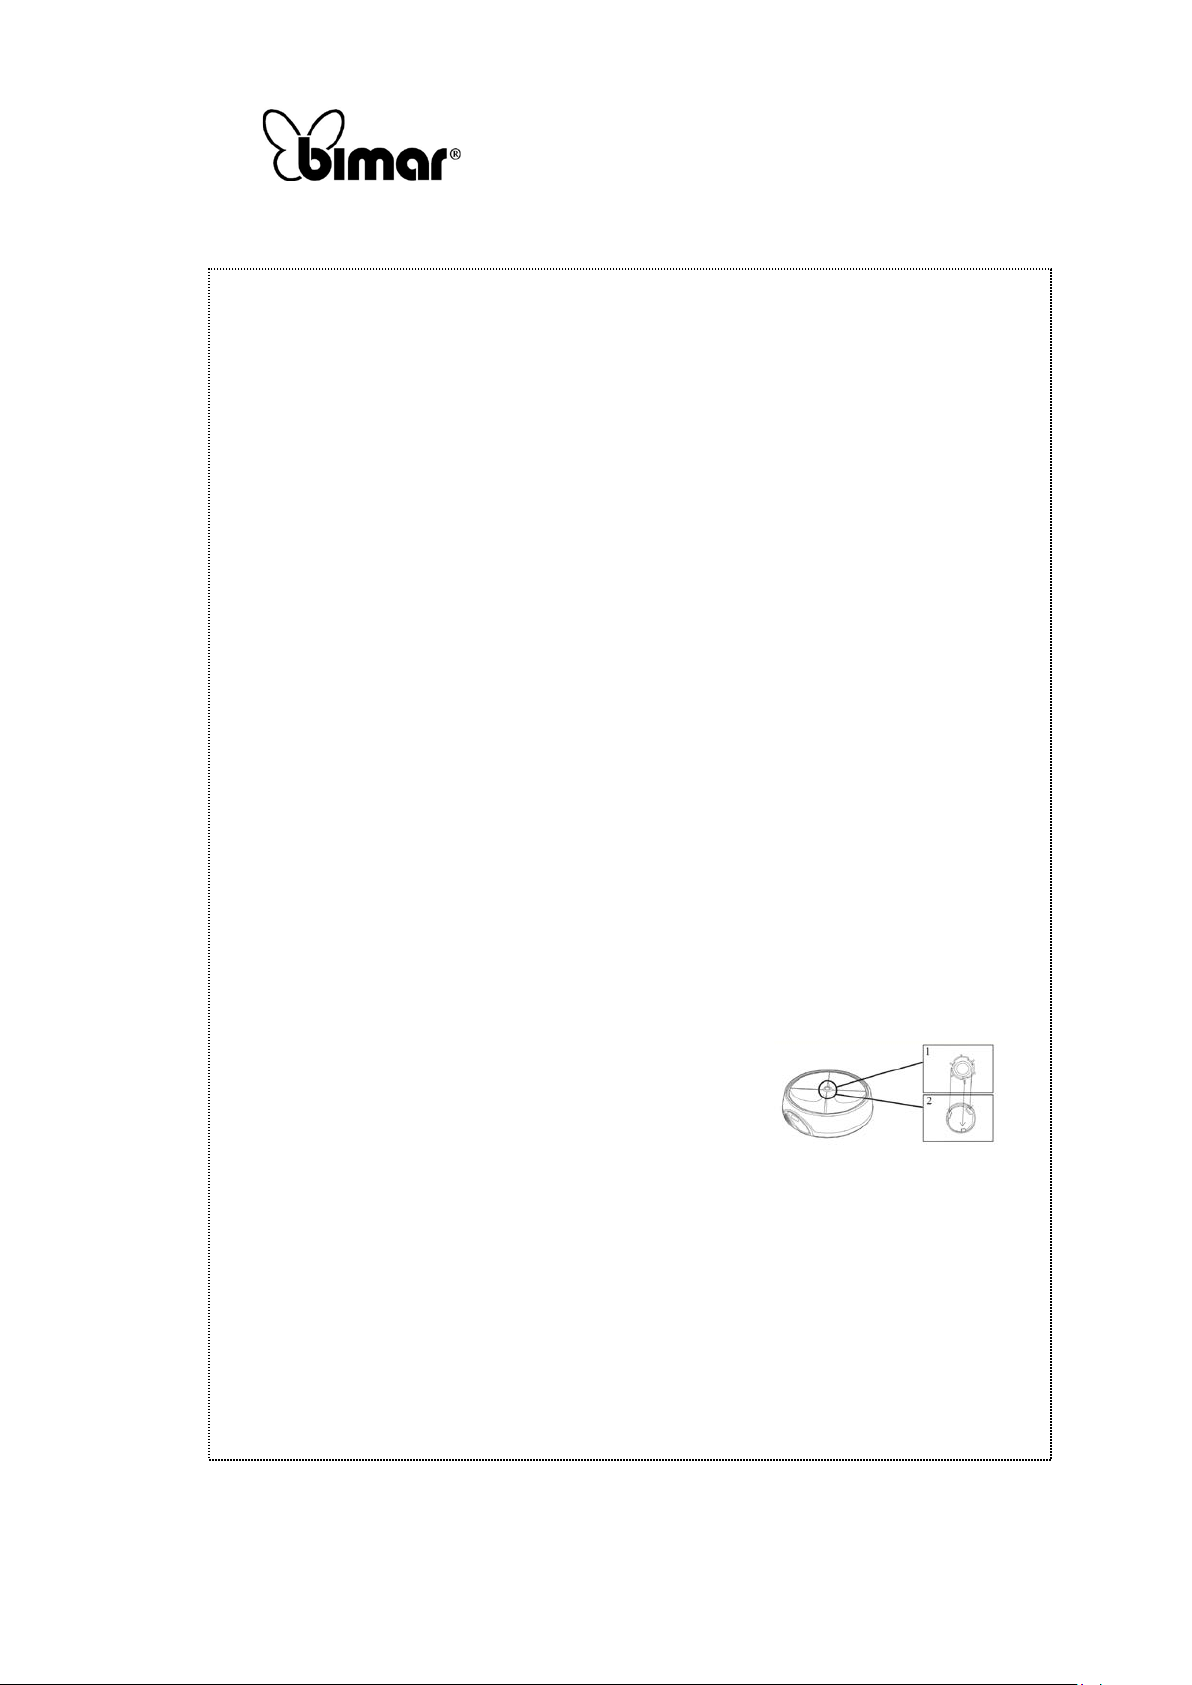
-Ciotola per 4 pasti (I): ogni settore ha indicato il numero del
pasto (1-4), l’adattatore per le comuni scatolette (può essere
inserito in qualsiasi settore): la ciotola è inserita sulla base e si
alloggia perfettamente solo se le scanalature “2” si accoppiano
con i corrispondenti rilievi “1” ricavati nella cavità centrale
-Disco (E), deve essere inserito al centro del foro
-Coperchio ciotola (B) include il comparto per il ghiaccio (H) ed il gancio a molla per bloccare il
coperchio scorrevole: ha 5 perni che assicurano alla base per mezzo dei fori corrispondenti
praticati nella corona interna della base
-Coperchio scorrevole (C): va posizionato sopra il settore aperto, e agganciato al gancio a molla
del coperchio (B)
-Copertura principale (A): chiude completamente il coperchio e ha 6 perni che lo assicurano alla
base per mezzo dei fori corrispondenti praticati nella corona esterna della base.
FUNZIONAMENTO
1. Assicurarsi che l’interruttore sia in pos. OFF.
2. Aprire i 2 coperchi dei 2 vani batterie, e rispettando la polarità inserire n.4 batterie (2 caduno),
tipo C, 1.5V, chiudere i coperchi correttamente.
3. Portare l’interruttore in pos. ON, sul display si illuminerà scritta , ed inizierà un ciclo di
auto controllo per alcuni secondi.
4. Inserire il cibo negli appositi settori e se desiderato utilizzare adattatore per scatolette, fare
attenzione a non mettere troppo cibo all’interno.
5. Porre il coperchio della ciotola sulla base in modo corretto, inserire il disco nel foro centrale.
6. Collocare il coperchio scorrevole sopra il settore scoperto ed agganciarlo al coperchio (B).

Copies of the I/B. Please reproduce them without any
changes except under special instruction from Bimar
(Italy). The pages must be reproduced and folded in
order to obtain a booklet A5 (+/- 148.5 mm width x 210
mm height). When folding, make sure you keep the good
numbering when you turn the pages of the I/B. Don’t
change the page numbering. Keep the language
integrity.
4/24
Assembly page 4/24
Fax +32 030 9904733
7. All’interno del comparto ghiaccio (H) è possibile inserire alcuni cubetti o la mattonella di
ghiaccio (se fornita in dotazione e dopo averla lasciata precedentemente nel freezer per circa 12
ore) per mantenere fresco il cibo.
8. Posizionare la copertura principale sulla base.
9. Pannello di comandi:
-Impostazione orologio: premere il tasto “SET” per almeno 2 secondi fino a che l’ora inizierà a
lampeggiare, per modificare ora premere il tasto “MODE”, per confermare premere il tasto
“SET”; successivamente i minuti inizieranno a lampeggiare, per regolarli premere il tasto
“MODE” e per confermare premere nuovamente il tasto “SET”. A questo punto l’ora ed i
minuti inizieranno a lampeggiare contemporaneamente, premendo il tasto “MODE” si può
scegliere di impostare orologio tra le 12 ore o le 24 ore, alla fine della selezione confermare
tramite il tasto “SET”.
-Programmazione pasti: è possibile impostare l’orario del pasto premendo il tasto “MODE”, il
primo numero indica il pasto, mentre il secondo numero (se impostato 12h), mentre (se
impostao 24h) i numeri sono il secondo ed il terzo che indicano ora intera; premendo il tasto
“SET” per almeno 2 secondi inizierà a lampeggiare ora, per regolare ora premere il tasto
“MODE” e per confermare premere il tasto “SET”.
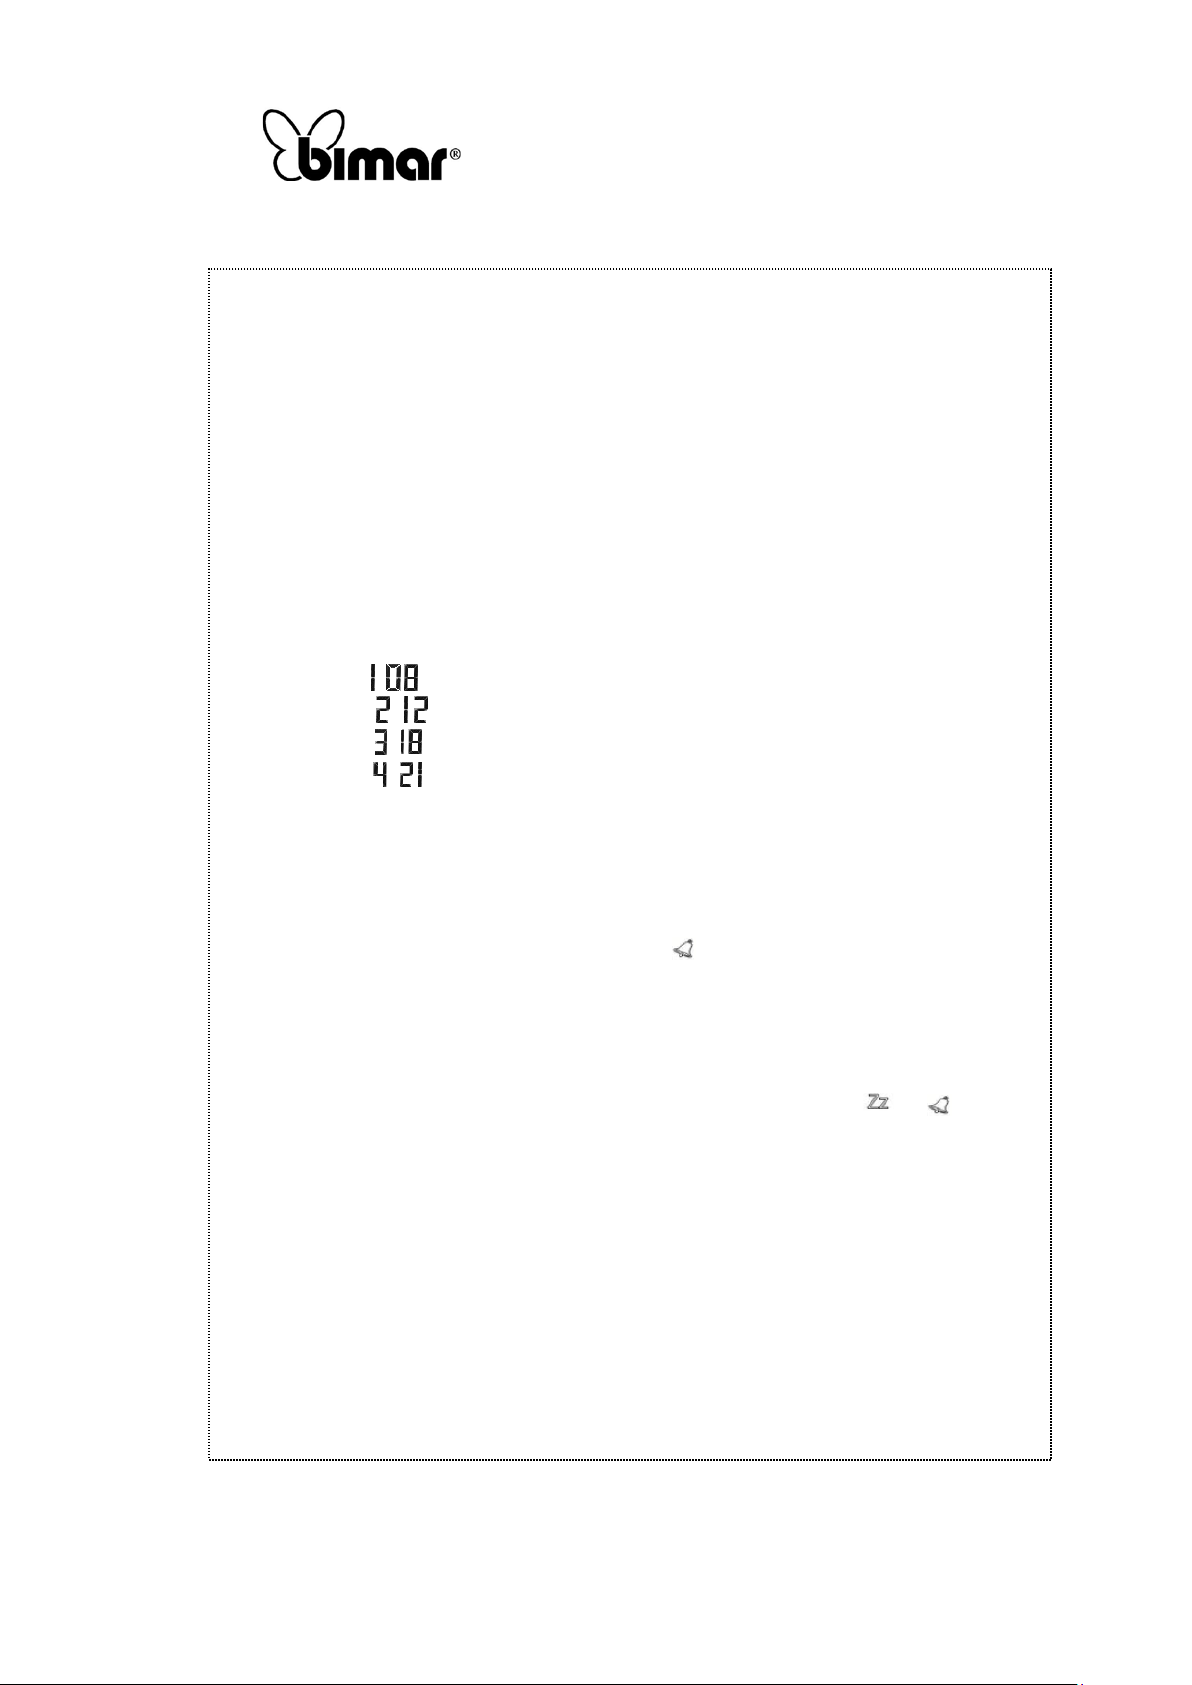
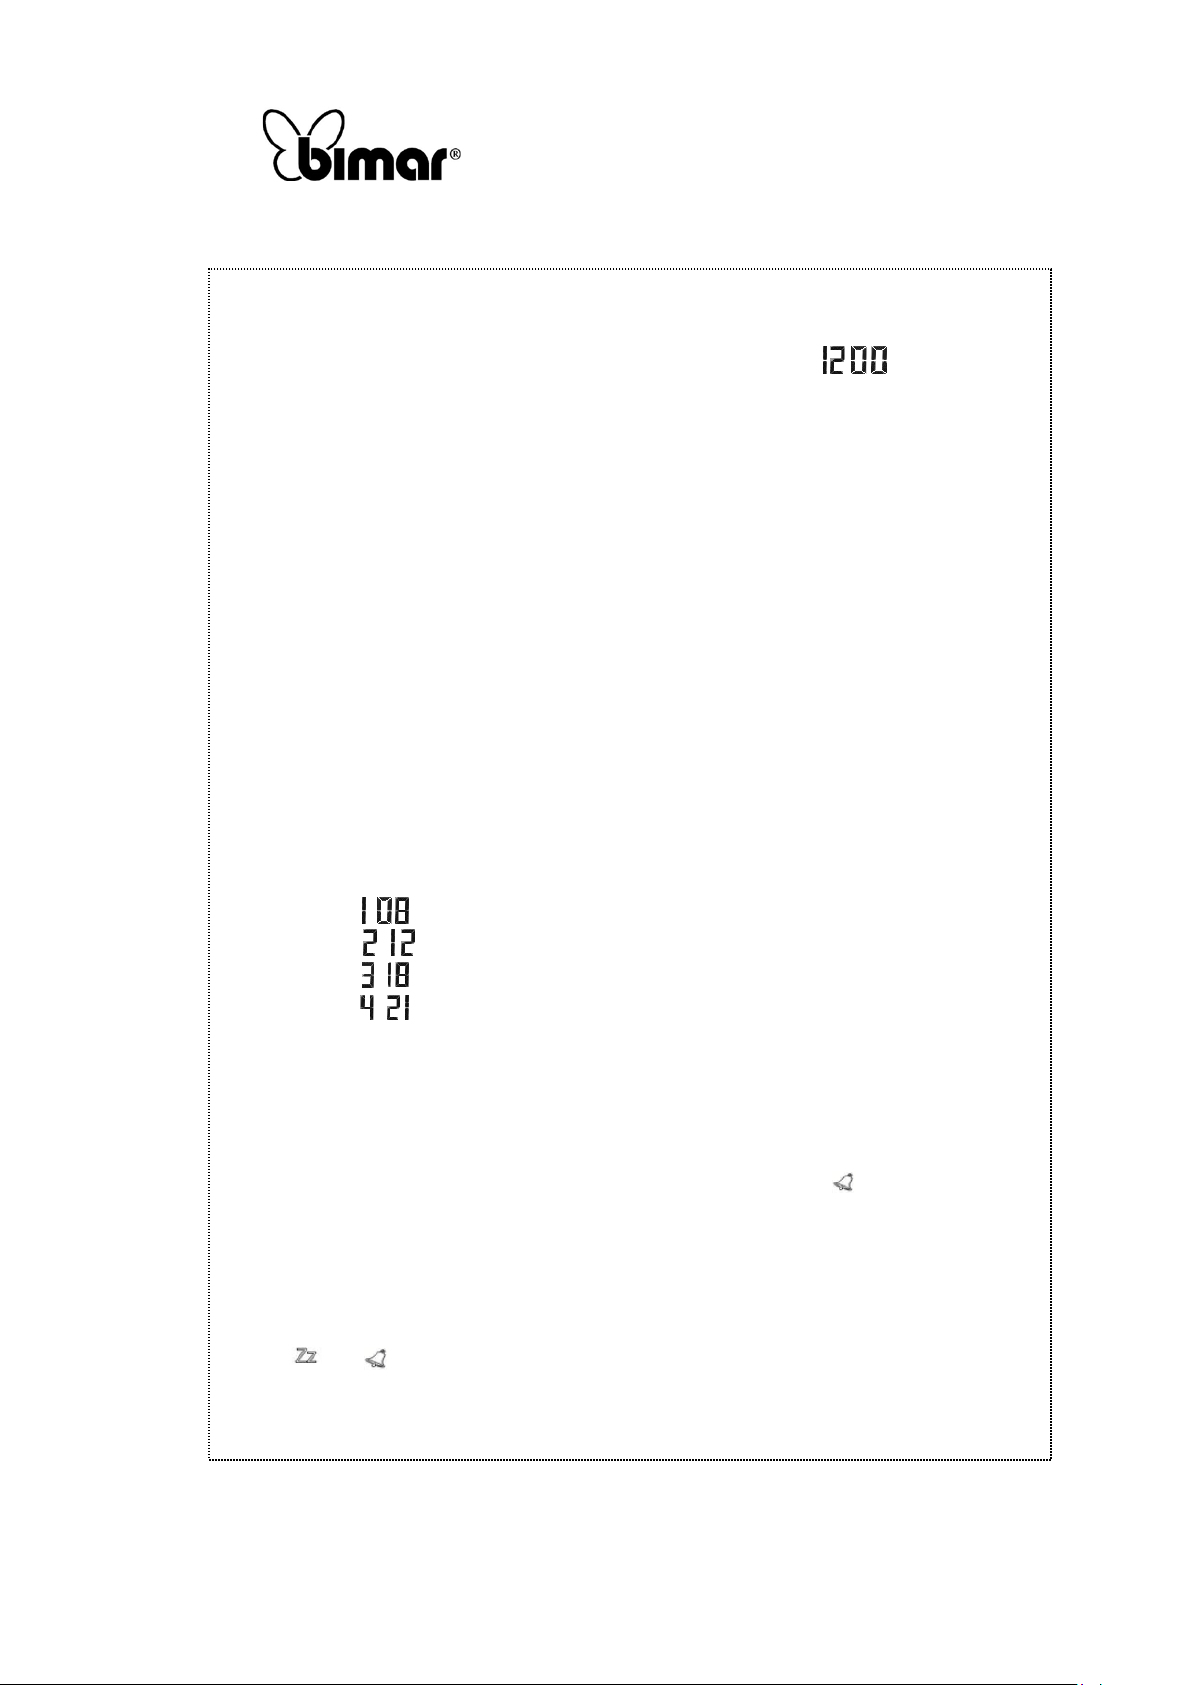
Un giorno con 4 pasti diversi (impostazione 24h); esempio:
- impostando il primo pasto è disponibile alle 8
- impostando il secondo pasto è disponibile alle 12
- impostando il terzo pasto è disponibile alle 18
- impostando il quarto pasto è disponibile alle 21
10. Allo scadere di ogni intervallo di tempo, la ciotola ruota dando accesso al successivo pasto.
11. Registrazione del messaggio vocale: per registrare la voce, premere il tasto “REC” fino alla fine
del messaggio, massima durata 6 secondi. È possibile riascoltare il messaggio registrato
premendo il tasto “PLAY”; si diffonde alla fine di ogni programmazione del pasto e dopo ogni
ciclo di auto controllo.
12. Premendo il tasto “START NOW” (INIZIO PROGRAMMA) viene attivata immediatamente la
programmazione elettronica dei pasti, sul display apparirà il simbolo della campana “ ”, la
ciotola inizierà un ciclo di auto controllo per posizionarsi nel settore n.4, porre il coperchio
scorrevole sopra il settore scoperto n.4 ed agganciarlo al coperchio (B). Allo scadere
dell’intervallo di tempo impostato la ciotola ruota dando accesso al primo pasto disponibile nel
settore n.1. Allo scadere del secondo tempo impostato la ciotola ruota nuovamente rendendo
accesso al secondo pasto disponibile, settore n.2; fino ai pasti successivi 3 e 4.
13. Premendo il tasto “START TOM” (INIZIO PROGRAMMA DOMANI, TOM=TOMORROW)
viene attivata la programmazione elettronica dei pasti dalla mezzanotte (per il giorno successivo),
sul display appariranno i simboli “ ” e “”, la ciotola inizierà un ciclo di auto controllo per
posizionarsi nel settore n.4, porre il coperchio scorrevole sopra il settore scoperto n.4 ed
agganciarlo al coperchio (B). Allo scadere dell’intervallo di tempo impostato la ciotola ruota
dando accesso al primo pasto disponibile nel settore n.1. Allo scadere del secondo tempo
impostato la ciotola ruota nuovamente rendendo accesso al secondo pasto disponibile, settore n.2,
fino ai pasti successivi 3 e 4.
14. Ultimato l’utilizzo, portare interruttore principale in pos. OFF.
Per lunghi periodi di inattività, portare sempre interruttore nella pos. OFF.

Copies of the I/B. Please reproduce them without any
changes except under special instruction from Bimar
(Italy). The pages must be reproduced and folded in
order to obtain a booklet A5 (+/- 148.5 mm width x 210
mm height). When folding, make sure you keep the good
numbering when you turn the pages of the I/B. Don’t
change the page numbering. Keep the language
integrity.
5/24
Assembly page 5/24
Fax +32 030 9904733
PULIZIA E MANUTENZIONE
•Per smontare la copertura principale con coperchio (B) tirare verso l’alto; per la pulizia di tutti
questi elementi compreso anche il coperchio scorrevole, la ciotola, adattatore per le scatolette e
disco utilizzare una spugnetta morbida con acqua tiepida e un normale detersivo per stoviglie,
risciacquare poi con acqua abbondante, e asciugare con cura. Non utilizzare pagliette metalliche o
prodotti abrasivi. Le parti a contatto con gli alimenti possono essere lavati in lavastoviglie.
•Base può essere pulita unicamente con un panno morbido leggermente imbevuto d’acqua e/o
normale detersivo. Non può essere lavato in lavastoviglie e neppure sotto il getto d’acqua: nel
caso le parti elettriche (contatti batterie) si bagnino, asciugare con cura e completamente prima
dell’utilizzo.
•Se si decide di non utilizzare più l’apparecchio, si raccomanda di renderlo inoperante togliendo le
batterie, e di rendere innocue quelle parti che sono pericolose qualora utilizzate per gioco dai
bambini. Le batterie esauste devono essere smaltite negli appositi centri di raccolta siti nel
comune di appartenenza o comunque in appositi contenitori. In questo modo, verranno rispettate
le normative di legge.
Avvertenze per il corretto smaltimento del prodotto ai sensi della Direttiva Europea
direttiva 2011/65/UE.
Alla fine della sua vita utile il prodotto non deve esser smaltito insieme ai rifiuti urbani.Può essere
consegnato presso gli appositi centri di raccolta differenziata predisposti dalle amministrazioni
comunali, oppure presso i rivenditori che forniscono questo servizio. Smaltire separatamente un
elettrodomestico consente di evitare possibili conseguenze negative per l’ambiente e per la salute
derivanti da un suo smaltimento inadeguato e permette di recuperare i materiali di cui è composto
al fine di ottenere un importante risparmio di energia e di risorse. Per rimarcare l’obbligo di
smaltire separatamente gli elettrodomestici, sul prodotto è riportato il marchio del contenitore di
spazzatura mobile barrato. Lo smaltimento abusivo del prodotto da parte dell’utente comporta
l’applicazione delle sanzioni amministrative previste dalla normativa vigente.
Copies of the I/B. Please reproduce them without any
changes except under special instruction from Bimar
(Italy). The pages must be reproduced and folded in
order to obtain a booklet A5 (+/- 148.5 mm width x 210
mm height). When folding, make sure you keep the good
numbering when you turn the pages of the I/B. Don’t
change the page numbering. Keep the language
integrity.
6/24
Assembly page 6/24
Fax +32 030 9904733
T
his symbol invites you to read these instructions carefully before using the
appliance, and also inform other users of them, if necessary. Store this booklet for
future reference and for the entire lifetime of the device. If any parts of these
instructions are difficult to understand or if in doubt, contact the company at the
address written on the last page before using the product.
This symbol indicates: Note: instructions and warnings for safe use.
WARNINGS
•This appliance should be used exclusively for pets (such as dogs, cats or other species of pets of a
similar size and type) to hold food: the food is stored in a specific bowl divided into 4
compartments (one for each meal), and the food can either be dry or wet; thanks to the specific
adaptor, the food can be left in its packaging if it is in a commonly-used tin (78x80)mm. With the
control panel it is possible to programme when the 4 meals will be served. Any other use should be
considered inappropriate and dangerous. The manufacturer cannot be held responsible for any
damages caused by improper, incorrect or irresponsible use and/or by repairs done by an
unqualified person.
•Do not use the appliance outdoors.
•Only use the accessories provided: any other accessories used can pose a danger to the pet and can
damage the appliance. Before each use check that the appliance and its components are in good
condition: in case of doubt, contact an authorised service centre and make sure that the parts
supplied are original.
•Only 4 C batteries (not included) must be used in this appliance. Replacing all batteries at the
same time is recommended. No not mix already used batteries with new batteries. Use new alkaline
batteries.
•Do not overfill the compartments of the bowl with dry food (max: 500ml). The food must not
exceed the line
•Should the appliance fail or not work correctly, turn it off. Check that it is not damaged, and
thereafter turn it back on: if in any doubt, consult a qualified professional.
•Do not move the appliance when it is running.
•The user must check the appliance periodically so as to not compromise the safety of the pet.
Animals should not play with the appliance.
•The appliance can be used by persons with reduced physical, sensory or mental capabilities or lack
of experience and knowledge provided they receive the necessary supervision or instructions
concerning the safe use of the appliance, with regard to the pet too, and they are aware of the
potential dangers.
•Children should not use the appliance as a toy.
•Do not leave the appliance exposed to atmospheric conditions (sun, rain, etc.).

Copies of the I/B. Please reproduce them without any
changes except under special instruction from Bimar
(Italy). The pages must be reproduced and folded in
order to obtain a booklet A5 (+/- 148.5 mm width x 210
mm height). When folding, make sure you keep the good
numbering when you turn the pages of the I/B. Don’t
change the page numbering. Keep the language
integrity.
7/24
Assembly page 7/24
Fax +32 030 9904733
INSTALLATION
•After unpacking, check the integrity of the appliance; if in doubt, do not use and contact a qualified
technician. The packaging materials (plastic bags, polystyrene, metal staples, etc.) must not be left
within reach of children, as they constitute possible sources of danger and must be disposed of
according to applicable regulations.
•Before each use, ensure that the appliance is in good order: if in any doubt, consult a qualified
professional.
•The surface where the appliance is used must be stable, spacious (do not use on shelves), and level
(since the appliance could tip over).
•Ensure that the appliance is kept far from any sources of heat (stoves, heaters), curtains, tapestries,
electrical appliances (such as computers, precision tools, etc.) or delicate furniture that could get
damaged. The surface where the appliance is used must not be damaged should it come into contact
with food.
•Ensure that the appliance works correctly: if not, turn it off and consult a qualified professional.
•When using the appliance for the first time, first clean the bowl: refer to the paragraph "Cleaning
and Maintenance".
•If there is a fault or the appliance is not working correctly, switch it off and have it checked by a
qualified professional. Repairs done by an unqualified person can be dangerous and cause the
guarantee to become void.
USING THE APPLIANCE
The appliance consists of the following parts:
-Base (F), with two slots for batteries and the main ON/OFF switch on the bottom; electronic
panel (L): this allows you to programme the meals, set the time, record and play a command
when the food is dispensed, and it includes a “LO BATT” LED, that lights up when the
batteries need to be replaced.
-Bowl for 4 meals (I): each compartment is numbered (1-4), the
adaptor for commonly-used tins (can be inserted into any
compartment): the bowl is inserted in the base and fits
perfectly only if the grooves “2” match up with the
corresponding notches “1” in the central hole.
-Disc (E), must be inserted in the middle of the hole
-Bowl cover (B) includes the ice compartment (H) and the spring-loaded catch to block the
sliding cover: it has 5 pins that secure it to the base through the corresponding holes set in the
internal ring of the base.
-Sliding cover (C): place it over the open compartment, and hook it onto the spring-loaded catch
(B)
-Main cover (A): closes the cover completely and has 6 pins that secure it to the base through the
corresponding holes set in the external ring of the base.
USING THE APPLIANCE
Ensure the switch is set to OFF
1. Open the 2 covers of the two battery slots, and insert the 4 batteries (2 in each), ensuring the
polarities are correct. The batteries are C type, 1.5V. Replace the battery covers.
2. Set the switch to ON. Text will light up on the display , and an auto check cycle will
run for a few seconds
3. Add the food to the compartments, and if you wish to use the tin adaptor ensure that you do not
place too much food in the compartments.
4. Place the cover of the bowl on the base correctly. Insert the disc in the hole in the middle.
5. Place the sliding cover above the uncovered compartment and hook it to cover (B).
Copies of the I/B. Please reproduce them without any
changes except under special instruction from Bimar
(Italy). The pages must be reproduced and folded in
order to obtain a booklet A5 (+/- 148.5 mm width x 210
mm height). When folding, make sure you keep the good
numbering when you turn the pages of the I/B. Don’t
change the page numbering. Keep the language
integrity.
8/24
Assembly page 8/24
Fax +32 030 9904733
6. Ice blocks or an ice pack can be placed inside the ice compartment (H) to keep food cool. (The
ice pack may come with the appliance and must be placed in the freezer for approximately 12
hours before use.)
7. Place the main cover on the base.
8. Control panel:
a. Setting the time: press and hold the “SET” button for at least 2 seconds until the time starts
flashing. To change the time, press “MODE”, to confirm press “SET”; the minutes will then
start flashing. To set them press “MODE” and to confirm the time press “SET” once again. The
hour and minutes will start flashing together. Press “MODE” to select either a 12 or 24 hour
clock. Confirm your selection by pressing “SET”.
b. Programming meals: it is possible to set the time of the meal by pressing “MODE”. The first
number indicates the meal number, while the second number (if using a 12 hour clock), or the
second and third numbers (if using a 24 hour clock) indicate the time; press and hold “SET” for
at least 2 seconds and the time will start flashing. To set the time press “MODE” and to confirm
the time press “SET”.
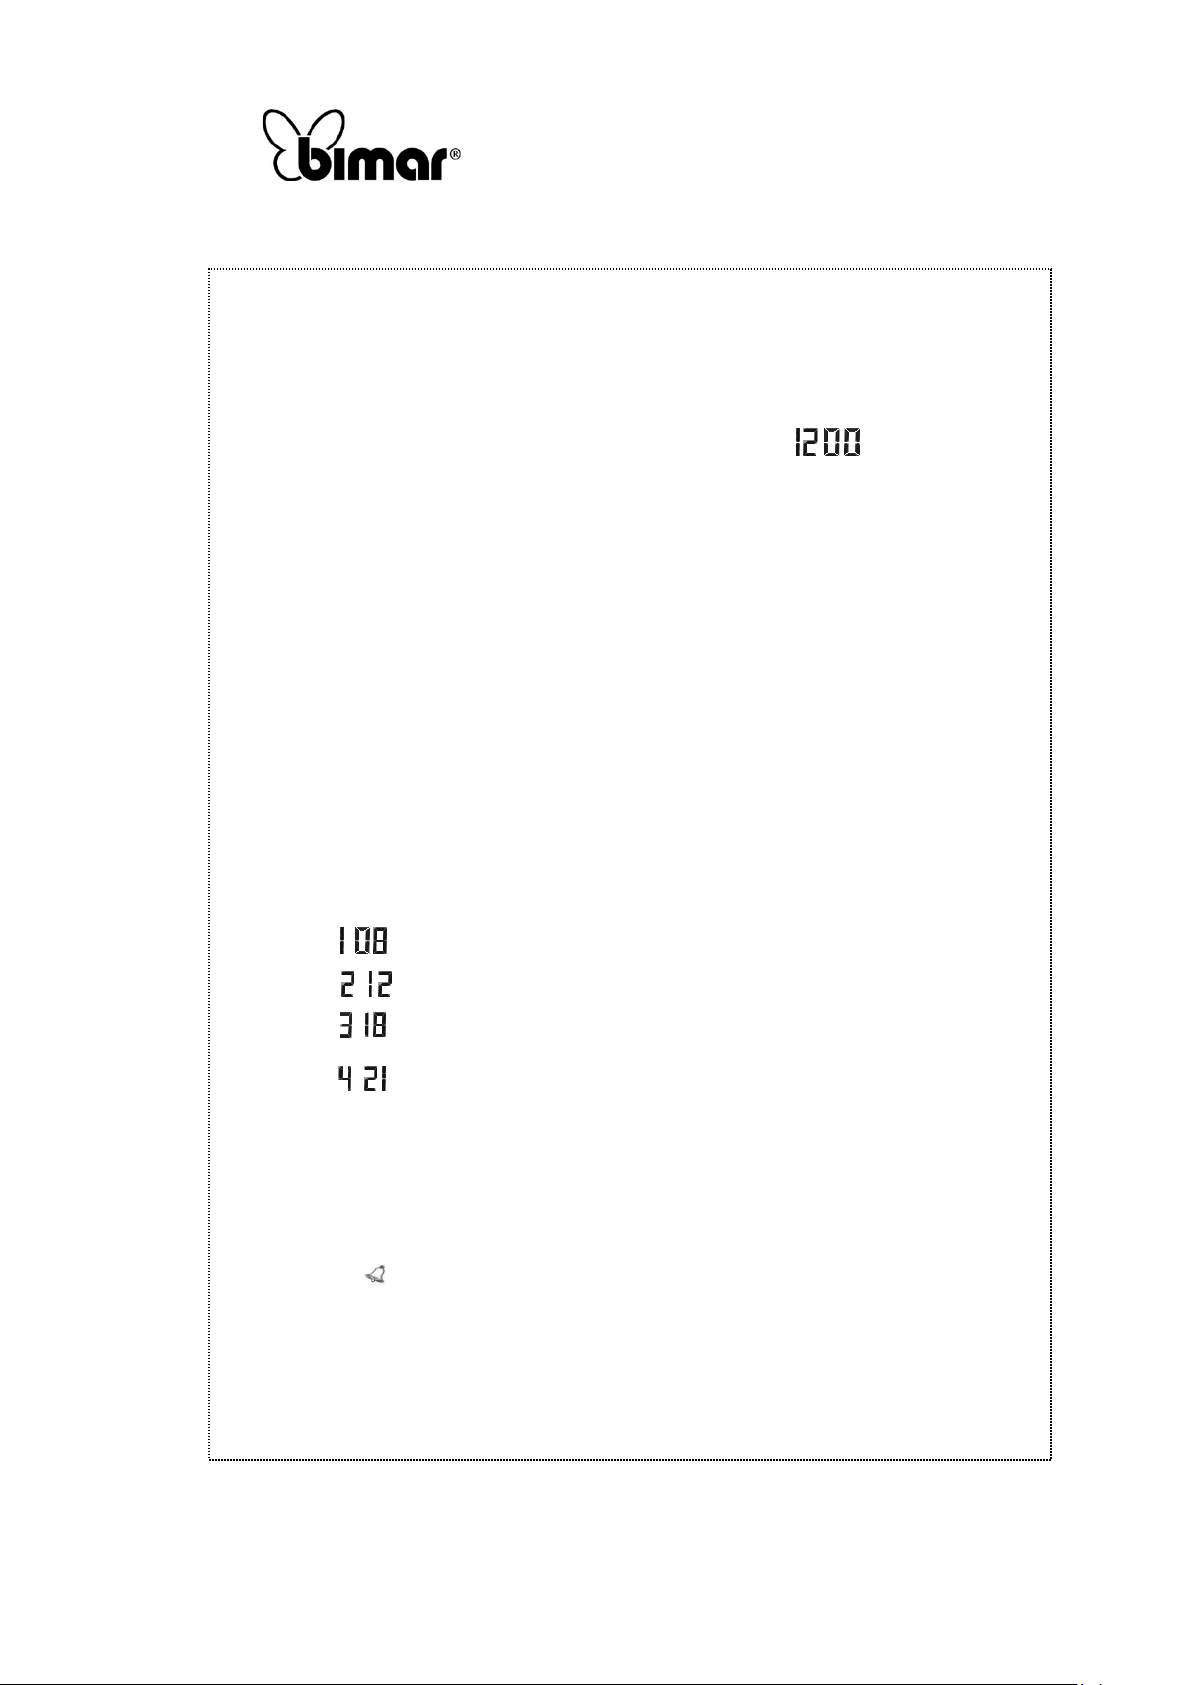
9. A day with 4 separate meals (24h setting); example
-by setting the first meal will be at 08h00
-by setting the first meal will be at 12h00
-by setting the first meal will be at 18h00
-by setting the first meal will be at 21h00
10. When each time interval is over, the bowl turns, allowing the pet to access its next meal.
11. Recording voice message: to record your voice, press and hold the “REC” button until the end
of the message. The recording can be a maximum of 6 seconds long. It is possible to listen to
the recording by pressing the “PLAY” button; it plays each time a meal is set and after each
auto control cycle.
12. By pressing the “START NOW” button (CYCLE STARTS) the programming of the meals is
immediately activated. On the display the bell symbol ” will appear. The bowl will start an
auto check cycle. In order to place itself in compartment 4, place the sliding cover above the
uncovered compartment no. 4 and hook it to the cover (B). When the set time interval has
lapsed, the bowl turns, giving the pet access to the first meal available in compartment no. 1.
When the second period of time has lapsed, the bowl will turn once again, giving the pet access
to the second meal available in compartment no. 2. The same applies for meals 3 and 4
13. By pressing the “START TOM” button (CYCLE STARTS TOMORROW) the programming of
the meals is activated at midnight (for the next day). On the display the symbols “” e “ ”,
will appear. The bowl will start an auto check cycle. In order to place itself in compartment 4,
place the sliding cover above the uncovered compartment no. 4 and hook it to the cover (B).
When the set time interval has lapsed, the bowl turns, giving the pet access to the first meal
available in compartment no. 1. When the second period of time has lapsed, the bowl will turn
once again, giving the pet access to the second meal available in compartment no. 2. The same
applies for meals 3 and 4
14. When you have finished using the appliance, turn the switch to the OFF position
Should the appliance not be used for long periods of time, always turn the switch to the
OFF position

Copies of the I/B. Please reproduce them without any
changes except under special instruction from Bimar
(Italy). The pages must be reproduced and folded in
order to obtain a booklet A5 (+/- 148.5 mm width x 210
mm height). When folding, make sure you keep the good
numbering when you turn the pages of the I/B. Don’t
change the page numbering. Keep the language
integrity.
9/24
Assembly page 9/24
Fax +32 030 9904733
CLEANING AND MAINTENANCE
•Le parti a contatto con gli alimenti possono essere lavati in lavastoviglie. To disassemble the
main cover with cover (B), pull upwards; use only a soft sponge with warm water and normal
dish washing detergent to clean all the parts of the appliance including the sliding cover, the bowl,
the tin adaptor and the disc. Rinse and dry the parts thoroughly. Do not use steel wool or abrasive
products. All parts in contact with food can be washed in the dishwasher
•The base must only be cleaned with a soft cloth that has been slightly dampened either with just
water and/or detergent. It cannot be washed in the dishwasher, nor under a stream of water: if the
electrical parts (battery connections) get wet, dry carefully and completely before using it again.
•If you decide to no longer use the appliance, it is recommended that it is made inoperative by
removing the batteries, and ensure that any parts that could represent a risk to playing children are
put away. Used batteries must be disposed of at appropriate collection centres at your local
authority or in suitable containers. In this way, local laws will be respected.
Important information for correct disposal of the product under the European Directive
2011/65/EU.
At the end of its lifespan, the product must not be disposed of as part of ordinary waste.
It can be handed in to specific collection points set up by the municipality, or to retailers who
provide such a service.
Disposing of a household appliance separately avoids possible negative consequences for the
environment and human health resulting from inappropriate disposal and allows the recovery of
the materials of which it is made in order to obtain significant savings in energy and resources. As
a reminder of the obligation to dispose of appliances separately, the product is marked with a
wheeled bin symbol. Incorrect disposal of the product by the user will lead to administrative
sanctions according to current regulations.
Copies of the I/B. Please reproduce them without any
changes except under special instruction from Bimar
(Italy). The pages must be reproduced and folded in
order to obtain a booklet A5 (+/- 148.5 mm width x 210
mm height). When folding, make sure you keep the good
numbering when you turn the pages of the I/B. Don’t
change the page numbering. Keep the language
integrity.
10/24
Assembly page 10/24
Fax +32 030 9904733
Ce symbole vous invite à lire attentivement ces instructions avant d'utiliser l'appareil et
éventuellement d’informer d’autres utilisateurs, si besoin. Conserver ce livret pour le consulter
ultérieurement et pour toute la durée de vie de l'appareil. Si à la lecture de ces instructions certaines
parties étaient difficile à comprendre ou en cas de doute, avant d'utiliser le produit, contactez la société
à l'adresse indiquée à la dernière page.
Ce symbole signifie: Attention : instructions et des avertissements pour une utilisation
en toute sécurité du produit.
AVERTISSEMENTS
•Cet appareil est destiné uniquement à contenir des aliments pour animaux domestiques (tels que
chiens, chats ou autres animaux de taille similaire). Les aliments contenus dans la gamelle à 4
secteurs (un pour chaque repas) peuvent être secs ou humides. Grâce à la présence de l'adaptateur,
la nourriture vendue dans des barquettes standard (78 x 80 mm) peut être laissé dans sa confection
d'origine.
•Le tableau de commande permet de programmer la distribution des 4 repas. Toute autre
utilisation est considérée comme impropre et dangereuse. Le fabricant ne pourra pas être tenu
responsable de tout dommage causé par une utilisation impropre, erronée et irresponsable et/ou
par des réparations effectuées par du personnel non qualifié.
•Ne pas utiliser à l'extérieur.
•Utiliser l'appareil avec les accessoires fournis; ne pas utiliser d'autres accessoires: ceci peut être
dangereux pour l'animal et endommager l'appareil.
•Contrôler le bon état de l'appareil et de ses éléments avant chaque utilisation : en cas de doute,
contacter un centre d’assistance agréé et s’assurer que les pièces fournies sont d'origine.
•Cet appareil doit être alimenté uniquement par 4 batteries type C (non incluses). Il est
recommandé de remplacer toutes les batteries en une seule fois. Ne pas mélanger des batteries
déjà utilisées et des neuves. Utiliser des batteries alcalines neuves.
•Ne pas remplir les compartiments de la gamelle au delà de la quantité conseillée (max: 500ml);
en aucun cas les aliments ne doivent dépasser le rebord.
•En cas de chute ou de mauvais fonctionnement, éteindre l'appareil. Vérifier qu'aucune partie ne
soit endommagée, puis rallumer l'appareil: en cas de doute, consulter un technicien qualifié.
•Ne pas déplacer l'appareil lors qu'il est en fonction.
•L'utilisateur doit vérifier périodiquement l'appareil afin de ne pas compromettre la santé de
l'animal.
•Les animaux ne doivent pas jouer avec l'appareil.
•
C
et appareil peut être utilisé par des personnes ayant un handicap physique, sensoriel ou mental
Copies of the I/B. Please reproduce them without any
changes except under special instruction from Bimar
(Italy). The pages must be reproduced and folded in
order to obtain a booklet A5 (+/- 148.5 mm width x 210
mm height). When folding, make sure you keep the good
numbering when you turn the pages of the I/B. Don’t
change the page numbering. Keep the language
integrity.
11/24
Assembly page 11/24
Fax +32 030 9904733
ou avec un manque d'expérience et de connaissances, si elles sont surveillées ou si elles ont reçu
les informations nécessaires pour une utilisation en toute sécurité de l’appareil et qu'elles sont
conscientes des dangers potentiels.
•Les enfants ne doivent pas utiliser l’appareil comme un jeu.
•Ne pas laisser l’appareil exposé aux agents atmosphériques (soleil, pluie etc.).
INSTALLATION
•Après avoir retiré l'emballage, vérifier que l’appareil soit complet ; en cas de doute, ne pas l'utiliser ìet
contacter un technicien qualifié et agréé. Les éléments de l'emballage (sacs en plastique,
polystyrène,clous, etc...) ne doivent pas être laissés à la portée des enfants , car ils sont potentiellement
dangereux.
•Les éliminer comme prévu par les normes en vigueur.
•Avant toute utilisation, vérifier que l’appareil soit en bon état: en cas de doute, s’adresser à un
technicien qualifié.
•La surface d’appui doit être stable, ample (les étagères sont à exclure) et plate (l'appareil pourrait se
renverser sur des surfaces en pente).
•Placer l'appareil loin de toutes sources de chaleur (poêles, thermoventilateur), rideaux, tapisseries,
appareils électriques (tels que des ordinateurs, instruments de précision, etc.), ou meubles délicats qui
pourraient s'abimer. La surface d'appui ne doit pas s'abiment en contact avec la nourriture.
•S'assurer du bon fonctionnement de l'appareil: dans le cas contraire, éteindre l'appareil et le faire
contrôler par un technicien qualifié.
•Lors de la première utilisation, nettoyer et laver les gamelles : voir le paragraphe “Nettoyage et
Entretien”.
•En cas de panne ou de dysfonctionnement, éteindre l'appareil et le faire vérifier par un technicien
qualifié ; les réparations effectuées par du personnel non qualifié peuvent être dangereuses et annuler la
garantie.
FONCTIONNEMENT
L'appareil se compose des éléments suivants:
-Base (F), avec deux emplacements pour batteries et un interrupteur principal ON/OFF en dessous;
-panneau électronique (L) permettant la programmation des repas, le réglage de l'heure,
-l'enregistrement et la diffusion vocale de l'appel au moment de la distribution des repas. Il
-inclut le voyant à led “LO BATT” qui s'allume quand il devient nécessaire de changer les batteries.
-Gamelle pour 4 repas (I): chaque secteur affiche le numéro du
repas (1-4), l’adaptateur pour les barquettes (peut être inséré
dans tous les secteurs): la gamelle est posée dans la base et
elle se loge parfaitement seulement si les rainures “2”
correspondent aux reliefs “1” dans la cavité centrale
-Disque (E), à insérer dans le centre du trou
-Couvercle gamelle (B) incluant le compartiment pur les glaçons (H) et le crochet à ressort pour le
-blocage du couvercle coulissant: 5 goujons le fixent à la base à travers les trous correspondants
-dans la couronne intérieure de la base
-Couvercle coulissant (C): à placer sur le secteur ouvert et accrocher au crochet à ressort du couvercle (B)
-Couvercle principale (A): il ferme complètement le couvercle et est fixé à la base par 6 goujons
-traversants les trous correspondants dans la couronne extérieure de la base même.
FONCTIONNEMENT
1. Vérifier que l'interrupteur est en pos. OFF.
2. Ouvrir les 2 couvercles des 2 logements pour batteries et insérer n.4 batteries (2 chacun), type C,
Copies of the I/B. Please reproduce them without any
changes except under special instruction from Bimar
(Italy). The pages must be reproduced and folded in
order to obtain a booklet A5 (+/- 148.5 mm width x 210
mm height). When folding, make sure you keep the good
numbering when you turn the pages of the I/B. Don’t
change the page numbering. Keep the language
integrity.
12/24
Assembly page 12/24
Fax +32 030 9904733
1.5V, en respectant la polarité, puis fermer correctement les couvercles.
3. Porter l'interrupteur en pos. ON, sur l'afficheur s'illuminera l'inscription , et un cycle de
contrôle aura lieu pendant quelques secondes.
4. Insérer les aliments dans les différents secteurs en utilisant, si souhaité, un adaptateur pour
barquettes/boîtes, en veillant à ne pas remplir excessivement les compartiments.
5. Placer correctement le couvercle de la gamelle sur la base; insérer le disque dans le trou centrale.
6. Placer le couvercle coulissant sur le secteur découvert et l'accrocher au couvercle (B).
7. Le compartiment à glaçons peut être rempli de glaçons ou d'un pain de glace (s'il est livré avec
l'appareil et après l'avoir laissé au congélateur pendant environ 12 heures) pour grader la nourriture
froide.
8. Placer le couvercle principal sur la base.
9. Panneau de commandes:
-Réglage heure: appuyer sur le bouton “SET” pendant au moins 2 secondes, jusqu'à ce que l'heure
commence à clignoter. Pour modifier l'heure appuyer sur le bouton “MODE”, pour confirmer appuyer
sur le bouton “SET”; suite à cette opération les minutes commenceront à clignoter: pour les régler
appuyer sur “MODE” et pour confirmer le réglage appuyer à nouveau sur le bouton “SET”. L'heure et
les minutes commenceront à clignoter en même temps; en appuyant sur le bouton “MODE” on peut
choisir entre l'affichage de l'heure sur 12 ou 24 heures. A la fin du réglage, confirmer en appuyant sur
le bouton “SET”.
-Programmation des repas: pour régler l'heure du repas, appuyer sur le bouton "MODE". Le premier
Numéro indique le repas, et le deuxième numéro (si l'affichage de l'heure est réglé sur 12 heures) ou
le deuxième et le troisième numéro (si l'affichage de l'heure est réglé sur 24 heures) indiquent l'heure.
Appuyer sur le bouton "SET" pendant au moins 2 secondes, jusqu'à ce que l'heure commence à
clignoter; pour régler l'heure appuyer sur le bouton "MODE" et pour confirmer appuyer sur le bouton
“SET”.
Exemple de programmation de 4 repas dans un jour (affichage sur 24h):
-en réglant le premier repas est disponible à 8h
-en réglant le premier repas est disponible à 12h
-en réglant le premier repas est disponible à 18h
-en réglant le premier repas est disponible à 21h
10. Après chaque intervalle de temps, les gamelles tournent et donnent accès au repas suivant.
11. Enregistrement du message vocal: pour enregistrer votre voix, appuyez sur le bouton "REC" jusqu'à la
fin du message d'une durée maximale de 6 secondes. Pour réécouter le message enregistré, appuyez sur
le bouton "PLAY"; le message est diffusé à la fin de chaque programmation d'un repas et après le cycle
d'auto-contrôle.
12. En appuyant sur le bouton “START NOW” (DEBUT PROGRAMMATION) la programmation
électronique des repas s'active immédiatement. Le symbole de la cloche “ ” s'affiche, et la gamelle
démarre un nouveau cycle d'auto-contrôle pour se placer dans le secteur n.4, placer le couvercle
coulissant sur le secteur découvert n.4 et l'accrocher au couvercle (B). A la fin de chaque intervalle de
temps réglé, les gamelles tournent et donnent accès au premier repas disponible dans le secteur n. 1. A
la fin de chaque intervalle de temps les gamelles tournent une nouvelle fois et donnent accès au
deuxième repas disponible, secteur n.2, et ainsi pour les repas suivants 3 et 4.
13. En appuyant sur le bouton “START TOM” (DEBUT PROGRAMMATION DEMAIN) la
programmation électronique des repas à partir de minuit (pour le jour suivant) s'active. Les symboles
“” et “ ” s'affichent, l'appareil démarre un cycle d'auto-contrôle pour se placer dans le secteur
n.4,placer le couvercle coulissant sur le secteur découvert n.4 et l'accrocher au couvercle (B). A la fin

Copies of the I/B. Please reproduce them without any
changes except under special instruction from Bimar
(Italy). The pages must be reproduced and folded in
order to obtain a booklet A5 (+/- 148.5 mm width x 210
mm height). When folding, make sure you keep the good
numbering when you turn the pages of the I/B. Don’t
change the page numbering. Keep the language
integrity.
13/24
Assembly page 13/24
Fax +32 030 9904733
de chaque intervalle de temps réglé, les gamelles tournent et donnent accès au premier repas disponible
dans le secteur n. 1. A la fin de chaque intervalle de temps les gamelles tournent une ouvelle fois et
donnent accès au deuxième repas disponible, secteur n.2, et ainsi pour les repas suivants 3 et 4.
14. A la fin de chaque utilisation, placer l'interrupteur principale en pos. OFF.
Pour des longues périodes d'inactivité, toujours placer l'interrupteur en pos. OFF.
NETTOYAGE ET ENTRETIEN
•Tirer vers le haut pour détacher la couverture principale avec couvercle (B); pour le nettoyage de tous
les éléments, y compris le couvercle coulissant, la gamelle, l'adaptateur pour barquettes/boites et le
disque, utiliser une éponge souple avec de l'eau tiède et un produit pour vaisselle classique. Rincer
abondamment et sécher soigneusement. Ne pas utiliser de tiges métalliques ou de produits abrasifs.
Toutes les pièces en contact avec les aliments peuvent être lavées dans le lave-vaisselle.
•La base peut être nettoyée uniquement avec un chiffon doux légèrement imbibé d’eau et/ou de
détergeant classique. Ne pas laver au lave-vaisselle ni sous un jet d'eau : si les pièces électriques(les
contacts et les batteries) rentrent en contact avec de l'eau, les sécher soigneusement et complètement
avant de les utiliser.
•Si on décide de ne plus utiliser l'appareil, il doit être rendu inopérant en enlevant les batteries, et les
parties dangereuses lorsqu'elles sont utilisées comme des jouets par les enfants doivent être rendues
inoffensives. Les batteries déchargées doivent être éliminées dans les centre de récolte ou dans les
conteneurs prévus à cet effet. Ainsi, les prescriptions légales seront respectées.
Avertissements pour une élimination adéquate du produit aux termes de la Directive Européenne
2011/65/UE.
A la fin de sa vie, le produit ne doit pas être jeté avec les déchets domestiques.
Il peut être remis à un des centres spéciaux de recyclage mis à disposition par les services publics ou à
des revendeurs assurant ce service.
Jeter séparément un appareil électroménager permet d’éviter d’éventuelles conséquences négatives pour
l'environnement et pour la santé humaine résultant d’une élimination inappropriée et permet de récupérer
les matériaux qui le composent afin d'obtenir des économies significatives d'énergie et de ressources.
Pour rappeler la nécessité de jeter les appareils électroménagers séparément, sur le produit il y a une
poubelle sur roulettes barrée. Se débarrasser illégalement du produit par l'utilisateur entraîne l'application
des sanctions administratives prévues par la loi en vigueur.

Copies of the I/B. Please reproduce them without any
changes except under special instruction from Bimar
(Italy). The pages must be reproduced and folded in
order to obtain a booklet A5 (+/- 148.5 mm width x 210
mm height). When folding, make sure you keep the good
numbering when you turn the pages of the I/B. Don’t
change the page numbering. Keep the language
integrity.
14/24
Assembly page 14/24
Fax +32 030 9904733
D
ieses Symbol fordert Sie auf, diese Anleitung vor dem Gebrauch des Geräts zu
lesen und bei Bedarf auch andere Personen darüber zu informieren. Bewahren Sie
diese Anleitung zum späteren Nachschlagen und über die gesamte Lebensdauer
des Geräts auf. Sollten Teile dieser Anleitung schwer verständlich sein oder wenn
Sie Zweifel haben, kontaktieren Sie bitte das Unternehmen unter der auf der
letzten Seite genannten Adresse, bevor Sie das Produkt benutzen.
Dieses Symbol kennzeichnet Hinweise und Warnungen für die sichere
Benutzung.
WICHTIGER HINWEIS
•Dieses Gerät ist ausschließlich für Haustiere (wie Hunde, Katzen oder andere Arten und Größen)
bestimmt und soll Futter enthalten. Das Futter befindet sich im Napf, der in 4 Bereiche unterteilt ist (ein
Bereich für jede Mahlzeit) und kann sowohl trocken als auch feucht sein. Mit Hilfe des entsprechenden
Adapters kann das Futter in der Packung gelassen werden, wenn es sich um die übliche Schale 78x80
mm handelt. Über die entsprechende Bedienungstafel kann die Verteilung der 4 Mahlzeiten
programmiert werden. Jede davon abweichende Verwendung wird als unsachgemäß und gefährlich
angesehen. Der Hersteller haftet nicht für Schäden, die durch unsachgemäßen, fehlerhaften oder unv
rantwortlichen Gebrauch und/oder durch Reparaturen entstehen, die von nicht qualifizierten Personen
durchgeführt werden.
•Das Gerät nicht außen (im Freien) benutzen.
•Das Gerät mit seinem mitgelieferten Zubehör verwenden. Niemals anderes Zubehör benutzen.
Daskönnte das Tier gefährden und das Gerät beschädigen. Überprüfen Sie vor jeder Verwendung den
guten Zustand des Geräts und seiner Bauteile. Wenden Sie sich im Zweifelsfall an ein zugelassenes
Kundendienstzentrum und stellen Sie sicher, dass die gelieferten Teile Originalteile sind.
•Dieses Gerät darf nur mit 4 Batterien des Typs C (nicht eingeschlossen) benutzt werden. Wir
empfehlen, alle Batterien gleichzeitig auszuwechseln. Bereits benutzte und neue Batterien nicht
miteinander mischen. Neue Alkalinbatterien verwenden.
•Nicht übermäßig viel Trockenfutter in die Bereiche des Napfes füllen (max. 500 ml). Das Futter darf
auf jeden Fall den Rand nicht übersteigen.
•Nach dem Herunterfallen oder bei schlechtem Betrieb das Gerät sofort ausschalten. Prüfen, ob Teile
des Geräts beschädigt sind und es erst nach dieser Prüfung einschalten. Wenden Sie sich im
Zweifelsfall an einen qualifizierten Fachmann.
•Das Gerät nicht verschieben, wenn es in Funktion ist.
•Der Benutzer muss das Gerät regelmäßig überprüfen, damit die Gesundheit des Tiers nicht gefährdet
wird. Die Tiere dürfen nicht mit dem Gerät spielen.
•Das Gerät kann von Personen mit eingeschränkten körperlichen, sensorischen oder geistigen
Fähigkeiten oder mangelnder Erfahrung und Wissen benutzt werden, sofern sie die notwendige Aufsicht
oder Anweisungen im Hinblick auf den sicheren Umgang mit dem Gerät auch in Bezug auf das Tier
erhalten und wenn sie sich der möglichen Gefahren bewusst sind.
•Kinder dürfen das Gerät nicht als Spielzeug verwenden.
•
S
etzen Sie das Gerät nicht der Witterung (Sonne, Regen, usw.) aus.

Copies of the I/B. Please reproduce them without any
changes except under special instruction from Bimar
(Italy). The pages must be reproduced and folded in
order to obtain a booklet A5 (+/- 148.5 mm width x 210
mm height). When folding, make sure you keep the good
numbering when you turn the pages of the I/B. Don’t
change the page numbering. Keep the language
integrity.
15/24
Assembly page 15/24
Fax +32 030 9904733
AUFSTELLUNG
•Sie sich nach Auspacken des Geräts, dass das Gerät in einem guten Zustand ist. Im Zweifelsfall, das
Gerät nicht benutzen, sondern es erst von einem Fachmann überprüfen lassen. Halten Sie Kinder vom
Verpackungsmaterial fern (Kunststoffbeutel, Styropor, Heftklammern, usw.), da dieses eine Gefahr
darstellen könnte. Das Verpackungsmaterial ist vorschriftsmäßig zu entsorgen.
•Vor jeder Verwendung prüfen, ob das Gerät in einem guten Zustand ist. Wenden Sie sich bei Zweifeln
an einen Fachmann.
•Die Aufliegefläche muss stabil und groß (keine Ablagen benutzen) und darf nicht nach unten geneigt
sein (da das Gerät umkippen könnten).
•Das Gerät entfernt von Wärmequellen aufstellen (Öfen, Heizlüfter), von Gardinen, Polsterungen,
elektronischen Geräten (wie Computer, Präzisionsgeräte, usw.) oder empfindlichen Möbeln, die
beschädigt werden können. Die Aufliegefläche darf nicht durch den Kontakt mit dem Futter
beschädigt werden.
•Vergewissern Sie sich, dass das Gerät korrekt funktioniert. Das Gerät andernfalls ausschalten und es
von einem qualifizierten Fachmann überprüfen lassen.
•Bei der ersten Verwendung müssen die Näpfe gesäubert und gewaschen werden. Siehe Abschnitt
"Säuberung und Wartung".
•Bei Störungen oder nicht ordnungsgemäßem Betrieb das Gerät ausschalten und es von einem
qualifizierten Fachmann überprüfen lassen. Nicht von qualifiziertem Personal durchgeführte
Reparaturen können gefährlich sein und deshalb verfällt in diesem Fall die Garantie.
FUNKTIONSWEISE
Das Gerät besteht aus den folgenden Elementen:
-Unterteil (F), mit zwei Sitzen für Batterien und ON/OFF-Hauptschalter an der unteren Seite.
Elektronische Tafel (L) zur Programmierung der Mahlzeiten. Eingabe der Uhrzeit, Aufnahme und
Abspielen des Rufs bei Ausgabe der Mahlzeiten und “LO BATT”-Led, die sich eingeschaltet, wenn
die Batterien ausgewechselt werden müssen.
-Napf für 4 Mahlzeiten (I). In jeden Bereich ist die Nummer der Mahlzeit (1-4) angegeben und der
Adapter für die üblichen Dosen kann in jeden einzelnen Bereich eingefügt werden. Der Napf wird am
Unterteil in Stellung gebracht und wurde nur dann perfekt eingesetzt, wenn die Rillen "2" mit den
entsprechenden Vorsprüngen "1" im mittleren Hohlraum übereinstimmen
-Die Platte (E) muss in der Mitte der Öffnung eingesetzt sein.
-Der Napfdeckel (B) schließt den Bereich für das Eis (H) und den Federhaken zur Blockierung des
Schiebedeckels ein. Verfügt über 5 Stifte zur Befestigung am Unterteil durch die entsprechenden
Öffnungen im Innenkranz des Unterteils.
-Der Schiebedeckel (C) muss über dem offenen Bereich positioniert und am Federhaken des Deckels
(B) eingehakt werden
-Die Hauptabdeckung (A) schließt vollständig den Deckel und hat 6 Stifte, mit denen er am Unterteil
über die Öffnungen am Außenkranz des Unterteils befestigt ist..
Copies of the I/B. Please reproduce them without any
changes except under special instruction from Bimar
(Italy). The pages must be reproduced and folded in
order to obtain a booklet A5 (+/- 148.5 mm width x 210
mm height). When folding, make sure you keep the good
numbering when you turn the pages of the I/B. Don’t
change the page numbering. Keep the language
integrity.
16/24
Assembly page 16/24
Fax +32 030 9904733
FUNKTIONSWEISE
1. Prüfen, ob der Schalter auf OFF ist
2. Die 2 Deckel der 2 Batteriefächer öffnen und unter Beachtung der Pole die 4 Batterien (je 2 Stück)
des Typs C 1.5V einsetzen und die Deckel wieder korrekt schließen
3. Den Schalter auf ON stellen. Am Display erscheint die Schrift , und es beginnt ein
Selbstkontrollzyklus, der einige Sekunden lang dauert.
4. Das Futter in die entsprechenden Bereiche füllen und falls gewünscht den Dosenadapter
benutzen.Nicht zu viel Futter ins Innere füllen .
5. Den Deckel des Napfs korrekt auf das Unterteil und die Platte in die zentrale Öffnung setzen.
6. Den Schiebedeckel auf den unbedeckten Bereich setzen und ihn am Deckel (B) einhaken.
7. In das Innere des Eisfachs (H) können einige Eiswürfel oder der Kühlakku (falls mitgeliefert und
nachdem er 12 Stunden lang im Gefrierschrank war) zum Frischhalten des Futters gelegt werden
8. Die Hauptabdeckung auf das Unterteil setzen
9. Steuertafel:
- Einstellung der Uhr: Mindestens 2 Sekunden lang die Taste "SET" drücken, bis die Stunden zu
blinken beginnen. Zum Ändern der Stunden die Taste "MODE" und zur Bestätigung die Taste “SET”
drücken. Anschließend beginnen die Minuten zu blinken. Zum Einstellen die Taste "MODE" und zur
Bestätigung die Taste “SET” drücken. Nun beginnen die Stunden und die Minuten gleichzeitig zu
blinken. Durch Betätigung der Taste "MODE" kann gewählt werden, ob die Uhr auf 12 oder 24
Stunden eingestellt werden soll. Am Ende die Wahl mit der Taste "SET" bestätigen.
- Programmierung der Mahlzeiten: Durch Betätigung der Taste "MODE" kann die Uhrzeit der
Mahlzeiten eingestellt werden. Die erste Nummer zeigt die Mahlzeit an und die zweite Nummer die
Uhrzeit (wenn 12 Stunden eingestellt wurden). Wenn 24 Stunden eingestellt curde zeigen die zweite
und die dritte Nummer die Vollstunde an. Bei Betätigung der Taste "SET", mindestens 2 Sekunden lang,
beginnen die Stunden zu blinken. Zum Einstellen die Taste "MODE" und zur Bestätigung die Taste
"SET" drücken.
Beispiel eines Tags mit 4 Mahlzeiten (24 Stunden-Einstellung):
- Eingabe Die erste Mahlzeit steht um 8 Uhr zur Verfügung
- Eingabe Die erste Mahlzeit steht um 12 Uhr zur Verfügung
- Eingabe Die erste Mahlzeit steht um 18 Uhr zur Verfügung
- Eingabe Die vierte Mahlzeit steht um 21 Uhr zur Verfügung
10. Bei Erreichen der Uhrzeit dreht sich der Napf und die nächste Mahlzeit ist erreichbar.
11. Aufnahme der Stimme: Zum Aufnehmen der Stimme bis zur Beendigung der Aufnahme von
höchstens Sekunden die Taste "REC" gedrückt halten 6. Die registrierte Aufnahme kann durch
Betätigung der Taste "PLAY" abgehört werden. Die Stimme wird bei jeder programmierten
Mahlzeit und nach jedem Selbstkontrollzyklus ausgegeben.
12. Bei Betätigung der Taste “START NOW” (PROGRAMMBEGINN) wird die elektronische
Programmierung der Mahlzeiten automatisch aktiviert. Am Display erscheint das Symbol der
Glocke “ ". Der Napf beginnt den Selbstkontrollzyklus und positioniert sich im Bereich Nr. 4,
stellt den Schiebedeckel über den offenen Bereich Nr. 4 und hakt ihn am Deckel (B) ein. Nach
Ablauf der eingegebenen Zeit dreht sich der Napf und gibt die erste Mahlzeit im Bereich Nr. 1 frei.
Nach Ablauf der zweiten eingegebenen Zeit dreht sich der Napf erneut und gibt die zweite
verfügbare Mahlzeit im Bereich Nr. 2 frei, bis zu den anschließenden Mahlzeiten 3 und 4.
13. Bei Betätigung der Taste “START TOM” (PROGRAMMBEGINN MORGEN,

Copies of the I/B. Please reproduce them without any
changes except under special instruction from Bimar
(Italy). The pages must be reproduced and folded in
order to obtain a booklet A5 (+/- 148.5 mm width x 210
mm height). When folding, make sure you keep the good
numbering when you turn the pages of the I/B. Don’t
change the page numbering. Keep the language
integrity.
17/24
Assembly page 17/24
Fax +32 030 9904733
TOM=TOMORROW) wird die elektronische Programmierung der Mahlzeiten ab Mitternacht (für
den nächsten Tag) aktiviert. Am Display erscheinen die Symbole “ ” e “ ”, Der Napf beginnt
einen Selbstkontrollzyklus und positioniert sich im Bereich Nr. 4, schiebt den Schiebedeckel über
den offenen Bereich Nr. 4 und hakt den Deckel (B) ein. Nach Ablauf der eingegebenen Zeit dreht
sich der Napf und gibt die erste Mahlzeit im Bereich Nr. 1 frei. Nach Ablauf der zweiten
eingegebenen Zeit dreht sich der Napf erneut und gibt die zweite verfügbare Mahlzeit im Bereich
Nr. 2 frei, bis zu den anschließenden Mahlzeiten 3 und 4.
14. Nach Beendigung der Benutzung den Hauptschalter auf OFF stellen
Bei längeren Stillständen den Schalter immer auf OFF stellen
REINIGUNG UND WARTUNG
•Zum Abbauen der Hauptabdeckung mit dem Deckel (B) die Abdeckung nach oben ziehen. Zur
Säuberung aller dieser Elemente, einschließlich des Schiebedeckels, des Napfes, des
Dosenadapters und der Scheibe einen weichen Schwamm mit lauwarmem Wasser und normales
Spülmittel benutzen. Dann mit viel Wasser abspülen und sorgfältig abtrocknen. Benutzen Sie
keine Stahlwolle oder Scheuermittel.
•Alle Teile, die mit Futter in Kontakt kommen, können in der Geschirrspülmaschine gewaschen
werden. Das Unterteil darf nur mit einem weichen Tuch, das leicht entweder nur mit Wasser
und/oder Reinigungsmittel befeuchtet wurde, gereinigt werden. Er darf nicht in der Spülmaschine
und auch nicht unter fließendem Wasser gewaschen werden. Wenn die elektrischen Teile nass
werden (Batteriekontakte),sie sorgfältig und vollständig vor der Benutzung des Geräts abtrocknen.
•Wenn das Gerät nicht mehr verwendet wird, muss es unbrauchbar gemacht werden. Dazu die
Batterien herausnehmen und alle Teile entfernen, die für spielende Kinder gefährlich werden
können. Die leerenBatterien müssen an entsprechenden Sammelstellen in der zuständigen
Gemeinde bzw. in entsprechenden Behältern entsorgt werden. Auf diese Weise werden die
gesetzlichen Vorschriften eingehalten.
Wichtiger Hinweis für die korrekte Entsorgung des Produkts in Übereinstimmung mit der
EG-Richtlinie 2011/65/EG
Am Ende seiner Lebensdauer darf das Produkt nicht als allgemeiner Hausmüll entsorgt werden.
Es kann an speziellen Sammelstellen der Gemeinde oder beim Einzelhändler, der dieses der Entsorgung
zuführt, entsorgt werden. Die getrennte Entsorgung eines Haushaltsgerätes vermeidet mögliche negative
Auswirkungen auf die Umwelt und die menschliche Gesundheit, die bei einer nicht vorschriftsmäßigen
Entsorgung verursacht werden.
Außerdem ermöglicht dies die Wiederverwertung der Werkstoffe, aus denen das Gerät hergestellt
wurde,
was erhebliche Einsparungen an Energie und Rohstoffen mit sich bringt. Als Hinweis für die vom
Hausmüll getrennte Entsorgungspflicht von Haushaltsgeräten wurde am Gerät das Symbol
der durchgestrichenen Mülltonne angebracht. Bei nicht vorschriftsmäßiger Entsorgung des Geräts durch
den Verwender wird die gesetzlich vorgeschriebene Ordnungsstrafe verhängt
Copies of the I/B. Please reproduce them without any
changes except under special instruction from Bimar
(Italy). The pages must be reproduced and folded in
order to obtain a booklet A5 (+/- 148.5 mm width x 210
mm height). When folding, make sure you keep the good
numbering when you turn the pages of the I/B. Don’t
change the page numbering. Keep the language
integrity.
18/24
Assembly page 18/24
Fax +32 030 9904733
E
ste símbolo le invita a leer atentamente las instrucciones antes de utilizar el
aparato y a comunicarlas a terceros si es necesario. Guarde este folleto para
referencias futuras y durante toda la vida del aparato. Si cualquier parte de estas
instrucciones de uso es difícil de comprender o si tiene dudas, contacte con la
empresa a la dirección que aparece en la última página antes de utilizar el
producto.
Este símbolo indica: Atención: instrucciones y advertencias para un uso seguro.
ADVERTENCIAS
•Este aparato está destinado exclusivamente para animales de compañía (como perros, gatos uotras
especies de dimensiones similares), para contener comida: los alimentos están contenidos en la escudilla
dividida en 4 sectores (uno para cada comida) y pueden ser tanto alimentos secos como húmedos;
mediante el adaptador correspondiente es posible dejar la comida en el embalaje si ésta se encuentra en
el recipiente común de (78x80) mm. Mediante el panel de mandos correspondiente es posible programar
la distribución de las 4 comidas. Cualquier otro uso debe considerarse inadecuado y peligroso. El
fabricante no podrá considerarse responsable por ninguno de los posibles daños provocados por el uso
inadecuado, incorrecto o irresponsable y/o por reparaciones realizadas por una persona no calificada.
•No utilice el aparato al aire libre.
•Use el aparato dotado de los accesorios suministrados, no utilice accesorios diferentes: puede ser
peligroso para el animal y pueden dañar el aparato. Antes de cada uso, verifique el buen estado del
aparato y de sus elementos: si tiene alguna duda, contacte con un centro de asistencia autorizado y
asegúrese de que los repuestos suministrados sean originales.
•Este aparato debe utilizarse sólo con n. 4 baterías tipo C (no incluidas). Recomendamos sustituir todas
las baterías al mismo tiempo. No mezcle baterías ya utilizadas y baterías nuevas. Utilice baterías nuevas
alcalinas.
•No llene excesivamente con alimentos secos los compartimientos de la escudilla (máx.: 500 ml.), y de
todos modos los alimentos no pueden sobrepasar el borde.
•En caso de caída o mal funcionamiento, apague el aparato. Verifique que ninguna parte esté dañada,y
después de efectuar estos controles enciéndalo: si tiene alguna duda, contacte con un técnico calificado.
•No traslade el aparato cuando esté en funcionamiento.
•El usuario debe controlar el aparato periódicamente para no perjudicar la salud del animal. Los
animales no deben jugar con el aparato.
•El aparato puede ser preparado por personas con capacidades mentales, sensoriales y físicas reducidas
o con falta de experiencia y conocimientos, si reciben la supervisión o las instrucciones necesarias
acerca del uso seguro del aparato también para el animal y si están conscientes de los peligros
potenciales.
•Los niños no deben usar el aparato como un juguete.
•No deje el aparato expuesto a los agentes atmosféricos (sol, lluvia, etc.).

Copies of the I/B. Please reproduce them without any
changes except under special instruction from Bimar
(Italy). The pages must be reproduced and folded in
order to obtain a booklet A5 (+/- 148.5 mm width x 210
mm height). When folding, make sure you keep the good
numbering when you turn the pages of the I/B. Don’t
change the page numbering. Keep the language
integrity.
19/24
Assembly page 19/24
Fax +32 030 9904733
INSTALACIÓN
•Después de desempacar, asegúrese de la integridad del aparato, si tiene dudas, no lo use y contacte
con un técnico calificado. Los materiales de embalaje (bolsas de plástico, poliestireno expandido,
clavos,etc.) no deben dejarse al alcance de niños pues constituyen posibles fuentes de peligro;
deséchelos de acuerdo con los reglamentos vigentes.
•Antes de cada uso, compruebe que el aparato esté en buenas condiciones: si tiene alguna duda,
contacte con un técnico calificado.
•La superficie de apoyo debe ser estable, amplia (se deben excluir repisas), no inclinada (ya que el
aparato podría volcarse).
•Coloque el aparato lejos de fuentes de calor (estufas, termoventiladores), cortinas, tapices, aparatos
eléctricos (como ordenadores, instrumentos de precisión etc.), o muebles delicados que podrían
dañarse.
•La superficie de apoyo no debe deteriorarse al entrar en contacto con los alimentos.
•Asegúrese de que el aparato funcione correctamente: de lo contrario apáguelo y encargue a
unprofesional calificado para que lo revise.
•Cuando se usa por primera vez es necesario limpiar y lavar las escudillas: véase el apartado
“Limpieza y Mantenimiento”.
•En caso de avería o mal funcionamiento apague el aparato y encargue a un profesional calificado para
que lo revise, las reparaciones llevadas a cabo por personal no calificado pueden ser peligrosas y
pueden invalidar la garantía.
FUNCIONAMIENTO
El aparato está compuesto por los siguientes elementos:
-Base (F), con dos alojamientos para baterías e interruptor principal ON/OFF en el fondo; panel
electrónico (L): que permite la programación de las comidas, la configuración de la hora, la grabación y
la difusión vocal de llamada en el momento del suministro de las comidas e incluye el led “LO BATT”
que se enciende cuando las baterías deben sustituirse
-Escudilla para 4 comidas (I): en cada sector está indicado el
número de la comida (1-4), el adaptador para las latas comunes
(puede introducirse en cualquier sector): la escudilla se coloca en
la base y se aloja perfectamente sólo si las ranuras “2” se
emparejan con las protuberancias correspondientes “1” que se
encuentran en la cavidad central
-Disco (E), debe colocarse en el centro del orificio
-Tapa de la escudilla (B) incluye el compartimiento para el hielo (H) y el gancho de muelle para
bloquear la tapa corrediza: tiene 5 pernos que se fijan en la base por medio de los orificios
-correspondientes realizados en la corona interna de la base
-Tapa corrediza (C): debe colocarse sobre el sector abierto, y engancharse en el gancho de muelle
de la tapa (B)
-Cobertura principal (A): cierra completamente la tapa y tiene 6 pernos que la fijan en la base por
medio de los orificios correspondientes realizados en la corona externa de la base.

Copies of the I/B. Please reproduce them without any
changes except under special instruction from Bimar
(Italy). The pages must be reproduced and folded in
order to obtain a booklet A5 (+/- 148.5 mm width x 210
mm height). When folding, make sure you keep the good
numbering when you turn the pages of the I/B. Don’t
change the page numbering. Keep the language
integrity.
20/24
Assembly page 20/24
Fax +32 030 9904733
FUNCIONAMIENTO
1. Asegúrese de que el interruptor esté en pos. OFF.
2. Abra las 2 tapas de los 2 compartimientos de baterías y según la polaridad correcta introduzca n.4
baterías (2 cada uno), tipo C, 1.5 V, cierre las tapas correctamente.
3. Coloque el interruptor en pos. ON, en la pantalla se iluminará el texto e iniciará un ciclo
de autocontrol por algunos segundos.
4. Introduzca la comida en los sectores correspondientes y si lo desea utilice el adaptador para latas,
tenga cuidado de no poner demasiada comida en su interior.
5. Coloque la tapa de la escudilla en la base de manera correcta, introduzca el disco en el orificio
central.
6. Coloque la tapa corrediza sobre el sector destapado y engánchelo en la tapa (B).
7. En el interior del compartimiento del hielo (H) es posible introducir algunos cubitos o el contenedor
de hielo (si se suministra, después de haberlo dejado en el congelador por aproximadamente 12
horas) para mantener fresca la comida.
8. Coloque la cobertura principal en la base.
9. Panel de mandos:
a. Configuración del reloj: pulse el botón “SET” durante por lo menos 2 segundos hasta que la hora
comience a parpadear, para modificar la hora pulse el botón “MODE”, para confirmar pulse el
botón “SET”; luego los minutos comenzarán a parpadear, para regularlos pulse el botón “MODE” y
para confirmar vuelva a pulsar el botón “SET”. Ahora, la hora y los minutos comenzarán a
parpadear al mismo tiempo, pulsando el botón “MODE” es posible escoger la configuración del
reloj entre las 12 horas o las 24 horas, al final de la selección confirme mediante el botón “SET”.
b. Programación de las comidas: es posible configurar el horario de la comida pulsando el botón
“MODE”, el primer número indica la comida, en cambio (si se ha configurado 12h) es el segundo
número y (si se ha configurado 24h) los números son el segundo y el tercero que indican hora
entera; al pulsar el botón “SET” durante por lo menos 2 segundos comenzará a parpadear la hora,
para regular la hora pulse el botón “MODE” y para confirmar pulse el botón “SET”.
Un día con 4 comidas diferentes (configuración 24h); ejemplo:
c. configurando la primera comida está disponible a las 8
d. configurando la segunda comida está disponible a las 12
e. configurando la tercera comida está disponible a las 18
f. configurando la cuarta comida está disponible a las 21
10. Al vencerse cada plazo, la escudilla gira dando acceso a la comida siguiente.
11. Grabación del mensaje vocal: para grabar la voz, pulse el botón “REC” hasta el final del mensaje,
duración máxima 6 segundos. Es posible volver a escuchar el mensaje grabado pulsando el botón
“PLAY”; se emite al final de cada programación de la comida y después de cada ciclo de autocontrol.
12. Al pulsar el botón “START NOW” (INICIO DE PROGRAMA) se activa inmediatamente la
programación electrónica de las comidas, en la pantalla aparecerá el símbolo de la campana “ ”, la
escudilla comenzará un ciclo de autocontrol para colocarse en el sector n.4, coloque la tapa corrediza
sobre el sector destapado n.4 y engánchelo en la tapa (B). Al vencerse el plazo configurado, la
escudilla gira dando acceso a la primera comida disponible en el sector n.1. Al vencerse el segundo
plazo configurado, la escudilla gira nuevamente permitiendo el acceso a la segunda comida
disponible, sector n. 2; hasta las comidas siguientes 3 y 4.
This manual suits for next models
1
Table of contents
Languages:
Other Bimar Pet Care Product manuals


