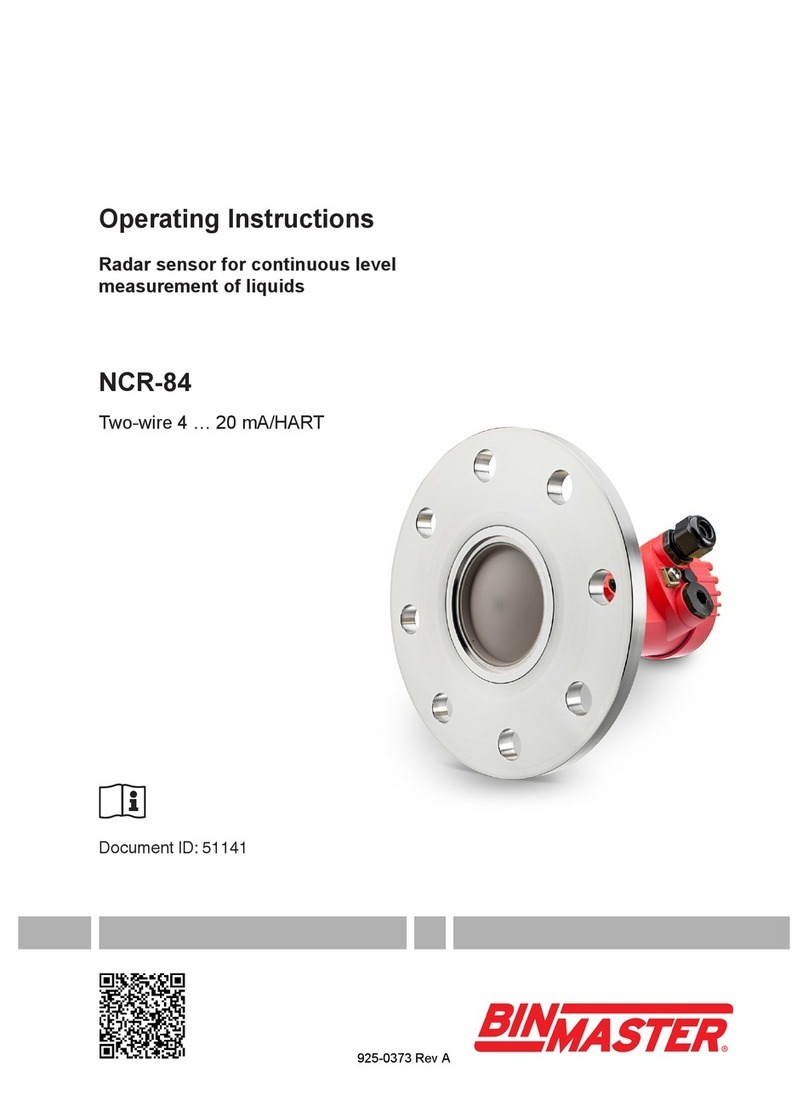
Bin Master NCR-25 User manual

Operating Instructions
Radar sensor for continuous level
measurement of liquids
NCR-25
4 … 20 mA/HART - two-wire
925-0369
Document ID: 36503
925-0369 Rev A

2
Contents
NCR-25 • 4 … 20 mA/HART - two-wire
36503-EN-170405
Contents
1 About this document
1.1 Function ........................................................................................................................... 4
1.2 Target group ..................................................................................................................... 4
1.3 Symbols used................................................................................................................... 4
2 For your safety
2.1 Authorised personnel ....................................................................................................... 5
2.2 Appropriate use................................................................................................................ 5
2.3 Warning about incorrect use............................................................................................. 5
2.4 General safety instructions............................................................................................... 5
2.5 EU conformity................................................................................................................... 6
2.6 NAMUR recommendations .............................................................................................. 6
2.7 Radio license for Europe .................................................................................................. 6
2.8 Radio license for USA ...................................................................................................... 7
2.9 Radio license for Canada ................................................................................................. 7
2.10 Environmental instructions ............................................................................................... 9
3 Product description
3.1 Conguration.................................................................................................................. 11
3.2 Principle of operation...................................................................................................... 12
3.3 Packaging, transport and storage................................................................................... 13
3.4 Accessories and replacement parts ............................................................................... 13
4 Mounting
4.1 General instructions ....................................................................................................... 16
4.2 Mounting preparations ................................................................................................... 17
4.3 Mounting instructions ..................................................................................................... 19
4.4 Measurement setup - Pipes ........................................................................................... 25
4.5 Measurement setup - Flow............................................................................................. 30
5 Connecting to power supply
5.1 Preparing the connection ............................................................................................... 32
5.2 Connecting..................................................................................................................... 33
5.3 Wiring plan, single chamber housing.............................................................................. 35
5.4 Wiring plan, double chamber housing ............................................................................ 35
5.5 Wiring plan, Ex-d-ia double chamber housing................................................................ 37
5.6 Double chamber housing with VEGADIS-Adapter.......................................................... 38
5.7 Wiring plan - version IP 66/IP 68, 1 bar........................................................................... 39
5.8 Switch-on phase............................................................................................................. 39
6 Set up with the display and adjustment module
6.1 Insert display and adjustment module............................................................................ 40
6.2 Adjustment system......................................................................................................... 41
6.3 Measured value indication - Selection of national language........................................... 43
6.4 Parameter adjustment .................................................................................................... 43
6.5 Saving the parameterisation data................................................................................... 61
7 Setup with PACTware
7.1 Connect the PC.............................................................................................................. 62
7.2 Parameter adjustment .................................................................................................... 63
7.3 Saving the parameterisation data................................................................................... 64
925-0369 Rev A

3
Contents
NCR-25 • 4 … 20 mA/HART - two-wire
36503-EN-170405
8 Set up with other systems
8.1 DD adjustment programs ............................................................................................... 65
8.2 Field Communicator 375, 475 ........................................................................................ 65
9 Diagnosis, asset management and service
9.1 Maintenance .................................................................................................................. 66
9.2 Diagnosis memory ......................................................................................................... 66
9.3 Asset Management function........................................................................................... 67
9.4 Rectify faults................................................................................................................... 70
9.5 Exchanging the electronics module................................................................................ 73
9.6 Software update ............................................................................................................. 74
9.7 How to proceed if a repair is necessary.......................................................................... 74
10 Dismount
10.1 Dismounting steps.......................................................................................................... 75
10.2 Disposal ......................................................................................................................... 75
11 Supplement
11.1 Technical data ................................................................................................................ 76
11.2 Dimensions .................................................................................................................... 86
11.3 Industrial property rights................................................................................................. 95
11.4 Trademark ...................................................................................................................... 95
Safety instructions for Ex areas
TakenoteoftheExspecicsafetyinstructionsforExapplications.
These instructions are attached as documents to each instrument
with Ex approval and are part of the operating instructions manual.
Editing status: 2017-04-03
925-0369 Rev A

4
1 About this document
NCR-25 • 4 … 20 mA/HART - two-wire
36503-EN-170405
1 About this document
1.1 Function
This operating instructions manual provides all the information you
need for mounting, connection and setup as well as important instruc-
tionsformaintenanceandfaultrectication.Pleasereadthisinforma-
tion before putting the instrument into operation and keep this manual
accessible in the immediate vicinity of the device.
1.2 Target group
This operating instructions manual is directed to trained specialist
personnel.The contents of this manual should be made available to
these personnel and put into practice by them.
1.3 Symbols used
Information, tip, note
This symbol indicates helpful additional information.
Caution: If this warning is ignored, faults or malfunctions can result.
Warning: If this warning is ignored, injury to persons and/or serious
damage to the instrument can result.
Danger: If this warning is ignored, serious injury to persons and/or
destruction of the instrument can result.
Ex applications
This symbol indicates special instructions for Ex applications.
•List
The dot set in front indicates a list with no implied sequence.
→Action
This arrow indicates a single action.
1 Sequence of actions
Numbers set in front indicate successive steps in a procedure.
Battery disposal
This symbol indicates special information about the disposal of bat-
teries and accumulators.
925-0369 Rev A

5
2 For your safety
NCR-25 • 4 … 20 mA/HART - two-wire
36503-EN-170405
2 For your safety
2.1 Authorised personnel
All operations described in this operating instructions manual must
be carried out only by trained specialist personnel authorised by the
plant operator.
During work on and with the device the required personal protective
equipment must always be worn.
2.2 Appropriate use
VEGAPULS 62 is a sensor for continuous level measurement.
Youcannddetailedinformationabouttheareaofapplicationin
chapter "Product description".
Operational reliability is ensured only if the instrument is properly
usedaccordingtothespecicationsintheoperatinginstructions
manual as well as possible supplementary instructions.
2.3 Warning about incorrect use
Inappropriate or incorrect use of the instrument can give rise to
application-specichazards,e.g.vesseloverllordamagetosystem
components through incorrect mounting or adjustment. Also the pro-
tectivecharacteristicsoftheinstrumentcanbeinuenced.
2.4 General safety instructions
This is a state-of-the-art instrument complying with all prevailing
regulations and directives. The instrument must only be operated in a
technicallyawlessandreliablecondition.Theoperatorisresponsible
for the trouble-free operation of the instrument.
During the entire duration of use, the user is obliged to determine the
compliance of the necessary occupational safety measures with the
current valid rules and regulations and also take note of new regula-
tions.
The safety instructions in this operating instructions manual, the na-
tional installation standards as well as the valid safety regulations and
accident prevention rules must be observed by the user.
For safety and warranty reasons, any invasive work on the device
beyond that described in the operating instructions manual may be
carried out only by personnel authorised by the manufacturer. Arbi-
traryconversionsormodicationsareexplicitlyforbidden.
The safety approval markings and safety tips on the device must also
be observed.
Depending on the instrument version, the emitting frequencies are in
the C, K or W band range.The low emission power is far below the
internationally approved limit values.When used correctly, the device
poses no danger to health.
925-0369 Rev A

6
2 For your safety
NCR-25 • 4 … 20 mA/HART - two-wire
36503-EN-170405
2.5 EU conformity
ThedevicefullsthelegalrequirementsoftheapplicableEUdirec-
tives.ByaxingtheCEmarking,weconrmtheconformityofthe
instrument with these directives.
YoucanndtheEUconformitydeclarationonourwebsiteunder
www.vega.com/downloads.
Electromagnetic compatibility
Instruments in four-wire or Ex-d-ia version are designed for use in an
industrial environment. Nevertheless, electromagnetic interference
from electrical conductors and radiated emissions must be taken into
account, as is usual with class A instruments according to EN 61326-
1.Iftheinstrumentisusedinadierentenvironment,theelectromag-
netic compatibility to other instruments must be ensured by suitable
measures.
2.6 NAMUR recommendations
NAMUR is the automation technology user association in the process
industry in Germany. The published NAMUR recommendations are
acceptedasthestandardineldinstrumentation.
ThedevicefullstherequirementsofthefollowingNAMURrecom-
mendations:
•NE 21 – Electromagnetic compatibility of equipment
•NE 43 – Signal level for fault information from measuring transduc-
ers
•NE53–Compatibilityofelddevicesanddisplay/adjustment
components
•NE107-Self-monitoringanddiagnosisofelddevices
For further information see www.namur.de.
2.7 Radio license for Europe
The instrument was tested according to the latest issue of the follow-
ingharmonizedstandards:
•EN 302372 - Tank Level Probing Radar
It is hence approved for use inside closed vessels in countries of the
EU.
Use is also approved in EFTA countries, provided the respective
standards have been implemented.
For operation inside of closed vessels, the following conditions must
befullled:
•The instrument must be permanently mounted on a closed vessel
made of metal, reinforced concrete, or comparable attenuating
materials
•Flanges,processttingsandmountingaccessoriesmustensure
the microwave impermeability of the vessel and not let the radar
signal escape to the outside
925-0369 Rev A

7
2 For your safety
NCR-25 • 4 … 20 mA/HART - two-wire
36503-EN-170405
•If necessary, existing viewing windows in the vessel must be
coated with a microwave impermeable material (e.g. electrically
conductive coating)
•Manholesandangesonthevesselmustbeclosedandsealedto
avoid penetration of the radar signal
•The instrument should be preferably mounted on top of the vessel
with antenna orientation downward
•The instrument must only be installed and maintained by appropri-
atelyqualiedsta
2.8 Radio license for USA
This approval is only valid for USA. Hence the following text is only
available in the English language.
This device complies with Part 15 of the FCC Rules. Operation is
subject to the following two conditions:
•This device may not cause interference, and
•This device must accept any interference, including interference
that may cause undesired operation of the device
This device is approved for unrestricted use only inside closed, sta-
tionaryvesselsmadeofmetal,concreteandreinforcedberglass.
For operation outside of closed vessels, the following conditions must
befullled:
•This device shall be installed and maintained to ensure a verti-
cally downward orientation of the transmit antenna's main beam.
Furthermore, the use of any mechanism that does not allow the
main beam of the transmitter to be mounted vertically downward is
prohibited.
•Operation of the instrument with horn antennas ø 40 mm and
ø 48 mm is only permitted within closed vessels.
•Operation of the instrument with parabolic antenna (ø 245 mm)
in conjunction with the electronics with increased sensitivity
(PS60HS) is only permitted within closed vessels.
•Thisdeviceshallbeinstalledonlyatxedlocations.TheLPR
device shall not operate while being moved or while inside a mov-
ing container.
•Hand-held applications are prohibited.
•Marketing to residential consumers is prohibited.
Changesormodicationsnotexpresslyapprovedbythemanufac-
turer could void the user’s authority to operate this equipment.
2.9 Radio license for Canada
This approval is only valid for Canada. Hence the following texts are
only available in the English/French language.
This device complies with Industry Canada's license-exempt RSS
standards. Operation is subject to the following conditions:
•This device may not cause interference, and
•This device must accept any interference, including interference
that may cause undesired operation of the device
925-0369 Rev A

8
2 For your safety
NCR-25 • 4 … 20 mA/HART - two-wire
36503-EN-170405
This device has been approved for both closed containers and open-
air environments with the following limitations:
•ClosedContainers:Forinstallationsutilizingatiltduringinstalla-
tion: This device is limited to installation in a completely enclosed
containermadeofmetal,concreteorreinforcedberglasstopre-
vent RF emissions, which can otherwise interfere with aeronauti-
cal navigation, the maximum approved tilt angle is 10°.
•Open Air Environment: For operation outside of closed vessels,
thefollowingconditionmustbefullled:Thisdeviceshallbe
installed and maintained to ensure a vertically downward orienta-
tion of the transmit antenna's main beam. Furthermore, the use of
any mechanism that does not allow the main beam of the transmit-
ter to be mounted vertically downward is prohibited.
•Operation of the instrument with horn antennas ø 40 mm and
ø 48 mm is only permitted within closed vessels.
•Operation of the instrument with parabolic antenna (ø 245 mm)
in conjunction with the electronics with increased sensitivity
(PS60HS) is only permitted within closed vessels.
The installation of the LPR/TLPR device shall be done by trained
installers, in strict compliance with the manufacture's instructions.
Thisdeviceshallbeinstalledonlyatxedlocations.TheLPRdevice
shall not operate while being moved or while inside a moving con-
tainer.
Hand-held applications are prohibited.
Marketing to residential consumers is prohibited.
The use of this device is on a "no-interference, no-protection" basis.
That ist, the user shall accept operatings of high-powered radaar in
the same frequency band which may interfere with or damage this
device.
However, devices found to interfere with primary licensing operations
will be required to be removed at the user's expense.
The installer/user of this device shall ensure that it is at least 10 km
from the Dominion Astrophysical Radio Observatory (DRAO) near
Penticton, British Columbia. The coordinates of the DRAO are latitude
49°19′15″Nandlongitude119°37′12″W.Fordevicesnotmeeting
this 10 km separation (e.g., those in the Okanagan Valley, British Co-
lumbia,) the installer/user must coordinate with, and obtain the written
concurrence of, the Director of the DRAO before the equipment can
be installed or operated.The Director of the DRAO may be contacted
at 250-497-2300 (tel.)or 250-497-2355 (fax). (Alternatively, the Man-
ager, Regulatory Standards, Industry Canada, may be contacted.)
Le présent appareil est conforme aux CNR d’Industrie Canada ap-
plicables aux appareils radio exempts de licence. L’exploitation est
autorisée aux conditions suivantes:
•L’appareil ne doit pas produire de brouillage; et
•L’utilisateur de l’appareil doit accepter tout brouillage radioélect-
rique subi, même si le brouillage est susceptible d’en compromet-
tre le fonctionnement.
925-0369 Rev A

9
2 For your safety
NCR-25 • 4 … 20 mA/HART - two-wire
36503-EN-170405
Cet appareil est homologué pour une utilisation dans les cuves fer-
mées et les environnements ouverts avec les restrictions suivantes :
•Cuves fermées : Pour les installations impliquant une inclinaison
lors de l'installation : cet appareil ne doit être installé que dans une
cuve totalement fermée en en métal, en béton ou en matière plas-
tiqerenforcéedebresdeverre,pourempêcherlesémissionsRF
susceptibles d'interférer avec la navigation aéronautique. L'angle
d'inclinaison maximum autorisé est de 10°.
•Environnement ouvert : Pour l'utilisation hors des cuves fermées,
la condition suivante doit être remplie : L'appareil doit être installé
et entretenu de manière à garantir une orientation verticale vers
le bas du faisceau principal de l’antenne émettrice. De plus,
l’utilisation de tout mécanisme ne permettant pas l’orientation ver-
ticale vers le bas du faisceau principal de l’émetteur est interdite
•Il est uniquement autorisé d'exploiter l'appareil avec les antennes
cônes ø 40 mm et ø 48 mm dans des boîtiers fermés.
•Il est uniquement autorisé d'exploiter l'appareil avec une antenne
parabolique (ø 245 mm) en liaison avec l'électronique à sensibilité
accrue (PS60HS) dans des boîtiers fermés.
L’installationd’undispositifLPRouTLPRdoitêtreeectuéepardes
installateursqualiés,enpleineconformitéaveclesinstructionsdu
fabricant.
Cetappareilnedoitêtreinstalléqu'àdesemplacementsxes.
L’appareil LPR ne doit pas être utilisé pendant qu’il est en train d’être
déplacé ou se trouve dans un conteneur en mouvement.
Les applications portables sont interdites.
La vente à des particuliers est interdite
Ce dispositif ne peut être exploité qu'en régime de non-brouillage
et de non-protection, c'est-à-dire que l'utilisateur doit accepter que
des radars de haute puissance de la même bande de fréquences
puissent brouiller ce dispositif ou même l'endommager. D'autre part,
les capteurs de niveau qui perturbent une exploitation autorisée par
licence de fonctionnement principal doivent être enlevés aux frais de
leur utilisateur.
La personne qui installe/utilise ce capteur de niveau doit s'assurer
qu'il se trouve à au moins 10 km de l'Observatoire fédéral de radioas-
trophysique (OFR) de Penticton en Colombie-Britannique. Les coor-
donnéesdel'OFRsont:latitudeN49°19′15″,longitudeO119°37′
12″.Lapersonnequiinstalle/utiliseundispositifnepouvantrespecter
cette distance de 10km (p. ex. dans la vallée de l'Okanagan [Colom-
bie-Britannique])doitseconcerteravecledirecteurdel'OFRan
d’obtenir de sa part une autorisation écrite avant que l'équipement
ne puisse être installé ou mis en marche. Le directeur de l'OFR peut
être contacté au 250-497-2300 (tél.) ou au 250-497-2355 (fax). (Le
Directeur des Normes réglementaires d'Industrie Canada peut égale-
ment être contacté).
2.10 Environmental instructions
Protection of the environment is one of our most important duties.
That is why we have introduced an environment management system
925-0369 Rev A

10
2 For your safety
NCR-25 • 4 … 20 mA/HART - two-wire
36503-EN-170405
with the goal of continuously improving company environmental pro-
tection.Theenvironmentmanagementsystemiscertiedaccording
to DIN EN ISO 14001.
Pleasehelpusfullthisobligationbyobservingtheenvironmental
instructions in this manual:
•Chapter "Packaging, transport and storage"
•Chapter "Disposal"
925-0369 Rev A

11
3 Product description
NCR-25 • 4 … 20 mA/HART - two-wire
36503-EN-170405
3 Product description
3.1 Conguration
Thetypelabelcontainsthemostimportantdataforidenticationand
use of the instrument:
2
1
15
13
14
12
11
5
3
6
4
7
8
10
9
Fig. 1: Layout of the type label (example)
1 Instrument type
2 Product code
3 Approvals
4 Power supply and signal output, electronics
5 Protection rating
6 Measuring range
7 Process and ambient temperature, process pressure
8 Material, wetted parts
9 Hardware and software version
10 Order number
11 Serial number of the instrument
12 Data matrix code for smartphone app
13 Symbol of the device protection class
14 ID numbers, instrument documentation
15 Reminder to observe the instrument documentation
The type label contains the serial number of the instrument. With it
youcanndthefollowinginstrumentdataonourhomepage:
•Product code (HTML)
•Delivery date (HTML)
•Order-specicinstrumentfeatures(HTML)
•Operating instructions and quick setup guide at the time of ship-
ment (PDF)
•Order-specicsensordataforanelectronicsexchange(XML)
•Testcerticate(PDF)-optional
Go to "www.vega.com", "Instrument search (serial number)". Enter
the serial number.
Alternatively, you can access the data via your smartphone:
•Download the smartphone app "VEGA Tools" from the "Apple App
Store" or the "Google Play Store"
•Scan the Data Matrix code on the type label of the instrument or
•Enter the serial number manually in the app
Type label
Serial number - Instru-
ment search
925-0369 Rev A

12
3 Product description
NCR-25 • 4 … 20 mA/HART - two-wire
36503-EN-170405
This operating instructions manual applies to the following instrument
versions:
•Hardware version from 2.1.0
•Software version from 4.5.1
Theinstrumentisavailableintwodierentelectronicsversions.Each
versioncanbeidentiedviatheproductcodeonthetypelabelas
well as on the electronics.
•Standard electronics type PS60HK.-
•Electronics with increased sensitivity type PS60HS.-
The scope of delivery encompasses:
•Radar sensor
•Documentation
– Quick setup guide VEGAPULS 62
– Instructions for optional instrument features
– Ex-specic"Safety instructions" (with Ex versions)
– Ifnecessary,furthercerticates
•DVD "DTM Collection", included therein
– PACTware
– DTM Collection
– Instrumentmasterles(GSD)forProbusPA
– FDTcerticates
Information:
The optional instrument features are described in the operating
instructions manual.The respective scope of delivery results from the
orderspecication.
3.2 Principle of operation
The VEGAPULS 62 radar sensor can be used in a wide variety of ap-
plications for continuous level measurement of liquids. It is suitable for
applications in storage vessels, reactors and process vessels, even
underextremelydicultprocessconditions.
Dependentontheapplicationrange,dierentversionsareused:
•Antenna
– Small tanks and process vessels, measurement of virtually all
products: Horn antenna ø 40 mm
– Storage tanks and process vessels, measurement of products
such as solvents, hydrocarbons and fuels under extremely dif-
cultprocessconditions:Horn antenna ø 48 … 95 mm
– Productswithlowεrvalue with large measuring distances:
Parabolic antenna
•Electronics
– Productswithanεrvalue≥1.8:Standard electronics
– Productswithanεrvalue<1.8,≥1.5;applicationswithverybad
reectiveproperties:Electronics with increased sensitivity
The actual values that can be reached depend on the measurement
conditions, the antenna system or the standpipe or bypass.
Scope of this operating
instructions manual
Versions
Scope of delivery
Application area
925-0369 Rev A

13
3 Product description
NCR-25 • 4 … 20 mA/HART - two-wire
36503-EN-170405
The antenna of the radar sensor emits short radar pulses with a
durationofapprox.1ns.Thesepulsesarereectedbytheproduct
and received by the antenna as echoes.The transit time of the radar
pulses from emission to reception is proportional to the distance and
hence to the level. The determined level is converted into an appropri-
ate output signal and outputted as measured value.
3.3 Packaging, transport and storage
Your instrument was protected by packaging during transport. Its
capacity to handle normal loads during transport is assured by a test
based on ISO 4180.
The packaging of standard instruments consists of environment-
friendly, recyclable cardboard. For special versions, PE foam or PE
foil is also used. Dispose of the packaging material via specialised
recycling companies.
Transport must be carried out in due consideration of the notes on the
transport packaging. Nonobservance of these instructions can cause
damage to the device.
The delivery must be checked for completeness and possible transit
damage immediately at receipt. Ascertained transit damage or con-
cealed defects must be appropriately dealt with.
Up to the time of installation, the packages must be left closed and
stored according to the orientation and storage markings on the
outside.
Unless otherwise indicated, the packages must be stored only under
the following conditions:
•Not in the open
•Dry and dust free
•Not exposed to corrosive media
•Protected against solar radiation
•Avoiding mechanical shock and vibration
•Storage and transport temperature see chapter "Supplement -
Technical data - Ambient conditions"
•Relative humidity 20 … 85 %
3.4 Accessories and replacement parts
The display and adjustment module PLICSCOM is used for measured
value indication, adjustment and diagnosis. It can be inserted into the
sensor and removed at any time.
The integrated Bluetooth module (optional) enables wireless adjust-
ment via standard adjustment devices:1)
•Smartphone/tablet (iOS or Android operating system)
•PC/notebook with Bluetooth USB adapter (Windows operating
system)
Youcanndfurtherinformationintheoperatinginstructions"Display
and adjustment module PLICSCOM" (Document-ID 27835).
Functional principle
Packaging
Transport
Transport inspection
Storage
Storage and transport
temperature
PLICSCOM
925-0369 Rev A

14
3 Product description
NCR-25 • 4 … 20 mA/HART - two-wire
36503-EN-170405
The interface adapter VEGACONNECT enables the connection of
communication-capable instruments to the USB interface of a PC. For
parameter adjustment of these instruments, the adjustment software
PACTware with VEGA-DTM is required.
Youcanndfurtherinformationintheoperatinginstructions"Interface
adapter VEGACONNECT" (Document-ID 32628).
The VEGADIS 81 is an external display and adjustment unit for VEGA
plics®sensors.
For sensors with double chamber housing the interface adapter
"VEGADIS adapter" is also required for VEGADIS 81.
Youcanndfurtherinformationintheoperatinginstructions
"VEGADIS 81" (Document-ID 43814).
The VEGADIS adapter is an accessory part for sensors with double
chamber housings. It enables the connection of VEGADIS 81 to the
sensor housing via an M12 x 1 plug.
Youcanndfurtherinformationinthesupplementaryinstructions
"VEGADIS adapter" (Document-ID 45250).
VEGADIS 82 is suitable for measured value indication and adjustment
of sensors with HART protocol. It is looped into the 4 … 20 mA/HART
signal cable.
Youcanndfurtherinformationintheoperatinginstructions
"VEGADIS 82 4 … 20 mA/HART" (Document-ID 45300).
PLICSMOBILE T61 is an external GSM/GPRS radio unit for transmis-
sion of measured values and for remote parameter adjustment of
plics®sensors. Adjustment is carried out via PACTware/DTM and the
integrated USB connection.
Youcanndfurtherinformationinthesupplementaryinstructions
"PLICSMOBILE T61" (Document-ID 37700).
PLICSMOBILE is an internal GSM/GPRS radio unit for transmission
ofmeasuredvaluesandforremotecongurationofplics®sensors.
Adjustment is carried out via PACTware/DTM and the integrated USB
connection.
Youcanndfurtherinformationinthesupplementaryinstructions
"PLICSMOBILE GSM/GPRS radio module" (Document-ID 36849).
The overvoltage arrester B81-35 is used in the single or double
chamber housing instead of the connection terminals. It reduces any
voltage surges that may reach the signal cables to a harmless level.
Youcanndfurtherinformationinthesupplementaryinstructions
"Overvoltage arrester B81-35" (Document-ID 50708).
The protective cover protects the sensor housing against soiling and
intense heat from solar radiation.
VEGACONNECT
VEGADIS 81
VEGADIS adapter
VEGADIS 82
PLICSMOBILE T61
PLICSMOBILE
Overvoltage protection
Protective cover
1) Bluetooth function with VEGADIS 82 can only be used at a later date.
925-0369 Rev A

15
3 Product description
NCR-25 • 4 … 20 mA/HART - two-wire
36503-EN-170405
Youwillndadditionalinformationinthesupplementaryinstructions
manual "Protective cover" (Document-ID 34296).
Screwedangesareavailableindierentversionsaccordingtothe
following standards: DIN 2501, EN 1092-1, BS 10, ASME B 16.5,
JIS B 2210-1984, GOST 12821-80.
Youcanndadditionalinformationinthesupplementaryinstructions
manual "Flanges according to DIN-EN-ASME-JIS".
Electronics module "VEGAPULS series 60" is a replacement part for
radarsensorsofVEGAPULSseries60.Adierentversionisavailable
for each type of signal output.
Youcanndfurtherinformationintheoperatinginstructions"Elec-
tronics module VEGAPULS series 60" (Document-ID 36801).
The supplementary electronics is a replacement part for 4 … 20 mA/
HART sensors with double chamber housing.
Youcanndfurtherinformationintheoperatinginstructions"Supple-
mentary electronics for 4 … 20 mA/HART - two-wire" (Document-ID
42764).
The antenna impedance cone is a replacement part used for optimum
transmission of microwaves and for sealing against the process.
Youndfurtherinformationintheoperatinginstructions"Antenna
impedance cone VEGAPULS 62 and 68" (Document-ID 31381).
Flanges
Electronics module
Supplementary electron-
ics for double chamber
housing
Antenna impedance cone
925-0369 Rev A

16
4 Mounting
NCR-25 • 4 … 20 mA/HART - two-wire
36503-EN-170405
4 Mounting
4.1 General instructions
Oninstrumentswiththreadedprocesstting,thehexagonmustbe
tightenedwithasuitablewrench.Fortheproperwrenchsizesee
chapter "Dimensions".
Warning:
The housing must not be used to screw the instrument in! Applying
tightening force can damage internal parts of the housing.
Protect your instrument against moisture ingress through the following
measures:
•Use the recommended cable (see chapter "Connecting to power
supply")
•Tighten the cable gland
•Whenmountinghorizontally,turnthehousingsothatthecable
gland points downward
•Loop the connection cable downward in front of the cable gland
This applies mainly to outdoor installations, in areas where high
humidity is expected (e.g. through cleaning processes) and on cooled
or heated vessels.
Make sure before mounting that all parts of the instrument exposed to
the process are suitable for the existing process conditions.
These are mainly:
•Active measuring component
•Processtting
•Process seal
Process conditions in particular are:
•Process pressure
•Process temperature
•Chemical properties of the medium
•Abrasionandmechanicalinuences
Youcannddetailedinformationontheprocessconditionsinchapter
"Technical data" as well as on the type label.
Metric threads
In the case of instrument housings with metric thread, the cable
glands are screwed in at the factory.They are sealed with plastic
plugs as transport protection.
You have to remove these plugs before electrical connection.
NPT thread
In the case of instrument housings with self-sealing NPT threads, it is
not possible to have the cable entries screwed in at the factory. The
free openings for the cable glands are therefore covered with red dust
protection caps as transport protection.The dust protection caps do
notprovidesucientprotectionagainstmoisture.
Screwing in
Protection against mois-
ture
Suitability for the process
conditions
Cable glands
925-0369 Rev A

17
4 Mounting
NCR-25 • 4 … 20 mA/HART - two-wire
36503-EN-170405
Prior to setup you have to replace these protective caps with ap-
proved cable glands or close the openings with suitable blind plugs.
4.2 Mounting preparations
The instrument is also available in versions with an antenna whose
diameterislargerthantheprocesstting(thread,ange).Insuch
casestheantennamustbedisconnectedfromtheprocesstting
before mounting.
Proceed as follows:
1. Loosen the hexagon socket screws (3) on the antenna socket
withanAllenwrench(size3)
2. Remove the antenna (4)
Note:
The plastic cone may not be pulled out of the antenna socket.
3. Insert the antenna from below into the vessel socket and secure it
againstfallingo
4. Retighten the antenna with hexagon screws to the antenna
socket; max. torque see chapter "Technical data"
Note:
The radar sensor with rinsing air connection or with antenna exten-
sionhasanotchontheantennasocketforpolarization.Thisnotch
mustbealignedwiththemarkingontheprocesstting.
4
3
5
1
2
Fig. 2: Dismounting of the horn antenna
1 Markingontheprocesstting
2 Marking at the antenna socket
3 Screw locking device
4 Hexagon socket screws
5 Antenna
Caution:
A secure hold of the antenna is only ensured with the untwist guard.
The untwist guards inserted on site must hence be used again.
Depending on temperature range and antenna material, these are
Horn antenna
925-0369 Rev A

18
4 Mounting
NCR-25 • 4 … 20 mA/HART - two-wire
36503-EN-170405
spring rings according to DIN 217 or wedge lock washers according
to DIN 25 201.
Proceed as follows:
1. ClampVEGAPULS62withtheange,e.g.inabenchvice
2. Holdtheconnectionpiece(1)withawrenchontheatsurfaces
(widthacrossats22mm)
3. Loosen counter nut (3) completely with a wrench (width across
ats36mm)inthedirectionoftheantenna
4. Loosen compression nut (2) completely with a wrench (width
acrossats41mm)inthedirectionoftheantenna
5. Remove the parabolic antenna (4) axially
6. Mountsensorangeontheadapterangeandfastenittightly
7. Check if the O-ring seal is present on the connection piece and
make sure it is not damaged.
Note:
A damaged O-ring seal must be replaced: FKM (SHS FPM 70C3
GLT),FFKM(Kalrez6375)
8. Remount the parabolic antenna (4)
9. Fastencompressionnut(2)withawrench(widthacrossats41),
max. torque see chapter "Technical data"
10. Fastencounternut(3)withawrench(widthacrossats36),max.
torque see chapter "Technical data"
Note:
On the version with rinsing air connection, make sure that the holes
intheantennaandintheprocessttingcoincide.Thisensuresasuf-
cientairow(theairisledthroughtheholestothefeedsystem.A
rinsing of the whole parabolic antenna is not intended).
1
2
3
4
Fig. 3: Dismounting, parabolic antenna
1 Connection piece
2 Compression nut
3 Counter nut
4 Parabolic antenna
Parabolic antenna
925-0369 Rev A

19
4 Mounting
NCR-25 • 4 … 20 mA/HART - two-wire
36503-EN-170405
4.3 Mounting instructions
The illustrations with the following mounting instructions show a radar
sensor with horn antenna.The mounting instructions apply analo-
gously also to the version with parabolic antenna.
The emitted radar impulses of the radar sensor are electromagnetic
waves.The polarisation is the direction of the electrical wave compo-
nent.Byturningtheinstrumentintheconnectionangeormounting
boss,thepolarisationcanbeusedtoreducetheeectsoffalse
echoes.
Thepositionofthepolarisationismarkedontheprocessttingofthe
instrument.
12
Fig. 4: Position of the polarisation
1 Marking with screwed version
2 Markingwithangeversion
When mounting the sensor, keep a distance of at least 200 mm
(7.874 in) from the vessel wall. If the sensor is installed in the center
of dished or round vessel tops, multiple echoes can arise. However,
these can be suppressed by an appropriate adjustment (see chapter
"Setup").
If you cannot maintain this distance, you should carry out a false
signal suppression during setup. This applies particularly if buildup on
the vessel wall is expected. In such cases, we recommend repeating
the false signal suppression at a later date with existing buildup.
> 200 mm
(7.87
")
Fig. 5: Mounting of the radar sensor on round vessel tops
In vessels with conical bottom it can be advantageous to mount the
sensor in the centre of the vessel, as measurement is then possible
down to the bottom.
Horn and parabolic
antenna
Polarisation
Installation position
925-0369 Rev A

20
4 Mounting
NCR-25 • 4 … 20 mA/HART - two-wire
36503-EN-170405
Fig. 6: Mounting of the radar sensor on vessels with conical bottom
Donotmounttheinstrumentsinorabovethellingstream.Makesure
thatyoudetecttheproductsurface,nottheinowingproduct.
Fig.7:Mountingoftheradarsensorwithinowingmedium
The socket piece should be dimensioned in such a way that the
antenna end protrudes slightly out of the socket.
ca. 10 mm
Fig. 8: Recommended socket mounting with horn antenna
Inowingmedium
Mounting socket
925-0369 Rev A
Table of contents
Other Bin Master Accessories manuals
Bin Master
Bin Master FD-2000 User manual
Bin Master
Bin Master CNCR-120 User manual
Bin Master
Bin Master GWR-2000 User manual
Bin Master
Bin Master CNCR-220 User manual
Bin Master
Bin Master NCR-80 User manual
Bin Master
Bin Master SmartBob AO User manual

Bin Master
Bin Master CNCR-190 User manual
Bin Master
Bin Master NCR-80 User manual

Bin Master
Bin Master NCR-80 User manual

Bin Master
Bin Master NCR-80 User manual
