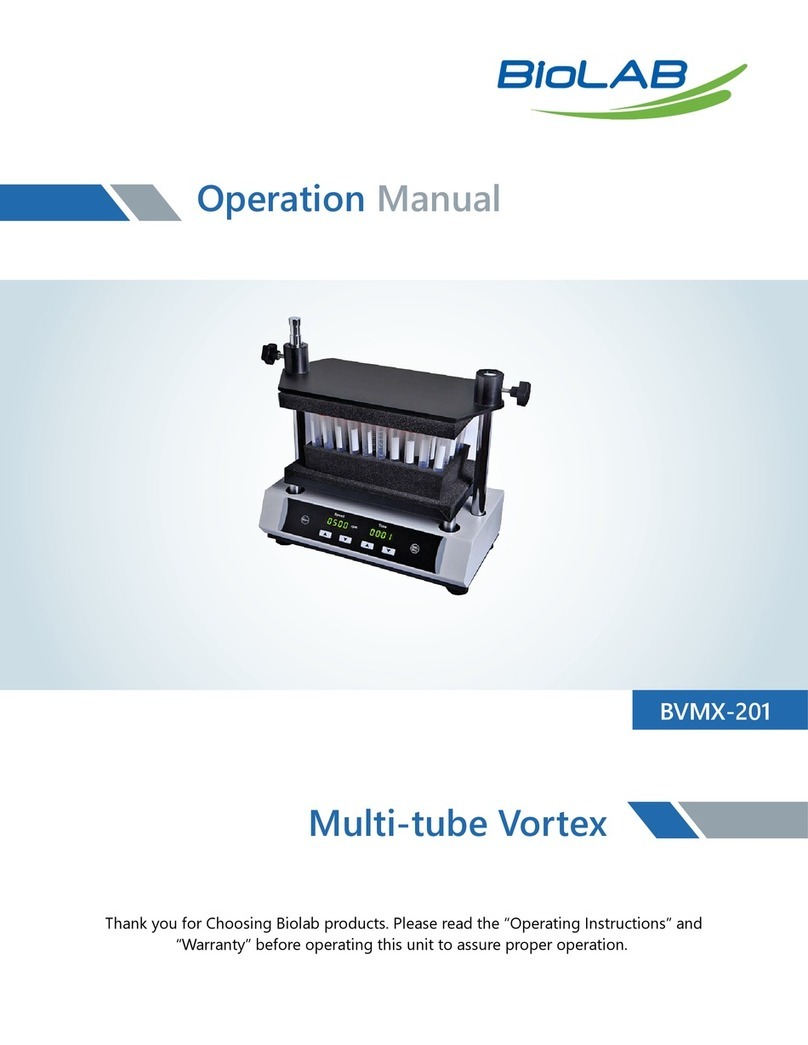
BioLegend Mini ELISA Plate Reader Mounting instructions

Mini ELISA Plate
Reader™
Instrument and Software Manual
[description
Cat. No. 423555

It is highly recommended that this manual be read in its entirety before using this product. Do not use this kit beyond the expiration date.
For Research Purposes Only. Not for use in diagnostic or therapeutic procedures. Purchase does not include or carry the right to resell or transfer this product either as a
stand-alone product or as a component of another product. Any use of this product other than the permitted use without the express written authorization of BioLegend
is strictly prohibited.
Table of Contents
General Information � � � � � � � � � � � � � � � � � � � � � � � � � � � � � � � � � � � � � � � � � � � � � � � � � � � � � � � � � � � � � � � � � � � � � � � � � � � � � � � � � � � � � � � � � � � � � � � � � � � � � � � � � � �3
Dear Valued BioLegend Customer � � � � � � � � � � � � � � � � � � � � � � � � � � � � � � � � � � � � � � � � � � � � � � � � � � � � � � � � � � � � � � � � � � � � � � � � � � � � � � � � � � � � � � � � � � �3
Warnings � � � � � � � � � � � � � � � � � � � � � � � � � � � � � � � � � � � � � � � � � � � � � � � � � � � � � � � � � � � � � � � � � � � � � � � � � � � � � � � � � � � � � � � � � � � � � � � � � � � � � � � � � � � � � � � � � � �3
Liability for Device Performance and Damage � � � � � � � � � � � � � � � � � � � � � � � � � � � � � � � � � � � � � � � � � � � � � � � � � � � � � � � � � � � � � � � � � � � � � � � � � � � � � � �3
Disposal of Used Electrical and Electronic Equipment � � � � � � � � � � � � � � � � � � � � � � � � � � � � � � � � � � � � � � � � � � � � � � � � � � � � � � � � � � � � � � � � � � � � � � � �3
Working with Biological and Harmful Material � � � � � � � � � � � � � � � � � � � � � � � � � � � � � � � � � � � � � � � � � � � � � � � � � � � � � � � � � � � � � � � � � � � � � � � � � � � � � � �3
Overview of the Mini ELISA Plate Reader™ � � � � � � � � � � � � � � � � � � � � � � � � � � � � � � � � � � � � � � � � � � � � � � � � � � � � � � � � � � � � � � � � � � � � � � � � � � � � � � � � � � � � � �4
Scope of Application� � � � � � � � � � � � � � � � � � � � � � � � � � � � � � � � � � � � � � � � � � � � � � � � � � � � � � � � � � � � � � � � � � � � � � � � � � � � � � � � � � � � � � � � � � � � � � � � � � � � � � � �4
Measurement Method � � � � � � � � � � � � � � � � � � � � � � � � � � � � � � � � � � � � � � � � � � � � � � � � � � � � � � � � � � � � � � � � � � � � � � � � � � � � � � � � � � � � � � � � � � � � � � � � � � � � � �4
About the Mini ELISA Plate Reader™ � � � � � � � � � � � � � � � � � � � � � � � � � � � � � � � � � � � � � � � � � � � � � � � � � � � � � � � � � � � � � � � � � � � � � � � � � � � � � � � � � � � � � � � � �4
Information on Consumables � � � � � � � � � � � � � � � � � � � � � � � � � � � � � � � � � � � � � � � � � � � � � � � � � � � � � � � � � � � � � � � � � � � � � � � � � � � � � � � � � � � � � � � � � � � � � � �5
Power Consumption � � � � � � � � � � � � � � � � � � � � � � � � � � � � � � � � � � � � � � � � � � � � � � � � � � � � � � � � � � � � � � � � � � � � � � � � � � � � � � � � � � � � � � � � � � � � � � � � � � � � � � � �5
Preparing the Product for Use � � � � � � � � � � � � � � � � � � � � � � � � � � � � � � � � � � � � � � � � � � � � � � � � � � � � � � � � � � � � � � � � � � � � � � � � � � � � � � � � � � � � � � � � � � � � � � � � � �5
Unpacking, Storing and Transporting� � � � � � � � � � � � � � � � � � � � � � � � � � � � � � � � � � � � � � � � � � � � � � � � � � � � � � � � � � � � � � � � � � � � � � � � � � � � � � � � � � � � � � � �5
Checking the Supplied Parts � � � � � � � � � � � � � � � � � � � � � � � � � � � � � � � � � � � � � � � � � � � � � � � � � � � � � � � � � � � � � � � � � � � � � � � � � � � � � � � � � � � � � � � � � � � � � � � �6
Working Environment� � � � � � � � � � � � � � � � � � � � � � � � � � � � � � � � � � � � � � � � � � � � � � � � � � � � � � � � � � � � � � � � � � � � � � � � � � � � � � � � � � � � � � � � � � � � � � � � � � � � � � �6
Software Installation & Updates � � � � � � � � � � � � � � � � � � � � � � � � � � � � � � � � � � � � � � � � � � � � � � � � � � � � � � � � � � � � � � � � � � � � � � � � � � � � � � � � � � � � � � � � � � � � �6
Windows Installation� � � � � � � � � � � � � � � � � � � � � � � � � � � � � � � � � � � � � � � � � � � � � � � � � � � � � � � � � � � � � � � � � � � � � � � � � � � � � � � � � � � � � � � � � � � � � � � � � � � � � � � �6
MacOS Installation� � � � � � � � � � � � � � � � � � � � � � � � � � � � � � � � � � � � � � � � � � � � � � � � � � � � � � � � � � � � � � � � � � � � � � � � � � � � � � � � � � � � � � � � � � � � � � � � � � � � � � � � � �6
Operation � � � � � � � � � � � � � � � � � � � � � � � � � � � � � � � � � � � � � � � � � � � � � � � � � � � � � � � � � � � � � � � � � � � � � � � � � � � � � � � � � � � � � � � � � � � � � � � � � � � � � � � � � � � � � � � � � � � � �7
Getting Started with the Mini ELISA Plate Reader™ App � � � � � � � � � � � � � � � � � � � � � � � � � � � � � � � � � � � � � � � � � � � � � � � � � � � � � � � � � � � � � � � � � � � � � �7
Icons � � � � � � � � � � � � � � � � � � � � � � � � � � � � � � � � � � � � � � � � � � � � � � � � � � � � � � � � � � � � � � � � � � � � � � � � � � � � � � � � � � � � � � � � � � � � � � � � � � � � � � � � � � � � � � � � � � � � � � �7
Connecting the Mini ELISA Plate Reader™ to a Computer� � � � � � � � � � � � � � � � � � � � � � � � � � � � � � � � � � � � � � � � � � � � � � � � � � � � � � � � � � � � � � � � � � � � �8
Setting Up an Assay and Creating a Protocol � � � � � � � � � � � � � � � � � � � � � � � � � � � � � � � � � � � � � � � � � � � � � � � � � � � � � � � � � � � � � � � � � � � � � � � � � � � � � � � � �9
Running the Assay � � � � � � � � � � � � � � � � � � � � � � � � � � � � � � � � � � � � � � � � � � � � � � � � � � � � � � � � � � � � � � � � � � � � � � � � � � � � � � � � � � � � � � � � � � � � � � � � � � � � � � � � 12
Additional Instrument Information � � � � � � � � � � � � � � � � � � � � � � � � � � � � � � � � � � � � � � � � � � � � � � � � � � � � � � � � � � � � � � � � � � � � � � � � � � � � � � � � � � � � � � � � � � � 15
Signal Lights� � � � � � � � � � � � � � � � � � � � � � � � � � � � � � � � � � � � � � � � � � � � � � � � � � � � � � � � � � � � � � � � � � � � � � � � � � � � � � � � � � � � � � � � � � � � � � � � � � � � � � � � � � � � � � 15
Troubleshooting� � � � � � � � � � � � � � � � � � � � � � � � � � � � � � � � � � � � � � � � � � � � � � � � � � � � � � � � � � � � � � � � � � � � � � � � � � � � � � � � � � � � � � � � � � � � � � � � � � � � � � � � � � 15
Maintenance and Cleaning � � � � � � � � � � � � � � � � � � � � � � � � � � � � � � � � � � � � � � � � � � � � � � � � � � � � � � � � � � � � � � � � � � � � � � � � � � � � � � � � � � � � � � � � � � � � � � � � � � � 16
Maintenance � � � � � � � � � � � � � � � � � � � � � � � � � � � � � � � � � � � � � � � � � � � � � � � � � � � � � � � � � � � � � � � � � � � � � � � � � � � � � � � � � � � � � � � � � � � � � � � � � � � � � � � � � � � � � 16
Cleaning � � � � � � � � � � � � � � � � � � � � � � � � � � � � � � � � � � � � � � � � � � � � � � � � � � � � � � � � � � � � � � � � � � � � � � � � � � � � � � � � � � � � � � � � � � � � � � � � � � � � � � � � � � � � � � � � � 16
Technical Support � � � � � � � � � � � � � � � � � � � � � � � � � � � � � � � � � � � � � � � � � � � � � � � � � � � � � � � � � � � � � � � � � � � � � � � � � � � � � � � � � � � � � � � � � � � � � � � � � � � � � � � � 17
Repairs � � � � � � � � � � � � � � � � � � � � � � � � � � � � � � � � � � � � � � � � � � � � � � � � � � � � � � � � � � � � � � � � � � � � � � � � � � � � � � � � � � � � � � � � � � � � � � � � � � � � � � � � � � � � � � � � � � � 18
Performance Data and Technical Data � � � � � � � � � � � � � � � � � � � � � � � � � � � � � � � � � � � � � � � � � � � � � � � � � � � � � � � � � � � � � � � � � � � � � � � � � � � � � � � � � � � � � � � � 18
Warranty � � � � � � � � � � � � � � � � � � � � � � � � � � � � � � � � � � � � � � � � � � � � � � � � � � � � � � � � � � � � � � � � � � � � � � � � � � � � � � � � � � � � � � � � � � � � � � � � � � � � � � � � � � � � � � � � � � � � 19

biolegend.com 3
Mini ELISA Plate Reader™
General Information
Dear Valued BioLegend Customer
We hope you enjoy your BioLegend Mini ELISA Plate Reader™� As with all of our products, we hope that this instrument will enable
your research on your path to legendary discovery�
To make full use of the instrument’s performance, please carefully read these instructions in their entirety before using the device�
Operate the instrument in accordance with these instructions� The performance and safety of the instrument is only guaranteed if
the instructions in this manual are fully regarded�
BioLegend accepts no liability for any damage resulting from the improper use or operation of the instrument� Ensure that this
manual is accessible at all times and is read and understood by all persons operating the instrument� The latest version of this
manual is available via the Mini ELISA Plate Reader™ App� This document is subject to technical changes and updates�
Warnings
This manual highlights particularly important remarks as follows:
WARNING: Indicates a risk of death or serious injury, or damage to property�
CAUTION: Indicates a risk of moderate or minor injury, or damage to property�
IMPORTANT: Indicates critical information that must be observed�
Liability for Device Performance and Damage
The operation of the device must be performed in accordance with the instructions provided in this manual�
The performance guarantee of the device shall be void in all cases where the device is improperly maintained, repaired, or
modied by unauthorized service personnel, or if the device is handled in a manner inconsistent with its intended use�
WARNING
» Operation of the instrument in an improper working environment can lead to measurement errors and may damage the
device, or cause a reduction in service life� Please see the explanations and warnings in “Working Environment” on page
6�
» To avoid measurement errors, it is essential to ensure that the instrument is connected properly and that the experiments
are carried out correctly� Please see the explanations and warnings in“Preparing the Product for Use” on page 5�
» Incorrect cleaning of the instrument can reduce its service life and can cause damage to the instrument�
Please see the explanations and warnings in“Cleaning” on page 16�
» To avoid the risk of electric shock, do not expose the instrument to rain or excessive moisture and do not touch the
instrument or USB cable with wet hands�
IMPORTANT
» Follow all safety instructions on the device and in the attached documents�
» Follow all general precautions that apply to electrical instruments�
Disposal of Used Electrical and Electronic Equipment
This symbol indicates that the instrument must be disposed of at a recycling collection point for electronic equipment� For further
information on how to recycle this product, please contact your local authority or municipal waste disposal companies�
Working with Biological and Harmful Material
Do not use the Mini ELISA Plate Reader™ for the measurement of biohazardous substances�
Always observe the manufacturer’s hazard information pertaining to the substances being measured�
The instrument alone does not produce any toxic or harmful gases or substances� During the measurement, make sure that there
are no toxic or harmful substances in the microtiter plate�

Mini ELISA Plate Reader™
4Tel: 858-768-5800
Overview of the Mini ELISA Plate Reader™
Scope of Application
The Mini ELISA Plate Reader™ is an absorbance-based measurement device with which the absorbance values of the contents of
a 96-well microtiter plate can be read, recorded, and further processed� The Mini ELISA Plate Reader™ is intended for research use
only� It is to be operated by trained laboratory personnel and is intended for professional use�
The Mini ELISA Plate Reader™ App is a microplate-reader-control software that is intended to be used for the readout and analysis
of data produced by the Mini ELISA Plate Reader™�
Measurement Method
The Mini ELISA Plate Reader™ is designed to carry out fast and sensitive absorbance measurements� It measures the optical
density (OD) of samples at dened wavelengths�
Absorption
Absorption refers to the amount of light absorbed by a medium� Absorption reduces transmission� Transmission is the ratio of
incident to transmitted light� Accordingly, the degree of transmission is calculated as follows: T = (I/I0) where I is transmitted light
and I0 is incident light�
Optical Density
Optical density is a measure of the attenuation of light radiation after it has passed through a medium� Optical density is the
logarithmic quantity that describes the reciprocal of the transmittance T: OD = log(I0/I) where I is the transmitted light and I0 is
incident light�
About the Mini ELISA Plate Reader™
The Mini ELISA Plate Reader™ has 96 detection units, which allow for measurement without a scanning mechanism� In the upper
part of the measuring instrument there are four light sources with dierent wavelengths and four interference lters� The four
signal lights on the top of the reader show which measuring channel is being used for the current measurement� The microtiter
plate is inserted manually into the slot of the device� There are two raised locking-edges at the bottom of the slot, as well as an
arrow for visual inspection that becomes wholly visible only after the microtiter plate has been completely inserted�
Figure 1� Visual representation of the product from the front, top�
1� Signal lights� 2� Slot for microtiter plate� 3� Raised locking-edges� 4� Arrow�

biolegend.com 5
Mini ELISA Plate Reader™
On the back of the Mini ELISA Plate Reader™ is a USB plug for connecting the instrument to a computer via the included Micro-
USB cable� Furthermore, there is an eject button for ejecting the microtiter plate out of the slot�
Figure 2� Visual representation of the product from behind, top�
5� Eject button� 6� Micro-USB plug�
Information on Consumables
The Mini ELISA Plate Reader™ can read ANSI/SBS Standard 96-well microtiter plates� When using microtiter plates, always review
the specications provided by the manufacturer� Not all microtiter plates are intended for use in immunoassays�
Power Consumption
The Mini ELISA Plate Reader™ is operated by a Micro-USB cable and the total power consumption is generally less than 2�5 W�
Preparing the Product for Use
Unpacking, Storing and Transporting
Unpacking
Remove the packaging material and carefully place the unit on a rm and level surface�
Check the parts supplied (see “Checking the Supplied Parts”on page 6)�
CAUTION
» Check the product for external damages�
» Make sure the rubber feet are completely attached to the underside of the device�
The device is packed in a specially designed cardboard box� Keep this packaging material, as it will be required should you need to
return the device for repair�
Storing and Protecting During Normal Use
WARNING
» Protect the device from moisture and dust during prolonged storage�
CAUTION
» Do not store the device next to heat sources� Protect it from direct sunlight�
Store the device at temperatures between 5-45 °C�
Transporting
Before transporting the device, make sure that it is turned o and disconnected from the computer�
WARNING
» Before transport, make sure that there is no microtiter plate in the instrument�

Mini ELISA Plate Reader™
6Tel: 858-768-5800
CAUTION
» Always transport the product securely to avoid possible transport damage�
Checking the Supplied Parts
When unpacking the device, please check that the following components are present:
• Mini ELISA Plate Reader™
• Micro-USB cable
• Hex key
• Microber cloth
• USB ash drive
Working Environment
Due to its small size, the Mini ELISA Plate Reader™ oers outstanding handling and portability�
However, please note the following warnings� Failure to adhere to these recommendations may lead to inaccurate measurement
results or damage to the device:
WARNING
» Place the device on a level surface, free from dust and vibrations�
» Do not operate the device near heat sources or under direct sunlight�
» Operate the device at temperatures between 5-45 °C�
» Ambient humidity should not exceed 90 %�
Software Installation & Updates
The Mini ELISA Reader™ App can be installed in either a Windows or a MacOS environment�
Windows Installation
To install the Mini ELISA Plate Reader™ App, insert the USB ash drive provided with the Mini ELISA Plate Reader™ into a PC
computer and follow the steps below:
1� Locate and select the USB drive in the document browser�
2� Double-click the “BioLegendSetup”le� This will open the BioLegend App Setup Wizard�
3� Follow the steps in the Setup Wizard to complete the installation�
IMPORTANT
» To install the proper drivers and software on the computer, the user must have administrator access�
» The computer must have at least Windows 7 or above� Windows 10 and later versions function through plug and play� If an
older version is being used, drivers may need to be installed� These are available on the USB ash drive provided with the
device�
MacOS Installation
To install the Mini ELISA Plate Reader™ App, insert the USB ash drive provided with the Mini ELISA Plate Reader™ into a MacOS
computer and follow the steps below:
• Locate and select the USB DISK under“Locations”�
• Double-click the “MiniELISAPlateReaderApp�dmg” le� The application will become visible under “Locations”�
• A small window displaying the BioLegend logo and application will appear� Double-click on the BioLegend logo to launch the
reader software�
Uninstalling the Software
The Mini ELISA Plate Reader™ App can be uninstalled using the standard uninstall procedure for your computer�
Updates
Software updates will occasionally become available� To check for new updates, the user must click on the update button in the
menu bar� If an update is available, this will be shown in a bar on the top of the screen� Follow the prompts to download any
updates�

biolegend.com 7
Mini ELISA Plate Reader™
Operation
Before rst using the Mini ELISA Plate Reader™, carefully read the entire manual�
Getting Started with the Mini ELISA Plate Reader™ App
Software Homepage
After launching the “Mini ELISA Plate Reader™ App”, a window will appear which consists of the Menu Bar, the Control Bar and the
Main Window (see Figure 3)� All measurement settings will be set and managed from this main window�
Figure 3� Software Window Description�
“No Reader Found”
This message appears when the Microplate Reader is not connected to the computer� Simply attach the reader to proceed� If
the reader is connected but not recognized by the software, you may need to install the drivers present on the USB ash drive
provided� See “Software Installation & Updates”on page 6�
Icons
The following is a complete list of all icons used in the Mini ELISA Plate Reader™ App with a description of their function�
Table 1� Icons in the Mini ELISA Plate Reader™ App�
Icon Function
Create a protocol/create a new measurement
Open a previously saved protocol or assay
Save your current protocol or assay
Export the results
Open the instructions for use
Check for a new update when connected to the Internet

Mini ELISA Plate Reader™
8Tel: 858-768-5800
Icon Function
Setup
Readout
Results
Repeat
File Types
The following le types are used by the Mini ELISA Plate Reader™ App (Table 2):
Table 2� File Types in the Mini ELISA Plate Reader™ App�
Quality Extension
Protocol �byop
Assay �byoa
Export �csv/�pdf
Connecting the Mini ELISA Plate Reader™ to a Computer
The Mini ELISA Plate Reader™ requires a connection to a computer in order to power the device, access the software, and to
transfer data�
WARNING
» Always use the Micro-USB cable for the connection to your computer�
IMPORTANT
» Place the instrument on a horizontal surface, secured against falling�
» Connect the instrument directly to your computer; do not use an external USB hub�
» The device may only be operated with a USB port USB 2/USB 3 with 5 VDC and a maximum of 3 A of a certicated computer
(with certication mark of an approved testing laboratory)� Use an adapter cable on USB 3�1 with type C plug connection,
which ensures the prole 1: 5 V@2�0 A�
Insert the Micro-USB cable into the Mini ELISA Plate Reader™ and into an open USB port on the computer�
The Mini ELISA Plate Reader™ will start automatically after it is connected to the computer via the Micro-USB cable and the
software has established a connection�
When the Mini ELISA Plate Reader™ is switched on, the signal lights on the top of the instrument light up� Each time the
instrument is switched on, an internal self-test is performed to ensure there are no malfunctions�
If no connection between the instrument and the computer is established, install the driver for the USB connection� You can nd it
in the supplied USB ash drive� See“Software Installation & Updates”on page 6�

biolegend.com 9
Mini ELISA Plate Reader™
Setting Up an Assay and Creating a Protocol
Select “New”from the menu bar to dene experiment parameters�
Figure 4� Experiment Parameters�
Dening a Protocol
In the rst section of the Setup Page you can name your assay/protocol� For each protocol you can add a description, assign a
supplier for the assay kit, or choose a logo�
Selecting a Wavelength
Under “Wavelength”, choose a sample and reference wavelength�
The sample wavelength is the wavelength (in nanometers) at which the principal measurement will be run�
The reference wavelength is the wavelength (in nanometers) at which the reference is measured� The values measured at the
reference wavelength will be subtracted from the values measured at the sample wavelength�
If no reference wavelength is desired, click the “None” button beside the reference wavelength�
Evaluation
The evaluation section allows you to choose which evaluative method will be used for the readout:
No Evaluation
No evaluation will be used� The raw OD values will later be shown in plate format�
Quantitative
• Upon selection of the Quantitative evaluation method, a second section titled “Regression Analysis” will appear in the
evaluation eld�
• Click the drop-down menu and select one of the options: 4-parameter regression, linear regression, or point-to-point�
• The selected evaluation method will be used for the standard curve and subsequent data analysis�
Qualitative
Upon selection of qualitative evaluation, the plate layout window will change and a formula for the cut-o denition will appear�
Terms for Cut-O Denition:
• POS = the mean of the OD values of the positive control wells�
• NEG = the mean of the OD values of the negative control wells�
• CUT = the mean of the OD values of the cut-o control wells�
• 0 OD = zero� User dened value may be entered� See example 3�

Mini ELISA Plate Reader™
10 Tel: 858-768-5800
• Oset = the oset value for cut-o calculation�
• Range = a percentage value dening a range beyond which the results are interpreted as either positive or negative�
The formula setup for the cut-o denition covers multiple formula types� These are listed below:
• Cut-O Value = Mean Neg� Controls +(−) k
• Cut-O Value = Mean Pos� Controls + k
• Cut-O Value = Mean CO� Controls + k
• Cut-O Range = [Mean (x)control + k] +/− x %
Where k is an experimentally determined factor normally dened by the laboratory professional or by the kit manufacturer�
Example 1: Subtraction
To replace the minus function, the user must simply enter a negative value� For example, if the cut-o is:
• Cut-o = Mean Neg� Controls −0�2
This must be entered as shown in Figure 5:
Figure 5� Entering a negative value�
Example 2: Range Denition
To dene a range, you may use the “Range” eld in the cut-o editor� This allows you to enter a percentage that will correspond to
values above and below a given cut-o value� Experimental values within the range will be deemed intermediate, values above
the range will be deemed positive, and values below the range will be deemed negative�
For example:
• Sample is considered positive if: Sample OD > (Mean Pos� + 10 %)
• Sample is considered negative if: Sample OD < (Mean Pos� − 10 %)
• Sample is considered intermediate if: (Mean Pos� − 10 %) < Sample OD < (Sample OD + 10 %)
• This would be entered as shown in Figure 6:
Figure 6� Entering a range�
Example 3: Known Cut-O Value
It may be the case that the cut-o value is known for a given experiment and need not be calculated� In this case,
the “0 OD” option may be selected for the calculation and the desired value entered into the oset�
• For Example: Cut-O = 0�3
This would be entered as shown in Figure 7:
Figure 7� Entering a known cut-o�
IMPORTANT
» The examples shown in this manual do not represent actual data, rather function to clarify software features,
and may not be referenced for experimental methods or procedure�

biolegend.com 11
Mini ELISA Plate Reader™
Plate Layout
In the plate layout section, the microplate can be lled out as desired�
Each well may be dened individually using the buttons below the plate�
IMPORTANT
» The format of the plate layout and the corresponding buttons are dened by the evaluation method� Quantitative and
qualitative evaluations have dierent elds and buttons�
» Blank values will be subtracted in the readout�
» The mean value of replicates will be calculated�
» Once the conditions/parameters of a given experiment have been set, these settings may be saved as a protocol� All
parameters, such as wavelength and plate layout, will be saved�
» Wells without values (concentration or sample ID) are shown with a ring instead of solid colour�
Quantitative Evaluation
When the quantitative evaluation is selected, the window will be as shown in Figure 8�
Figure 8� Quantitative plate denition window�
To dene a well, click on the desired button below the plate� You may then click and drag, or individually dene
single wells� The blue ring indicates which eld is currently selected; all elds will be dened starting with the
selected number�
To enter a concentration or sample ID, type the value in beside the number and press ENTER to move
to the next eld�
To enter a unit, enter the desired unit in the rst eld and press ENTER� All elds will be automatically lled out according to the
rst selection�
To dene, for example, two duplicate standard rows, click and drag the desired number of wells, release, then click and drag again
in the next row�
To set a blank or to empty a given well, click on the “Blank” or “Empty” button respectively, then click the desired well or drag and
drop across the plate�
IMPORTANT
» Clicking on previously dened wells will overwrite them�
» When blank wells are selected, the values of these wells will be subtracted in the readout�

Mini ELISA Plate Reader™
12 Tel: 858-768-5800
Qualitative Evaluation
Upon selection of qualitative evaluation, the plate layout window will look like that shown in Figure 9�
Figure 9� Qualitative plate denition window�
Dene the plate according to the description above�
Running the Assay
Procedure Walkthrough
Once all the setup steps have been completed, the“Readout” button in the Control Bar can be clicked (it will be blue)� The
measurement can now be run�
1� Empty Slot
Ensure the slot is empty for calibration�
2� Calibrate
Click “OK” to start the calibration� The calibration will begin, which is indicated by a short illumination of the respective LEDs�

biolegend.com 13
Mini ELISA Plate Reader™
Figure 10� Instrument measurement steps�
3� Insert Plate
After successful calibration, you will be prompted to insert the microtiter plate� Pay attention to the alignment of the microtiter
plate� For orientation, a pictogram on the top of the Mini ELISA Plate Reader™ indicates the correct alignment of the microtiter
plate� (The pictogram is a schematic representation� The actual shape of the microtiter plate, especially the position of the
rounded corner, may vary and dier from the illustration� Base your alignment on the A1 Well)�
In order to guarantee correct measurement results, please pay attention to the following:
WARNING
» When inserting the microtiter plate, pay attention to its alignment�
» Make sure the microtiter plate is completely inserted into the slot� The arrow at the bottom of the slot should be completely
visible�
» The bottom of the microtiter plate must be dry before it is inserted into the instrument� If the microtiter plate is wet at the
bottom, dry it with a paper towel or similar�
» Shocks to the Mini ELISA Plate Reader™ and of the microtiter plate can cause an unwanted signal� Therefore, neither the
Mini ELISA Plate Reader™ nor the microtiter plate should be touched during measurement�
» Note that the system depends on a clean and dust-free environment� Therefore, do not wear powdered safety gloves�
» Ensure that no direct sunlight or other strong light sources shine on the Mini ELISA Plate Reader™, especially into its slot�
» Carefully insert the plate to avoid spills�

Mini ELISA Plate Reader™
14 Tel: 858-768-5800
Figure 11� Insertion of the microtiter plate�
After insertion, conrm in the software that the microtiter plate has been inserted by clicking “OK”� The measurement will
subsequently be carried out, accompanied by a short illumination of the respective signal lights�
4� Read Plate
When the measurement is complete, the results will be shown�
You may now remove the microtiter plate from the Mini ELISA Plate Reader™� To do this, push the eject button on the rear side of
the device�
Figure 12� Remove the microtiter plate�
Results and Interpretation
Plate Overview: Provides an overview of the dierent OD values in their respective wells� Undened wells are not shown� Click on
a given well to see the OD, label and, if applicable, concentration�
Graph Overview: A representation of the data will be shown on the graph� The curve will be dependent on the data analysis
method chosen and will be tted accordingly� By choosing the right regression method, the distance from the curve to each point
is minimized� Using the standard curve, the concentration of each sample is calculated� The equation below the graph reects the
regression method applied and oers further data�
Tabular View: Provides an overview of the various samples, wells, ODs and calculations�

biolegend.com 15
Mini ELISA Plate Reader™
Table 3� Overview of terms in results section�
Parameter Description
ID The assigned ID of a given standard
Well The assigned well
Absorbance The absorbance reading in OD units
Concentration CV The coecient of variation between replicates
Standard conc� The entered concentration values for the standards
Concentration The calculated concentration values
Mean Absorbance The mean absorbance of replicate wells
Result* Pos/Neg/Intermediate result of a qualitative experiment
(*Only appears by qualitative evaluation)
Repeat Assay
After completing the measurement, the “Repeat Assay” button in the Control Bar will be highlighted blue� Click this button to
delete the current results and repeat the measurement� This will bring you back to the Main Window�
Additional Instrument Information
Signal Lights
Table 4� Explanation of the signal lights�
Activity of the signal light Meaning
All signal lights ash simultaneously Error, software shows error message or self-test after connection fails
No signal lights light up Device is o
All signal lights light up briey in sequence Self-test after connection to power is successful
Signal light of the respective measuring
channel ashes/illuminates continuously
Calibration/measurement in progress
Troubleshooting
If there is an error, all four signal lights ash simultaneously� Check the software to determine which type of error
has occurred�
In the event of the following errors, a new measurement can be carried out immediately after the error has been corrected�
Table 5� Error messages and solutions�
Type of error Cause Solution Restart necessary?
Calibration failed
There was a microtiter plate in
the slot during calibration� Remove the plate/all objects�
No
The inside of the slot is dirty
Clean the inside of the slot
according to the cleaning
instructions in “Cleaning” on
page 16�
Interference due to ambient
light that is too bright
Too much ambient light is
entering the slot
Make sure the instrument
is not exposed to too
much ambient light, e.g.
direct sunlight, during the
measurement process�
No

Mini ELISA Plate Reader™
16 Tel: 858-768-5800
Type of error Cause Solution Restart necessary?
Temperature out of
specication
The ambient temperature was
too high or too low
Make sure the ambient
temperature is between
5-45 °C�
No
Defective USB port
Use a dierent USB port on
the computer or a dierent
computer�
Yes
USB Power Supply Defective
(< 450 mA or < 4 V)
Using a USB hub Connect the instrument
directly to the computer�
Yes� Remove cable and
reconnect it�
Defective micro-USB cable Contact Technical Service� N/A
Irrecoverable hardware error Irrecoverable hardware error Contact Technical Service� N/A
Maintenance and Cleaning
Maintenance
The Mini ELISA Plate Reader™ is maintenance-free� Each time the instrument is switched on, an internal self-test is carried out to
ensure there are no malfunctions�
There are no parts within the instrument that can be serviced by the user� It is only necessary for users to ensure that the device is
kept clean�
Cleaning
Warnings for Cleaning
When cleaning, pay attention to the following warnings� The non-observance of these warnings may result in damage to the user
or to the instrument� This can lead to a reduction of the instrument’s service life or in measurement errors:
WARNING
» Always avoid spraying liquid directly onto the surfaces of the Mini ELISA Plate Reader™� This is especially important for
the inside of the slot, where there are optical elements that are very sensitive and essential for the functioning of the
instrument�
» Never clean the inside of the slot with sharp, abrasive, solvent-containing agents�
» Biological hazard: Always wear gloves during cleaning operations that may be associated with contact with biological or
generally hazardous materials or liquids�
» Ensure that there is no microplate in the instrument prior to any cleaning�
IMPORTANT
» Remove the Micro-USB cable from the instrument before cleaning�
Cleaning the Housing
The housing surfaces should be cleaned regularly� For this purpose, you can use a cloth, or a sponge lightly wetted in water� For
heavier soiling, clean the surface of the housing with a mild soap solution diluted with water or glass cleaner and then wipe with a
lightly moistened cloth or sponge to remove any residue� Do not use scouring agents�
Cleaning the Slot
To clean the slot of the Mini ELISA Plate Reader™, rst open the four screws on the bottom of the instrument (see Figure 14) using
the Hex key provided�
IMPORTANT
» Do not loosen any screws that are not explicitly marked in the manual, as this can lead to a malfunction and may void the
instrument’s warranty�

biolegend.com 17
Mini ELISA Plate Reader™
Figure 13� Bottom side of the instrument�
Carefully pull apart the top and the bottom of the instrument to unplug the plug connection on the back of the instrument�
IMPORTANT
» To avoid damaging the rigid plug connection between the top and bottom of the instrument, grasp the instrument at the
back during the pull movement� Avoid any tilting movement�
Figure 14� Pulling the instrument apart into its two components�
Use a dry microber cloth or a bellows to carefully remove dust or dirt from the surface� If this is not enough, the microber cloth
can be slightly soaked with 80 % ethanol to carefully remove dust or contamination from the surface�
Do not allow water or other liquids to get inside the instrument�
Technical Support
In case of problems with the instrument, please contact BioLegend technical service at tech@biolegend�com�
WARNING
» Biological hazard: It is your responsibility to decontaminate the instrument and all accessories before servicing and before

Mini ELISA Plate Reader™
18 Tel: 858-768-5800
returning the instrument or accessories to the manufacturer�
For decontamination of the Mini ELISA Plate Reader™, follow the government guidelines for inactivation of organisms used in
biological laboratories�
Repairs
Repairs on the device may only be carried out by the manufacturer� The product warranty will be voided if the device is modied
by unauthorized personnel�
Performance Data and Technical Data
Table 6� Performance & technical data�
Parameter Value
Type of product Absorbance reader
Product name Mini ELISA Plate Reader™
Service life 10 years at an average use of 4 hr/day
Housing material Aluminium
Place for use Laboratory
Degree of contamination 2
Temperature for storage/measurement 5-45 °C
Temperature (transport) −10-50 °C
Relative tolerated humidity (storage/measurement) 0-90 %
Air pressure (measurement) 900-1070 hPa
Air pressure (storage/transport) 600-1070 hPa
Elevation Max 5100 m
Measurement method Absorbance
Measuring technique Endpoint
Light source 4 LEDs: 405 nm, 450 nm, 492 nm, and 620 nm
Filters 4
Detection 96 Photodiodes
Measurement range 0-4�0 OD
Resolution 0�001 OD
Accuracy* 0�000-2�000 OD ≤ (1 % + 0�010 OD)
2�000-3�000 OD ≤ (1�5 % + 0�010 OD)
Reproducibility** 0�000-2�000 OD ≤ (0�5 % + 0�005 OD)
2�000-3�000 OD ≤ (1 % + 0�010 OD)
Linearity*** 0�000-2�000 OD ≤ 1 %
2�000-3�000 OD ≤ 1�5 %
Connection to computer USB 2/USB 3 with 5 VDC and max� 3A
Dimensions 55 x 96 x 154 mm
Power supply 5 VDC
Nominal value/Characteristic of the fuse 1A/very fast-acting
Power input 2�5 W
Weight 900 g
Regulatory status Research use only, CE marked
*Accuracy is the maximum deviation between the determined value and the true value�
**Reproducibility is the maximum deviation between the determined values when the measurement is repeated directly�
***Linearity is the maximum deviation between the true and the determined increase of the value�

biolegend.com 19
Mini ELISA Plate Reader™
Warranty
The warranty period of the Mini ELISA Plate Reader™ is 18 months� If a defect occurs in your device during this warranty period,
please contact BioLegend technical services (tech@biolegend�com) directly� In the event of such defects, the device should only
be operated again after it has been repaired�
This warranty does not cover damage caused by improper use or external mechanical inuences, transport damage, or
modications to the device by unauthorized service personnel�

Mini ELISA Plate Reader™
20 Tel: 858-768-5800
Index
A
Absorption 4
App
Controls 7
Icons 7
Installation 6
MacOS installation 6
Uninstalling 6
Updates 6, 7
Windows installation 6
Assay 9
Repeat 15
Running the assay 12
B
Biohazard 3
byoa le 8
byop le 8
C
Calibrate 12
Cleaning 16
Connecting to a computer 8
Control bar 7
Cut-o value 9, 10
D
Disposal 3
E
Empty slot 12
Error
Ambient light 15
Calibration failed 15
Hardware error 16
Temperature 16
USB power supply 16
Evaluation 9
Qualitative 9, 12
Quantitative 9, 11
Export result 7
F
File types 8
Flashing lights 15
G
Graph 14
H
Help 7
Homepage 7
I
Installation
MacOS 6
Windows 6
L
Liability 3
Lights 15
M
MacOS installation 6
Maintenance 16
Main window 7
Menu bar 7
N
New protocol or measurement 7
No reader found message 7
O
Opening 16
Optical density 4
P
Parts 6
Performance data 18
Plate
Inserting plate 13
Plate layout 11
Power consumption 5
Protecting 5
Protocol 9
Dene 9
R
Range 10
Readout 8
Repairs 18
Results 14
Graph 14
Interpretation 14
Tabular view 14
S
Scope of application 4
Software
Installation 6
MacOS 6
Uninstalling 6
Updates 6
Windows 6
Storing 5
Subtraction 10
Support 17
This manual suits for next models
1
Table of contents

