BIOMET Vanguard CR User manual

Surgical Technique
Addendum to the Vanguard®
Complete Knee System
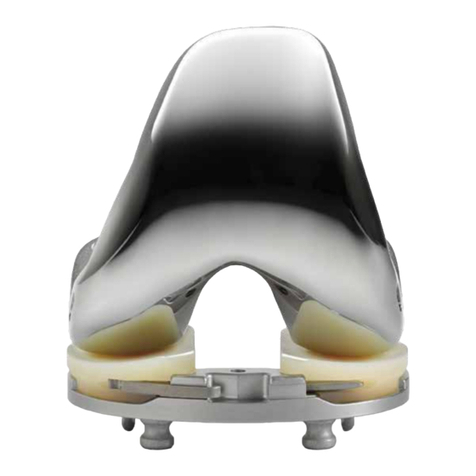
Vanguard®CR Stem Housing
Knees • Hips • Extremities • Cement and Accessories • PMI® • Technology

Introduction .................................................................................................................................. 1
Setting Medial-Lateral Position ................................................................................................... 1
Reaming........................................................................................................................................ 2
Distal Cut ...................................................................................................................................... 2
Drilling for Femoral Lugs (Optional) ............................................................................................ 3
Trial Reduction.............................................................................................................................. 3
Implant Assembly......................................................................................................................... 4
Ordering Information
Implants .................................................................................................................................. 5
Instrumentation ....................................................................................................................... 6
Table of Contents

1
Introduction
Femoral size should have been determined before femoral
bone cuts were completed using desired Vanguard®
instrument platform (Premier™ Total Knee Instrumentation
or Microplasty® Minimally Invasive Knee Instruments
surgical techniques).
Setting Medial-Lateral Position
Use a 3.5mm hex driver in the upper right hand corner
of the Vanguard®stem housing reamer guide to set the
appropriate femoral size (Figure 1). Attach the medial-
lateral (M/L) wing, ensuring that the correct side is facing
out. Place the stem housing reamer guide ush with the
anterior cortex and distal femur. Determine the appropriate
M/L position (Figure 1a). Pin the stem housing guide in
place using 1/8in pins through the anterior plate. Remove
the M/L wing and snap the stem housing reamer guide
bushing into place (Figure 2).
This surgical technique is utilized by Edward McPherson, M.D. Biomet as the
manufacturer of this device, does not practice medicine and does not recommend
this device or technique. Each surgeon is responsible for determining the
appropriate device and technique to utilize on each individual patient.
Figure 1
Figure 1a
Figure 2

2
Reaming
Ream the intramedullary canal with the 10mm diameter
reamer. Align the reamer with the matching sized bushing
and sequentially increase diameter until diaphyseal cortical
contact is achieved (Figure 3a).
For diameters under 18mm, the stem housing reamer
must be used to complete bone preparation (Figure 3).
Distal Cut
Re-cut the distal femur (+5mm) to accommodate the
stem housing attachment plate, using the slot on the
anterior side of the Vanguard®stem housing reamer guide
(Figure 4).
Figure 3
Figure 4
Figure 3a

3
Figure 6
Drilling For Femoral Lugs
(Optional)
The Vanguard® CR stem housing will allow for pegs to be
placed into the distal femur. If peg use is desired, utilize
the distal peg guide. Begin by setting the canal guide for a
left or right femur. Place the canal guide into the prepared
femur to orient the guide M/L. Ensure that the posterior
feet are ush with the posterior bone. Tighten the thumb
screw of the canal guide (Figure 5). Use a ¼in drill through
the holes in the distal peg guide. If posterior augments are
required, a trial can be threaded onto the distal peg guide.
Trial Reduction
Select the correct size trial CR stem housing and adjust
the position of the bolts by aligning the black line to
the correct size as indicated by the color coded dot
(Figure 6). Thread the selected trial stem onto the CR
stem housing trial. Attach the housing trial to the trial
femoral component and complete the trial reduction.
Figure 5

4
Implant Assembly
Impact the stem onto the CR stem housing. Insert the
locking screw and tighten. Bolt the stem housing to
the femoral component using the two supplied bolts
(Figures 7 and 8).
Optional: If you desire femoral pegs, select the 5mm
Vanguard® augment pegs and attach the CR stem housing
construct to the femoral component.
Figure 7
Figure 8

5
Vanguard®CR Stem Housing
Implants
Product Part Number Description Size
183077
183078
183079
183080
183081
183082
183083
183084
183085
183086
183087
183088
183089
183090
183091
183092
183093
183094
183095
183096
Vanguard®CR Stem Housing
Vanguard®CR Stem Housing
Vanguard®CR Stem Housing
Vanguard®CR Stem Housing
Vanguard®CR Stem Housing
Vanguard®CR Stem Housing
Vanguard®CR Stem Housing
Vanguard®CR Stem Housing
Vanguard®CR Stem Housing
Vanguard®CR Stem Housing
Vanguard®CR Stem Housing
Vanguard®CR Stem Housing
Vanguard®CR Stem Housing
Vanguard®CR Stem Housing
Vanguard®CR Stem Housing
Vanguard®CR Stem Housing
Vanguard®CR Stem Housing
Vanguard®CR Stem Housing
Vanguard®CR Stem Housing
Vanguard®CR Stem Housing
55 Left
57.5 Left
60 Left
62.5 Left
65 Left
67.5 Left
70 Left
72.5 Left
75 Left
80 Left
55 Right
57.5 Right
60 Right
62.5 Right
65 Right
67.5 Right
70 Right
72.5 Right
75 Right
80 Right
183097 Vanguard® CoCr Augment Bolt (Replacement)
184296 Vanguard® Augment Peg 5mm

6
Vanguard®CR Stem Housing
Instrumentation
Product Part Number Description Size
32-483070
32-483071
32-483072
32-483073
32-483074
32-483075
Vanguard® Trial CR Stem Housing
Vanguard® Trial CR Stem Housing
Vanguard® Trial CR Stem Housing
Vanguard® Trial CR Stem Housing
Vanguard® Trial CR Stem Housing
Vanguard® Trial CR Stem Housing
55–62.5 Left
65–70 Left
72.5–80 Left
55–62.5 Right
65–70 Right
72.5–80 Right
32-483076 Vanguard®Stem Housing Reamer Guide
32-483077
32-483078
32-483079
32-483080
32-483081
32-483082
32-483083
32-483084
Vanguard® Stem Housing Reamer Guide Bushing
Vanguard® Stem Housing Reamer Guide Bushing
Vanguard® Stem Housing Reamer Guide Bushing
Vanguard® Stem Housing Reamer Guide Bushing
Vanguard® Stem Housing Reamer Guide Bushing
Vanguard® Stem Housing Reamer Guide Bushing
Vanguard® Stem Housing Reamer Guide Bushing
Vanguard® Stem Housing Reamer Guide Bushing
10mm
12mm
14mm
16mm
18mm
20mm
22mm
24mm
32-483085 Vanguard®Stem Housing Wing
32-483086 Vanguard® Stem Housing Reamer with Stop 18mm
32-483087 Vanguard® Stem Housing Guide for Pivot Drill
595315 Instrument Case

The information contained in this package insert was current on the date this brochure was printed. However, the package insert may have been revised after that date. To obtain a current package
insert, please contact Biomet at the contact information provided herein.
VANGUARD CR STEM HOUSING
INSTRUCTIONS FOR USE
WARNING!!: The surgeon must have a thorough knowledge of the medical, surgical and
mechanical aspects concerning the use of this product, and should read these instructions
carefully before using it.
PRODUCT DESCRIPTION
The CR Vanguard stem housing comprises a central body xed to a Vanguard CR femoral
component by two xing screws (included in the product packaging). The central body also has
a space for securing an intramedullary femoral stem with a xing screw (included in the stem
packaging).
Both components (the central body and xing screws) are made of a chrome-cobalt-molybdenum
alloy.
The Vanguard CR stem housing can only be used with CR Femoral Components of the
Vanguard Knee system and with Intramedullary Femoral Stems from the Maxim Knee
system.
INDICATIONS
Total knee arthroplasty in the following cases; osteoarthritis, traumatic arthritis, rheumatoid
arthritis, correction of functional deformities, and replacement techniques when other treatments
have failed.
CONTRAINDICATIONS
a) Absolute contraindications
1. Infection or inammation of the knee joint.
2. Distant foci of infection that could lead to spreading to the prosthesis through the
bloodstream.
3. Rapid progression of primary or metastatic tumours, or bone metastasis, as shown by
destruction of bone mass or bone absorption that is evident in the X-ray.
4. Patients with immature skeletons.
5. Patients who are hypersensitive or allergic to any of the product components indicated on
the unit container label.
b) Conditions increasing the risk of failure
1. Uncooperative patients or those with neurological disorders, senile patients, patients with
mental illnesses, alcoholic patients or drug addicts, patients unable to follow the surgeon’s
advice.
2. Marked bone loss, severe osteoporosis or reviews for which the prosthesis cannot be
properly secured.
3. Patients with metabolic disorders that could reduce bone formation or cause bone loss.
4. Osteomalacy.
5. Pathological obesity.
6. Poor prognosis for wound healing (e.g. bedsores, terminal diabetes, serious protein decit,
and or/ malnutrition).
WARNINGS
a) Implant resistance and load: Although these types of devices have a high success rate, they
cannot be expected to support the same high levels of activity, load, resistance and longevity as
those of a healthy bone. The load caused by bone support and the activity levels will determine
the prosthesis service life. It is advisable to carry out regular controls following surgery.
b) Adequate selection of the implant: The adequate selection of the size, shape, and design of
the prosthesis will increase its possibilities of success. The implant requires careful setting with
adequate xation to bone.
The Vanguard CR stem housing can only be used with CR Femoral Components from the
Vanguard Knee system and with Intramedullary Femoral Stems from the Maxim Knee system.
c) Critical factors in selecting the patients:
1. Occupation or activity: if the patient’s occupation or activity involves making efforts with the
knee, the resulting force could cause a failure in the xing and/or implanting. The implant
will not restore function to the level of a healthy bone, and patients should not be given false
expectations.
2. Senility, mental illness or alcoholism: these conditions, among others, could cause the patient
to ignore certain limitations and precaution in using the implant, with the risk of failure or other
complications.
3. Hypersensitivity to foreign bodies: in the event of suspecting the presence of hypersensitivity
to metals, the appropriate allergy tests will be performed before placing the implant.
PRECAUTIONS
a) Sterile, disposable product: The product is marketed sterilized by gamma radiation. It cannot
be implanted after the expiry date shown on the label. The implant must not be re-sterilized by
the user.
Furthermore, the implant should not be reused under any circumstances, since although it may
appear to be intact, it may have minor defects, microscopic aws or internal stress points that
could cause it to break due to fatigue or fail due to the application of direct or indirect static or
dynamic loads or other undesirable types of functioning.
b) Handling the implant: The implant must be handled with care, using the special instrument
designed for implanting it, otherwise faults could occur in the nish of its surface or other faults
that eventually cause the device to fail.
Should it be necessary to remove the implant, the user must treat it as biological waste and
arrange for its disposal pursuant to internal hospital procedures.
c) Instructions and information for the patient: The surgeon must instruct and inform the patient
regarding the limitations of the implant so that the patient can take the necessary precautions as
regards supporting weight and load, to ensure healing is complete. The patient must be warned
that failure to abide by the post-surgical instructions could lead to the implant being broken or
moving more than it should, in which case review surgery will be necessary to remove it.
Furthermore, the surgeon should advise the patient regarding the composition of the implanted
product which is describe on the unit container label, for the patient to notify this during
subsequent diagnostic tests such as magnetic resonance imaging.
d) Surgical technique: The implant must be used by surgeons who are very familiar with and
experienced in the surgical technique and post-surgical care of the patient. To obtain more
information, a special surgical technique is available to the surgeon.
POTENTIAL ADVERSE EVENTS
1. No consolidation or delayed consolidation.
2. Fracture, loosening or sinking of the prosthesis.
3. Sensitivity to metals or reactions to foreign bodies.
4. Loss of bone density due to the transfer of load.
5. Pain, discomfort or strange sensations due to the presence of prosthesis.
6. Injuries to the nerves, soft tissues or blood vessels caused by surgical trauma.
7. Fracture of bone structures.
8. Bone necrosis.
9. Bleeding.
10. Infection.
CAUTION:
Federal law (USA) restricts this device to sale by or on the order of a physician.
ADDITIONAL INFORMATION
For further information, please contact the nearest BIOMET representative or distributor.

P.O. Box 587, Warsaw, IN 46581-0587 • 800.348.9500 ext. 1501
©2009 Biomet Orthopedics • www.biomet.com
Form No. BIV0026.0 • REV051509
All trademarks herein are the property of Biomet, Inc. or its subsidiaries unless
otherwise indicated.
This material is intended for the sole use and benet of the Biomet sales force and
physicians. It is not to be redistributed, duplicated or disclosed without the express
written consent of Biomet.
For product information, including indications, contraindications, warnings, precautions
and potential adverse effects, see the package insert herein and Biomet’s website.
Table of contents
Other BIOMET Medical Equipment manuals
Popular Medical Equipment manuals by other brands
Stryker Medical
Stryker Medical 4400 Operation & maintenance manual

iHome
iHome Zenergy Sunrise iZBT3 user manual

Gima
Gima CARDIO-B Use and maintenance book
Sirona
Sirona cerec ac operating instructions
iRhythm
iRhythm ZIO XT PATCH Quick manual
Joerns Healthcare
Joerns Healthcare Bari10A User & service manual
