BIQU PIXEL L 9.1 User manual

9.1 LCD 3D Printer User Guide
Notes:
● Please keep the 9.1 LCD printer and its accessories out of the reach of children.
●Please clean the cured resin in the resin vat and build platform after a failed print, or it can
damage the printer.
●Please pour the photosensitive resin into the vat till the resin reaches about 2/3 of the vat, so as
to prevent resin spilling as the build platform falling down.
●Please use 95% degree (or higher) ethyl alcohol or isopropyl alcohol to wash your model unless
you are using water washable resin.
●Please place the LCD indoors, and protect it from direct sunlight, dust, rain and moisture.
●Please wear a mask and gloves before using and avoid direct skin contact.
●Please level the build platform for the first time of use.
●In case of an emergency during use, please shut off the printer in time.
For technical support, please contact the official store customer service where you purchased it.

Content
1. Product Description ......................................................................................错误!未定义书签。
2. Machine Installation and Commissioning ....................................................错误!未定义书签。
3. Function Introduction ...................................................................................错误!未定义书签。
3.1 About screen ...................................................................................... 错误!未定义书签。
3.2 Thermostat mode ...............................................................................错误!未定义书签。
3.2.1 About thermostatic control panel .......................................... 错误!未定义书签。
3.2.2 Function description ............................................................... 错误!未定义书签。
3.3 Exposure test ...................................................................................... 错误!未定义书签。
3.4 Resin vat cleaning ...............................................................................错误!未定义书签。
3.5 Tolerance compensation .................................................................... 错误!未定义书签。
4. Model Printing ..............................................................................................错误!未定义书签。
4.1 Installation and setting of slicing software........................................ 错误!未定义书签。
4.2 Slicing ..................................................................................................错误!未定义书签。
4.3 Model printing ....................................................................................错误!未定义书签。
5. Post-Processing of Printed Model ................................................................错误!未定义书签。

1. Product Description
Packing List
resin vat
build platform
9.1 LCD
main body
acrylic protective cover
power cord
adapter
spiral micrometer
auto feeder
photosensitive resin
(250g)
thermostatic control
mask
release film
PVC gloves
filter
tool kit
manual
more

Specification
Name
LCD printer, 9.1”
Size
296*300*563mm
Weight
19.05kg (net weight)
Printing Size
196.704*122.880*220mm
Molding Tech
LCD technology
Screen Resolution
4K
Screen Type
monochrome screen
Operation Screen
4.3” touch screen
Printing Pixel
0.05mm
Layer Thickness Precision
0.025mm~0.03mm
Rated Voltage
24V
Real Power
210W
Light Source
matrix parallel light source
Printing Material
photosensitive resin
Printing Method
U disk
File Type
ctb
Light Source Wavelength
405nm

2. Machine Installation and Commissioning
Step 1
①nut
②resin vat
Loosen the nut to remove the resin vat.
Step 2
①nut
②screw connector
③build platform
Remove the protective film of the build platform, and mount the build platform to the screw

connector.
Step 3
Place a piece of A4 paper on the screen board.
Step 4
Connect the power supply and switch on. The interface is as shown, click ‘Tool”.

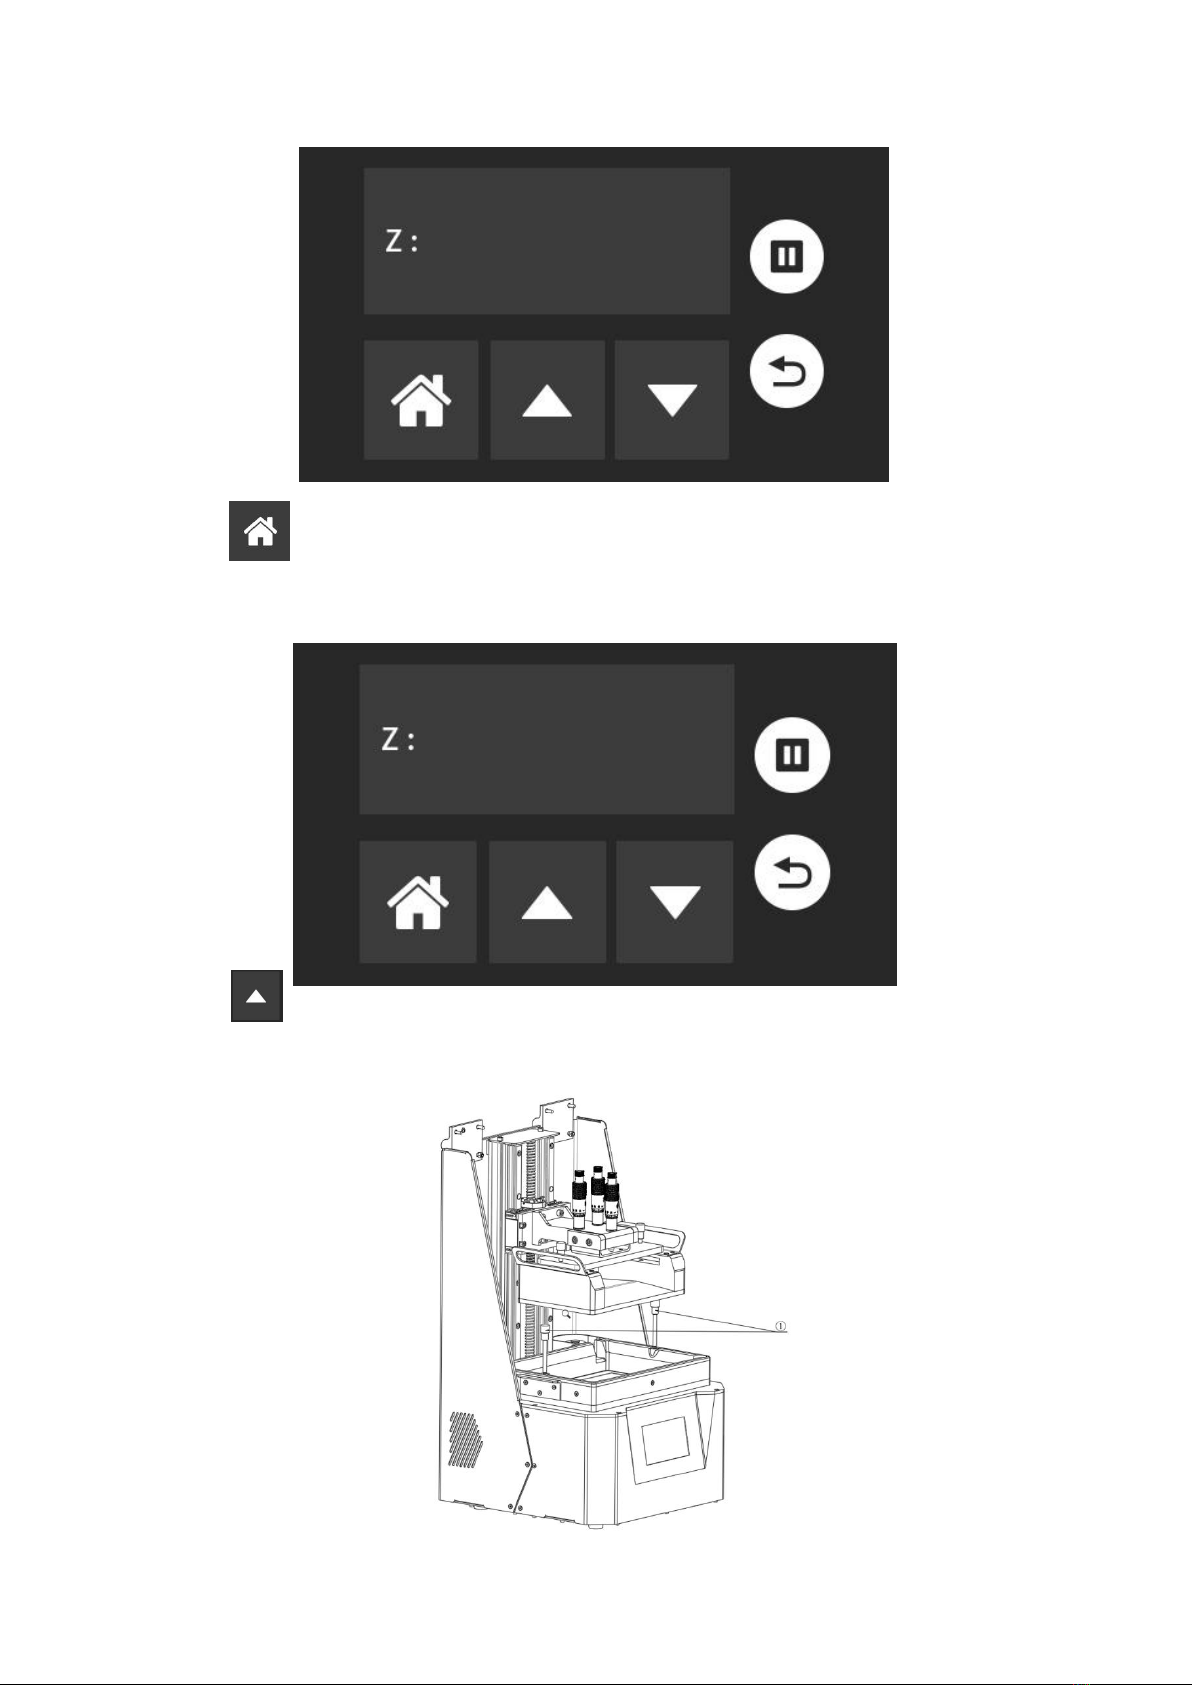
Click “Manual” to control the movement of build platform.
Click ” ” to make the build platform decline to the origin of coordinates.
Step 5
①M5x12 socket head cap screw
②fixed block
Unscrew the M5x12 socket head cap screw to loosen the build platform.
Step 6

①build platform rack
②spiral micrometer thimble
Rotate the top of 3 spiral micrometers (on the screw connector), and ensure that the thimble
contacts the build platform rack. Check whether the platform fits evenly with the paper.
Fix the screw connector to the build platform rack with the M5X12 socket head cap screw and
fixed block.
Step 7
Click , set the home position of the Z-axis: the build platform close to the screen.
Step 8
Click to to make the build platform ascend to the safe position, clean the surface of the LCD
screen and release liner, then put the resin vat on the screen and fix it.

①nut
Note: Before printing, make sure the bolt nut fixing the build platform and resin vat set are fully
tightened.
Step 9
Pour the photosensitive resin into the vat till the resin reaches about 2/3 of the vat, so as to
prevent resin spilling as the build platform falling down.
Step 10
①auto-feeder
②photosensitive resin bottle
Screw the auto-feeder into the photosensitive resin bottle, insert it into the resin vat and fix it by
rotating.

The auto-feeder will add the resin according to the liquid level to ensure a sufficient filament.
Installation and debugging of printer completed
3. Function Introduction
3.1 About screen
In the following interface, you can modify the system language, check system information, screen
calibration, etc.
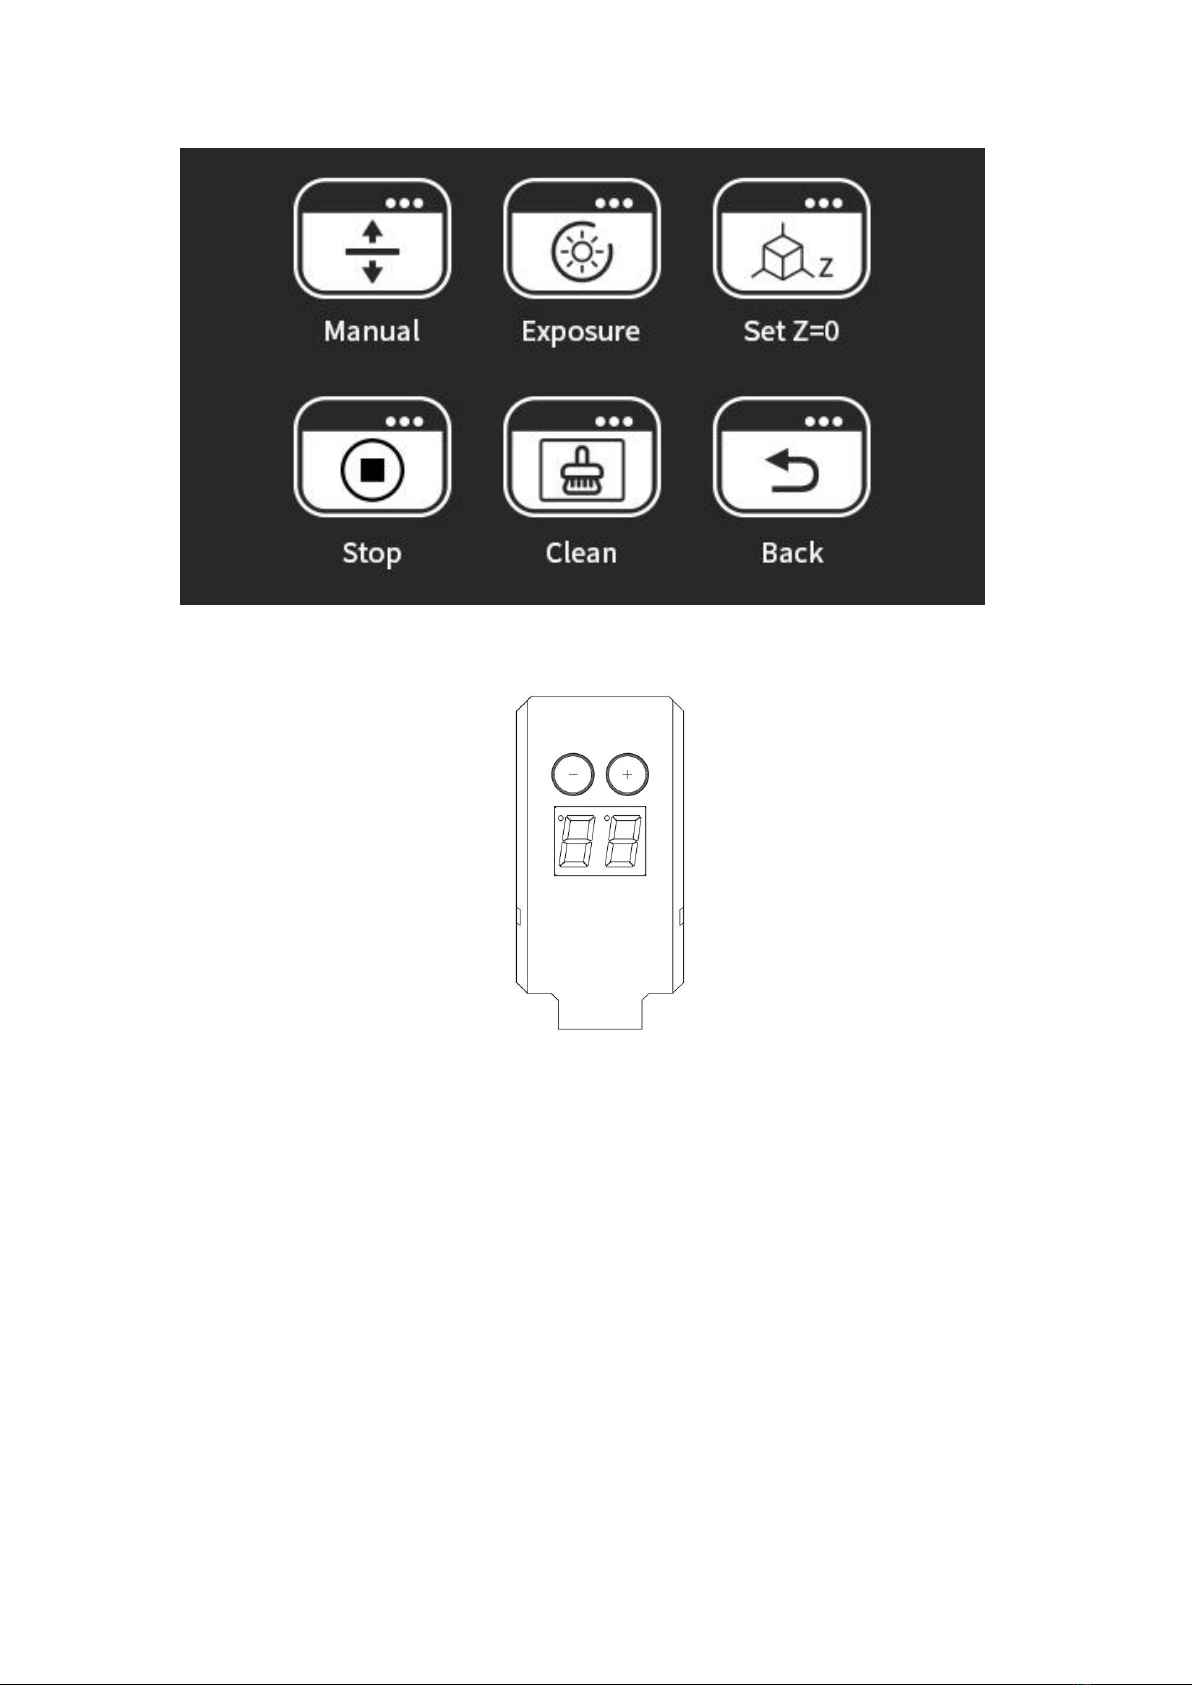
As the below interface shown, you can operate the machine, such as movement, exposure test,
Z-axis zero setting, vat cleaning, etc.
3.2 Thermostat mode
3.2.1 About thermostatic control panel
“+” “-” Function
3.2.2 Function description
1) Connect power supply, then press both “+” and “-” simultaneously to activate, and LED will
display the current thermistor temperature.
2) Adjust the temperature by pressing “+” and “-”
Short press “+” “-” to add or subtract the setting temperature.
Long press “+” “-” to add or subtract the setting temperature constantly.
LED will display the actual temperature after temperature setting in 2s. LED flickers when it turns
under the setting temperature.
3) Protection mode
When the resin vat does not contact the main body or is in poor contact, LED will display "E.0",
and protection mode can be activated. Then take up the resin vat and put it down to avoid short
circuit and electric arc.
When the LED displays “E.0”, and the resin vat does not work, press both “+” and “-” to activate
it.
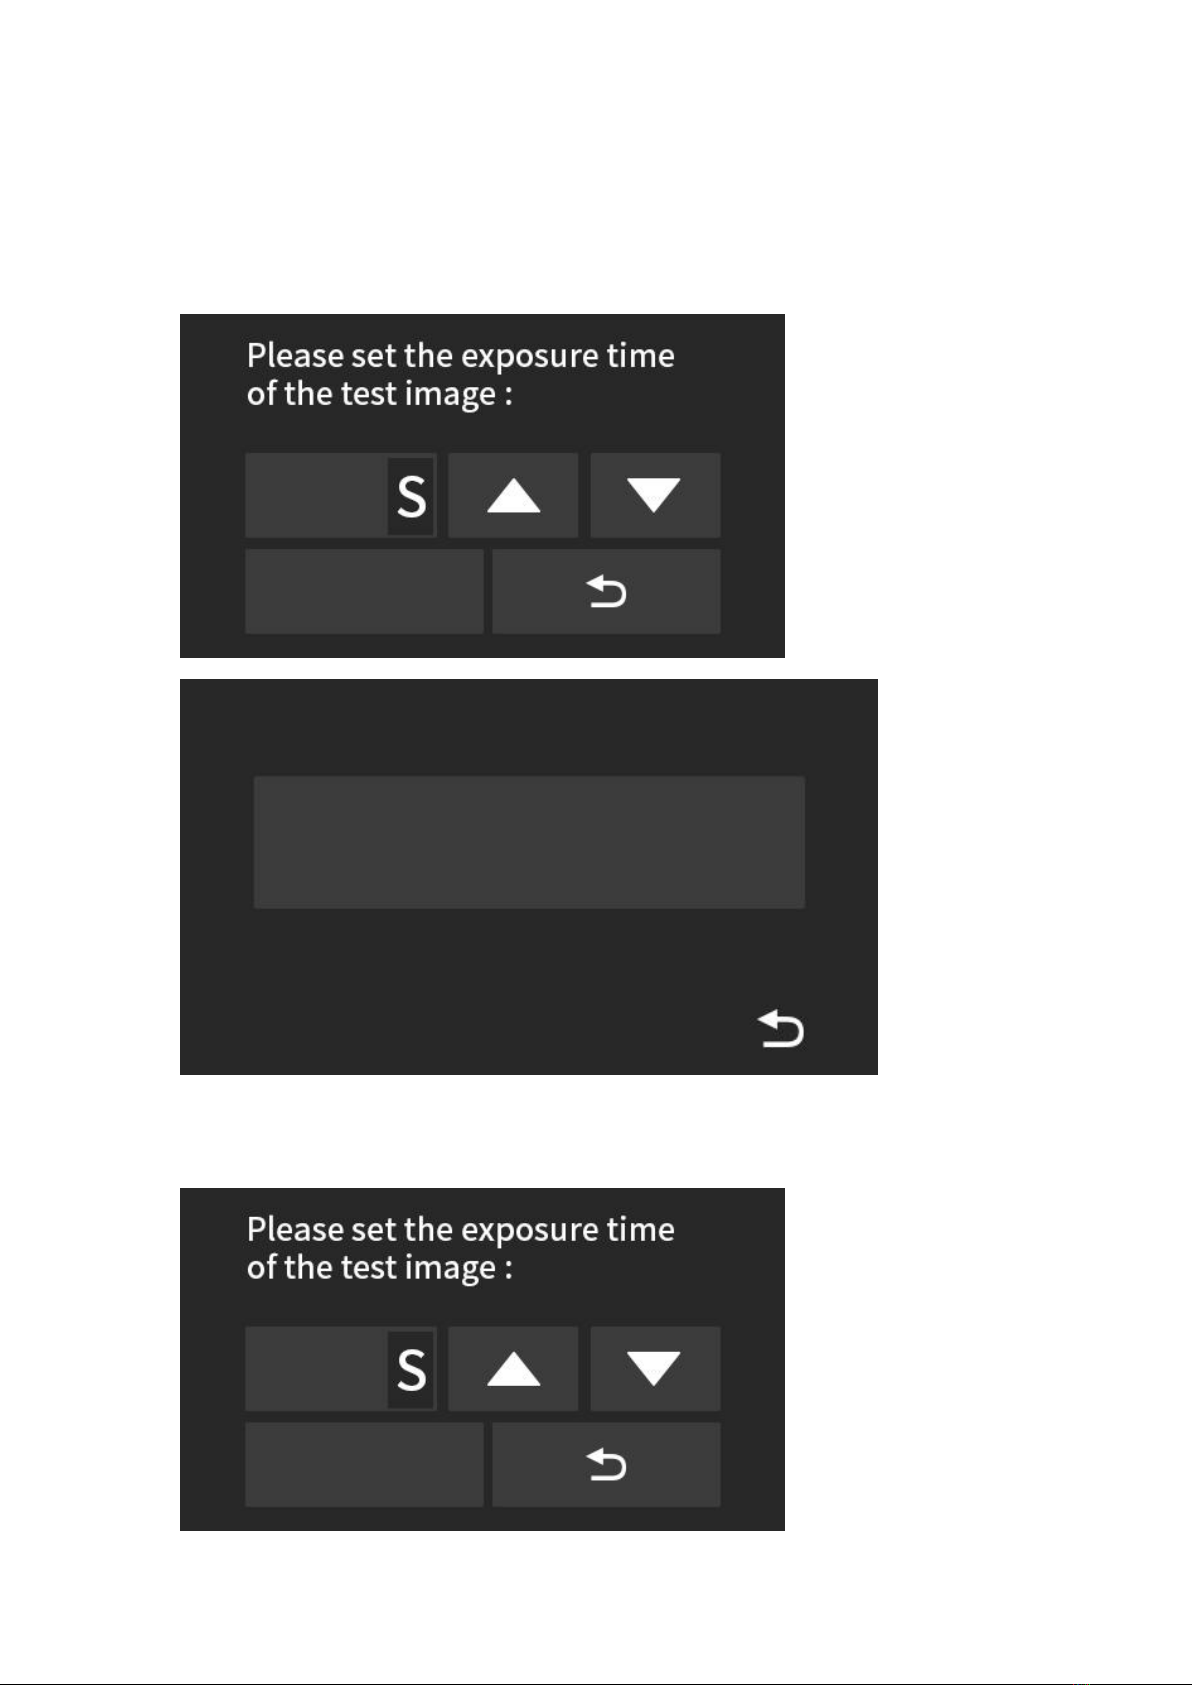
3.3 Exposure test
This function is to test if the light source and screen are normal.
3.4 Resin vat cleaning
Large-area exposure of the screen solidifies the remaining solid impurities, which cured into a
thin sheet. Then remove it with the plastic blade.
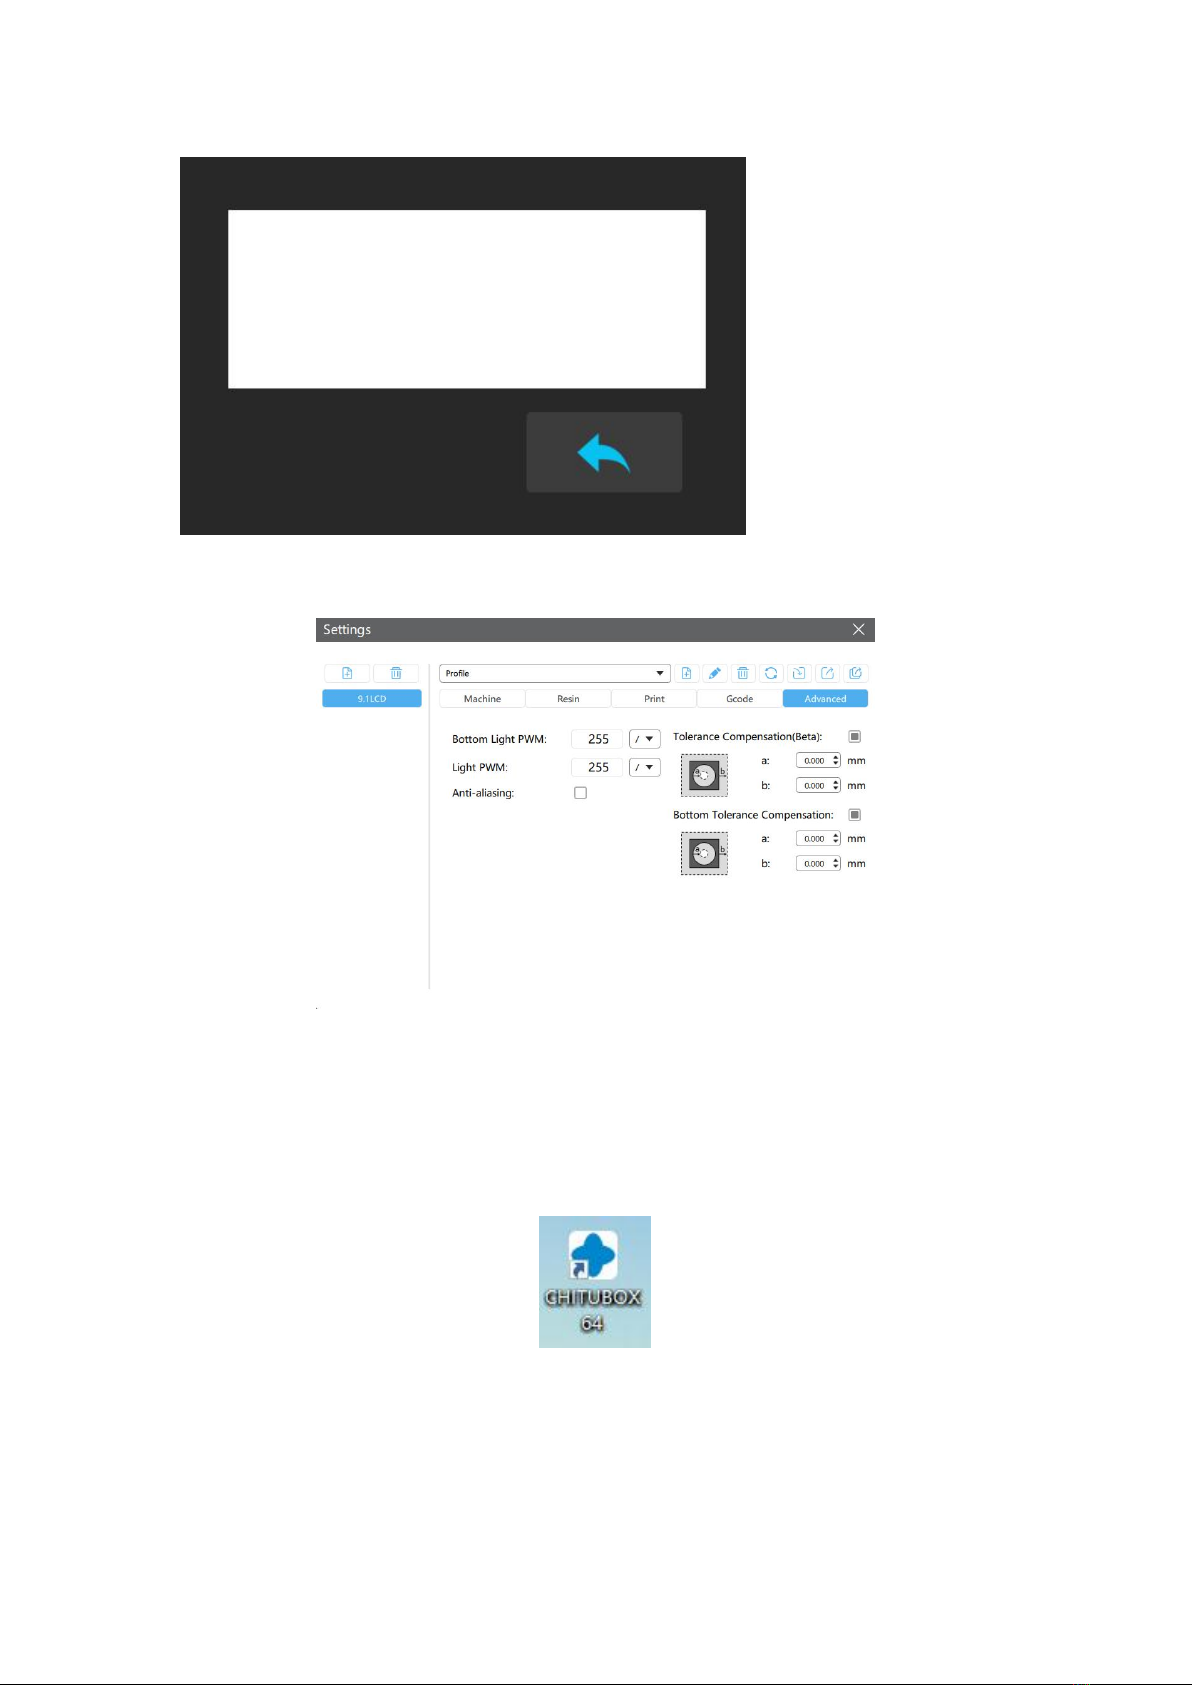
3.5 Tolerance compensation
As for the matching parts, set the parameter of “Tolerance Compensation” shown as above to
ensure a perfect match.
4. Model Printing
4.1 Installation and setting of slicing software
Install CHITUBOX (download link: https://www.chitubox.com/download.html)
4.1.1 Printer settings

Open CHITUBOX software, the interface is as shown, click "Settings".
(Fig. 1)
Click , choose “Others” →“Default” to add printer.
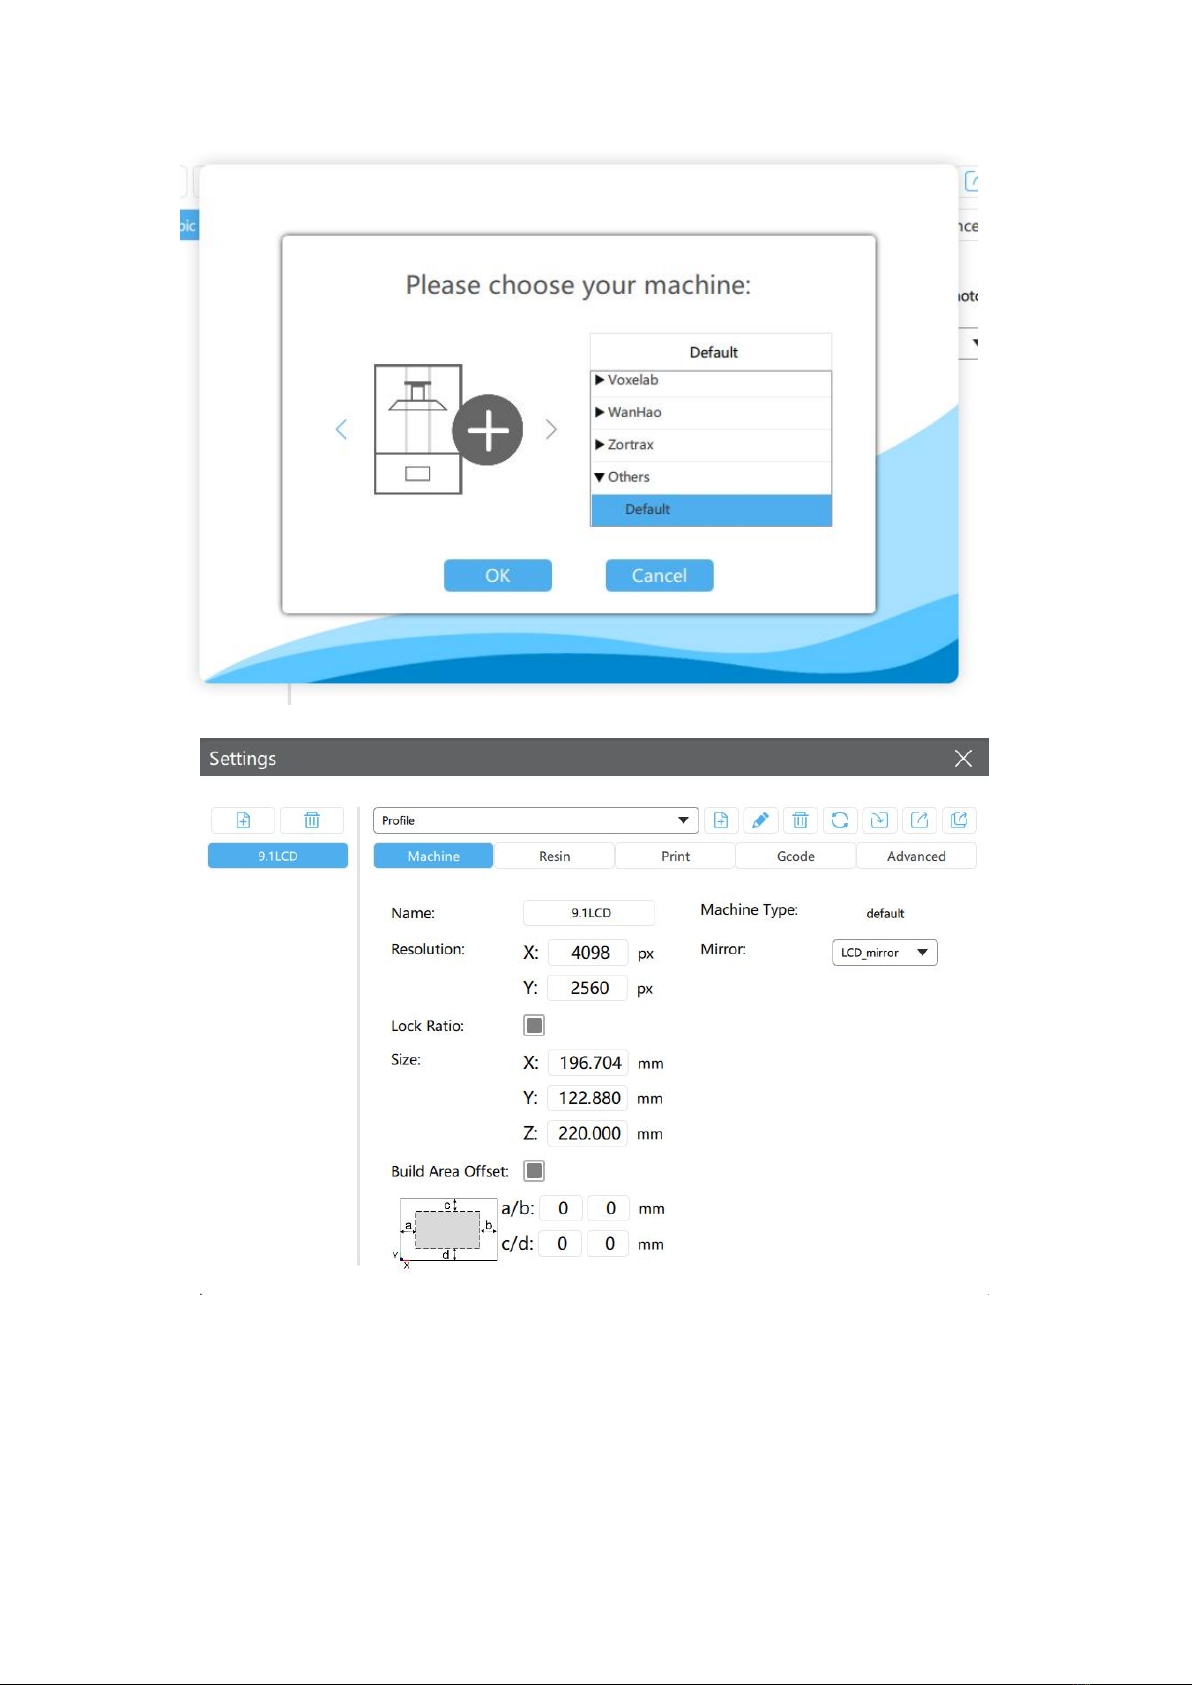
(Fig. 2)
(Fig. 3)
Resolution: 4098x2560 Size: 196.704x122.880x220.000mm
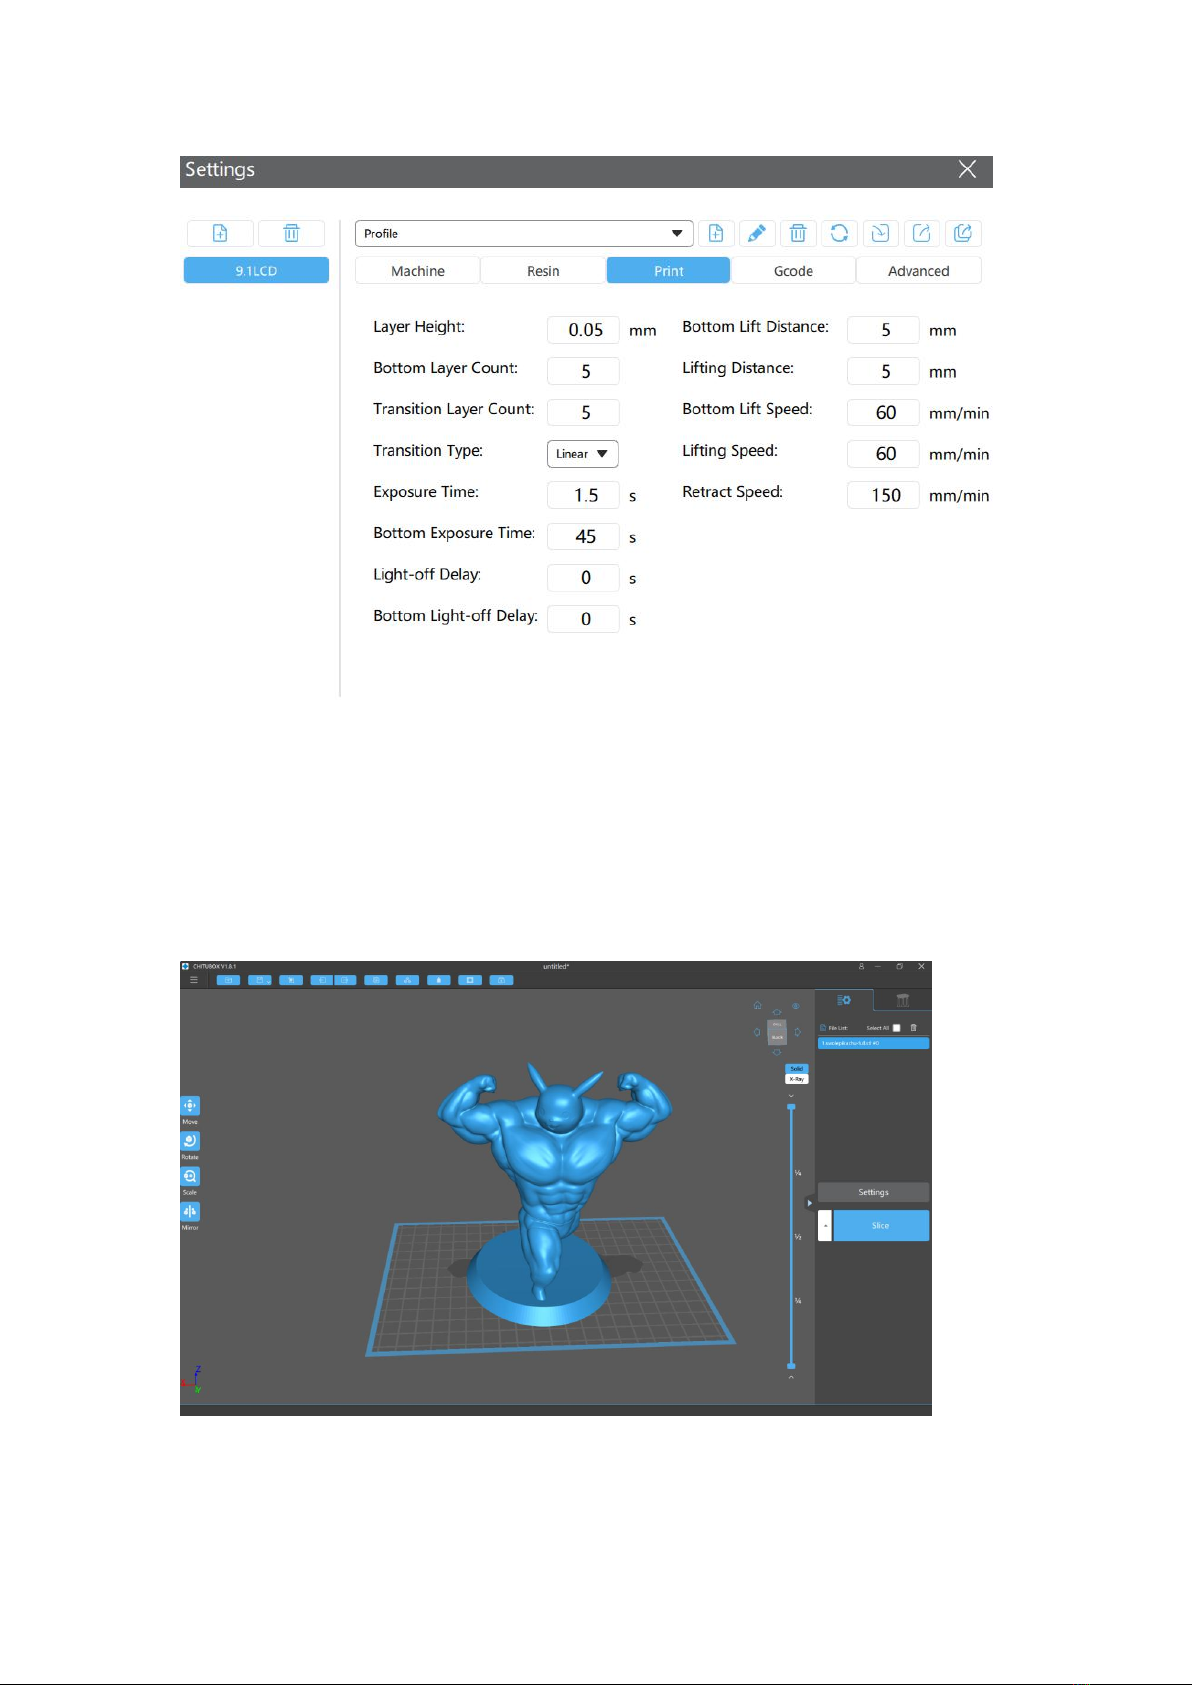
(Fig. 4)
The "Exposure Time" and "Bottom Exposure Time" above are for reference only. As for the
specific parameters, please set according to the photosensitive resin material file.
4.2. Slicing
4.2.1. Check the model by CHITUBOX
(Fig. 5)
Models can be scaled, rotated, moved, copied, auto placed, shelled, digging holes, repaired, etc.
4.2.2. Set support parameters

(Fig. 6)
For some parts with large inclinations or hanging in the air, it needs to add support to ensure that
the model can be printed completely.
Click "+AII" to add support automatically or manually.
Click the right side of screen to change the size of support.
(Fig. 7)

(Fig. 8)
Click ”Slice” to slice the model.

(Fig. 9)
Double check the shape of each slice layer, click “save” to save the slice file.
Note: The file format is “ctb”, and the U disk needs to be connected to the printer.
4.3 Model printing
Click to print.
Table of contents
Other BIQU 3D Printer manuals


