manuals.online logo
Brands
  1. Home
  2. •
  3. Brands
  4. •
  5. Birlea
  6. •
  7. Indoor Furnishing
  8. •
  9. Birlea SANTIAGO User manual

Birlea SANTIAGO User manual

Page 1 of 9
PLEASE KEEP THESE INSTRUCTIONS FOR FUTURE REFERENCE.
HEALTH & SAFETY:
DO NOT use this item if any parts are missing, damaged or worn.
DO NOT use this item unless all fixings are secured.
Please keep small parts out of reach of children.
Always use on a level, even surface.
t is recommended that two people handle and assemble the item
CARE & MAINTENANCE:
Assemble in the room of use.
To avoid damages assemble the item on a soft, clean surface
Periodically check all screws & fixings to ensure they are secure.
DO NOT push the item as this will damage the base.
Always lift the item with two people to reposition.
Keep any sharp objects away from the item.
This product is manufactured in pine which is a wood with natural characteristics including knots, grains,
clusters or indentations
On unpacking the item you may notice an odour due to production processes but this will disappear after a
period of time.
DO NOT place the item next to a radiator or direct sunlight – this item is susceptible to temperature change.
t is recommended an even room temperature be maintained with no sudden fluctuations.
DO NOT place hot or cold items directly onto the surface of the item as marking will occur
For general cleaning use a duster or damp cloth (almost dry) not wet – do not use soap and water,
detergents, aerosol sprays or any polish as use of these materials would invalidate any claims.
DO NOT place the item onto wet or damp flooring as staining may occur to the floor
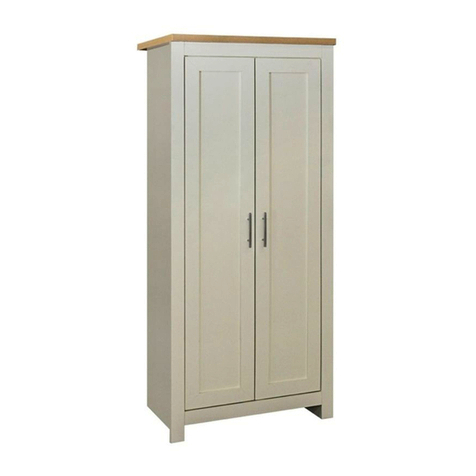
IMPORTANT: READ THESE INSTRUCTIONS CAREFULLY BEFORE ASSEMBLING OR USING 2 DOOR
WARDROBE.
ASSEMBLY INSTRUCTIONS
2 DOOR WARDROBE
Page 2 of 9
Parts List Har ware List
Part Description Qty Part Description Qty
1 Top Panel 1 A Wooden Dowel
12
2 Right Panel 1 B 14 mm Screw
48
3 Left Panel 1 C 30 mm Screw 16
4 Right Front Frame 1 D 35 mm Screw 36
5 Left Front Frame 1 E 40 mm Screw 6
6 Front Frame 2 F 19 mm Bolt 2
7 Base Panel – 724 x 454 mm 1 G
Handle
2
8 Shelf Panel – 724 x 448 mm 1 H
Door Hinge
6
9 Back Panel 2 J
Clip
4
10 Large Spine 1 K Plug 4
11 Small Spine 1 L Corner Bracket 1
12 Right Door 1 M Rail Support
2
13 Left Door 1 N Tack
40
14 Cross Rail 4 ** You will need a small mallet and a screwdriver.
15 Hanging Rail 1
16 Cleat 6
Page 3 of 9
Step 1: nsert the right panel (2) to the right front frame (4) ensuring parts are fully pushed together and
lined up. Place the cleats (16) between the marks shown, secure using hardware part D with a screwdriver
(not provided).
DO NOT use any power tools as this may amage the frame an will invali ate any claim
Page 4 of 9
Step 2: nsert the left panel (3) to the left front frame (5) ensuring parts are fully pushed together and lined
up. Place the cleats (16) between the marks shown, secure using hardware part D with a screwdriver (not
provided).
DO NOT use any power tools as this may amage the frame an will invali ate any claim
Step 3: nsert hardware part A using a small mallet (not provided). Attach hardware part M to the right panel
(2) and left panel (3) using hardware part B and a screwdriver (not provided).
DO NOT use any power tools as this may amage the frame an will invali ate any claim
Page 5 of 9
Step 4: Attach the front frames (6), base panel (7) and shelf panel (8) using hardware part D and a
screwdriver (not provided).
DO NOT use any power tools as this may amage the frame an will invali ate any claim
Step 5: Attach the left panel (3) using hardware part D. Attach hardware part L using hardware part B. You
will need to use a screwdriver (not provided).
DO NOT use any power tools as this may amage the frame an will invali ate any claim
Page 6 of 9
Step 6: Attach the top panel (1) using hardware part E and a screwdriver (not provided).
DO NOT use any power tools as this may amage the frame an will invali ate any claim
Step 7: Attach the cross rails (14) to the right door (12) and left door (13) using hardware part C. Attach
hardware part H using hardware part B. You will need to use a screwdriver (not provided).
DO NOT use any power tools as this may amage the frame an will invali ate any claim
Page 7 of 9
Step 8: Attach hardware part G to the right door (12) and left door (13) using hardware part F and a
screwdriver (not provided).
DO NOT use any power tools as this may amage the frame an will invali ate any claim
Step 9: Attach the right door (12) and left door (13) using hardware part B and a screwdriver (not provided).
DO NOT use any power tools as this may amage the frame an will invali ate any claim
Page 8 of 9
Step 10: Attach hardware part J to the base panel (7) and shelf panel (8) using hardware part B. nsert
hardware part K to hardware part J and push the doors shut against it to mark the wood. Attach hardware
part K to the right door (12) and left door (13) using hardware part B. You will need to use a screwdriver (not
provided).
DO NOT use any power tools as this may amage the frame an will invali ate any claim
Step 11: nsert the hanging rail (15).
DO NOT use any power tools as this may amage the frame an will invali ate any claim
Page 9 of 9
Step 12: Join the back panels (9) together with the large spine (10) and small spine (11). Secure to the frame
using hardware part N and a small mallet (not provided).
DO NOT use any power tools as this may amage the frame an will invali ate any claim

Other manuals for SANTIAGO

2

Other Birlea Indoor Furnishing manuals
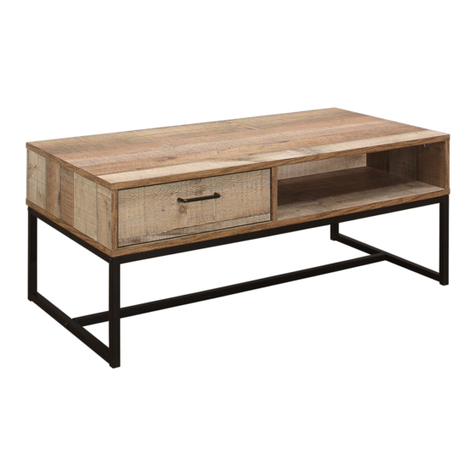
Birlea URBAN NEST OF TABLES User manual
Birlea

Birlea URBAN NEST OF TABLES User manual

Birlea VIENNA User manual

Birlea

Birlea VIENNA User manual
Birlea Arlo 1 Drawer Bedside User manual

Birlea

Birlea Arlo 1 Drawer Bedside User manual

Birlea SIRKKA COFFEE TABLE User manual

Birlea

Birlea SIRKKA COFFEE TABLE User manual

Birlea S000013 User manual

Birlea

Birlea S000013 User manual

Birlea CORFU User manual

Birlea

Birlea CORFU User manual

Birlea COMPTON LAMP TABLE User manual

Birlea

Birlea COMPTON LAMP TABLE User manual

Birlea DENVER 3' BED PINE User manual

Birlea

Birlea DENVER 3' BED PINE User manual

Birlea STRATUS User manual

Birlea

Birlea STRATUS User manual

Birlea STRATUS User manual

Birlea

Birlea STRATUS User manual

Birlea RIO 3 BED FRAME User manual

Birlea

Birlea RIO 3 BED FRAME User manual

Birlea DIS-STTPACHWHT User manual

Birlea

Birlea DIS-STTPACHWHT User manual

Birlea WINCHESTER NEST OF TABLES User manual

Birlea

Birlea WINCHESTER NEST OF TABLES User manual

Birlea SHARD User manual

Birlea

Birlea SHARD User manual

Birlea Winchester 3 Door 2 Drawer Sideboard User manual

Birlea

Birlea Winchester 3 Door 2 Drawer Sideboard User manual

Birlea LOGFSBGRY User manual

Birlea

Birlea LOGFSBGRY User manual

Birlea VALENTINO 2 DRAWER User manual

Birlea

Birlea VALENTINO 2 DRAWER User manual

Birlea Urban Coffee Table User manual

Birlea

Birlea Urban Coffee Table User manual

Birlea URB6WCHRUS User manual

Birlea

Birlea URB6WCHRUS User manual

Birlea COMPTON CORNER TV UNIT User manual

Birlea

Birlea COMPTON CORNER TV UNIT User manual

Birlea JESSICA 3' BED User manual

Birlea

Birlea JESSICA 3' BED User manual

Birlea Corona series User manual

Birlea

Birlea Corona series User manual

Birlea HAVANA 2 DRAWER BEDSIDE CABINET User manual

Birlea

Birlea HAVANA 2 DRAWER BEDSIDE CABINET User manual

Birlea Corfu Bunk Bed User manual

Birlea

Birlea Corfu Bunk Bed User manual

Popular Indoor Furnishing manuals by other brands
Stretch Now LINAK installation guide

Stretch Now

Stretch Now LINAK installation guide

Ameriwood HOME 5365222COM Instruction booklet

Ameriwood HOME

Ameriwood HOME 5365222COM Instruction booklet

Whalen Bayside FURNISHINGS 369333 quick start guide

Whalen

Whalen Bayside FURNISHINGS 369333 quick start guide

Whalen WSLW48IFV manual

Whalen

Whalen WSLW48IFV manual

ME MARCKERIC APARADOR EDEA 2P3C Assembly instructions

ME MARCKERIC

ME MARCKERIC APARADOR EDEA 2P3C Assembly instructions

aspenhome Lift Top Cocktail Table I215-9100 Assembly instructions

aspenhome

aspenhome Lift Top Cocktail Table I215-9100 Assembly instructions

iLive DTMS201WL Assembly Instructions & User Guide

iLive

iLive DTMS201WL Assembly Instructions & User Guide

Blumfeldt 10030023 manual

Blumfeldt

Blumfeldt 10030023 manual

ROOMS TO GO HLVN 6941-19 Assembly instruction

ROOMS TO GO

ROOMS TO GO HLVN 6941-19 Assembly instruction

Tauris DONATA2000 Assembly & instruction manual

Tauris

Tauris DONATA2000 Assembly & instruction manual

Enso flex EZZ FE1200 owner's manual

Enso

Enso flex EZZ FE1200 owner's manual

Home Decorators Collection SK19239Dr1-E Use and care guide

Home Decorators Collection

Home Decorators Collection SK19239Dr1-E Use and care guide

Asgard TROJAN PLUS manual

Asgard

Asgard TROJAN PLUS manual

FITMOBEL BANCADA ADEGA 900 product manual

FITMOBEL

FITMOBEL BANCADA ADEGA 900 product manual

BK FURNITURE HARRISBURG TODDLER BED RC5010 Assembly

BK FURNITURE

BK FURNITURE HARRISBURG TODDLER BED RC5010 Assembly

Rauch M2593 Assembly instructions

Rauch

Rauch M2593 Assembly instructions

Forte SNWS82 Assembling Instruction

Forte

Forte SNWS82 Assembling Instruction

Accuride 3832EC installation guide

Accuride

Accuride 3832EC installation guide

manuals.online logo
manuals.online logoBrands
  • About & Mission
  • Contact us
  • Privacy Policy
  • Terms and Conditions

Copyright 2025 Manuals.Online. All Rights Reserved.