INSTALLATION
3
1. Read this Manual thoroughly before installation and operation. Do not proceed with installation and
operation if you have any questions or do not understand anything in this Manual. Contact your local
Distributor, or BIRO rst.
2. Install machine on a level, solid, non-skid surface in a well-lighted work area away from children and
visitors.
3. Lock the Casters in the xed position before operating machine.
4. Electrical supply must be connected correctly, and properly grounded. The voltage must match the unit
voltage as labeled. See Electrical Specications, or contact Biro with the serial number of the machine.
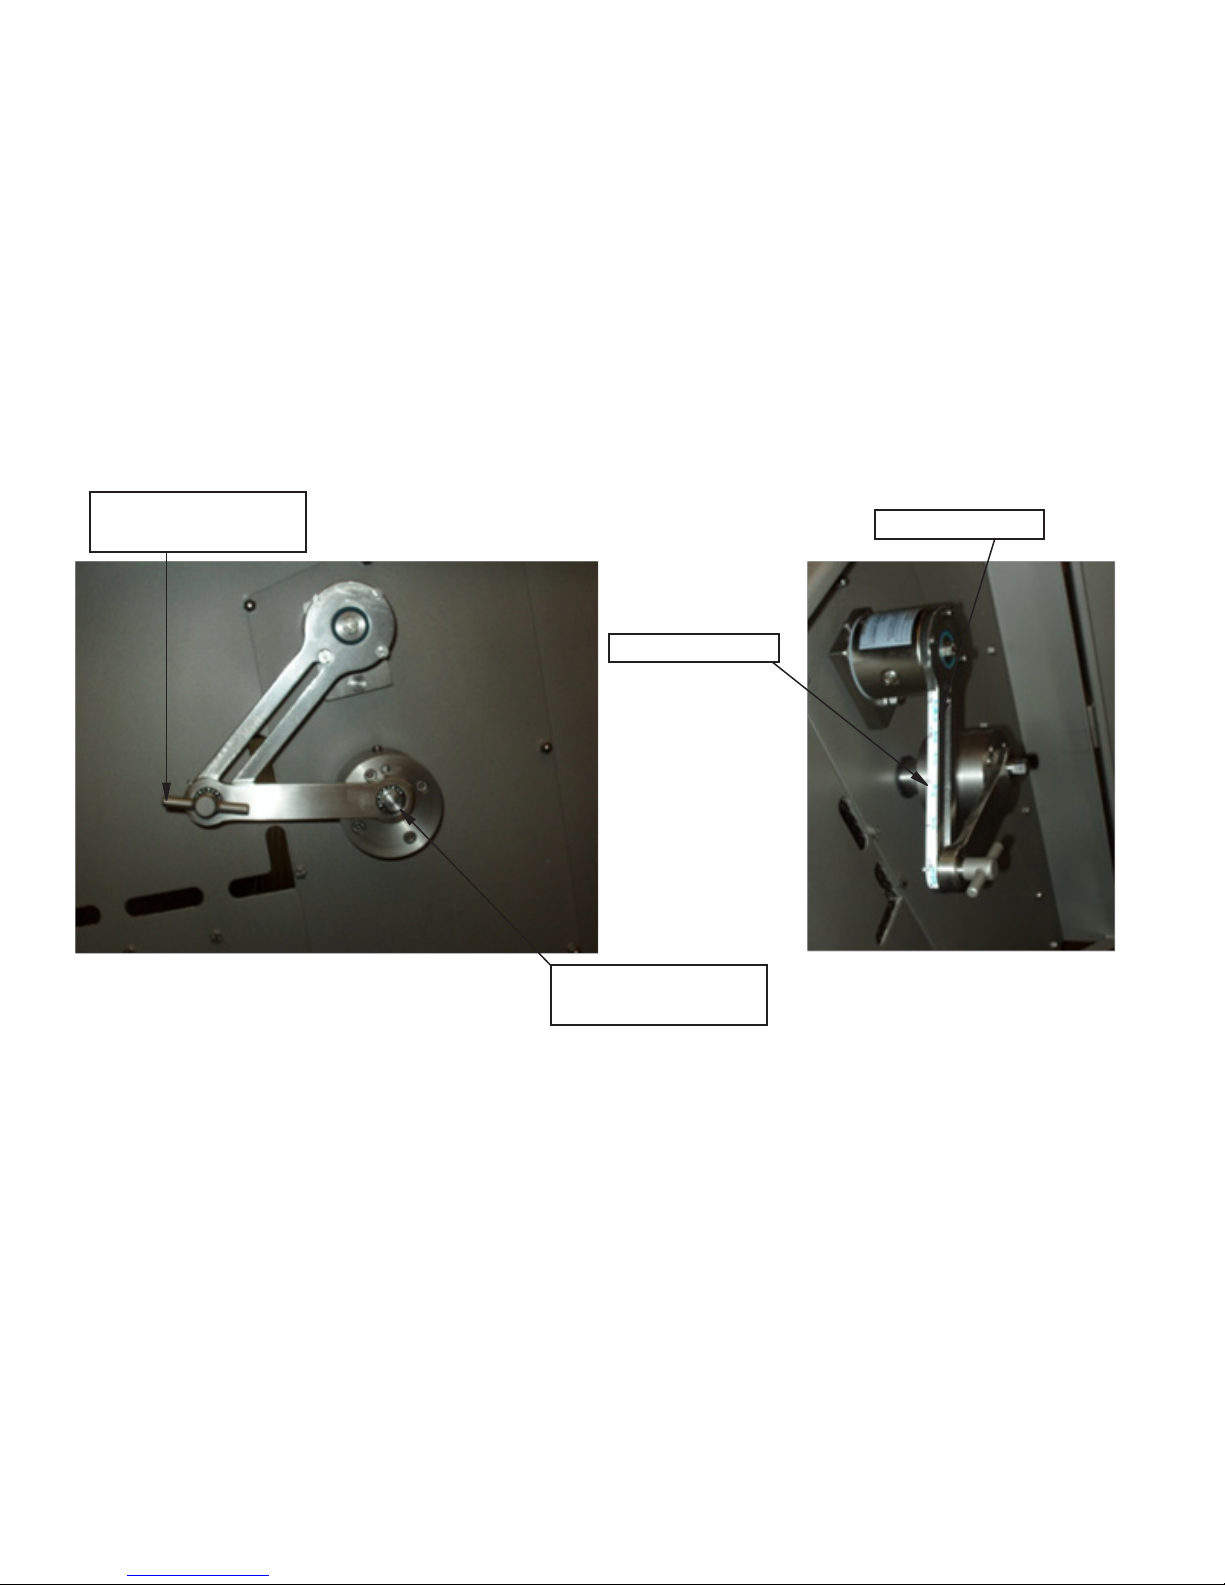
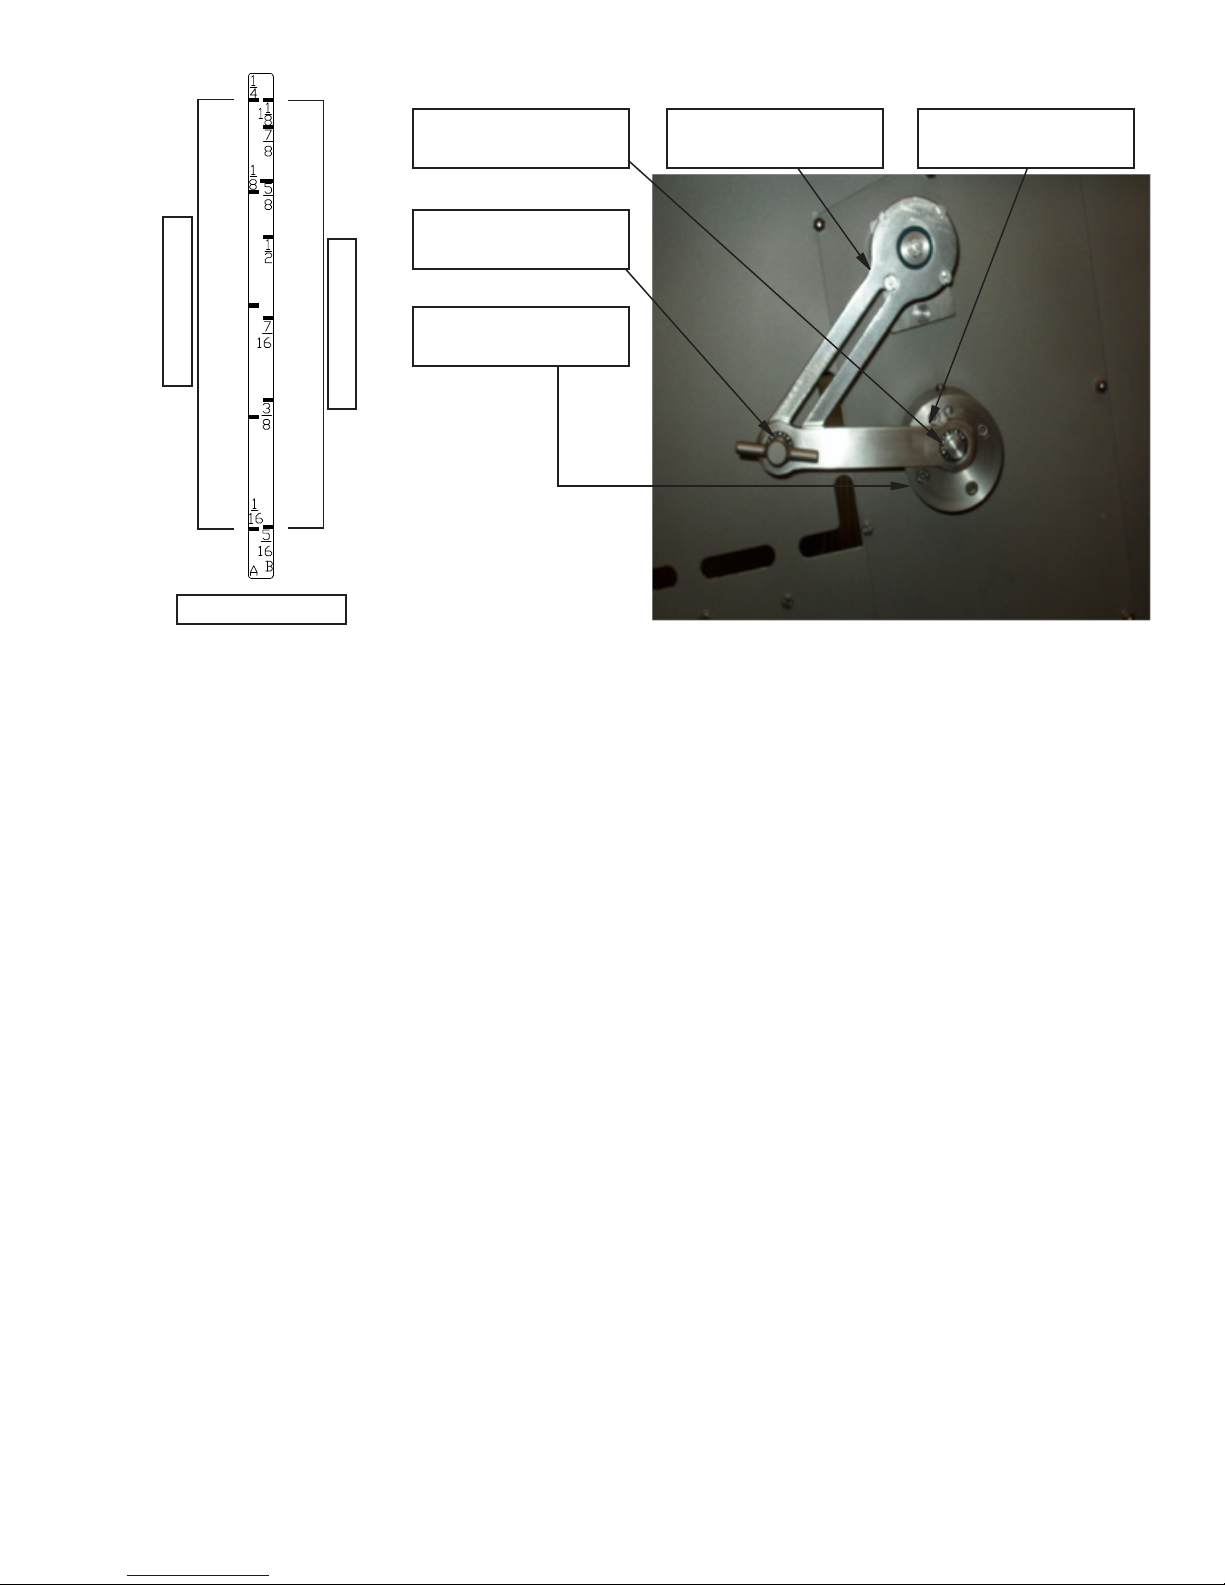
5. Check the Draw Lever by opening the Clutch Door on the right hand side of the unit. Make sure the 9/16
hex head fastener is tight on the eccentric hub and the linkage arm adjustment handle is tight.
6. For operation, turn Main Switch (Red Handle) “ON.” Close the blade door, clutch door and covers. Twist
& Pull the emergency stop into the “out” position. Open one cover and close again to “initiate” the
electronics. The Slicer is now operational.
7. The blade must have a sharp smooth edge. The blade is 5mm (.197) thick and replacement blades must
also be 5mm thick. Rotate the blade manually to ensure proper clearance. This procedure must be
performed on initial installation and with all blade replacements. Every time a blade is replaced, turn it
at least one revolution by hand, by Pressing and Holding the “BRAKE RELEASE” button with your left
hand. Open the Blade Door with your right hand and rotate the back, at edge of the blade clockwise.
The blade may also be turned by hand to the most convenient position for disassembly, assembly,
removal of product scraps, cleaning, etc...
8. Check Blade Rotation; the blade must travel downward through the product. When facing the blade it must
rotate clockwise. single rotation may be achieved by selecting “JOG” and pressing the “Green Start”
button. The direction of rotation may be changed by interchanging any two phase leads within the plug.
CAUTION! Do not interchange the ground lead. Note: Blade rotation should be changed only by a
recognized Biro representative or a certied electrician.
9. To move the Product Pusher Assembly, squeeze the hand lever which disconnects the Product Pusher from
the feed screw. The Product Pusher can then be freely moved by hand left or right. When the hand lever
is released, the Feed Screw will engage, and the Product Pusher will advance automatically. Allow 2 or
3 blade revolutions for Product Pusher to positively engage.
10. Product to be cut must be placed with its straight side against the loading chamber wall, toward the front
edge, nearest the operator. Engage the product securely to the Product Pusher Gripper.
11. If Product does not ll the Loading Chamber width by 70%, use the Side Product Deector, item number
PC103. If the Product width is over 70% remove the Side Deector by depressing the release button, and
sliding the deector to the right.