Bivocom TG462 Series User manual
®
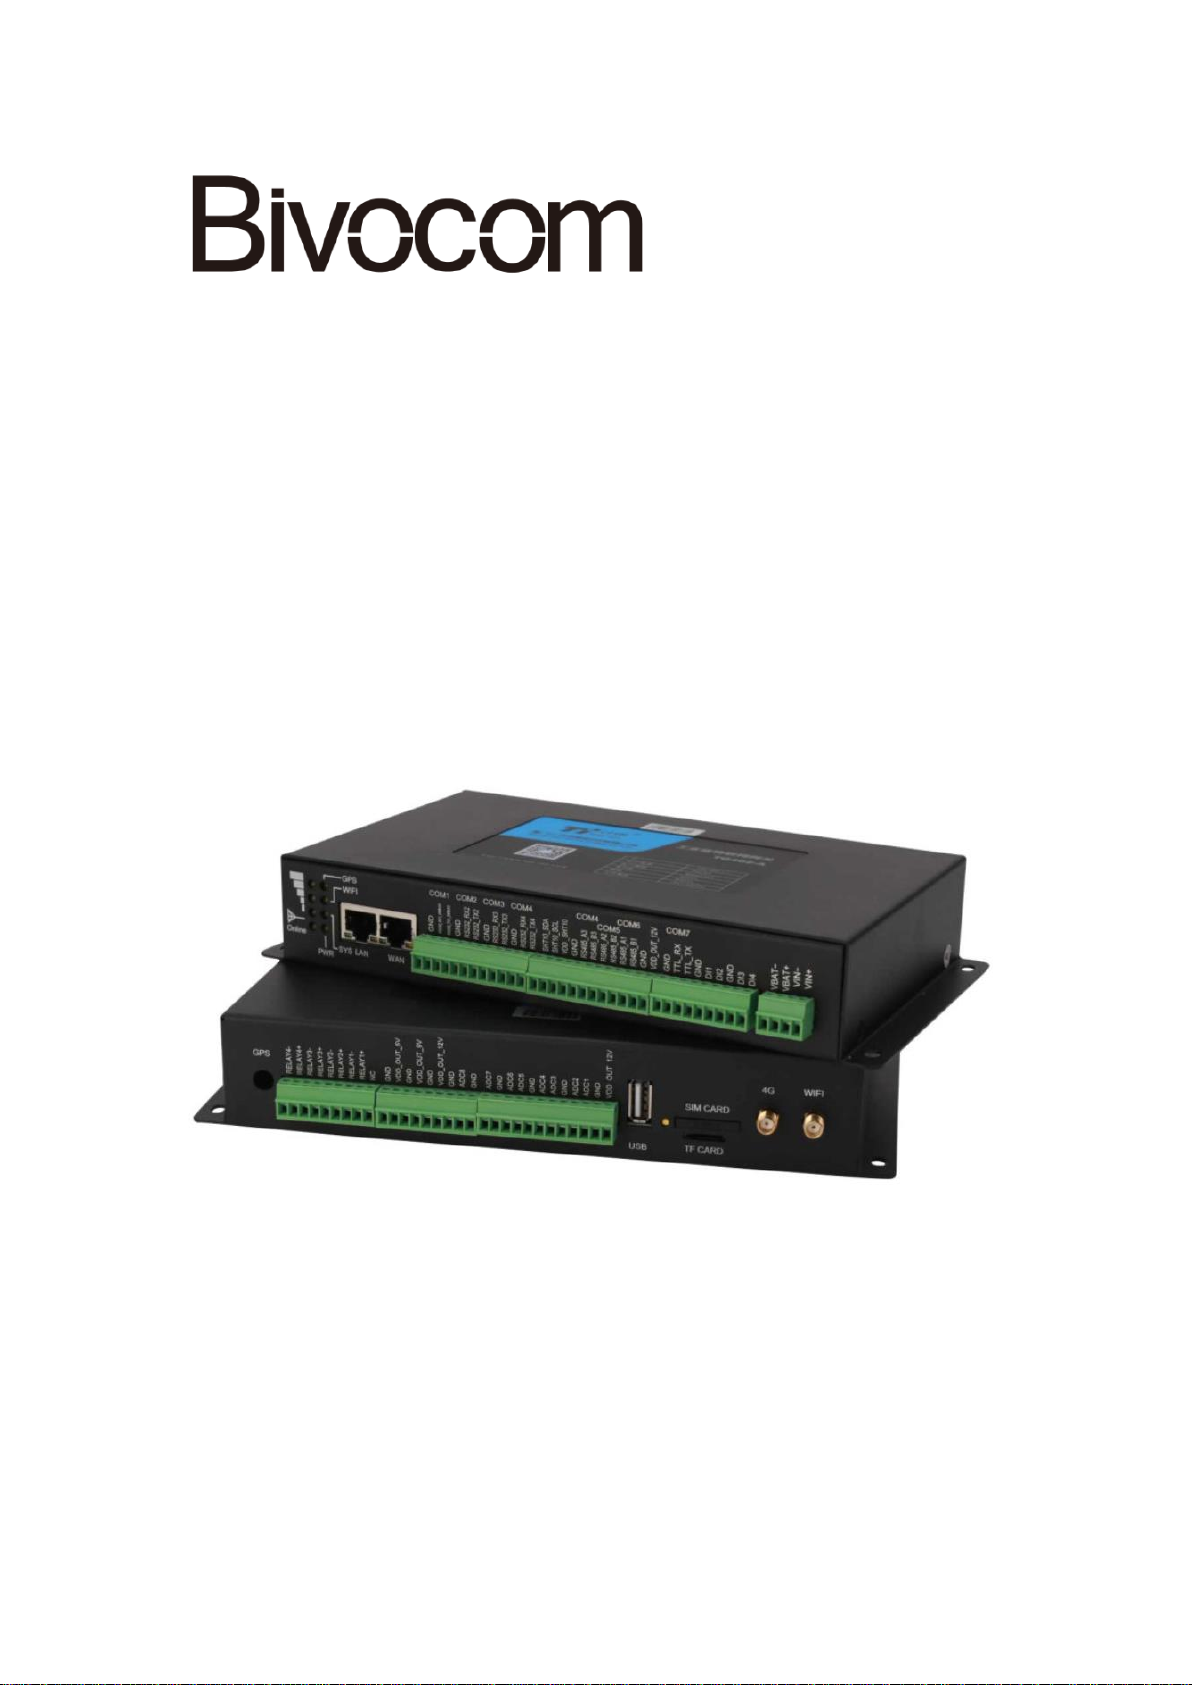
Industrial Cellular Edge Gateway
TG462 Series User Guide

Copyright
Copyright © XIAMEN BIVOCOM TECHNOLOGIES CO., LTD.All rights reserved.
Trademark
BIVOCOM logo is a registered trademark of Xiamen Bivocom Technologies Co., Ltd. All
other trademarks belong to their respective vendors or manufactures.
Disclaimer
Product specifications and information in this document are subject to change without any
notice, and BIVOCOM reserves the right to improve and change this user guide at any
time. Users should take full responsibility for their application of products, and Xiamen
Bivocom Technologies Co., Ltd. disclaims all warranties and liability for the accurateness,
completeness of the information published.
Global Technical &Sales Support
Xiamen Bivocom Technologies Co., Ltd.
Addr: Unit 1504, No. A1 Building, 3rd Software Park, Xiamen, China 361000
Tel.: +86-592‐6090 133
Fax: +86-592‐6211727
Email: support@bivocom.com
sales@bivocom.com
www.bivocom.com

About This Guide
Thank you for choosing Bivocom Industrial Cellular Edge Gateway TG462 Series.
Please thoroughly read this user guide before you configure and install the device.
This manual is compatible with below models
Model
Description
TG462
Industrial Edge Gateway
TG462S
Industrial Edge Gateway with Touch screen

Table of Contents
Copyright .................................................................................................................................2
Trademark ...............................................................................................................................2
Disclaimer................................................................................................................................2
About This Guide....................................................................................................................3
Table of Contents....................................................................................................................4
1. Introduction.................................................................................................................................6
1.1 Overview...........................................................................................................................6
1.2 Applications.......................................................................................................................6
1.3 Dimensions.......................................................................................................................7
1.4 Physical Characteristics..................................................................................................7
2. Getting Started...........................................................................................................................7
2.1 Package Checklist...........................................................................................................7
2.2 Installation.........................................................................................................................8
2.2.1 SIM/UIM Card.......................................................................................................9
2.2.2 Interfaces connection...........................................................................................9
2.2.3 Power Supply......................................................................................................10
2.2.4 Cellular Antenna .................................................................................................10
2.3 LED Indicators................................................................................................................10
3. Configuration and Management............................................................................................11
3.1 View.................................................................................................................................12
3.1.1 System.................................................................................................................12
3.1.2 Network................................................................................................................13
3.1.3 Routing Tables....................................................................................................13
3.1.4 System Log..........................................................................................................14
3.1.5 VPN Status..........................................................................................................14
3.2 Setup ...............................................................................................................................15
3.2.1 WAN.....................................................................................................................15
3.2.2 LAN.......................................................................................................................16
3.2.3 Wireless (Option)................................................................................................17
3.2.4 Online Detection.................................................................................................17
3.2.5 Diagnostics..........................................................................................................17
3.3 Security ...........................................................................................................................17
3.3.1 DMZ Host.............................................................................................................17
3.2.2 Port Forwarding..................................................................................................17
3.3.3 Traffic Rules.........................................................................................................18
3.3.4 Custom Settings.................................................................................................21
3.4 VPN..................................................................................................................................21
3.4.1 PPTP....................................................................................................................21
3.4.2 L2TP.....................................................................................................................23
3.4.3 OpenVPN.............................................................................................................26

3.4.4 IPSec....................................................................................................................27
3.5 Advanced........................................................................................................................28
3.5.1 Static Routing......................................................................................................28
3.5.2 Net Flow...............................................................................................................28
3.5.3 GPS Location......................................................................................................28
3.5.4 DHCP and DNS..................................................................................................28
3.6 Data Collect....................................................................................................................28
3.6.1 Basic Setting.......................................................................................................29
3.6.2 Interface Setting..................................................................................................29
3.6.3 Modbus Rules Setting........................................................................................30
3.6.4 IO Setting.............................................................................................................31
3.6.5 Server Setting.....................................................................................................34
3.6.6 Data View Setting...............................................................................................34
3.7 Administrate....................................................................................................................35
3.7.1 System.................................................................................................................35
3.7.2 Password.............................................................................................................36
3.7.3 Time Setting ........................................................................................................37
3.7.4 Log Settings ........................................................................................................38
3.7.5 Backup and Reset..............................................................................................39
3.7.6 Firmware Upgrade..............................................................................................40
3.7.7 Remote Management........................................................................................40
3.7.8 Manual Reboot....................................................................................................42
3.7.9 Schedule Reboot................................................................................................42
3.7.10 Screen Calibration............................................................................................43

1. Introduction
1.1 Overview
TG462/TG462S Industrial cellular Edge Gateways are designed for connecting diverse
types of field sensors and equipment to cloud via LTE/3G cellular network, which is suitable
for IIoT and M2M applications that require secure and rugged LTE connectivity in harsh
environment, such as water&waste water, gas&oil, industry 4.0, smart city, vending
machines, etc.
With rich interfaces, includes Ethernet ports, RS232/RS485, digital inputs, analog inputs,
relay outputs, I2C, power output, USB, GPS, WIFI, etc., The TG462/TG462S Edge
Gateways allow users to integrate legacy systems with modern sensors. With high-
performance 32-bit ARM-based CPU, Modbus RTU/TCP, MQTT, TCP/IP, and customized
protocols, as well as up to 1G flash and 32G micro SD local data storage, enables users
to collect, store and process data at IoT edge network. Besides, TG462S embedded with
a 7inch HD TFT touch screen provides a better user experience for field data display and
maintenance.
1.2 Applications
TG462 Series Edge Gateways utilizes cellular network to connect your edge devices and
controller devices to your center for remote monitoring and control.
Typical application as below.
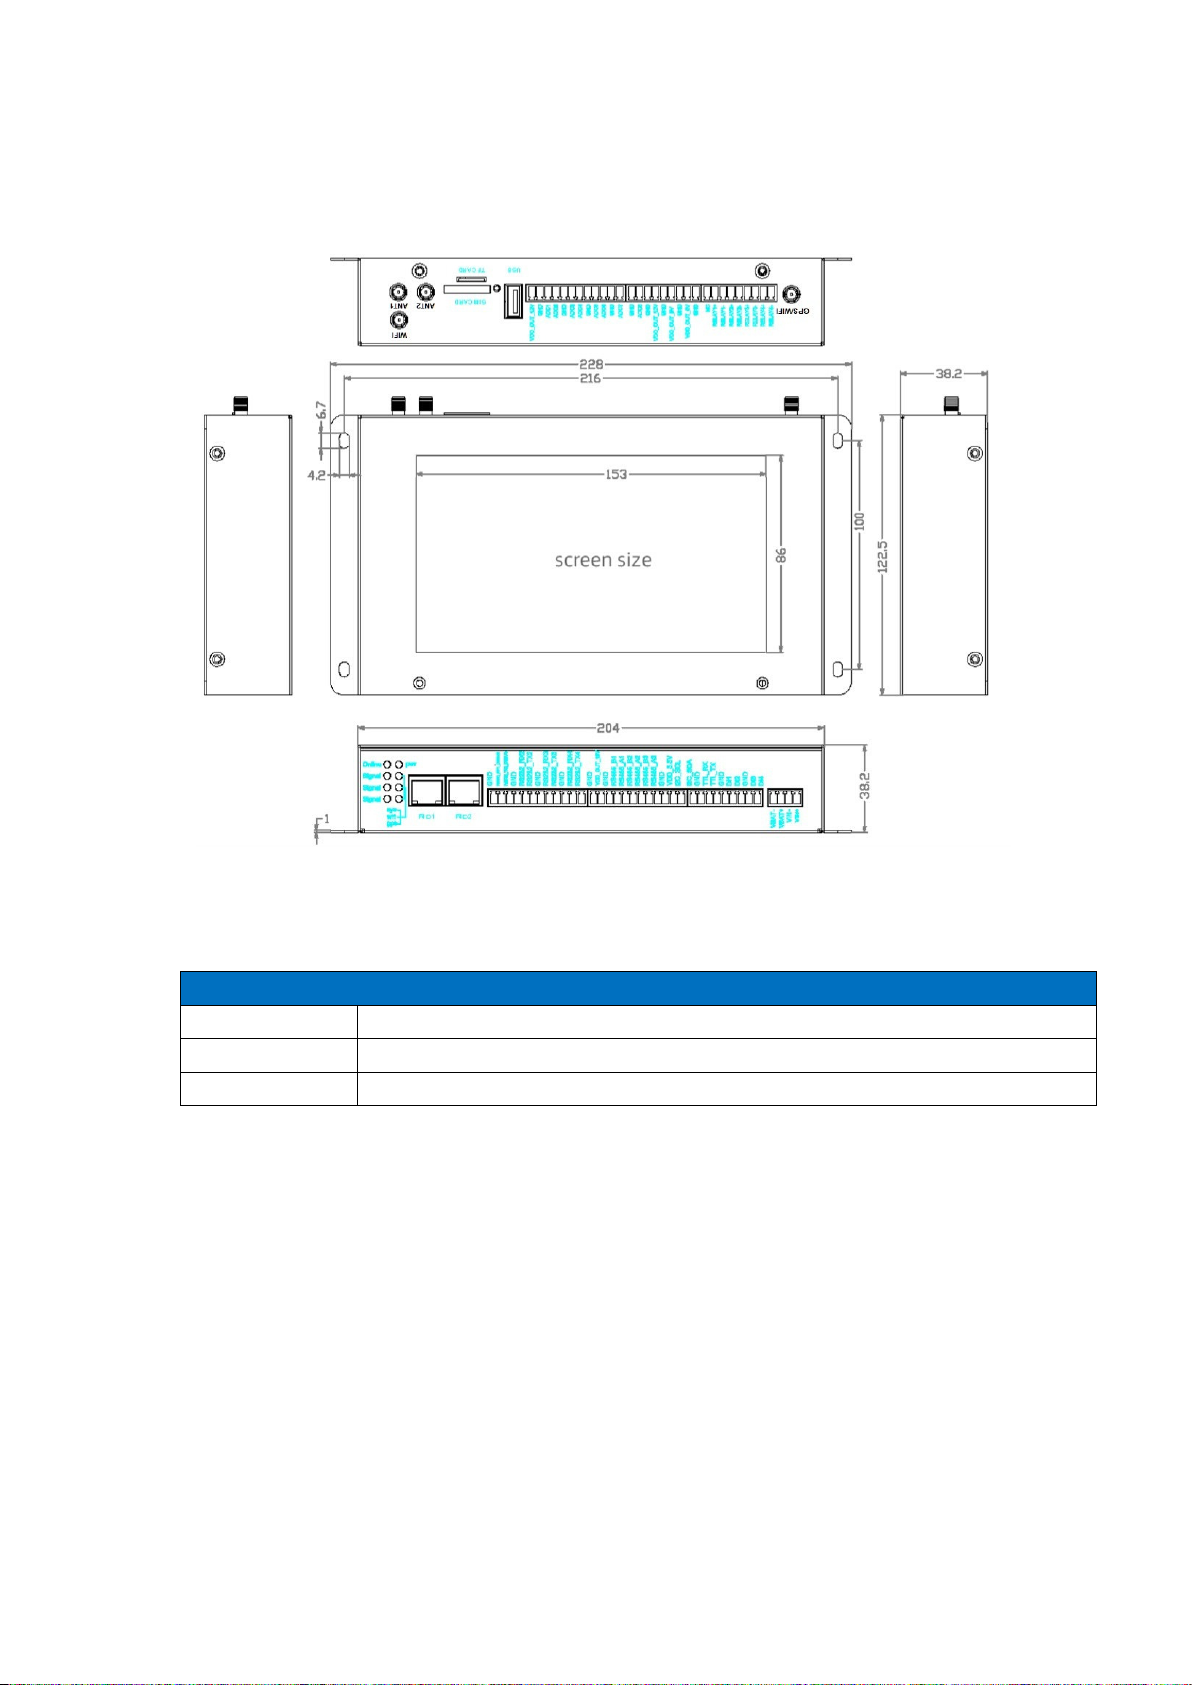
1.3 Dimensions
1.4 Physical Characteristics
Physical Characteristics
Housing
Metal, IP30
Dimensions
228×122.5×38.2mm(8.97x4.82x1.50in),Antenna and other accessories not included
Weight
TG462: 850g(1.87lbs), TG462S: 900g(1.98lbs), without accessories.
2. Getting Started
2.1 Package Checklist
The following components are included in your TG462 package.
Check the list before installation. If you find anything missing, Please feel free to contact
Bivocom.
1 x TG462/TG462S Gateway
1 x Power Adapter (DC 12V/1.5A, EU/US/UK/AU plug optio)

2 x Mag-mount Cellular Antenna (SMA Male, 1 meter, 5dBi)
1 x RS232 Cable (DB9 Female, 1 meter)
1 x Ethernet Cable (1 meter)
3 x 12-Pin Terminal Block
3 x 9-Pin Terminal Block
1 x 4-Pin Terminal Block (Power)
1 x Quick Start Guide (Printed)*
2.2 Installation
Hardware interfaces instruction:
2.2.1 SIM/UIM Card
TG462 supports normal SIM/UIM only, so if you’re using a Micro SIM or Nano SIM card,
you may need to use a Micro SIM or Nano SIM to Normal SIM adapter.
Make sure your router is powered off, then use a needle object(such as a pen) to push the
button near the SIM/UIM card holder, it will flick out immediately. Put the SIM/UIM card to
card holder with chipset upside, insert it to router and make sure it’s tightly matched.
Warning: Never install SIM/UIM card when router is powered on.
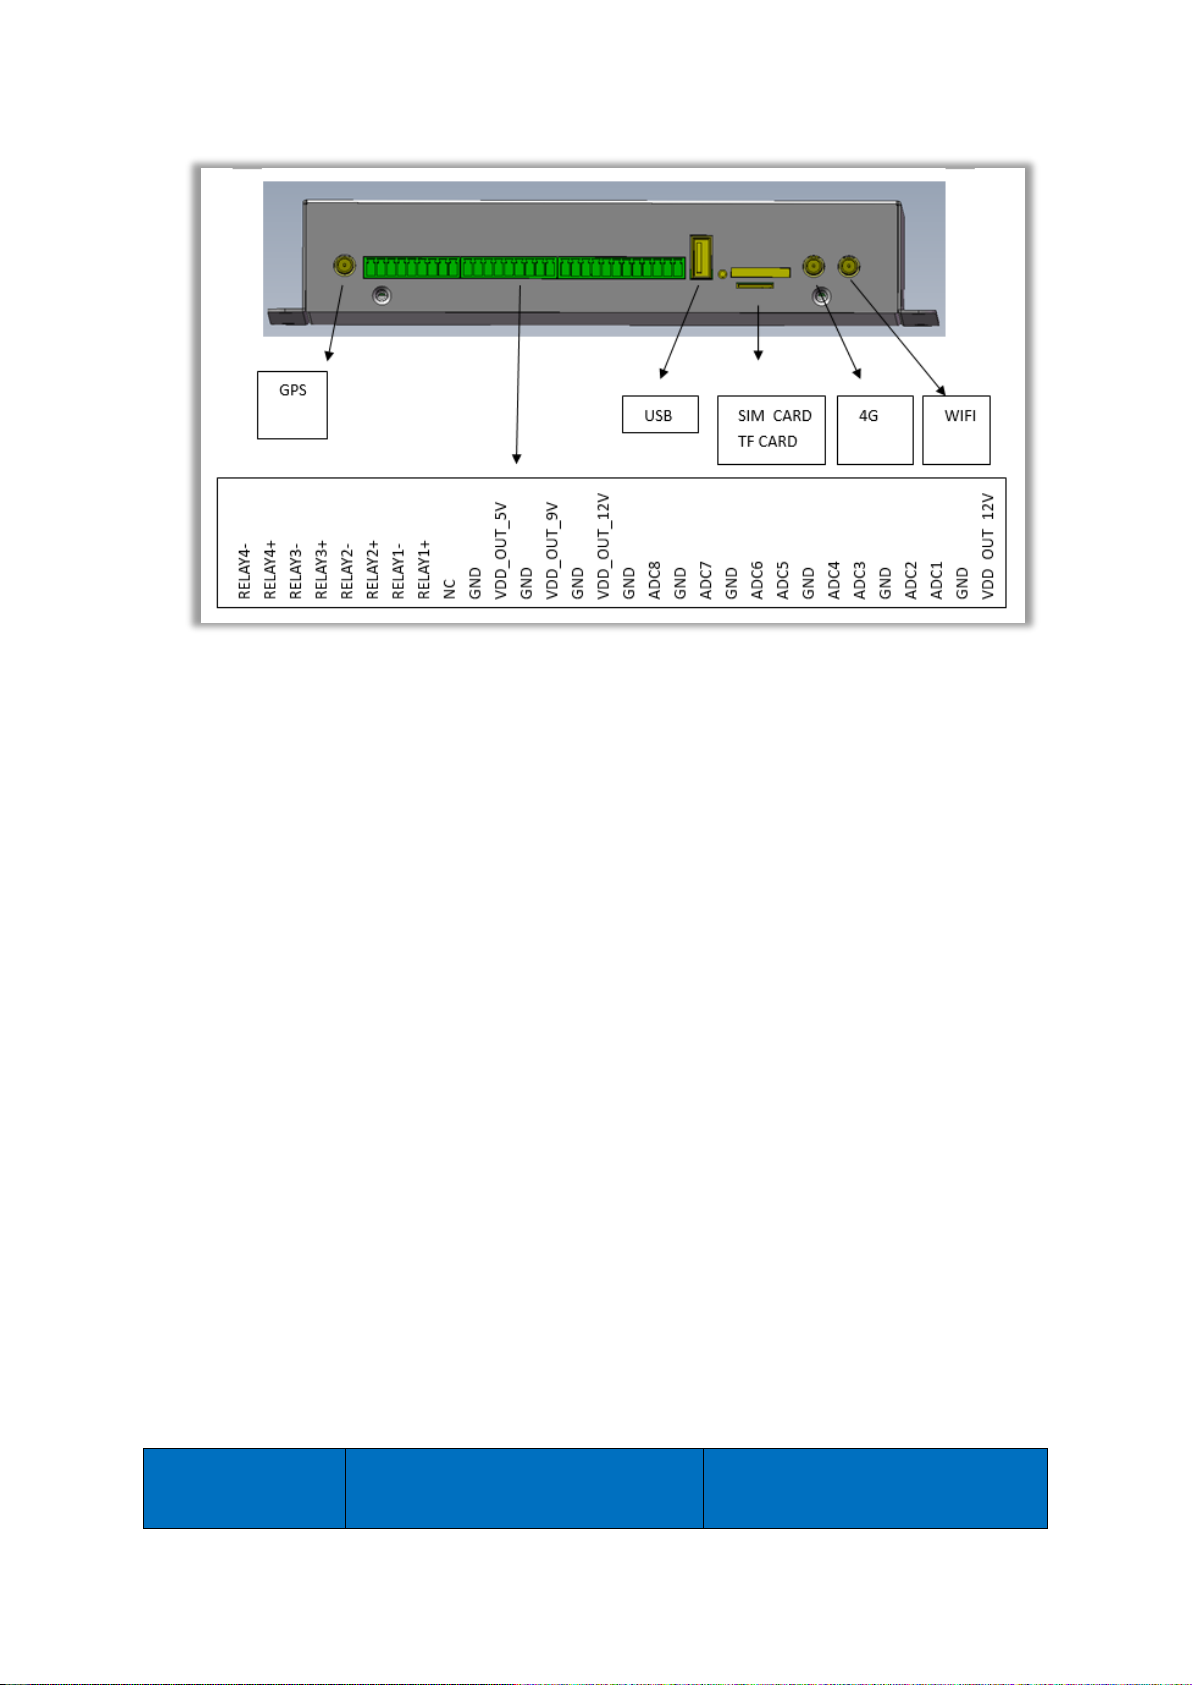
2.2.2 Interfaces connection
TG462 support a RS232 (com1) serial port as console port,which can be used for firmware
upgrade, system log checking, debug, etc.
TG462 include 3 RS232 (com1, com2, com3), and 3 RS485 (com4, com5, com6, while
com4 can be used as RS232 as well.), 1x I2C, 1x TTL, 4x DI, 8x ADC (12 bit AD, support
4~20mA current or 0-5V voltage signal input), 4x Relay, 5x power supply.
TG462 designed with industrial terminal block interface, and the cable in this package with
ends of female connector and stripping cable, the signal of console cable is defined as
below,
RS232 Cable(with DB9 female connector and stripping cable)
Color of cable
Corresponding DB9-Female Pin No.
Corresponding Pin No. of Router
(Pin 1 closes to power jack, Pin 5

closes to ethernet port)
Blue
2(RX)
1(TX)
Brown
3(TX)
2(RX)
Black
5(GND)
3(GND)
RS485 Cable
Color of cable
TG462 Router
Red
4(A)
Black
5(B)
2.2.3 Power Supply
We suggest you use Bivocom standard power adapter (1.5A/12VDC). If you have to use
your own power supply, make sure the power range is 5-35VDC and it is stable
enough(Ripple shall be less than 300mV, and Instantaneous voltage shall not larger than
35V), meanwhile, power shall over 4W.
2.2.4 Cellular Antenna
Screw the SMAmale antenna to TG462(SMA female port), make sure it is screwed tightly
to ensure the strength of signal.
2.3 LED Indicators
TG462 Series Gateway provides 8 LED indicators, as following.
Indicator
Status
Content
Power
On
Powered On
Off
Powered Off
Signal
1 Lights
Signal weak

Strength
2 Lights
Signal Middium
3 Lights
Signal Strong
System
Blink
System works perfect
Off
System doesn’t work
GPS
On
GPS attached the location
Off
GPS not attached the location
Online
On
Router accesses to Internet
Off
Router doesn’t access to Internet
Wifi
On
Wifi enabled
Off
Wifi disabled
WAN
On
WAN is connected
Off
WAN is not connected
LAN
Blink
LAN works
Off
LAN is not connected
3. Configuration and Management
Use an Ethernet cable to connect the LAN port of TG462 to your laptop, or use your laptop
or mobile phone to connect to WIFI hotspot ‘Bivocom’ of TG462, login with password:
admin123, normally your laptop will get an IP address from TG462 DHCP as 192.168.1.xx,
otherwise please manually configure your laptop IP to 192.168.1.100.
Open browser, enter 192.168.1.1 to enter into to login page, enter username: admin, and
password: admin, to go to configuration page.

3.1 View
To check the following system information.
3.1.1 System
Display system related information.

3.1.2 Network
Display WAN, LAN, WiFi, DHCP network information.
3.1.3 Routing Tables
Display routing tables.

3.1.4 System Log
Display system log.
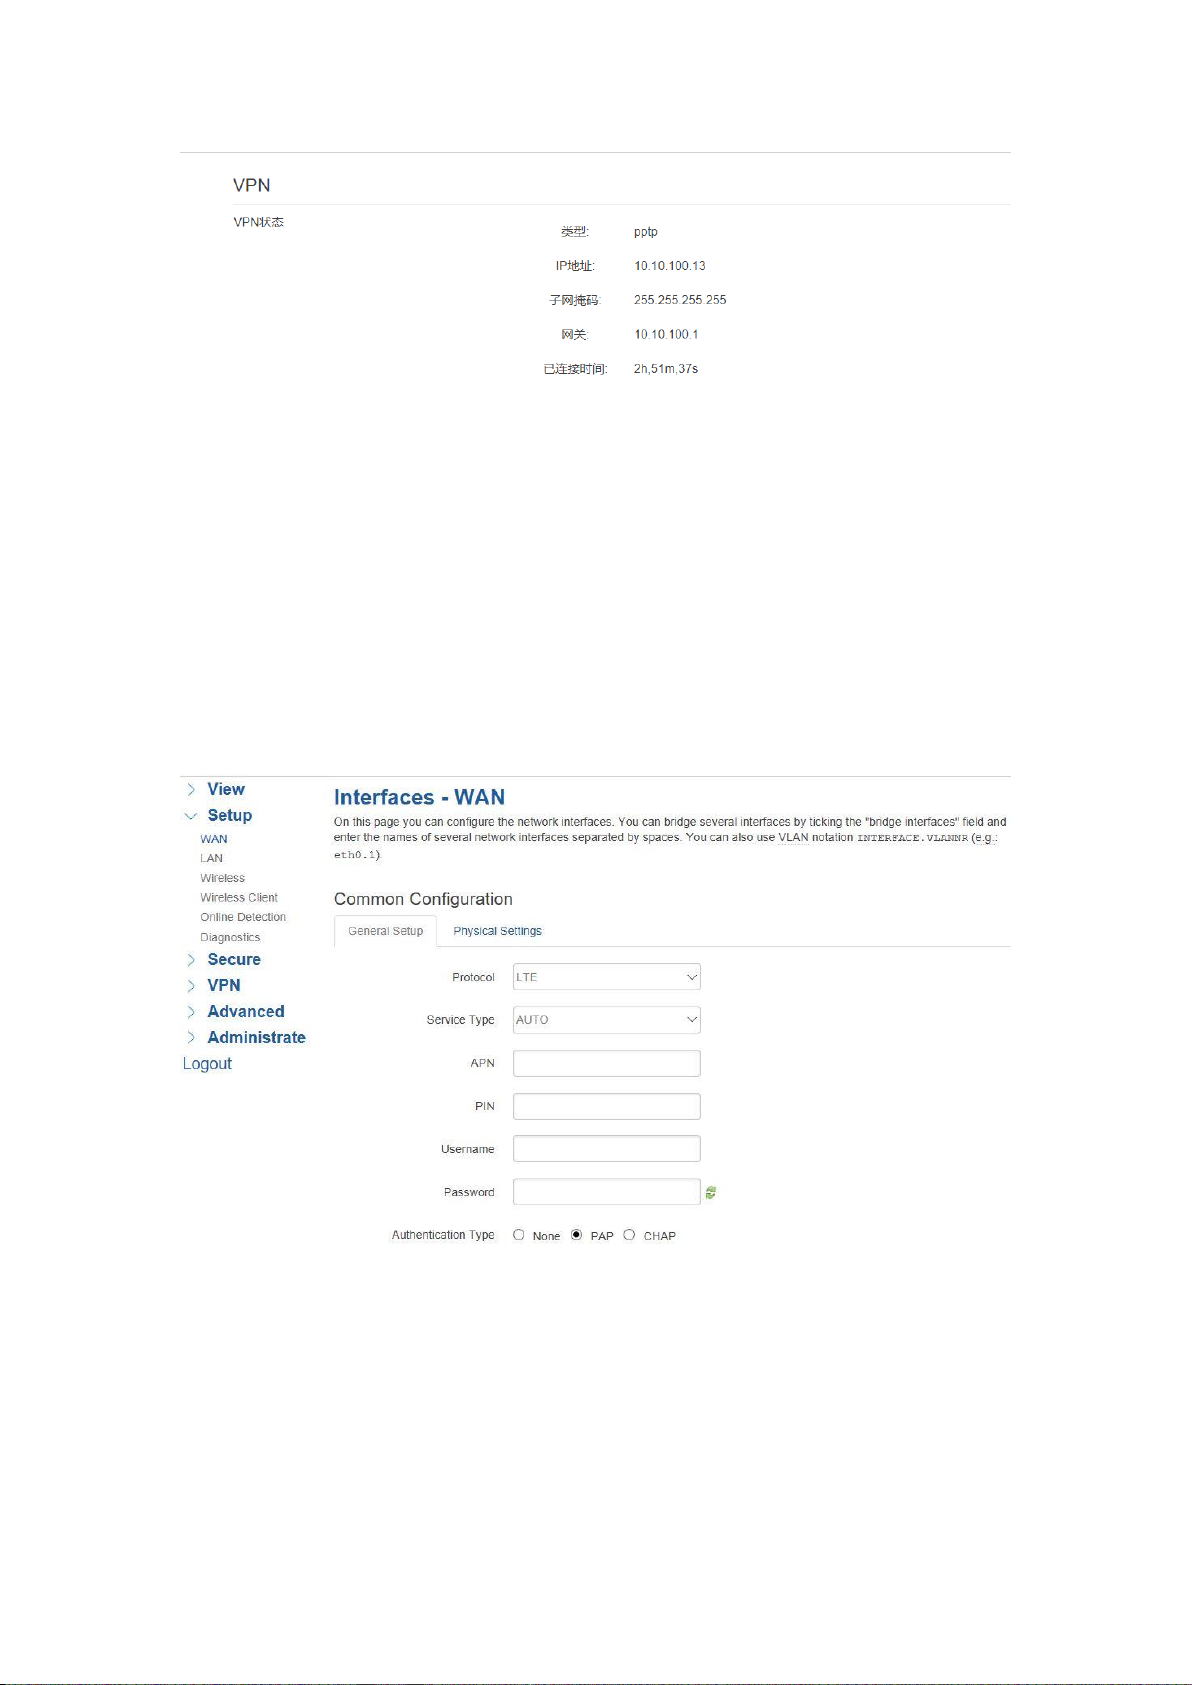
3.1.5 VPN Status
Display VPN status.
3.2 Setup
Main menu of this page includes, WAN, LAN, Wireless, Online Detection, Diagnostics.
3.2.1 WAN
WAN supports DHCP/Static IP/PPPoE/3G/LTE connection mode.
Choose the mode you need, then click ‘Switch Connection Mode’ and configure the related
parameters, then you can connect to the internet.
1) Server Type
Type of network, thedefaultvalue is AUTO,you cankeep it orchoose your own preference.

2) APN
Different carrier might have different APN, please ask your carrier if you have no idea of
what your APN is.
3) PIN
PIN code of SIM card, please use it carefully, or the SIM card may be locked.
4) PAP/CHAP Username
Only for private network SIM card, if you’re using public network SIM card, just keep it as
null.
5) PAP/CHAP Password
Only for private network SIM card, if you’re using public network SIM card, just keep it as
null.
6) Call Center No.
When you’re using SIM card,differentcarriermayhavedifferentcallcenter Number, please
ask your carrier for this info if you have questions.
7) Authentication Type
If there have username and password, you need to choose authentication type.
PAP, PlaintextAuthentication
CHAP, Handshake authentication
You need to choose the authentication type according to carrier’s network, or you may fail
to dial up.
8) WAN Used As LAN
When you use 4G/3G/2G cellular network to access internet, you can change the WAN to
act as a LAN port.
3.2.2 LAN
3.2.3 Wireless (Option)
3.2.4 Online Detection
3.2.5 Diagnostics
3.3 Security
Menu of Security are for configuring the firewall, to ensure the security of accessing to
internet, andimplement the port forwarding, accesscontrol, data packet filtering, and other
functions.
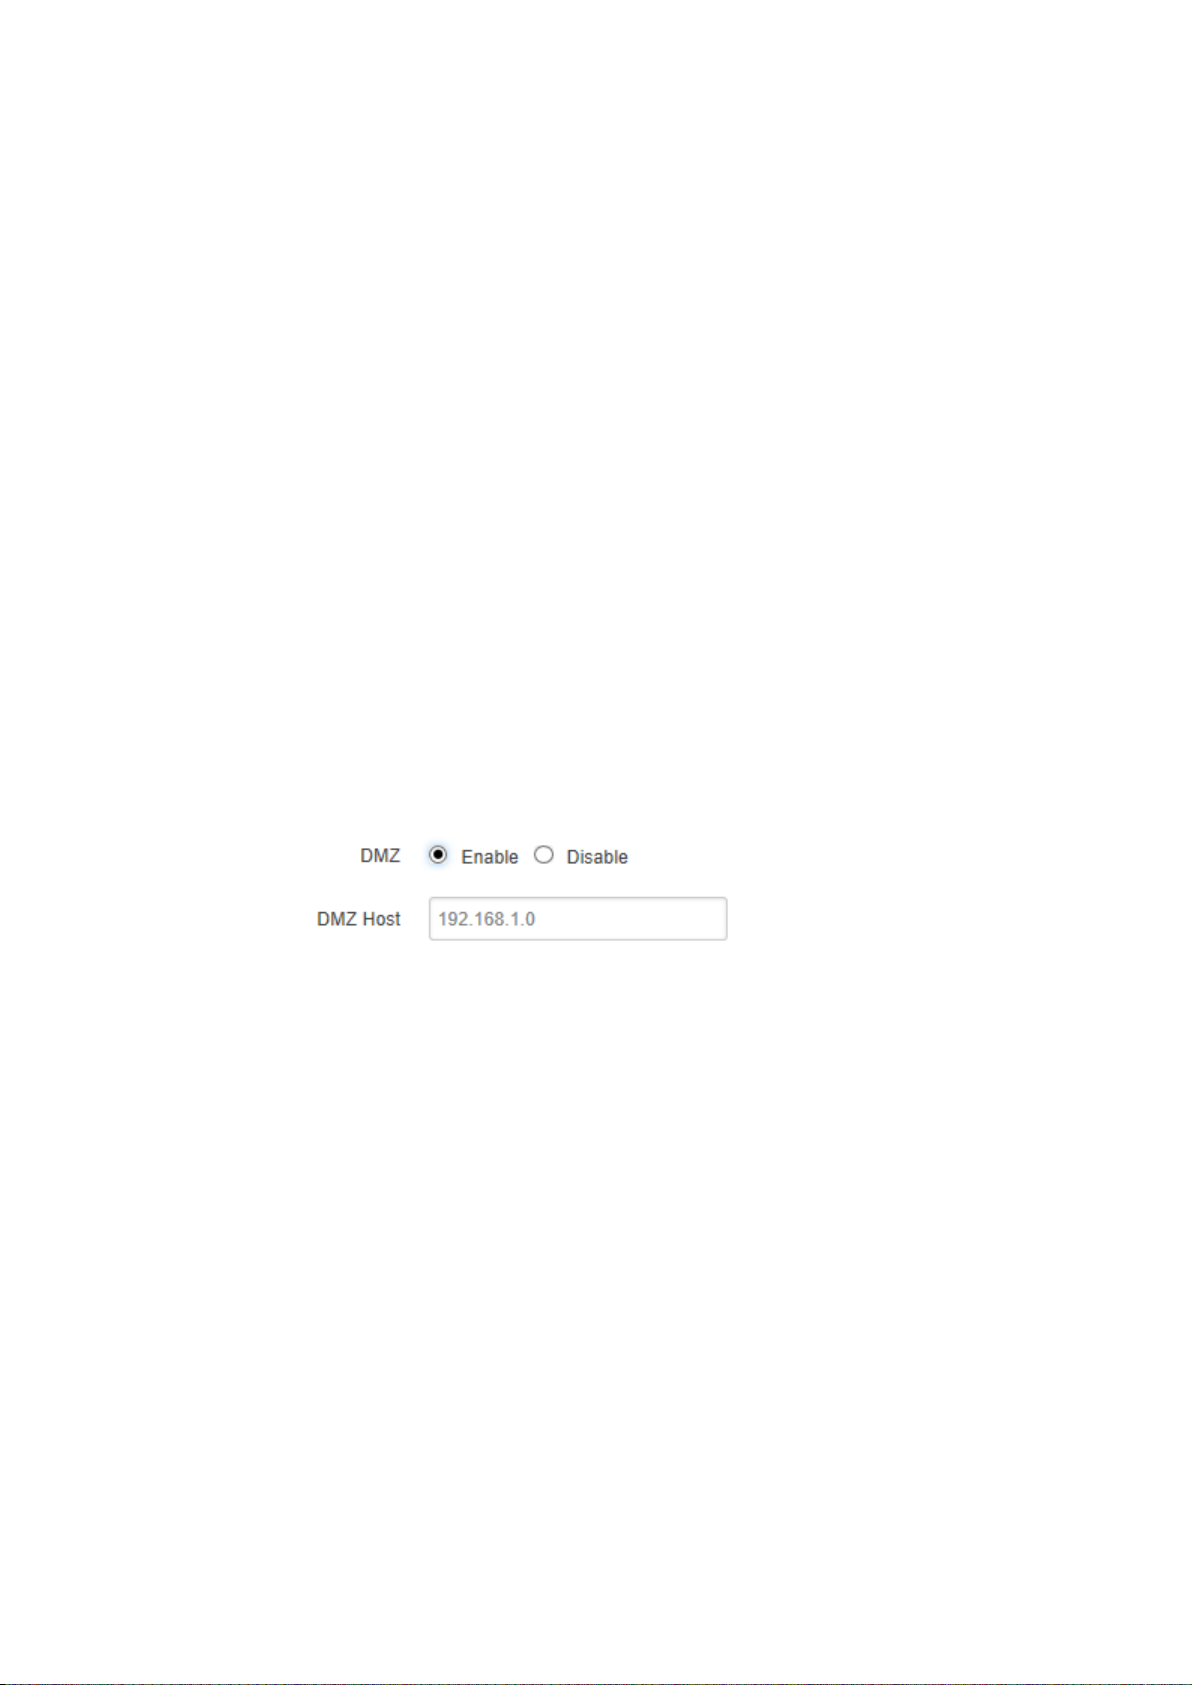
3.3.1 DMZ Host
DMZ can forward the port of WAN to a host of LAN; all packet from WAN will be forwarded
to specified host of LAN.
1) DMZ
You can enable or disable the DMZ.
2) DMZ Host
An IP address of a host of LAN you want to map.
3.2.2 Port Forwarding
Comparing with DMZ, Port Forwarding is for more precise control, user can forward the
data packet of a port to a host of LAN, to forward different port to different host.
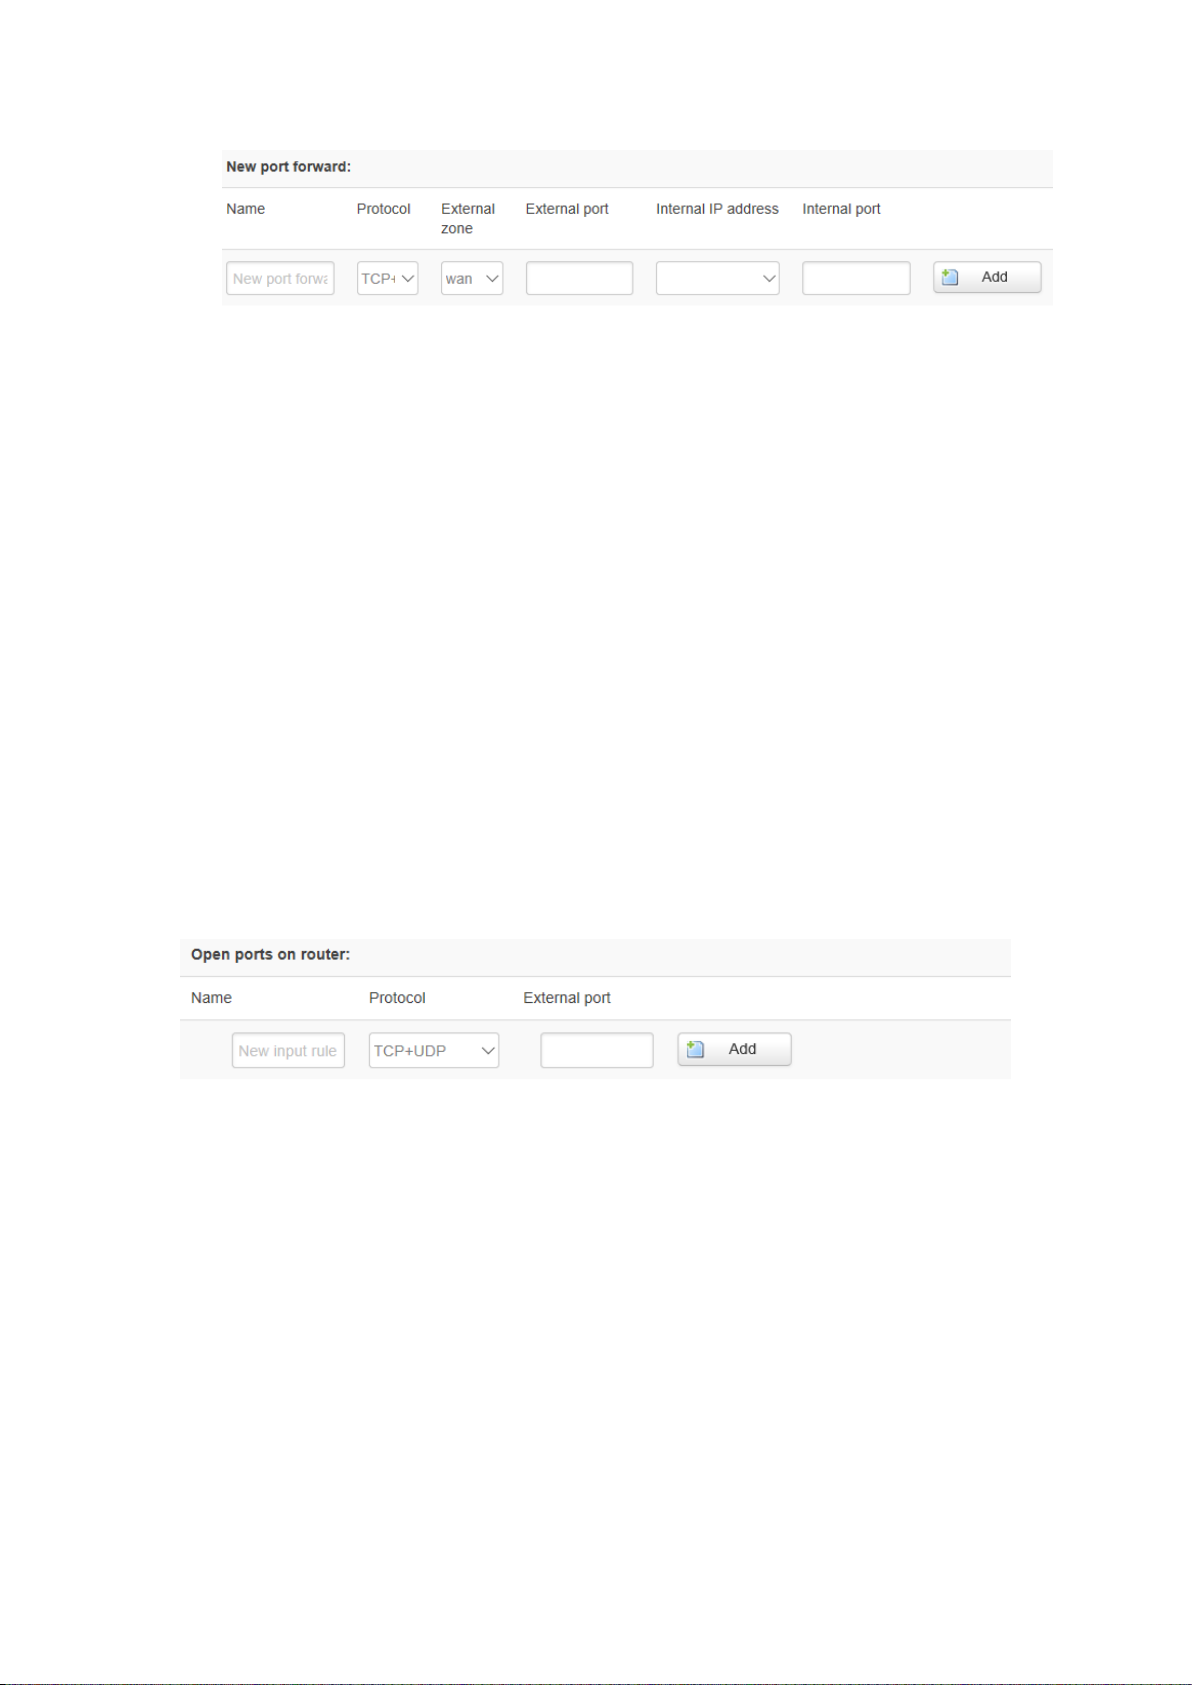
1) Name
You can name the rule you created.
2) Protocol
You can choose TCP, UDP, or TCP/UDP.
3) External Port
Destination port before port forwarding.
4) Internal IP Address
The Host IP address to forward.
5) Internal Port
The destination port after port forwarding. Normally, external port and internal port are the
same, but also can be different.
After configured above-mentioned, click ‘Add’, then a new rule will be added, and click
‘Save & Apply’, to have the rule take effect.
3.3.3 Traffic Rules
Trafficrules isusedforopeningsomerouter ports,such as remote accesstheconfiguration
page of router, you can open port 80; for remote SSH connection, you can open port 22.
1) Name
You can name the rule yourself.
2) Protocol
Choose the protocol of you want to forward can be TCP, UDP, or TCP/UDP.
3) External Port
Choose the port you want to open.
In addition, traffic rule can be used for creating some access control rules, it can be
from LAN to WAN, or WAN to LAN.

1) Name
You can name the rule yourself.
2) Source Zone
You can choose where to start the data packet.
3) Destination Zone
You can choose where to forward the data packet.
Click ‘Add and Edit’, then you can get more detailed matching condition.
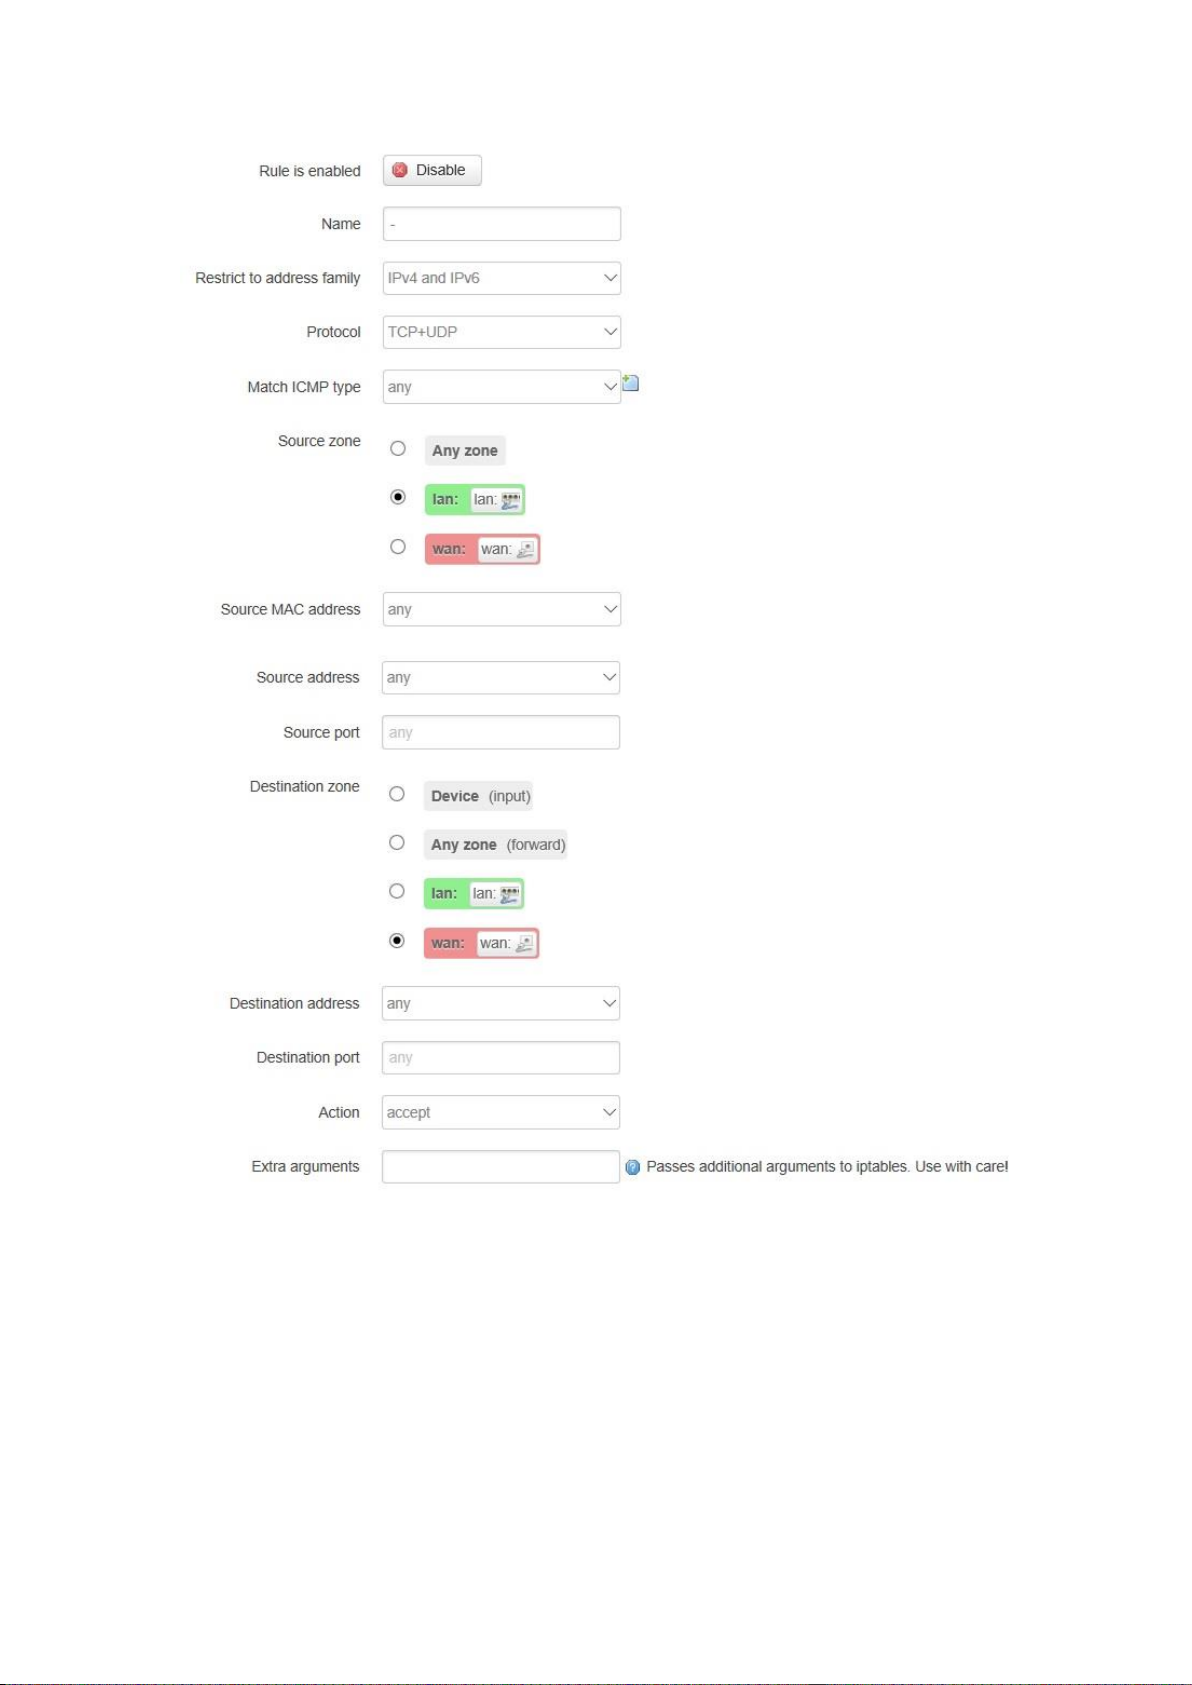
1) Restrict to Address Family
You can choose IPv4, IPv6, or Pv4/IPv6.
2) Protocol
To choose the protocol you want for access control, it can TCP, UDP or TCP/UDP.
3) Source MAC Address
To choose the source MAC address of data packet.
4) Source Address
To choose the source IP address of data packet.
5) Source Port
This manual suits for next models
2
Table of contents
Other Bivocom Gateway manuals


