manuals.online logo
Brands
  1. Home
  2. •
  3. Brands
  4. •
  5. BIXOLON
  6. •
  7. Printer
  8. •
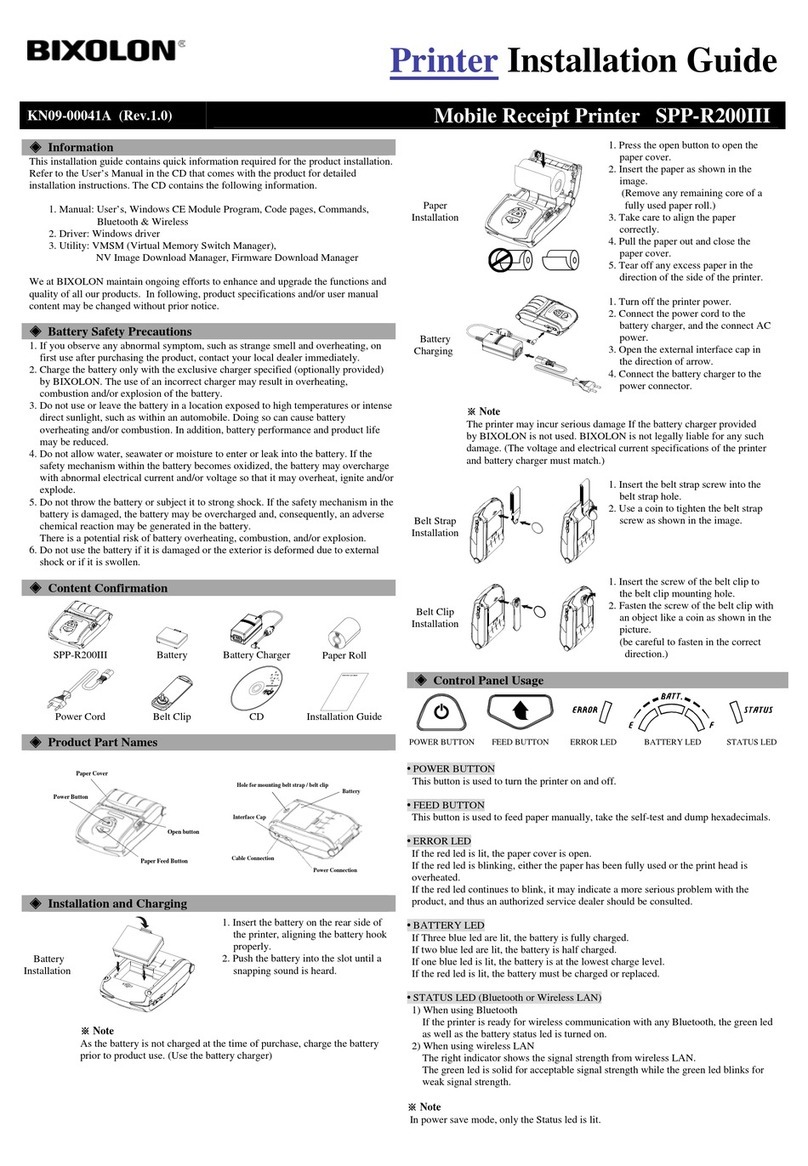
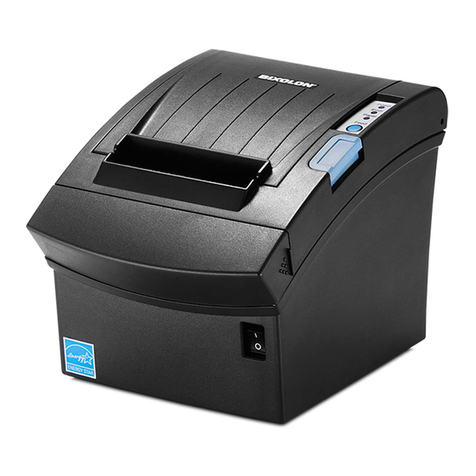
  9. BIXOLON XM7-30 User manual

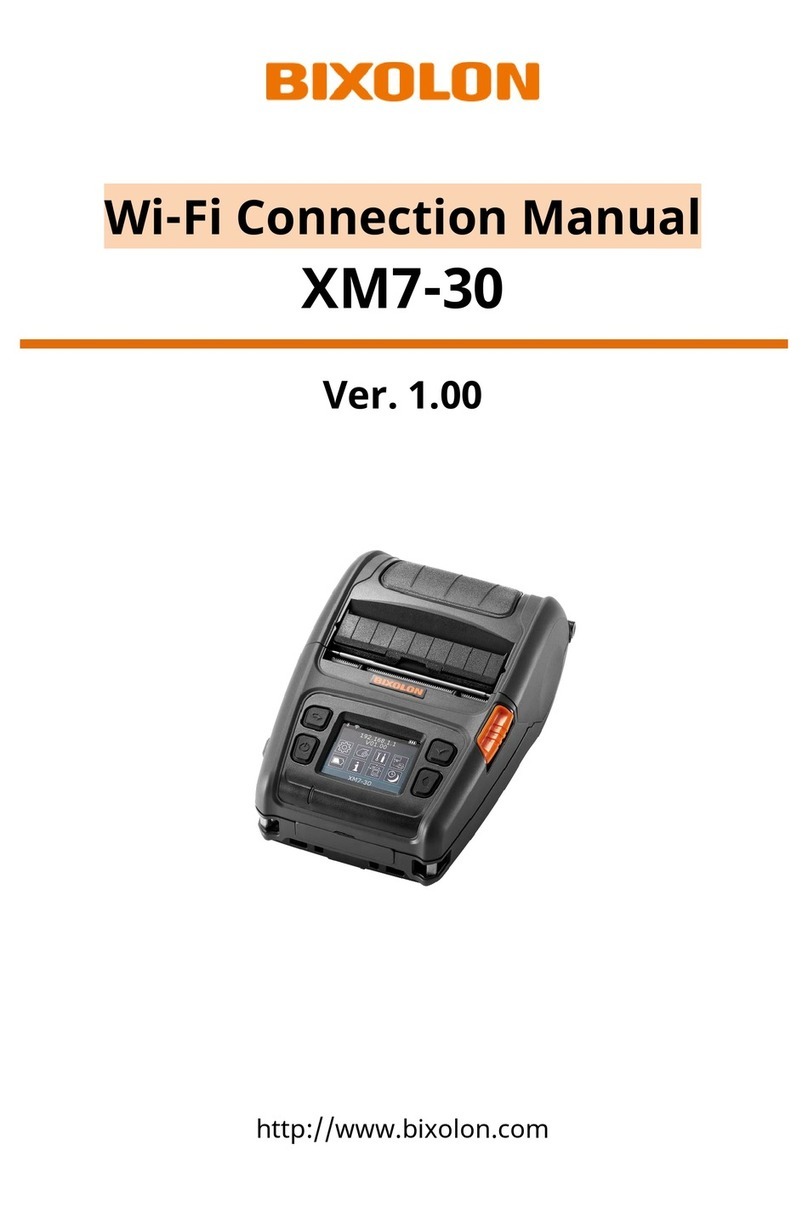
BIXOLON XM7-30 User manual


◈Information
Thisinstallationguidecontainsquickinformationrequiredfortheproductinstallation.
RefertotheUser’sManualinthewebsitethatcomeswiththeproductfordetailed
installationinstructions.Thewebsitecontainsthefollowinginformation.

1.Manual:User’s,Bluetooth&Wi-FiConnection,SLCSProgramming,CodePages,
Software
2.Driver:Windows,OPOS,Linux&MacCUPS
3.SDK:Android,Linux,Windows,iOS
4.Utility:NetConfigurationTool,UnifiedLabelUtility-II
5.LabelDesign:LabelArtist-II

WeatBIXOLONCo.,Ltd.maintainongoingeffortstoenhanceandupgradethefunctions
andqualityofallourproducts.Thefollowing,productspecificationsand/orusermanual
contentmaybechangedwithoutpriornotice.
PleaserefertotheBIXOLONwebsitefortheaddressesandphonenumbersofthe
company'sheadquartersandbranchoffices.

◈ContentConfirmation


XM7-30


SmartBattery


AC/DCAdapter


PowerCord


BeltStrap

InstallationGuide

GuideDisks
(for12mm(0.47inch)
innerdiameter)

◈ProductPartNames

MediaCover
PowerButton
LCD
MediaFeedButton
Peeler
MenuMoveButton
MenuSelectButton
OuterTerminalCover
CoverOpenButton
Charge
IndicationLED
ShoulderStrapRing
PowerPort
Battery
Holeformountingbeltstrap
CablePort
InterfaceCap

◈InstallationandCharging

Battery
Installation

1)Insertthebatterytothebottom
oftheprinter,andensurethatyou
alignthebatteryhookcorrectly.
2)Pushthebatteryintotheslot
untilyouhearitsnapinplace.
Thebatteryissolduncharged.
Media
Installation

1)PresstheOpenbuttontoopenthe
mediacover.
2)Fullyopenthemediacoverand
insertthemediaasshown.
(Removetheemptymediacore)
3)Checktheorientationofthemedia
wheninsertingitintotheprinter.
4)Pulloutthemediaasshownand
closethemediacover.
Battery
Charging
①②
③
1)Turnofftheprinterpower.
2)Connectthepowercord②tothe
AC/DCadapter①andthen
connectACpower.
3)Opentheexternalinterfacecapin
thedirectionof③.
4)ConnecttheAC/DCadaptertothe
powerport.

•TheprintermayincurseriousdamageiftheAC/DCadapterprovidedbyBIXOLONis
notused.BIXOLONisnotlegallyliableforanysuchdamages.
•Thevoltageandelectricalcurrentspecificationsoftheprinterandbatterycharger
mustmatch.)
BeltStrap
Installation

Belt Strap
Coin


1)Insertthebeltstrapscrewintothebelt
straphole.
2)Useacointotightenthebeltstrap
screw.Asshownintheimage.

◈ControlPanelUsage

 
PowerButtonMediaFeedButtonMenuMoveButtonMenuSelectButton
•PowerButton
Thisbuttonisusedtoturntheprinteron,off,tomovetomainmenuortooperatethe
action.
1)Whentheprinterisoff,pressthisbuttonforapproximately2secondstoturnon
thepower.
2)Whentheprinterison,pressthisbuttonforapproximately2secondstoturnoff
thepower.
3)PressingthisbuttonwhiletheLCDmenuisbeingoperatedmovestothemain
menuortooperatetheselectedactionfromthemenu.

•MediaFeedButton
Thisbuttonisusedtofeedthemediamanuallyorreturntothepreviousstep.
1)Pressandholdthisbuttonwhiletheprinterisbootingtoprintaself-testpage.
2)Pressthisbuttoninthestandbymodetofeedthemedia.
3)Pressthisbuttontoreturntothepreviousmenu.

•MenuMoveButton
ThisbuttonisusedtomovetheLCDmenu.
PressthisbuttontomovetheLCDmenufromthetoplefttothebottomright.

•MenuSelectButton
ThisbuttonisusedtoselecttheLCDmenu.
PressthisbuttontoselecttheLCDmenuorsavetheselectedsettingstotheprinter.


◈Self-test
Thisfunctionisindependentofsuchotherdevicesandsoftware.
Runtheself-testtocheckthesettinginformationwhenyouaresettinguptheprinterforthe
firsttimeorifthereisaproblem.

Ifnoissueisfoundwiththeprinterafterrunningtheself-test,examinetheotherdevices
runningonthesystemorperipheralsandsoftware.

•Self-TestInstructions
1)TurntheprinterpoweronandgotoTools>PrintPrinterConfigmenuontheLCD
2)Pressthepowerbutton(Print)toruntheself-test.
3)Theprintersettingsinformationisprintedonthefirstpage,andthewirelessinterface
informationisprintedonthenextpage.
4)Afterthewirelessinterfaceinformationisprinted,theself-testisautomatically
terminated.

◈PeripheralsConnection

1.Bluetooth&WirelessLanConnection
1)Theprintercanbeconnectedtodevices
equippedwithBluetoothcommunication
capacity(PDAs,PCs,etc.).
2)UsetheBluetoothconnectionfunction
supportedbythedevicetoconnecttothe
printer.
3)Theprintercanbeconnectedtoother
stations,suchasPDAsandPCssupporting
WirelessLancommunicationinAd-hoc
mode,SoftAPmodeandAPinnfrastructure
mode.

•RefertotheBluetooth&Wi-FiConnectionManualfordetailedinformationon
itsconnection.
•YoucanchecktheBluetoothenvironment(authentication,encryption,
connectionmode)andtheWirelessLanenvironment(IP,SSID,authentication,
encryption)viatheself-testpage.
①
②
2.InterfaceCableConnection
1)OpentheInterfaceCap①.
2)Connecttheexternalcommunicationcable
②tothecableportoftheprinter.
3)ConnecttheinterfacecabletotheUSBport
ofthedevice(PDAs,PCs,etc.).


TheinterfacecablethatcanbeconnectedtotheprinteristheSerial/USB
Type-C®cableprovidedbyBIXOLON(optional)orUSBType-C®cable
supportingUSB2.0.












PrinterInstallationGuide
KN09-00075A(Ver.1.0)MobilePrinterXM7-30


◈ProductSpecifications

ItemDescription
Printing
PrintingMethodDirectThermalPrinting
PrintingSpeedUpto127mm/s(5ips)
Resolution203dpi
Font
10SLCSResidentBitmapFonts
OneSLCSResidentScalableFont
16BPL-Z™ResidentBitmapFonts
OneBPL-Z™ResidentScalableFont
7BPL-C™ResidentBitmapFonts
23CodePage
Unicodesupported(UTF-8,UTF-16LE,UTF-16BE)
Barcode
1D:Codabar,Code11,Code39,Code93,Code128,
EAN-13,EAN-8,Industrial2-of-5,Interleaved2-of-5,
Logmars,MSI,Plessey,Postnet,GS1DataBar(RSS-14),
Standard2-of-5,UPC/EANextensions,UPC-A,UPC-E,IMB
2D:Aztec,Codablock,Code49,DataMatrix,MaxiCode,
MicroPDF417,PDF417,QRcode,TLC39
EmulationSLCS,BPL-Z™,BPL-C™
SensorGapSensor,BlackMarkSensor,
MediaCoverOpenSensor,Peel-offSensor
CutterTypeTear-bar
LanguageUserlanguagesupported
Media
MediaFormLabelmediaLinerlessmedia
MediaTypeThermalMediaThermalMedia
Diameter Max.Ø66mm(2.60inch)Max.Ø66mm(2.60inch)
Width
25~80mm(0.99~3.15inch)25~80mm(0.99~3.15inch)
Thickness0.07~0.19mm0.08±0.01mm

◈PrinterCleaning
Printhead (A)
Sensor(B)

1)Turnofftheprinteranddisconnectallcablesfromtheproduct.
2)Openthemediacoverandremoveanymediainside.
3)Cleantheprinthead(A)usingtheclothorcottonswabsoakedinalcohol(formedicaluse).
4)Usingtheclothorcottonswabsoakedinalcohol,removethemediadust
fromtheblackmarksensor(B).(Sensorcouldbelocatedinthemiddleoronleftoron
right)
5)Donotusetheprinterforonetotwominutesaftercleaninguntiltheliquidhascompletely
evaporatedordried.
6)Insertthemediaandclosethemediacover.

•Theheadisveryhotwhiletheprinterisrunning.
Whencleaningthehead,becarefulnottotouchtheheatedpartoftheheadwith
yourhands.
•Theheadmaybedamagedbystaticelectricity,etc.
•Becarefulnottoscratchthehead.
•BesuretouseonlygenuinelinerlessmediasuppliedbyBixolon.
Otherwise,post-salesupportmaynotbeavailable.
•Besuretoturnoffthepowerbeforeyouproceedwithcleaning.
•Whenusinglinerlessmedia,cleantheheadperiodicallyafterusing4rollsofmedia
(100m)oratleastonceaweek.Otherwise,theproductmayfailandprintquality
maybecompromised.

◈WEEE


Thismarkingshownontheproductoritsliterature,indicatesthatitshouldnotbe
disposedofwithotherhouseholdwastesattheendofitsworkinglife.Toprevent
possibleharmtotheenvironmentorpeoplefromuncontrolledwastedisposal,
pleaseseparatethisfromothertypesofwastesandrecycleitresponsiblyto
promotethesustainablereuseofmaterialresources.Householdusersshould
contacteithertheretailerwheretheypurchasedthisproduct,ortheirlocal
governmentoffice,fordetailsofwhereandhowtheycantakethisitemfor
environmentallysaferecycling.Businessusersshouldcontacttheirsupplierand
checkthetermsandconditionsofthepurchasecontract.Thisproductshouldnot
bemixedwithothercommercialwastesfordisposal.

◈BatterySafetyPrecautions
1.Ifthebatteryisnotchargedafterthechargingtime,stopchargingandcontacttheseller.
2.Storeandusethebatterywhereitwillnotcomeintodirectcontactwithliquid(water,saltwater
etc.)astheremaybeariskofoverheating,rupturingorigniting.
3.Avoidexposingthebatterytohightemperaturesover50℃anddonotstoreoruseitinaplace
withhightemperatureandhumidity.Theremaybeariskofoverheating,rupturingorigniting.In
addition,itmayreducetheperformanceandlifeofthebattery.Thereisariskofexplosion,
especiallywhenthebatteryisplacedbyafireorstorednearaheatingdevice(e.g.,heater,etc.).
4.Besuretoonlyuseanadapterorchargerapprovedbyustochargethebattery.Useofanyother
adapterorchargermayreducebatteryperformanceandlife,orcauseariskofoverheating,
rupturingorigniting.
5.Avoidcausinganystrongimpacttothebatteryorthrowingit.Theprotectivedeviceinsidethe
batterymaybedamaged,whichmayreducethebatteryperformanceandlife,ortheremaybea
riskofoverheating,rupturingorigniting.
6.Donotdisassembleormodifythebattery.Thebatterycontainssafetyandprotectiondevicesto
preventdanger.Itmayreducebatteryperformanceandlifeduetodamage,ortheremaybearisk
ofoverheating,rupturingorigniting.
◈SafetyPrecautions


WARNING&CAUTION
Isdescribedasdeath,physicalinjuries,seriousfinanciallosses,and
damagetodataetc.thatcanbecausedtotheuser.

 

 



 

 

 














Ifthereisaproblemwiththeproduct,
pleasecontacttheoriginalplaceof
purchaseorthroughBIXOLON
website’sproductrepairpage
(http://www.bixolon.com).
Donotletanyforeignsubstances
entertheproduct.Donotplaceheavy
objects,liquids,ormetalsonthe
product.Thiscouldcausedamageto
theproductorafire.

Neverindependentlydisassemble,
repair,ormodifytheproductasthe
warrantywillbecomeinvalid.
Whenrepairisnecessary,contact
theoriginalplaceofpurchase.
Installtheproductinafixedplacepreventingit
fromtippingover.Whenmovingtheproduct,
turnoffthepoweranddisconnectallconnected
cables,includingthepowercord.Itmay
damagetheproduct.

Installtheproductinawell-ventilatedareabykeepingitacertain
distancefromthewall.Theproductinstalledincertainplacessuch
aswherealotoffinedustisgenerated,wherethetemperatureis
toohighortoolow,wherethereisalotofmoistureorwater,andat
airportsorstationsthatareusedcontinuouslyforalongtimemay
sufferseriousqualityproblemsduetotheinfluenceofthe
surroundingenvironment.Anincreaseininternaltemperature
maystartafire.Besuretocontacttheplaceofpurchaseifyou
areunsureofproductplacement.
Iftheproductemitsastrangesound,burningsmell,or
smoke,turnoffthepowerimmediatelyandunplug
thepowercord.Iftheproductisdroppedorits
exteriorisdamaged,turnoffthepowerimmediately
andunplugthepowercord.Donotsubjectthe
producttoshock.Thiscouldcausedamagetothe
productorafire.
Donotallowtheproducttobe
damagedbyheavyobjects.
Noncompliancemaycauseelectric
shockorfire.
Keepexcessiveliquidsawayfromthepower
cordandoutlet.Ifmatterissmearedonto
thepowercords,wipewithadrycloth.
Noncompliancemaycauseelectricshock
orfire.

Keepsmallaccessoriesorotherpackagingmaterials
awayfromyoungchildren.Beware:chokinghazard.
Mishandlingtheproductmayincurinjuries
whichmayrequireseekingurgentmedical
attention.


Donotexcessivelybendorstrainthepowercord.
Securelypushthepowercordallthewayintothe
poweroutletlestitremainloose.Makesureto
holdthecordtightwhenseparatingitfromthe
poweroutlet.Donotremovethepowercord
whiletheproductisinuse.Noncompliancemay
causeelectricshockorfire.
OnlyuseauthenticproductsfromBIXOLON.
Thecompanywillnotprovidepost-sale
supportfordamagedorotherquality
issuesthatanyfake(orrefurbished)
productsmayincur.
Donotconnectmultipleproductstoa
singleorfaultypoweroutlet.
Onlyusegroundedpoweroutletsthat
meettheindustrystandard.
Noncompliancemaycauseelectric
shockorfire.

◈안내
본설치안내서는제품설치에필요한간단한정보만기록하고있습니다.자세한설치안내는웹사이트의
사용설명서를참고하십시오.웹사이트에포함되어있는내용은아래와같습니다.
1.매뉴얼:사용자,블루투스&와이파이연결,SLCS프로그래밍,코드페이지,소프트웨어
2.드라이버:Windows,OPOS,Linux&MacCUPS
3.SDK:Android,Linux,Windows,iOS
4.유틸리티:NetConfigurationTool,UnifiedLabelUtility-II
5.라벨디자인:LabelArtist-II
저희빅솔론은제품의기능과품질향상을위하여지속적인개선을하고있습니다.
이로인하여제품의사양과매뉴얼의내용은사전통보없이변경될수있습니다.
빅솔론의본사및지사주소와전화번호는빅솔론홈페이지를참고하시기바랍니다.

◈구성품확인

XM7-30


스마트배터리


AC/DC어댑터


전원코드


벨트스트랩


설치안내서

미디어디스크
(지관내경
12mm(0.47inch))
◈제품의주요명칭

미디어커버
전원 버튼
LCD
용지 이송 버튼
필러
메뉴 이동 버튼
메뉴 선택 버튼
외부 충전 단자 커버
미디어커버 열림 버튼
충전 LED
어깨끈 고리
전원 포트
배터리
벨트 스트랩 고정 홀
케이블 포트
인터페이스 캡

◈설치및충전

배터리
설치
1)그림과같이프린터밑면에배터리의
훅(hook)을결합하세요.
2)딸깍하는소리가날때까지프린터에
배터리를밀어넣으세요.
배터리는충전되지않은상태로판매됩니다.
미디어
설치


1)열림버튼을눌러미디어커버를
열어주세요.
2)홀더를그림과같이벌린후,미디어를
넣어주세요.
3)미디어를넣을때에는미디어의방향이
정확한지확인하세요.
4)그림과같이미디어를앞으로당긴다음
미디어커버를닫아주세요.
배터리
충전
①②
③
1)프린터전원을꺼주세요.
2)AC/DC어댑터①에전원코드②를
연결하고AC전원을연결하세요.
3)③의방향으로외부인터페이스
보호캡을열어주세요.
4)충전포트에AC/DC어댑터를
연결하세요.


•반드시전원을종료하고,배터리를충전하세요.
•반드시빅솔론에서공급하는정품만사용하세요.
그렇지않을경우제품의고장원인이되거나사용자의부상위험이있습니다.

벨트
스트랩
설치

Belt Strap
Coin


1.벨트스트랩고정홀에벨트스트랩의스크류를
삽입하세요.
2.그림과같이동전등으로벨트스트랩스크류를
체결하세요.

◈조작부사용법

 
전원버튼미디어이송버튼메뉴이동버튼메뉴선택버튼

•전원버튼
이버튼은전원을켜거나끌때,LCD메인메뉴복귀/동작실행시사용합니다.
1)프린터가꺼졌을때이버튼을2초정도누르고있으면전원이켜집니다.
2)그리고프린터가켜져있을때2초동안이버튼을누르면전원이꺼집니다.
3)LCD메뉴를조작중인상태에서이버튼을누르면메인메뉴로이동하거나,메뉴에서선택된동작이
실행됩니다.

•미디어이송버튼
이버튼은미디어를이송하거나,LCD메뉴에서전단계로복귀시사용합니다.
1)프린터가부팅되는동안이버튼을누르고있으면셀프테스트페이지가출력됩니다.
2)부팅이완료된후대기상태에서이버튼을누르면미디어를이송합니다.
3)LCD메뉴이동후,이버튼을누르면이전메뉴로되돌아갑니다.

•메뉴이동버튼
이버튼은원하는LCD메뉴로이동하기위해사용합니다.
이버튼을누르면LCD메뉴가좌측상단부터우측하단순서대로이동됩니다.

•메뉴선택버튼
이버튼은LCD메뉴를선택할때사용합니다.
이버튼을누르면LCD메뉴가선택되거나,선택된설정이프린터에저장됩니다.

◈셀프테스트
이기능은다른장치나소프트웨어와독립적으로동작합니다.
프린터를처음설정하거나문제가있을경우실행하여프린터의설정정보를확인할수있습니다.
셀프테스트결과프린터에문제가없을경우다른장치나소프트웨어에문제가있을수있습니다.

•셀프테스트방법
1)프린터전원을켜고LCD 의도구>프린터설정인쇄메뉴로이동합니다.
2)전원버튼(Print)을누르면셀프테스트가실행됩니다.
3)첫페이지에프린터설정정보가인쇄되고,다음페이지에무선인터페이스정보가출력됩니다.
4)무선인터페이스정보가출력되고나면셀프테스트가자동으로종료됩니다.

◈외부장치연결

1.블루투스및무선랜연결
1)프린터는블루투스통신이가능한단말기(PDA,PC
등)와연결이가능합니다.
2)단말기에서지원하는블루투스연결기능을사용하여
프린터와연결합니다.프린터에내장된NFC태그를
이용하여단말기와프린터간자동페어링이가능합니다.
3)프린터는Ad-hoc 모드,SoftAP 모드를통해무선랜
통신이가능한단말기(PDA,PC등)와연결이가능하며,
Infrastructure모드를통해AP 와연결이가능합니다.

•자세한내용은블루투스&와이파이연결매뉴얼을참고하세요.
•설정된블루투스환경(authentication,Encryption,connectionmode)및무선랜
환경(IP,SSID,authentication,encryption)은셀프테스트를통하여확인할수있습니다.
①
②
2.인터페이스케이블연결
1)①인터페이스캡을열어주세요.
2)프린터의케이블포트에인터페이스
케이블②을연결해주세요.
3)단말기(PDA,PC등)의USB포트에인터페이스
케이블을연결합니다.

인터페이스케이블은USB2.0 을지원하는USBType-C®케이블을사용하거나,
빅솔론에서공급(별도판매)하는시리얼또는USBType-C®케이블을사용할수있습니다.


프린터설치안내서
모바일프린터XM7-30
◈제품사양서

항목설명
인쇄
인쇄방식감열방식인쇄
인쇄속도최대127mm/s(5ips)
해상도203dpi
폰트
10SLCSResidentBitmapFonts
OneSLCSResidentScalableFont
16BPL-Z™ResidentBitmapFonts
OneBPL-Z™ResidentScalableFont
7BPL-C™ResidentBitmapFonts
23CodePage
Unicodesupported
(
UTF-8,UTF-16LE,UTF-16BE
)
바코드
1차원:Codabar,Code11,Code39,Code93,Code128,
EAN-13,EAN-8,Industrial2-of-5,Interleaved2-of-5,
Logmars,MSI,Plessey,Postnet,GS1DataBar(RSS-14),
Standard2-of-5,UPC/EANextensions,UPC-A,UPC-E,IMB
2차원:Aztec,Codablock,Code49,DataMatrix,MaxiCode,
MicroPDF417,PDF417,QRcode,TLC39
에뮬레이션SLCS,BPL-Z™,BPL-C™
센서갭센서,블랙마크센서,미디어커버센서,필러센서
커터유형매뉴얼커터(Tear-bar)
언어고객언어지원
RFID
주파수UHF,865~868MHz(EU),902~928MHz(KR,USA)
프로토콜ISO18000-6C(EPCClass1Gen2)
미디어
미디어형태라벨미디어라이너리스미디어
미디어종류감열지감열지
미디어외경최대Ø66mm(2.60inch)최대Ø66mm(2.60inch)
폭
25~80mm(0.99~3.15inch)25~80mm(0.99~3.15inch)
두께0.07~0.19mm0.08±0.01mm

◈프린터청소
헤드 (A)
센서 (B)

1)프린터의전원을종료하고모든케이블을제품과분리해주세요.
2)미디어커버를열고미디어가있으면제거해주세요.
3)의료용알코올에적신천이나면봉을사용하여프린터의헤드(A)부분을닦아주세요.
4)의료용알코올에적신천이나면봉으로미디어센서(B)의지분(미디어가루)을제거해주세요.
(센서는제품사양에따라중앙또는좌측또는우측에위치하고있습니다.)
5)청소후의료용알코올이완전히증발하여건조될때까지1~2 분동안프린터를사용하지마세요.
6)프린터에미디어를넣고프린터커버를닫아주세요.

•프린터가동작하는동안헤드부분은매우뜨거워져있습니다.
헤드청소시손으로헤드의가열부를만지지않도록주의하세요.
•헤드가정전기등에의해손상을입을수있습니다.
•헤드에흠집이발생하지않도록주의하세요.
•반드시빅솔론에서공급하는정품라이너리스미디어만사용하세요.
그렇지않을경우A/S지원이어려울수있습니다.
•반드시전원을종료하고,청소를진행해주세요.
•라이너리스미디어사용시미디어4롤(100 미터)사용후혹은일주일에1회이상
주기적으로헤드를청소해주세요.그렇지않을경우제품고장및인쇄품질에영향을줄수
있습니다.


◈배터리안전주의사항
1.충전시소정의충전시간이지나도충전이되지않을경우충전을중지하시고,구매처에문의하십시오.
2.배터리를액체(물,염수등)에닿지않는곳에서보관및사용하십시오.배터리의발열ㆍ파열ㆍ발화등의위험이
있습니다.
3.배터리를50℃이상의고온노출은피하고,고온다습한곳에서의보관및사용하지말아주십시오.
발열ㆍ파열ㆍ발화등의위험이있습니다.또,배터리의성능과수명을저하시킬수있습니다.
특히배터리를불속에넣거나발열장치(난방기기등)주변에보관할경우폭발의위험이있습니다.
4.배터리의충전은당사에서지정한전용어댑터또는충전기만을사용해야하며,임의의어댑터또는
충전기를사용할경우배터리성능과수명이저하되거나발열ㆍ파열ㆍ발화등의위험이있습니다.
5.배터리에강한충격을주거나던지지마십시오.배터리에들어있는보호장치가파괴되어배터리성능과
수명이저하되거나발열ㆍ파열ㆍ발화등의위험이있습니다.
6.배터리를분해하거나개조하지마십시오.배터리에는위험을방지하기위한안전기구및보호장치가
들어있습니다.손상으로인한배터리성능과수명이저하되거나발열ㆍ파열ㆍ발화등의위험이있습니다.


◈안전상의경고


주의&경고
사용자의사망또는신체적손상,심각한재산상의손상,
데이터등의정보손상을일으킬가능성이있는내용을설명합니다.
 





 

 

 








제품의문제가생겼을경우구입처로연락하세요.
또한,빅솔론홈페이지
(http://www.bixolon.co.kr)에서제품수리
동영상을제공하고있습니다.
제품 내부에 이물질이 들어가지 않도록 주의하세요.
제품 위에 무거운 물건이나 액체류나 금속류를
올려놓지 마세요. 화재의 위험이 있습니다.
제품 손상의 위험이 있습니다.
사용자 임의로 절대 분리, 수리, 개조하지
마세요. 수리가 필요할 때에는 구입처로
연락하세요.
제품이 넘어지지 않도록 고정된 장소에 설치하세요.
제품을 옮길 때에는 전원을 끄고 전원 코드 등 제품에 연결된
모든 선을 뽑아주세요. 제품을 들어서 옮길 때에는
떨어뜨리지 마세요. 제품 손상의 위험이 있습니다.
제품은 벽과 일정거리를 두어 통풍이 잘되는 곳에 설치하세요.
미세 먼지가 많이 발생하는 곳, 온도가 너무 높거나 낮은 곳,
습기나 물이 많은 곳, 장시간 연속적으로 사용하는 공항이나 역 등
특수한 장소에 설치된 제품은 주변 환경의 영향으로 심각한 품질
문제가 발생할 수 있습니다. 내부 온도 상승으로 인한 화재의
원인이 될 수 있습니다. 반드시 구입처에 문의 후 설치하세요.
제품에서 이상한 소리, 타는 냄새, 연기가 나면 즉시 전원을 끄고
전원 코드를 뽑아주세요. 제품을 떨어 뜨리 거나 외관이 파손된
경우 즉시 전원을 끄고 전원 코드를 뽑아주세요. 제품에 충격을
주지 마세요. 화재의 위험이 있습니다.
제품 손상의 위험이 있습니다.
무거운 물건에 눌리지 않도록 주의하세요.
감전 및 화재의 위험이 있습니다.
전원 코드를 꽂을 때 뽑을 때 젖은 손으로 만지지
마세요. 전원 코드의 핀 부위 또는 콘센트에
이물질이 묻어 있을 때에는 마른 천으로 깨끗이
닦아주세요. 감전및화재의위험이있습니다.
소형 액세서리 또는 포장물은 아이의 손에 닿지 않는 곳에
보관하세요. 아이가 삼키지 않도록 주의하세요.
제품을 잘못 다루어 부상의 위험이 있습니다.
만약 아이가 삼켰을 경우에는 즉시 의사와 상담하세요.
전원 코드를 무리하게 구부리거나 잡아당기지 마세요. 전원
코드가 흔들리지 않도록 안쪽 끝까지 정확히 꽂아 주세요. 전원
코드를 콘센트에서 분리할 때에는 반드시 코드를 잡고 분리해
주세요. 제품 사용 중에는 전원코드를 뽑지 마세요.
감전및화재의위험이있습니다.
반드시 빅솔론에서 공급하는 정품만
사용하세요. 유사품(재생품) 사용으로 인한
제품손상에 대한 품질 및 A/S 책임을 지지
않습니다.
하나의콘센트에여러제품을동시에연결하지
마세요.헐거운콘센트는사용하지마세요.
콘센트는규격제품을사용하세요.반드시접지된
콘센트에전원코드를연결하세요.감전및화재의
위험이있습니다.

Other manuals for XM7-30

2

Other BIXOLON Printer manuals

BIXOLON SLP-DV22 User manual

BIXOLON

BIXOLON SLP-DV22 User manual

BIXOLON STP-103 User manual

BIXOLON

BIXOLON STP-103 User manual

BIXOLON SRP-380 Installation and operating manual

BIXOLON

BIXOLON SRP-380 Installation and operating manual

BIXOLON SLP-TX420 Release note

BIXOLON

BIXOLON SLP-TX420 Release note

BIXOLON SRP-350PG - SRP 350 B/W Direct Thermal... User manual

BIXOLON

BIXOLON SRP-350PG - SRP 350 B/W Direct Thermal... User manual

BIXOLON SRP-E300 Installation and operating manual

BIXOLON

BIXOLON SRP-E300 Installation and operating manual

BIXOLON SPP-R300 User manual

BIXOLON

BIXOLON SPP-R300 User manual

BIXOLON Bixolon SRP-270 Installation instructions

BIXOLON

BIXOLON Bixolon SRP-270 Installation instructions

BIXOLON SRP-E300 User manual

BIXOLON

BIXOLON SRP-E300 User manual

BIXOLON SRP-350 PlusA User manual

BIXOLON

BIXOLON SRP-350 PlusA User manual

BIXOLON SRP-F310 Installation and operating manual

BIXOLON

BIXOLON SRP-F310 Installation and operating manual

BIXOLON SRP-340 User manual

BIXOLON

BIXOLON SRP-340 User manual

BIXOLON SRP-275 User manual

BIXOLON

BIXOLON SRP-275 User manual

BIXOLON SRP-QE300/302 Installation instructions

BIXOLON

BIXOLON SRP-QE300/302 Installation instructions

BIXOLON STP-103III User manual

BIXOLON

BIXOLON STP-103III User manual

BIXOLON XD3-40t User manual

BIXOLON

BIXOLON XD3-40t User manual

BIXOLON SRP-350plusA User manual

BIXOLON

BIXOLON SRP-350plusA User manual

BIXOLON SPP-R310 User manual

BIXOLON

BIXOLON SPP-R310 User manual

BIXOLON SPP-R200III User manual

BIXOLON

BIXOLON SPP-R200III User manual

BIXOLON STP-131 Mounting instructions

BIXOLON

BIXOLON STP-131 Mounting instructions

BIXOLON SRP-F310 Installation instructions

BIXOLON

BIXOLON SRP-F310 Installation instructions

BIXOLON XD5-40d Series User manual

BIXOLON

BIXOLON XD5-40d Series User manual

BIXOLON SRP-330 User manual

BIXOLON

BIXOLON SRP-330 User manual

BIXOLON SRP-B300 Instruction manual

BIXOLON

BIXOLON SRP-B300 Instruction manual

Popular Printer manuals by other brands

Logic Controls LR1100 user manual

Logic Controls

Logic Controls LR1100 user manual

Epson R320 - Stylus Photo Color Inkjet Printer Product information

Epson

Epson R320 - Stylus Photo Color Inkjet Printer Product information

SEWOO SLK-TL20X Series user manual

SEWOO

SEWOO SLK-TL20X Series user manual

Konica Minolta Magicolor 2490 MF Parts guide

Konica Minolta

Konica Minolta Magicolor 2490 MF Parts guide

Samsung CLP-350 user guide

Samsung

Samsung CLP-350 user guide

Epson Stylus Color 740i Start here

Epson

Epson Stylus Color 740i Start here

Canon MF275dw Setup guide

Canon

Canon MF275dw Setup guide

Lexmark MS410 series Specfications

Lexmark

Lexmark MS410 series Specfications

Eltron P210 Guide manual

Eltron

Eltron P210 Guide manual

Canon PIXMA MP150 Installation/troubleshooting

Canon

Canon PIXMA MP150 Installation/troubleshooting

Squid Ink CoPilot 500 user guide

Squid Ink

Squid Ink CoPilot 500 user guide

Sony UP-890CE Service manual

Sony

Sony UP-890CE Service manual

Digital Equipment DEClaser 2200 installation guide

Digital Equipment

Digital Equipment DEClaser 2200 installation guide

Lexmark Z65n quick start guide

Lexmark

Lexmark Z65n quick start guide

Epson C11CA27201 - WorkForce 40 Color Inkjet... Specifications

Epson

Epson C11CA27201 - WorkForce 40 Color Inkjet... Specifications

IBM RS/6000 44P Series 270 user guide

IBM

IBM RS/6000 44P Series 270 user guide

Ricoh SG 7100DN installation guide

Ricoh

Ricoh SG 7100DN installation guide

MIMAKI UJF-7151 plus Operation manual

MIMAKI

MIMAKI UJF-7151 plus Operation manual

manuals.online logo
manuals.online logoBrands
  • About & Mission
  • Contact us
  • Privacy Policy
  • Terms and Conditions

Copyright 2025 Manuals.Online. All Rights Reserved.