Network Interface
2) Self-test
While the printer is turned off, turn on the printer while pressing the feed button. The printer
setting values will then be printed with a beep sound.
*Output Message
SRP-F310 V01.00 STD 010110
================================
FPGA INFORMATION
BOARD VER.: 0x3
PROGRAM VER. : 0x11
DIP SWITCH STATUS
12345678
ON: *
OFF: ****** *
MEMORY SWITCH STATUS
MSW1 12345678
MSW2 12345678
MSW3 12345678
MSW4 12345678
MSW5 12345678
MSW6 12345678
MSW11 12345678
MSW12 12345678
SERIAL SETTING
BAUD RATE : 115200 BPS
DATABITS :8BITS
PARITY CHECK : NONE
STOP BITS : 1 BIT OR MORE
HANDSHAKING : DTR/DSR
ETHERNET SETTING
MAC ADDR: 00:11:22:33:44:55
LAN_DHCP disabled
IP ADDR : 192.168.192.123
NETMASK : 255.255.255.0
GATEWAY : 192.168.192.254
PORT : 9100
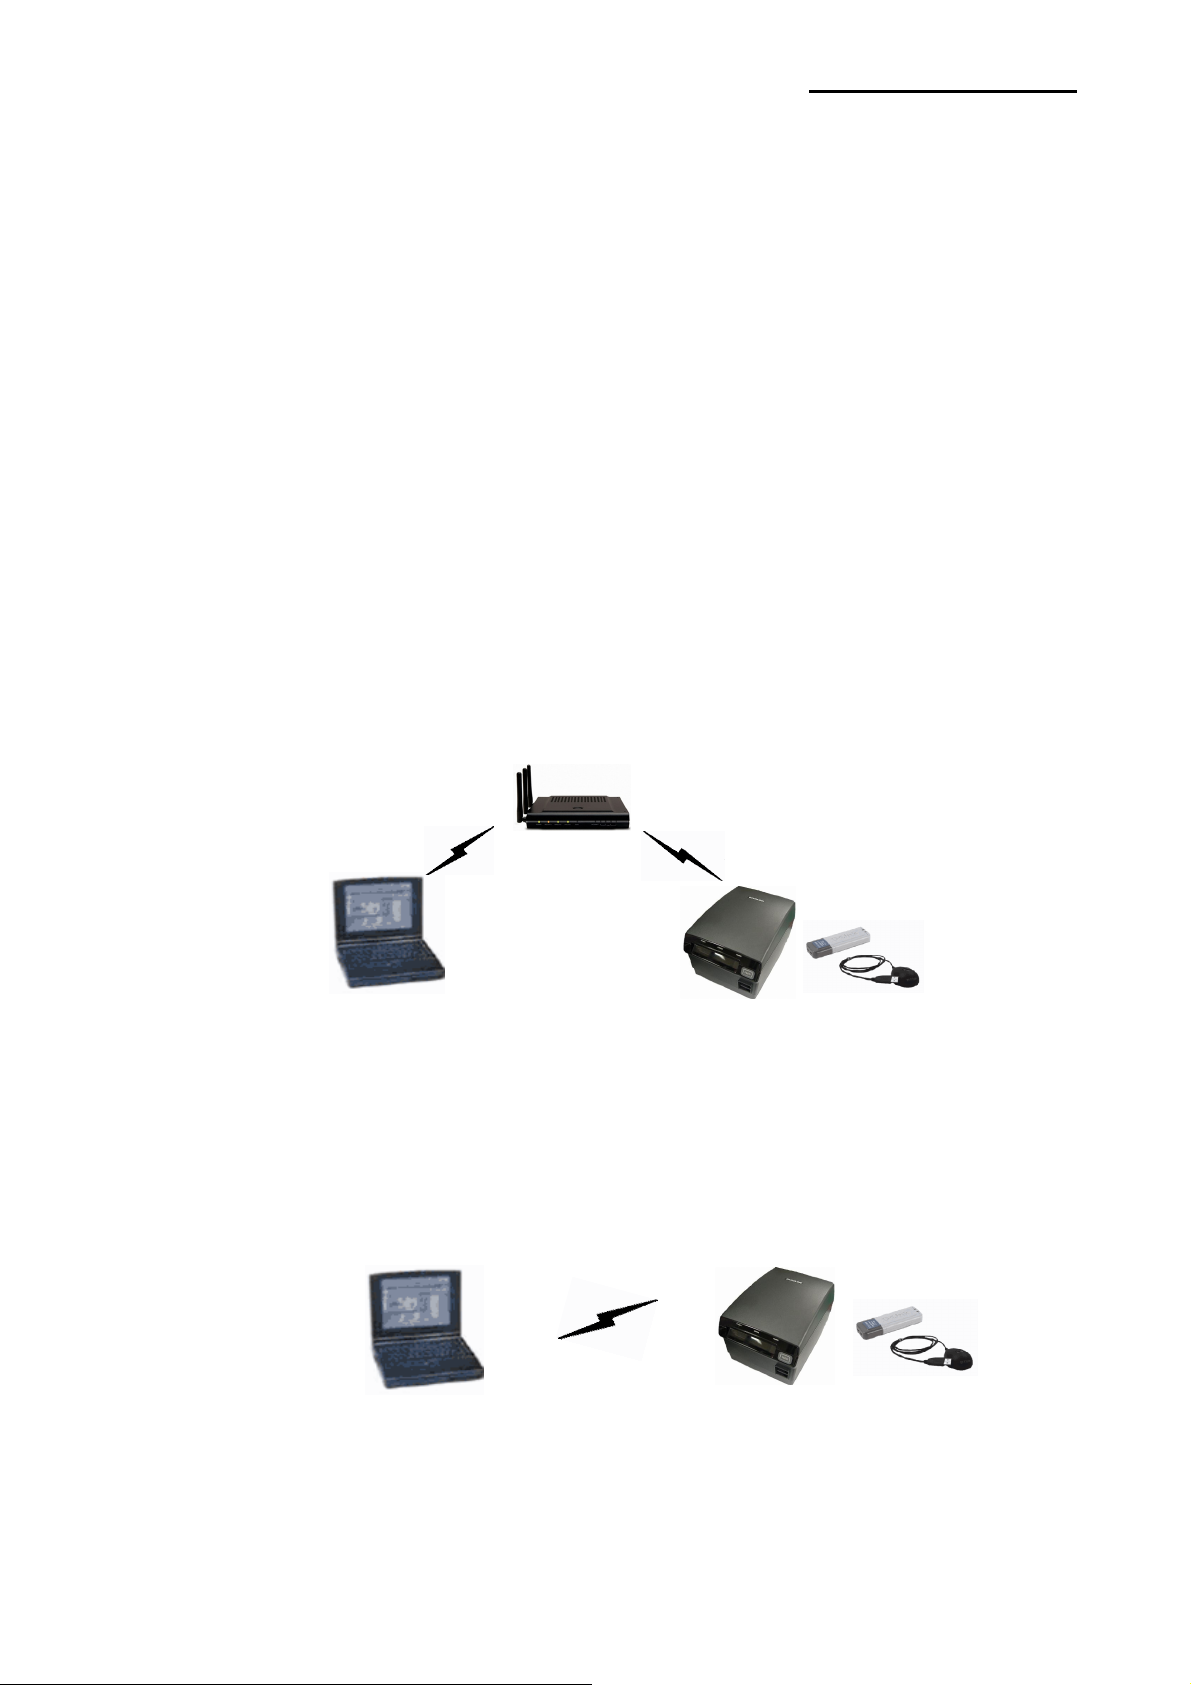
WLAN SETTING
NETWORK: adhoc
AUTH: open
ENCRYPT: none
ESSID: BIXOLON_adhoc
WLAN_DHCP disabled
IPADDR: 192.168.1.1
NETMASK: 255.255.255.0
GATEWAY: 192.168.1.2
PORT : 9100
BUFFER CAPACITY: 512KBYTES
PRINT DENSITY
LIGHT [ 1 2 3 4 ] DARK
*
SELF-TESTPRINTING
PLEASE PRESS THE FEED BUTTON
ASCII
!"#$%&'()*+,-./0123456789:;<=>?@
"#$%&'()*+,-./0123456789:;<=>?@A
#$%&'()*+,-./0123456789:;<=>?@AB
$%&'()*+,-./0123456789:;<=>?@ABC
%&'()*+,-./0123456789:;<=>?@ABCD
&'()*+,-./0123456789:;<=>?@ABCDE
'()*+,-./0123456789:;<=>?@ABCDEF
()*+,-./0123456789:;<=>?@ABCDEFG
)*+,-./0123456789:;<=>?@ABCDEFGH
*+,-./0123456789:;<=>?@ABCDEFGHI
+,-./0123456789:;<=>?@ABCDEFGHIJ
,-./0123456789:;<=>?@ABCDEFGHIJK
-./0123456789:;<=>?@ABCDEFGHIJKL
./0123456789:;<=>?@ABCDEFGHIJKLM
/0123456789:;<=>?@ABCDEFGHIJKLMN
0123456789:;<=>?@ABCDEFGHIJKLMNO
123456789:;<=>?@ABCDEFGHIJKLMNOP
23456789:;<=>?@ABCDEFGHIJKLMNOPQ
3456789:;<=>?@ABCDEFGHIJKLMNOPQR
456789:;<=>?@ABCDEFGHIJKLMNOPQRS
56789:;<=>?@ABCDEFGHIJKLMNOPQRST
6789:;<=>?@ABCDEFGHIJKLMNOPQRSTU
789:;<=>?@ABCDEFGHIJKLMNOPQRSTUV
89:;<=>?@ABCDEFGHIJKLMNOPQRSTUVW
9:;<=>?@ABCDEFGHIJKLMNOPQRSTUVWX
PC437
ÇüéâäàåçêëèïîìÄÅÉæÆôöòûùÿÖÜ¢£¥
Pt
ƒ
üéâäàåçêëèïîìÄÅÉæÆôöòûùÿÖÜ¢£¥
Pt
ć
éâäàåçêëèïîìÄÅÉæÆôöòûùÿÖÜ¢£¥
Pt
ƒáí
âäàåçêëèïîìÄÅÉæÆôöòûùÿÖÜ¢£¥
Pt
ƒáíó
äàåçêëèïîìÄÅÉæÆôöòûùÿÖÜ¢£¥
Pt
ƒáíóú
àåçêëèïîìÄÅÉæÆôöòûùÿÖÜ¢£¥
Pt
ƒáíóúñ
åçêëèïîìÄÅÉæÆôöòûùÿÖÜ¢£¥
Pt
ƒáíóúñÑ
çêëèïîìÄÅÉæÆôöòûùÿÖÜ¢£¥
Pt
ƒáíóúñѪ
êëèïîìÄÅÉæÆôöòûùÿÖÜ¢£¥
Pt
ƒáíóúñѪº
ëèïîìÄÅÉæÆôöòûùÿÖÜ¢£¥
Pt
ƒáíóúñѪº¿
èïîìÄÅÉæÆôöòûùÿÖÜ¢£¥
Pt
ƒáíóúñѪº¿┌
ïîìÄÅÉæÆôöòûùÿÖÜ¢£¥
Pt
ƒáíóúñѪº¿┌┐
îìÄÅÉæÆôöòûùÿÖÜ¢£¥
Pt
ƒáíóúñѪº¿┌┐½
ìÄÅÉæÆôöòûùÿÖÜ¢£¥
Pt
ƒáíóúñѪº¿┌┐½¼
ÄÅÉæÆôöòûùÿÖÜ¢£¥
Pt
ƒáíóúñѪº¿┌┐½¼¡
ÅÉæÆôöòûùÿÖÜ¢£¥
Pt
ƒáíóúñѪº¿┌┐½¼¡«
ÉæÆôöòûùÿÖÜ¢£¥
Pt
ƒáíóúñѪº¿┌┐½¼¡«»
æÆôöòûùÿÖÜ¢£¥
Pt
ƒáíóúñѪº¿┌┐½¼¡«»▓
ÆôöòûùÿÖÜ¢£¥
Pt
ƒáíóúñѪº¿┌┐½¼¡«»▓▒
ôöòûùÿÖÜ¢£¥
Pt
ƒáíóúñѪº¿┌┐½¼¡«»▓▒░
öòûùÿÖÜ¢£¥
Pt
ƒáíóúñѪº¿┌┐½¼¡«»▓▒░┃
òûùÿÖÜ¢£¥
Pt
ƒáíóúñѪº¿┌┐½¼¡«»▓▒░┃┤
ûùÿÖÜ¢£¥
Pt
ƒáíóúñѪº¿┌┐½¼¡«»▓▒░┃┤╡
ùÿÖÜ¢£¥
Pt
ƒáíóúñѪº¿┌┐½¼¡«»▓▒░┃┤╡╢
ÿÖÜ¢£¥
Pt
ƒáíóúñѪº¿┌┐½¼¡«»▓▒░┃┤╡╢╖
Rev.1.02 - 7 -