manuals.online logo
Brands
  1. Home
  2. •
  3. Brands
  4. •
  5. Cochlear
  6. •
  7. Recording Equipment
  8. •
  9. Cochlear Nucleus CP810 User manual

Cochlear Nucleus CP810 User manual

Nucleus® CP810 Sound Processor
Quick Reference Guide Quick press
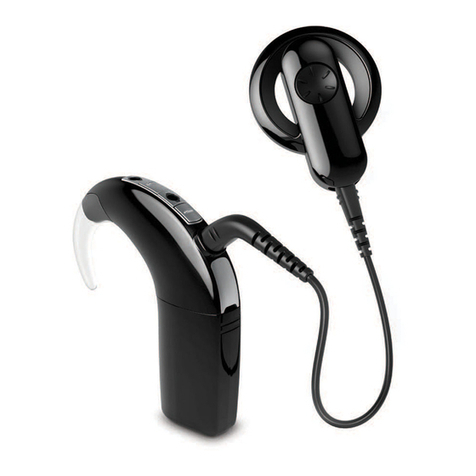
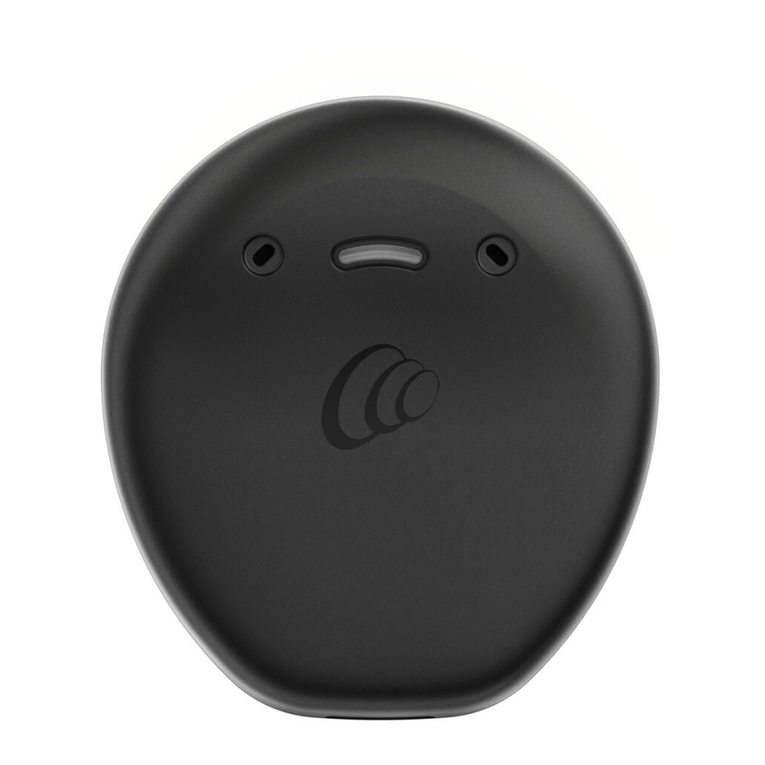
Your sound processor
OFF
Press and hold both
buttons at the same
time until you see the
steady orange light
ON and OFF
Press and hold
Quick press
both buttons at
the same time
Quick press both
buttons at the
same time
How to . . .
Change programs
Press and hold
Lock or unlock processor buttons
Turn your processor on and off
How to . . .
Adjust volume or sensitivity
Simple option
Use the Remote
Assistant.
Refer to the other
side of this guide.
How to . . .
Switch to and from telecoil input
Press and hold
Switch to and from accessory input *
Understanding the indicator lights
Light What it means
You are turning on your processor OR
You are changing programs.
The number of fl ashes corresponds to the number of the
selected program. For example, if you see three fl ashes,
you are using program three.
You are changing volume or sensitivity.
(Advanced option only.)
You are changing from microphones to telecoil or
accessory.
You are changing from telecoil or accessory to
microphones.
The microphones are capturing sound.
Understanding the indicator lights
Light What it means
You are locking your processor’s buttons.
You are unlocking your processor’s buttons.
The coil may be off OR your processor is not connected
to the correct implant.
Your processor’s buttons are locked.
Your processor’s battery is empty.
If you are pressing the lower button, you are turning off
your processor OR
There may be a fault with your processor. Contact your
clinician.
For more information about your processor, refer to the CP810 Sound
Processor User Guide.
Quick press
* Connect the
accessory before
switching
Quick press to increase
Quick press to decrease
Quick press
Simple
Advanced Simple
Advanced Simple
Advanced
ON
Press and hold the
lower button
Press and hold
Understanding private tones
Tone What it means
Single high tone You are changing volume or sensitivity.
(Advanced option only.)
Short high tones You are changing programs. The number
of tones corresponds to the number of the
selected program. For example, if you hear
two tones, you have changed to program
two.
Single long high tone You are changing from microphones to
telecoil or accessory OR
You are changing from telecoil or accessory
to microphones.
Single short low tone Your processor’s buttons are locked.
Two short low tones Your processor’s battery is low.
Sequence of short low
tones
Your processor’s battery is empty.
Sequence of long low
tones
There may be a fault with your processor.
Contact your clinician.
1 2
3
12
3
Coil
Coil magnet
Indicator light
Upper button Microphones
Lower button
Processing unit
Coil cable
Accessory
socket cover
Battery module
Battery cover lock
(Standard module only)
How to . . . How to . . .
Replace zinc air batteries Detach the battery module
Printed in Australia
217132 ISS3
English
Notes Notes
..................................................................................
..................................................................................
..................................................................................
..................................................................................
..................................................................................
..................................................................................
..................................................................................
..................................................................................
..................................................................................
..................................................................................
..................................................................................
..................................................................................
..................................................................................
..................................................................................
..................................................................................
..................................................................................
..................................................................................
..................................................................................
..................................................................................
..................................................................................
EverydayNoise
EverydayNoise
Your remote assistant
Make sure your processor and remote assistant are turned on. Your remote assistant is automatically in Simple mode when you
turn on your remote assistant for the first time. You can access
Advanced mode, by pressing the upper left soft key when the
remote assistant battery status screen displays.
To switch between Advanced and Simple modes:
Turn off your remote assistant and turn it back on.
When the battery status screen displays, press the upper left
soft key to select Advanced mode, or the upper right soft key
to select Simple mode.
Place the coil
on the back of
your remote
assistant.
A pairing confirmation displays.
How to . . .
Nucleus® CR110 Remote Assistant
English
Quick Reference Guide
How to . . . How to . . . How to . . .
Reset processor to values set by your clinician
Adjusting processor settings (Advanced mode only)
Icon What it means
T
Adjust the telecoil and microphone mixing ratio.
A
Adjust the accessory and microphone mixing ratio.
Change your processor’s sound ok indicator preferences.
Change your processor’s alert and key press indicator
preferences.
Enable or disable private tones.
Press the soft key corresponding to the program you want to use.
Use Focus when
you are in a noisy
environment and
want to focus on
hearing what one
person or a small
group of people are
saying.
Use Noise when
there is ongoing
background noise
coming from all
sides.
Use Music when you
want to listen to any
type of music from
any audio source.
Use Everyday when
you are in typical
everyday listening
situations without
much background
noise.
Change programsPair your remote assistant and processor Select Simple or Advanced mode Turn on auto telecoil* Use Demo mode
Switch from auto telecoil to telecoil on and off
1 2 3
AUTO
AUTO
Check the
status indicator
Soft keys
Soft keys
Turn telecoil
on/of f
Lock/unlock
the keypad
Adjust volume
Volume controls
your perception of
loudness.
Turn on/off (Press and hold) 
Check processor status
Return Home
Adjust sensitivity
Sensitivity controls
the softest level of
sound picked up by
the microphones.
How to . . . How to . . .
Press and hold both the
lower left and lower
right soft keys at the
same time from the
Home screen.
Press lower
right soft key
to confirm
reset.
Press the Cochlear key from the Home screen to check the
status of your processor(s).
Check the status of your processor
Processor
status is OK
Processor
battery level
Audio input
level
Press and
hold
When auto telecoil is enabled, the telecoil automatically
turns on when you use the telephone or enter a room
loop environment.
Quick
press
Auto telecoil* on Telecoil* on Telecoil off
3
* Your clinician must enable this feature.
1 2 3
Bilateral users: Repeat steps 2 and 3.
12
EverydayNoise
Reset
1
1
2
2
4
Press lower
right soft key.
Access Advanced
mode
Access Simple
mode
Pair
+
3
Home screen
How to . . . How to . . . How to . . .
Select remote assistant language
After turning on remote assistant, language select screen
displays if remote assistant is not paired.
Press lower left
soft key
Press lower right
soft key
EverydayNoise
English
Checking the status indicator
Indicator What it means
Your processor is within operating distance of your
remote assistant and they are communicating with each
other.
Your processor is not communicating with your remote
assistant. For example, they are not within operating
distance of each other, or they are not paired.
Your remote assistant is charging.
Flashing orange could mean:
A visual alert needs your attention.
Your remote assistant’s battery is low or empty.
Your remote assistant’s software may need an 
update. Contact your clinician.
Your remote assistant is fully charged and the USB cable
is still connected.
Access additional features (Advanced mode only)
Enter processor
settings menu
Enter remote
assistant settings
menu
Enter the interactive
troubleshooting
Processor
Status screen
Press the Cochlear key from the Home screen to access the
Processor Status screen.
Now pair your remote assistant.
For more information about your remote assistant, refer to
the CR110 Remote Assistant User Guide.
12
1
2
Demo mode allows you to familiarise yourself with the features
on your remote assistant.
To enter Demo mode when your remote assistant is already
paired with your processor:
Press and hold the top right and bottom left soft keys at the
same time from the Home screen. The Demo mode screen
displays.
To select bilateral advanced functions, press the lower left
soft key. To select unilateral simple functions, press the
lower right soft key.
1
2
DEMO
Access bilateral
advanced functions
Access unilateral
simple functions
To stop using Demo mode, turn off your remote assistant and turn
it back on.
EverydayNoise
EverydayNoise
Your remote assistant
Make sure your processor and remote assistant are turned on. Your remote assistant is automatically in Simple mode when you
turn on your remote assistant for the first time. You can access
Advanced mode, by pressing the upper left soft key when the
remote assistant battery status screen displays.
To switch between Advanced and Simple modes:
Turn off your remote assistant and turn it back on.
When the battery status screen displays, press the upper left
soft key to select Advanced mode, or the upper right soft key
to select Simple mode.
Place the coil
on the back of
your remote
assistant.
A pairing confirmation displays.
How to . . .
Nucleus® CR110 Remote Assistant
English
Quick Reference Guide
How to . . . How to . . . How to . . .
Reset processor to values set by your clinician
Adjusting processor settings (Advanced mode only)
Icon What it means
T
Adjust the telecoil and microphone mixing ratio.
A
Adjust the accessory and microphone mixing ratio.
Change your processor’s sound ok indicator preferences.
Change your processor’s alert and key press indicator
preferences.
Enable or disable private tones.
Press the soft key corresponding to the program you want to use.
Use Focus when
you are in a noisy
environment and
want to focus on
hearing what one
person or a small
group of people are
saying.
Use Noise when
there is ongoing
background noise
coming from all
sides.
Use Music when you
want to listen to any
type of music from
any audio source.
Use Everyday when
you are in typical
everyday listening
situations without
much background
noise.
Change programsPair your remote assistant and processor Select Simple or Advanced mode Turn on auto telecoil* Use Demo mode
Switch from auto telecoil to telecoil on and off
1 2 3
AUTO
AUTO
Check the
status indicator
Soft keys
Soft keys
Turn telecoil
on/of f
Lock/unlock
the keypad
Adjust volume
Volume controls
your perception of
loudness.
Turn on/off (Press and hold) 
Check processor status
Return Home
Adjust sensitivity
Sensitivity controls
the softest level of
sound picked up by
the microphones.
How to . . . How to . . .
Press and hold both the
lower left and lower
right soft keys at the
same time from the
Home screen.
Press lower
right soft key
to confirm
reset.
Press the Cochlear key from the Home screen to check the
status of your processor(s).
Check the status of your processor
Processor
status is OK
Processor
battery level
Audio input
level
Press and
hold
When auto telecoil is enabled, the telecoil automatically
turns on when you use the telephone or enter a room
loop environment.
Quick
press
Auto telecoil* on Telecoil* on Telecoil off
3
* Your clinician must enable this feature.
1 2 3
Bilateral users: Repeat steps 2 and 3.
12
EverydayNoise
Reset
1
1
2
2
4
Press lower
right soft key.
Access Advanced
mode
Access Simple
mode
Pair
+
3
Home screen
How to . . . How to . . . How to . . .
Select remote assistant language
After turning on remote assistant, language select screen
displays if remote assistant is not paired.
Press lower left
soft key
Press lower right
soft key
EverydayNoise
English
Checking the status indicator
Indicator What it means
Your processor is within operating distance of your
remote assistant and they are communicating with each
other.
Your processor is not communicating with your remote
assistant. For example, they are not within operating
distance of each other, or they are not paired.
Your remote assistant is charging.
Flashing orange could mean:
A visual alert needs your attention.
Your remote assistant’s battery is low or empty.
Your remote assistant’s software may need an 
update. Contact your clinician.
Your remote assistant is fully charged and the USB cable
is still connected.
Access additional features (Advanced mode only)
Enter processor
settings menu
Enter remote
assistant settings
menu
Enter the interactive
troubleshooting
Processor
Status screen
Press the Cochlear key from the Home screen to access the
Processor Status screen.
Now pair your remote assistant.
For more information about your remote assistant, refer to
the CR110 Remote Assistant User Guide.
12
1
2
Demo mode allows you to familiarise yourself with the features
on your remote assistant.
To enter Demo mode when your remote assistant is already
paired with your processor:
Press and hold the top right and bottom left soft keys at the
same time from the Home screen. The Demo mode screen
displays.
To select bilateral advanced functions, press the lower left
soft key. To select unilateral simple functions, press the
lower right soft key.
1
2
DEMO
Access bilateral
advanced functions
Access unilateral
simple functions
To stop using Demo mode, turn off your remote assistant and turn
it back on.

Other manuals for Nucleus CP810

5

Other Cochlear Recording Equipment manuals

Cochlear Baha 3 User manual

Cochlear

Cochlear Baha 3 User manual

Cochlear baha cordelle ii User manual

Cochlear

Cochlear baha cordelle ii User manual

Cochlear Baha 5 SuperPower User manual

Cochlear

Cochlear Baha 5 SuperPower User manual

Cochlear Nucleus 6 User manual

Cochlear

Cochlear Nucleus 6 User manual

Cochlear Aqua+ for Kanso 2 User manual

Cochlear

Cochlear Aqua+ for Kanso 2 User manual

Cochlear Baha 5 SuperPower User manual

Cochlear

Cochlear Baha 5 SuperPower User manual

Cochlear Baha 4 Assembly instructions

Cochlear

Cochlear Baha 4 Assembly instructions

Cochlear Baha 5 SuperPower User manual

Cochlear

Cochlear Baha 5 SuperPower User manual

Cochlear Osia 2 User manual

Cochlear

Cochlear Osia 2 User manual

Cochlear Baha 5 SuperPower User manual

Cochlear

Cochlear Baha 5 SuperPower User manual

Cochlear baha bp110 power User manual

Cochlear

Cochlear baha bp110 power User manual

Cochlear Baha User manual

Cochlear

Cochlear Baha User manual

Cochlear Baha 5 SuperPower User manual

Cochlear

Cochlear Baha 5 SuperPower User manual

Cochlear baha cordelle ii User manual

Cochlear

Cochlear baha cordelle ii User manual

Cochlear Baha 5 SuperPower User manual

Cochlear

Cochlear Baha 5 SuperPower User manual

Cochlear Nucleus Kanso 2 User manual

Cochlear

Cochlear Nucleus Kanso 2 User manual

Cochlear D1887457 User manual

Cochlear

Cochlear D1887457 User manual

Cochlear Baha 5 SuperPower User manual

Cochlear

Cochlear Baha 5 SuperPower User manual

Cochlear Baha 5 SuperPower User manual

Cochlear

Cochlear Baha 5 SuperPower User manual

Cochlear Baha 5 SuperPower User manual

Cochlear

Cochlear Baha 5 SuperPower User manual

Cochlear CP900 Series User manual

Cochlear

Cochlear CP900 Series User manual

Cochlear Baha 5 Power User manual

Cochlear

Cochlear Baha 5 Power User manual

Cochlear Nucleus 7 SE User manual

Cochlear

Cochlear Nucleus 7 SE User manual

Cochlear Kanso CP950 User manual

Cochlear

Cochlear Kanso CP950 User manual

Popular Recording Equipment manuals by other brands

Lütze DIOLINE20 operating instructions

Lütze

Lütze DIOLINE20 operating instructions

Montarbo DSI-12 user manual

Montarbo

Montarbo DSI-12 user manual

Daewoo Rautz RM-711AG Service manual

Daewoo

Daewoo Rautz RM-711AG Service manual

Interlogix ATS1741 RS232 Installation sheet

Interlogix

Interlogix ATS1741 RS232 Installation sheet

Leader LT 4610SER02 instruction manual

Leader

Leader LT 4610SER02 instruction manual

Mackie HDR 24 installation guide

Mackie

Mackie HDR 24 installation guide

Advantech MIO-3150 Startup manual

Advantech

Advantech MIO-3150 Startup manual

M-system EtherCAT R3-NECT1 instruction manual

M-system

M-system EtherCAT R3-NECT1 instruction manual

Nuoptix Stereo Optical Recording System owner's guide

Nuoptix

Nuoptix Stereo Optical Recording System owner's guide

ARTcessories PRO Split user manual

ARTcessories

ARTcessories PRO Split user manual

Extron electronics PIP 422 Setup guide

Extron electronics

Extron electronics PIP 422 Setup guide

Iron Age Audioworks Channel Strip CS1 user manual

Iron Age Audioworks

Iron Age Audioworks Channel Strip CS1 user manual

Palomar VC-100 owner's manual

Palomar

Palomar VC-100 owner's manual

Bosch DIP-5042EZ-0HD installation manual

Bosch

Bosch DIP-5042EZ-0HD installation manual

Mesa 7i48 manual

Mesa

Mesa 7i48 manual

Waves LIVE Calrec SoundGrid user guide

Waves

Waves LIVE Calrec SoundGrid user guide

PSI Audio Active Velocity Acoustic Absorber user manual

PSI Audio

PSI Audio Active Velocity Acoustic Absorber user manual

thomann harley benton user manual

thomann

thomann harley benton user manual

manuals.online logo
manuals.online logoBrands
  • About & Mission
  • Contact us
  • Privacy Policy
  • Terms and Conditions

Copyright 2025 Manuals.Online. All Rights Reserved.