BKI DRGV User manual

SS-OM-051.02 9/02/15
Gas Rotisserie Oven
MODEL DRGV (with To chTEC Controller)
Operator’s Man al
FOR YOUR SAFETY
Do not store or use gasoline or other flammable vapors or liquids in the
vicinit of this or an other appliance.
WARNING
Improper installation, adjustment, alteration, service or maintenance can
cause propert damage, injur or death. Read the installation, operation and
maintenance instructions thoroughl before installing or servicing this
equipment.
NOTICE
The purchaser must post, in a prominent location, instructions to be followed
in the event the user smells gas. This information shall be obtained b
consulting the local gas supplier.

SS-OM-051.02 9/02/15
BKI LIMITED WARRANTY
2812 Grandview Dr. • Simpsonville, SC 29680 • USA
(864) 963-3471 • Toll Free: (800) 927-6887 • Fax: (864) 963-5316
WHAT IS
COVERED
This warranty covers defects in material and workmanship nder normal se, and applies
only to the original p rchaser providing that:
អ
T
he eq ipment has not been accidentally or intentionally damaged, altered or mis sed;
អ
The eq ipment is properly installed, adj sted, operated and maintained in accordance
with national and local codes, and in accordance with the installation and operating
instr ctions provided with this prod ct.
អ
The serial n mber rating plate affixed to the eq ipment has not been defaced or
removed.
WHO IS
COVERED
This
warranty
is
extended
to the original
p rchaser
and applies only
to
eq ipment p rchased
for se in the U.S.A.
COVERAGE PERIOD
អ
Warranty claims m st be received in writing by BKI within one (1) year from
date of installation or within one (1) year and three (3) months from data of
shipment from the factory, whichever comes first.
អ
COB Models: One (1) Year limited parts and labor.
អ
COM Models: Two (2) Year limited parts and labor. COM convection ovens also have a
two (2) year door warranty.
អ
CO1 Models: Two (2) Year limited parts and labor. Five (5) Year limited door
warranty.
អ
BevLes Prod cts: Two (2) Year limited parts and labor.
អ
Warranty period begins the date of dealer invoice to c stomer or ninety (90) days
after shipment date from BKI, whichever comes first.
WARRANTY COVERAGE
This
warranty
covers on-site labor, parts and
reasonable
travel
time
and travel
e
xpenses
of the
a thorized
service
representative
p
to
(100) miles
ro nd
trip and (2)
ho rs
travel time and
performed
d ring
reg lar,
weekday
b siness
ho rs.
EXCEPTIONS
Any exceptions m st be pre-approved in advance and in writing by BKI. The
extended door warranty on convection ovens years 3 thro gh 5 is a parts only warranty and
does not incl de labor, travel, mileage or any other charges.
EXCLUSIONS
អ
Negligence
or acts of
God,
អ
Thermostat
calibrations
after (30) days
from
eq ipment
installation
date,
អ
Air and g
as
adj stments,
អ
Light
b lbs,
អ
Glass doors and
door
adj stments,
អ
F ses,
អ
Adj stments
to
b rner
flames and
cleaning
of
pilot
b rners,
អ
Tightening
of screws
or
fasteners,
អ
Fail res
ca sed
by erratic
voltages
or gas
s ppliers,
អ
Una thorized
repair by
anyone
other
than
a BKI F
actory
A thorized
Service Center,
អ
Damage
in
shipment,
អ
Alteration,
mis se or
improper
installation,
អ
Thermostats
and safety valves with
broken
capillary t bes,
អ
Freight
–
other
than
normal UPS charges,
អ
Ordinary
wear and
tear,
អ
Fail re to follow
installation
and/or
operating
instr ctions,
អ
Events
beyond
control
of the
company.
INSTALLATION
Leveling, as well as
proper
installation
and check o t of all
new
eq ipment
-
per
appropriate installation
and se materials – is t
he
responsibility of the
dealer
or
installer, not the
man fact rer.
REPLACEMENT PARTS
BKI
gen ine
Factory OEM parts receive a (90) day
materials
warranty
effective from the
date of
installation
by a BKI F
actory
A thorized
Service
Center.

SS-OM-051.02 9/02/15
Table of Contents
Table of Contents ........................................................................................................................................ 1
Introduction ................................................................................................................................................. 2
Safety Preca tions .................................................................................................................................... 2
Safety Signs and Messages ................................................................................................................. 2
Specific Preca tions ............................................................................................................................. 3
Safe Work Practices ............................................................................................................................. 4
Safety Labels ........................................................................................................................................ 5
Health and Sanitation Practices................................................................................................................ 5
Food Handling ...................................................................................................................................... 6
Storage of Raw Meats .......................................................................................................................... 6
Coding Cooked Foods .......................................................................................................................... 6
Storage of Prepared Foods .................................................................................................................. 6
Operation ..................................................................................................................................................... 7
Controls and Indicators ............................................................................................................................. 7
Hardware Controls................................................................................................................................ 7
Software Controls – Operation Screens ............................................................................................... 8
Software Controls – Programming Screens ....................................................................................... 10
Programming the Controller Using the To chscreen Interface .............................................................. 12
Edit a Recipe ...................................................................................................................................... 12
Edit the Basic Set p ........................................................................................................................... 12
Operation with the Controller .................................................................................................................. 13
Viewing Recipes ................................................................................................................................. 13
Cooking .............................................................................................................................................. 13
Operation After a Gas or Power O tage ................................................................................................ 14
Normal Sh toff ........................................................................................................................................ 14
Installing Rotor System ........................................................................................................................... 14
Preparing and Loading Chickens ........................................................................................................... 14
Tr ssing Chickens .............................................................................................................................. 15
V-Spits ................................................................................................................................................ 16
Baskets ............................................................................................................................................... 17
Installation ................................................................................................................................................. 18
Unpacking and Handling ......................................................................................................................... 18
Location and Clearance .......................................................................................................................... 18
Specific Instr ctions ................................................................................................................................ 18
Co nter Top and Stand .......................................................................................................................... 19
Mo nting ................................................................................................................................................. 20
Stacking Ovens ....................................................................................................................................... 22
Locking Ovens in Place .......................................................................................................................... 27
Gas S pply Connection .......................................................................................................................... 28
Gas Manifold Press re Test ................................................................................................................... 28
Maintenance .............................................................................................................................................. 29
Sched led Maintenance ......................................................................................................................... 29
Daily Cleaning & Maintenance ........................................................................................................... 29
Tro bleshooting ...................................................................................................................................... 32
Accessories ............................................................................................................................................... 33
Wiring Diagram .......................................................................................................................................... 34
Notes .......................................................................................................................................................... 35

Rotisserie Oven Introduction
2
Introduction
Yo r BKI DRGV is a comp ter controlled gas rotisserie oven. It tilizes a do ble revolving mechanism
and infrared b rner that ens re even prod ct cooking. A to chscreen control and switches are provided
to allow for q ick set p and operation. Removable components allow for easy maintenance and cleaning.
The BKI name and trademark on this nit ass res yo of the finest in design and engineering -- that it has
been b ilt with care and dedication -- sing the best materials available. Attention to the operating
instr ctions regarding proper installation, operation, and maintenance will res lt in long lasting
dependability to ens re the highest profitable ret rn on yo r investment.
PLEASE READ THIS ENTIRE MANUAL BEFORE OPERATING THE UNIT. If
yo have any q estions, please contact yo r BKI Distrib tor. If they are nable to
answer yo r q estions, phone the applicable BKI Technical Services Department:
BKI North America: (864) 963-3471
Safety Precautions
Always follow recommended safety preca tions listed in this man al. Below is the safety alert symbol.
When yo see this symbol on yo r eq ipment, be alert to the potential for personal inj ry or property
damage.
Safet Signs and Messages
The following Safety signs and messages are placed in this man al to provide instr ctions and identify
specific areas where potential hazards exist and special preca tions sho ld be taken. Know and
nderstand the meaning of these instr ctions, signs, and messages. Damage to the eq ipment, death or
serio s inj ry to yo or other persons may res lt if these messages are not followed.
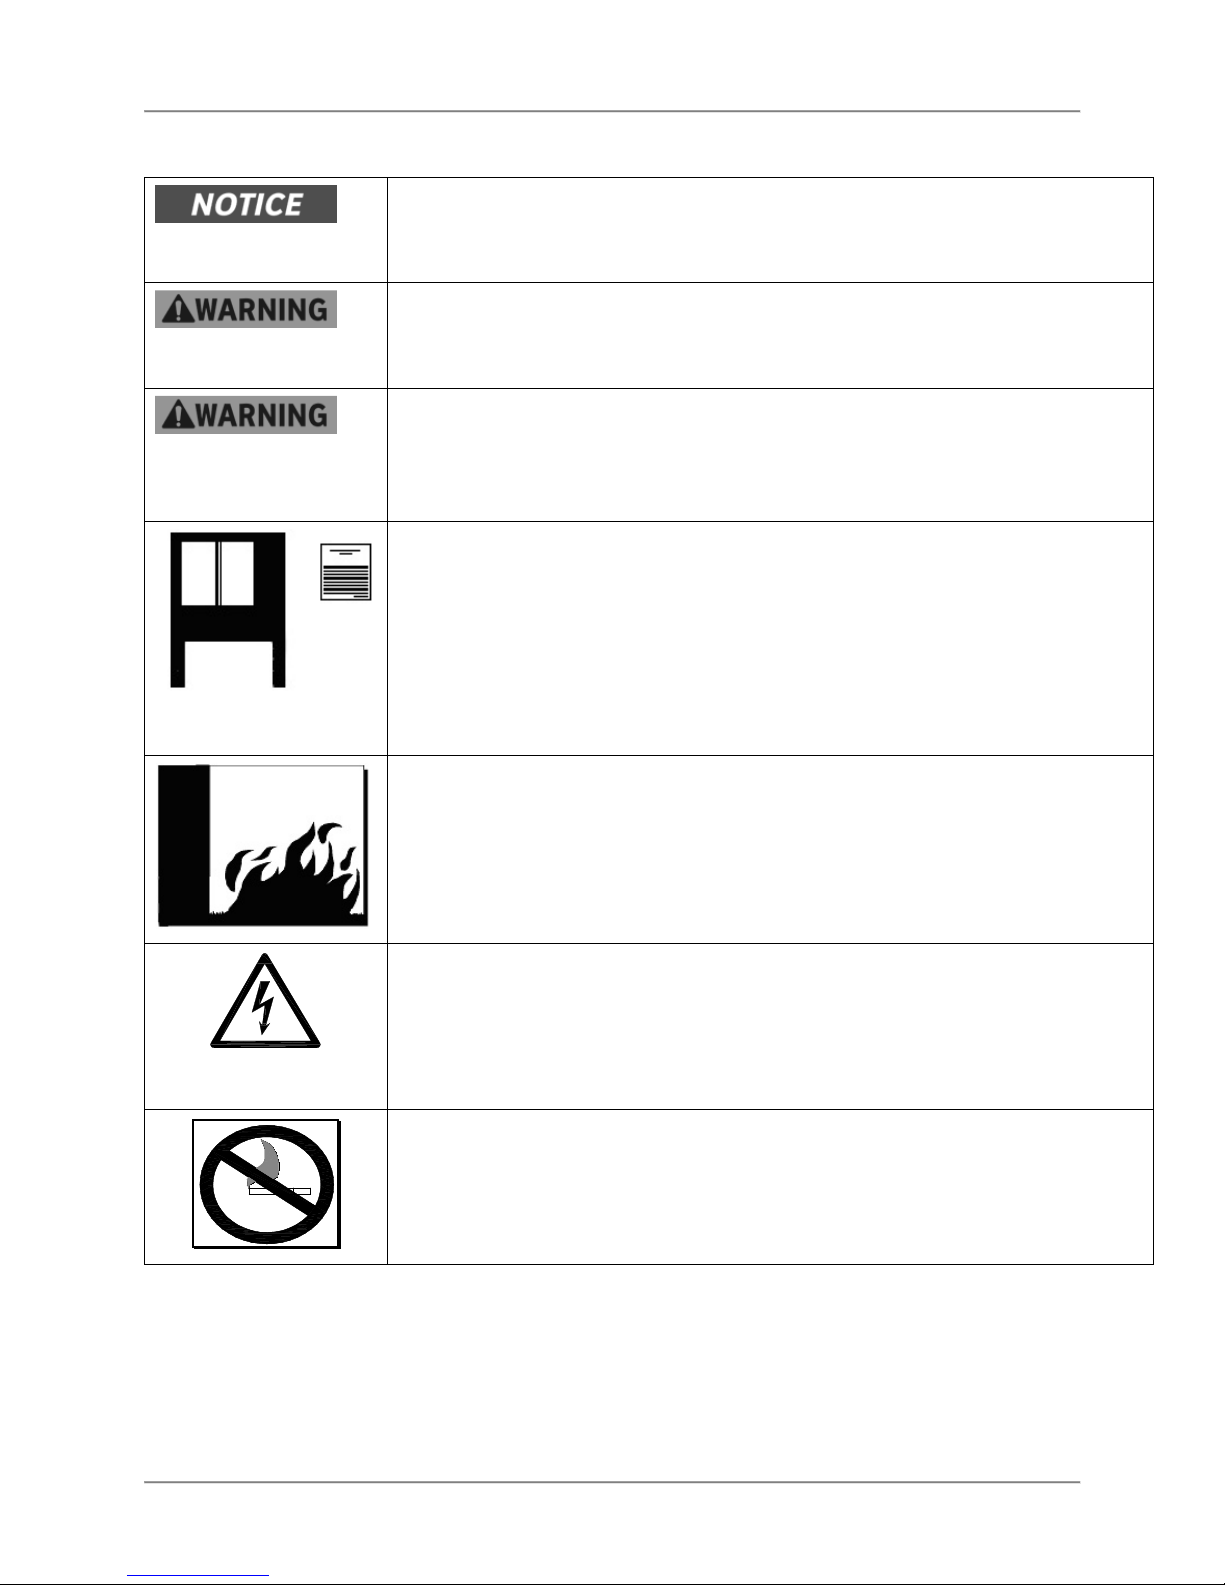
This message indicates an imminently hazardo s sit ation which, if not avoided,
will res lt in death or serio s inj ry.
This message indicates a potentially hazardo s sit ation, which, if not avoided,
co ld res lt in death or serio s inj ry.
This message indicates a potentially hazardo s sit ation, which, if not avoided,
may res lt in minor or moderate inj ry. It may also be sed to alert against nsafe
practices.
This message is sed when special information, instr ctions or identification are
req ired relating to proced res, eq ipment, tools, capacities and other special
data.
Rotisserie Oven Introduction
3
Specific Precautions
The purchaser must post, in a prominent location, instructions
to be followed in the event the user smells gas. This information
shall be obtained b consulting the local gas supplier.
FOR YOUR SAFETY
Do not store or use gasoline or other flammable vapors or
liquids in the vicinit of this or an other appliance
Improper installation, adjustment, alteration,
service or
maintenance can cause propert damage, injur or death. Read
the installation, operation and maintenance instructions
thoroughl before installing or servicing this equipment.
Use Gas Safel -- Avoid Danger
Gas can be a dangerous fuel if not handled safel .
Make sure to ventilate the oven properl . If the oven is not
properl ventilated, carbon monoxide can be released around
the oven. Asph xiation or suffocation can occur if gas is not
ventilated properl .
Clearance to Combustibles
Observe proper clearance to combustibles as noted on the oven
rating tag. Never place an thing on top of the oven.
Keep the area around the oven free and clear from combustibles.
WARNING – DANGEROUS VOLTAGE
This equipment uses high voltage. Serious injur can occur if
ou or an untrained or unauthorized person installs, services,
or repairs this equipment. Alwa s Use an Authorized Service
agent to Service Your Equipment.
Do Not Smoke Near the Oven
This oven uses combustible fuels to operate. Smoking near this
oven could possibl cause a fire. Do not allow an one to smoke
near this oven.

Rotisserie Oven Introduction
4
Safe Work Practices
Wear Safe Clothing Appropriate To Your Job
Always wear yo r ins lated mitts when handling hot oven parts or to ch any
hot metal s rface. If yo lose or damage yo r mitts, yo can b y new ones at
yo r local resta rant eq ipment s pply store or from yo r local BKI
Distrib tor.
Always wear non-skid shoes when working aro nd the oven or any other
eq ipment.
Never wear loose clothing s ch as neckties or scarves while operating this
eq ipment. Keep loose hair tied back or in a hair net while operating this
eq ipment.
Always wear appropriate personal protection eq ipment d ring the cleaning
process to g ard against possible inj ry.
Keep this manual with the Equipment
This man al is an important part of yo r eq ipment. Always keep it near for
easy access. If yo need to replace this man al, phone the applicable BKI
Technical Services Department:
BKI North America: (864) 963-3471
Protect Children
Keep children away from this eq ipment. Children may not nderstand that
this eq ipment is dangero s for them and others.
NEVER allow children to play near or operate yo r eq ipment.
Keep Safet Labels Clean and in Good Condition
Do not remove or cover any safety labels on yo r eq ipment. Keep all safety
labels clean and in good condition. Replace any damaged or missing safety
labels. Refer to the Safety Labels section for ill stration and location of safety
labels on this nit. If yo need a new safety label, obtain the n mber of the
specific label ill strated on page 5, then phone the applicable BKI Technical
Services Department:
BKI North America: (864) 963-3471.
Be Prepared for Emergencies
Be prepared for fires, inj ries, or other emergencies.
Keep a first aid kit and a fire exting isher near the eq ipment. Yo m st se
a 40-po nd Type BC fire exting isher and keep it within 25 feet of yo r
eq ipment.
Keep emergency n mbers for doctors, amb lance services, hospitals, and
the fire department near yo r telephone.
Know our responsibilities as an Emplo er
• Make certain yo r employees know how to operate the eq ipment.
• Make certain yo r employees are aware of the safety preca tions on the
eq ipment and in this man al.
• Make certain that yo have thoro ghly trained yo r employees abo t
operating the eq ipment safely.
Make certain the eq ipment is in proper working condition. If yo make
na thorized modifications to the eq ipment, yo will red ce the f nction and
safety of the eq ipment.

Rotisserie Oven Introduction
5
Safet Labels
Electrical Gro nding Instr ctions
- This appliance is eq ipped with a
three-prong (gro nding) pl g for yo r protection against shock hazard and sho ld be
pl gged directly into a properly gro nded three-prong receptacle. Do not c t or
remove the gro nding prong from this pl g.
Mise à la terre
- Cet appareil est po rv d’ ne fiche à trois broches dont ne
mise à la terre ass rant ne protection contre les chocs électriq es. La prise dans
laq elle elle est branchée doit être correctement mise à la terre. Ne pas co per ni
enlever la broche de mise à la terre de la fiche.
CAUTION
AVERTIR
DO NOT COVER or REMOVE THIS LABEL NE RECOUVREZ PAS o ENLEVEZ PAS CETTE ÉTIQUETTE
DANGER
HIGH VOLTAGE.
T rn power off before
servicing. May have more than
one disconnect switch.
HAUTE TENSION.
Mettez l'appareil hors tension avant
de proceder a l'entretien. Pe t-etre
d' comm tate r de deconnexion.
®
"Experts In Heat Transfer Technology"
www.bkideas.com
DRGV-7 123456789012-12345678
PHASE
1
VOLTS
115
AMPS / Ampère
2.2
Hz
60
EQUIPPED FOR
Eq ipé po r
NATURAL
GAS
Gaz INPUT
Énergie
72,000
BTU / Hr
BTU / H
MANIFOLD PRESSURE
Pression le Collecte r
4.5
INCHES of WATER
Po ces d'ea
Minim m spacing to a wall or adjacent nit.
L'espacement minim m s r n m r o nité
adjacente.
6
Back
Arrière
Side
Côté
in.
3
in.
Minim m spacing above mo nting s rface.
L'espacement minim m a -dess s de la
s rface de montage.
Bottom
Bas
4
in.
12345678
SIMPSONVILLE, SC, USA
DATE OF MANUFACTURE
DATE DE FABRICATION
ANS Z83.11 • CSA 1.8-2007 Food Service Eq ipment
MODEL
Modele SERIAL NO
Nº de Serie
S itable for installation on comb stible floors.
Convient à l’installation s r n plancher comb stible.
N0656 -1
Intended for other than ho sehold se.
Non destiné à l’ sage domestiq e.
Improper installation, adj stment, alteration, service or
maintenance can ca se property damage, inj ry or
death. Read the installation, operating and
main-tenance instr ctions thoro ghly before installing
or servicing this eq ipment.
L’installation, le réglage, la modification, la réparation
o l’entretien incorrect de cet appareil pe t ca ser des
dommages matériels, des bless res o la mort. Lire
attentivement les instr ctions d’installation, de
fonctionnement et d’entretien avant de procéder à son
installation o entretien.
WARNING
L'AVERTISSEMENT
For installation nder ventilation hood only.
Installer en desso s d’ ne hotte de ventilation se lement.
N0656 -2
NORMAL OPERATION -
1.) T rn main POWER switch on.
2.) To ch controller screen to activate.
3.) Select desired cook recipe.
4.) To ch Cook or Preheat to start oven.
TO CANCEL COOK PROGRAM -
1.) To ch
on pper right of controller
screen and hold for 3 seconds.
NORMAL SHUT DOWN -
1.) Cancel any activate cook program.
2.) Wait 30 seconds for fans to stop.
3.) T rn POWER switch off.
AFTER POWER or GAS OUTAGE -
the oven will sh t of a tomatically.
To restart the oven, t rn the POWER
switch off and wait 5 min tes.
Then follow NORMAL OPERATION
proced res above.
FONCTIONNEMENT NORMAL -
1.) All mez INTERRUPTEUR principal.
2.) Écran tactile de commande po r activer.
3.) Sélectionner le programme de c isson
désirée.
4.) To cher Cook o Preheat po r
commencer fo r.
D'ANNULER LE PROGRAMME de CUISSON -
1.) To cher
s r le contrôle et pendant
3 secondes.
ARRÊT NORMAL -
1.) Ann ler le programme de c isson actif.
2.) Attendre 30 secondes po r les fans
d'arrêter.
3.) Co per le co rant interr pte r.
APRÈS MISE SOUS TENSION ou
de GAZ PANNE -
le fo r a tomatically arrêter.
Redémarrer le fo r, Co per le co rant
interr pte r et attendre 5 min tes.
P is s ivre FONCTIONNEMENT
NORMAL procéd re ci-dess s.
NE PAS tiliser de nettoyants
ca stiq e po r nettoyer cette nité.
DO NOT se ca stic cleaners
when cleaning this nit.
L bricate rotor gears with BKI L0200
L bricant each day after cleaning. Fail re
to clean and l bricate the gears can
damage the drive motor or warp the gear
assembly.
LUBRICATE HERE
LUBRIFIEZ ICI
L brifier les engrenages d rotor avec BKI
L0200 l brifiant chaq e jo r aprè
le
nettoyage. D
éfa t de nettoyer et l brifier
les engrenagese t pe t endommager le
mote r d'entraînement o dedéformer
l'engrenage.
N0657
When this appliance is installed with
casters, it m st be installed with the
casters s pplied, a connector complying
with either ANSI Z21.69 • CSA 6.16 and a
q ick-disconnect device complying with
ANSI Z21.41 • CSA 6.9. It m st also be
installed with restraining means to g ard
against transmission of strain to the
connector, as specified in the appliance
man fact rer’s instr ctions.
Les appareils s r ro lettes doivent être
po rv s des ro lettes fo rnies, d’ n t ya
de raccordement conforme à la norme
ANSI Z21.69 o CAN/CGA-6.16 et d’ n
raccord à débranchement rapide
satisfaisant les exigences de la norme
ANSI Z21.41 o CAN1-6.9. Ils doivent
a ssi être m nis d’ n dispositif de
reten e po r empêcher to te
transmission de tension a t ya de
raccordement confromément a x
instr ctions d fabricant.
NOTICE
AVIS
L'AVERTISSEMENT
WARNING
For contin ed protection against risk of fire and
electrical shock, replace with 8 amp fuse onl .
Po r la protection contin ée le risq e de fe et
la décharge électriq e, remplace avec 8 fusible
d'Ampli seulement.
Do not cover or remove label
Ne pas co vrir o s pprimer l'étiq ette
N0658
FRONT of OVEN
BACK of OVEN
BOTH SIDES of OVEN
CONTROL SIDE of
OVEN ONLY
! WARNING
WHEN LIT UNIT IS
MALFUNCTIONING.
TURN OFF and CALL
FOR SERVICE. N 0536

Rotisserie Oven Introduction
6
Health and Sanitation Practices
BKI Rotisserie Ovens are man fact red to comply with health reg lations and are tested and certified to
NSF and FSA standards. Yo m st operate the eq ipment properly, sing only q ality prod cts and se
meat thermometers to ins re meats are thoro ghly cooked.
Food Handling
• Wash hands thoro ghly in warm, soapy water after handling raw po ltry or meats.
• Clean and sanitize all tensils and s rfaces that have been in contact with raw prod cts. Clean
and sanitize the meat forks or baskets between cooking.
• Never place cooked meats on the same s rfaces sed to prepare raw meats, nless the area
has been thoro ghly cleaned and sanitized.
Storage of Raw Meats
• Designate an area or shelf strictly for the storage of all raw meats to be sed in the rotisserie.
• Raw prod ct m st always be stored at temperat res below 38° F. (3° C.).
• Never store or mix raw foods above cooked foods, as this is a health hazard. The drippings from
raw foods contaminate cooked or processed foods.
• All chicken and chicken parts to be stored overnight m st be thoro ghly iced down and
refrigerated.
Coding Cooked Foods
All prod cts cooked d ring the day sho ld be sold the same day.
NOTE: It is not the intent of the rotisserie program to have nsold merchandise at the end of the cooking
day. Follow yo r company’s proced res for the handling of any leftover prod ct.
Storage of Prepared Foods
• Cold foods sho ld be kept at or below 38° F. (3° C.).
• Hot foods m st be maintained to meet local health codes, s ally a minim m 145° F. (63° C.).

Rotisserie Oven Operation
7
Operation
Controls and Indicators
Hardware Controls
Item #
Description
Function
1
Rotor Switch
Depressing the switch allows
the operator to “jog” the rotor
position when the door is
open. Releasing the switch
stops the rotor.
2
Main Power Isolator
Light
This light ill minates to
indicate that power is being
applied to the oven from the
Main Power Isolator (Circ it
Breaker).
3
Main Power Switch
T rns power to the entire nit
on or off. When placed in the
on position, the To chscreen
controller is powered, lights
ill minate and the rotor motor
engages (if both doors are
closed). When placed in the
off position, power is removed
from the entire nit.
4
Analog To chscreen
Controller
Used for operation and
programming of the oven. A
b ilt-in beeper is sed to
indicate to chscreen presses
and other oven f nctions. It
has 15 programmable cooking
recipes.
5
Cooling Fan
Indicator Light
This light ill minates to
indicate there is a malf nction
of the cooling fan in the
control compartment. Call a
q alified BKI service
technician to repair the oven.
The oven can still be operated
with when this light is
ill minated. However,
operating the oven for an
extended period of time may
res lt in oven fail re and
damage to additional
components.
3
2
1
4
OPERATOR SIDE
Power
To chTEC ________
5
! WARNING
WHEN LIT UNIT IS
MALFUNCTIONING.
TURN OFF and CALL
FOR SERVICE.

Rotisserie Oven Operation
8
Software Controls – Operation Screens
Screen Name
Screen
Description
Start p
Appears when the Main Power Switch is placed in the on
position.
Controller Off
Appears after the Start p screen displays. This screen
Indicates that the controller is t rned off. To ching anywhere
on the screen will t rn the controller on and display the
Recipe Selection screen.
Recipe
Selection
Displays a the list of available recipes. The p and down
arrow b ttons move the highlight box from one recipe to the
next. Once the desired recipe is highlighted the ser
to ches the GO b tton to start the cook cycle. To ching the
X b tton for 3 seconds t rns the controller off. To ching any
recipe will show the settings for that recipe.
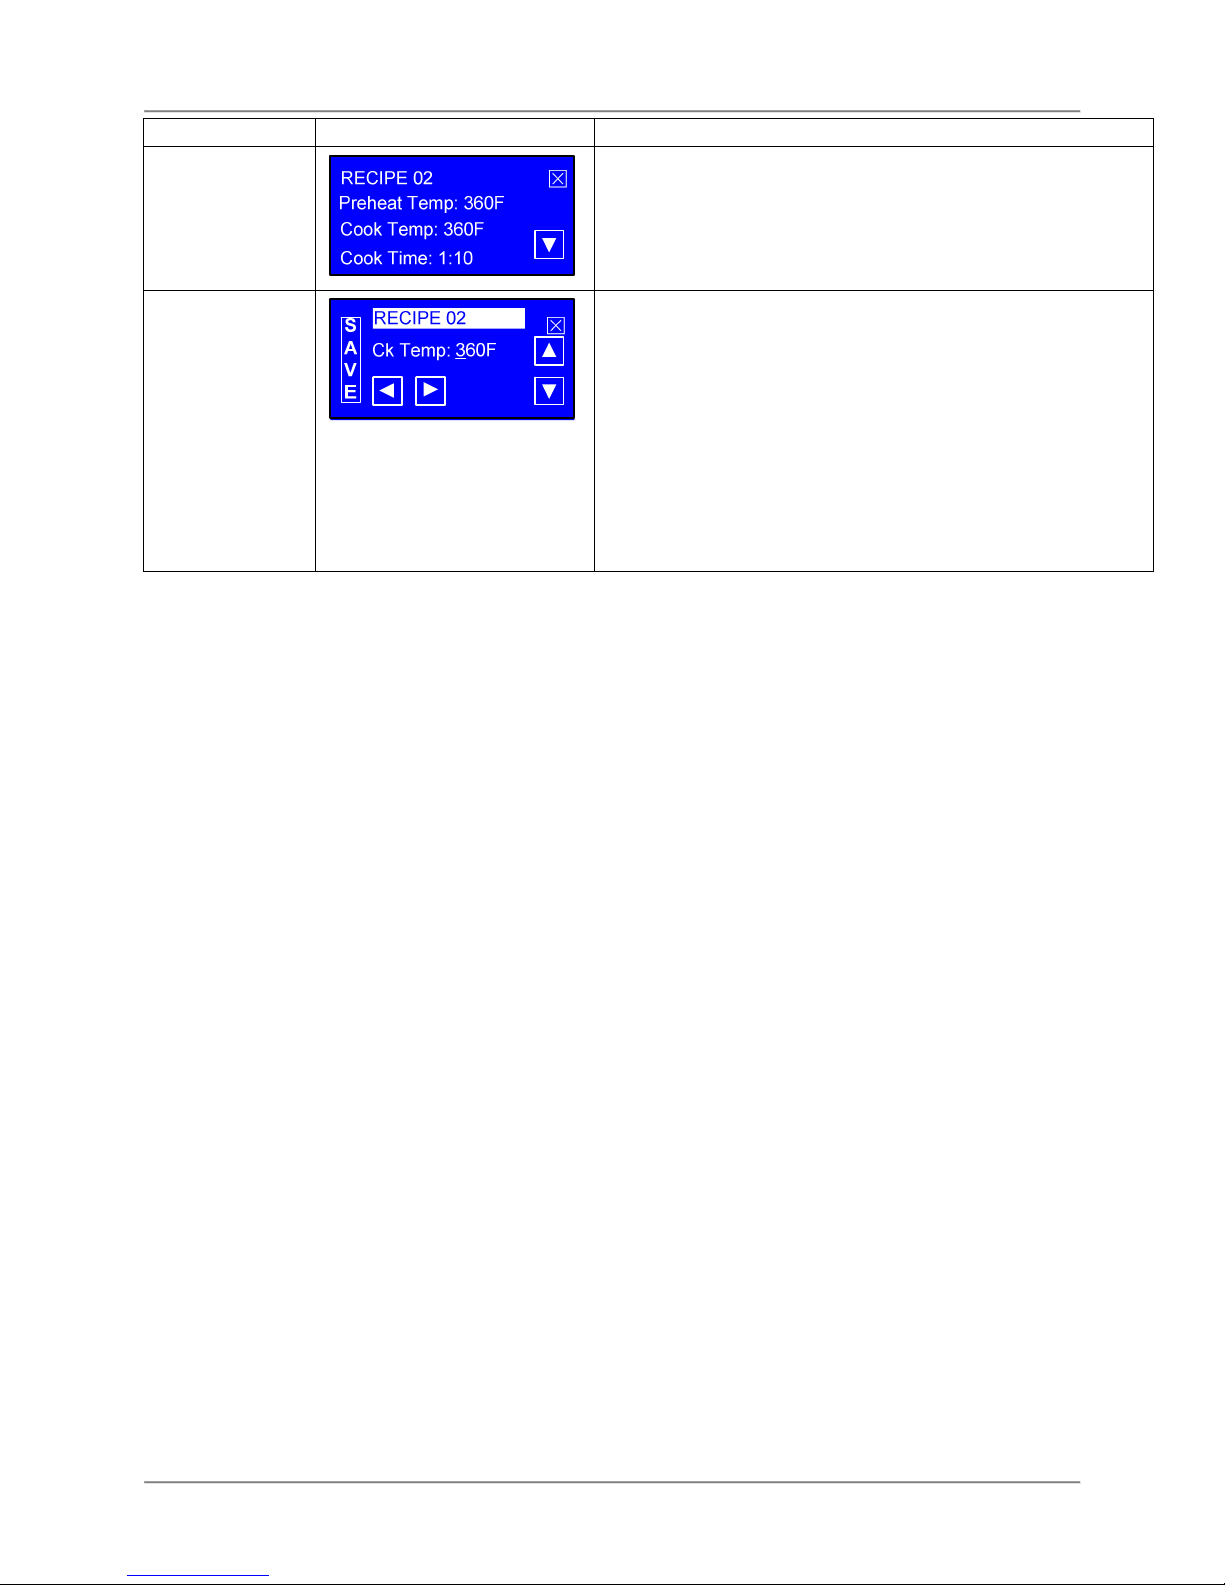
Recipe Settings
Displays Preheat Temperat re, Cook Temperat re, Cook
Time, Hold Temperat re and Cook To settings for a
selected recipe. To ching the p and down arrow b ttons
scroll the screen to view more settings. To ching the X
b tton momentarily ret rns yo to the previo s screen.
Preheat/Cook
Selection
Displays once the ser highlights a recipe and to ches the
GO b tton if the recipe has a preheat temperat re
programmed. The ser selects where to start the cooking
cycle by to ching Preheat or Cook. To ching Preheat
displays the Preheat screen. To ching Cook displays the
Ready To Cook screen. If the Preheat temperat re is set to
OFF the controller goes directly to the Ready To Cook
screen. The T b tton can be sed to display the c rrent
oven temperat re. To ching the T b tton displays the
temperat re, then a tomatically ret rns to the previo s
screen in 2 seconds. To ching the X b tton momentarily
ret rns yo to the previo s screen.
Preheat
Displays once the ser to ches the
Preheat
option from the
Preheat/Cook Selection screen. The Preheat cycle heats the
cooking cavity p to the pre-defined preheat temperat re.
Once this temperat re is reached the nit a tomatically
switches to the Ready To Cook mode. A small highlighted
letter H will appear to the right of the temperat re display to
indicate that the controller has energized the heating
elements. The absence of the letter H indicates that the
controller has de-energized the heating elements as the
oven temperat re has reached the set temperat re limit.
The T b tton works as described for the Preheat/Cook
Selection screen. To ching the X b tton for 3 seconds
ret rns yo to the Recipe Selection screen.

Rotisserie Oven Operation
9
Screen Name
Screen
Description
Ready to Cook
Displays once the ser to ches the
Cook
option from the
Preheat/Cook selection screen or once the preheat cycle is
finished or directly from the Recipe Selection screen if no
preheat temperat re was programmed. When the
temperat re is within 5° of the cook temperat re the
controller will emit three 2 second beeps indicating that the
prod ct can be loaded. The ser places the prod ct to be
cooked into the cooking cavity and to ches the COOK
b tton to start the cooking process. If the door is opened
and/or the temperat re drops below 25° below the preheat
temperat re, the screen will flash and beep every 30
seconds ntil the COOK b tton is to ched. The highlighted
letter H works as described for the Preheat screen. The T
b tton works as described for the Preheat/Cook Selection
screen. To ching the X b tton for 3 seconds ret rns yo to
the Recipe Selection screen.
Cooking
Displays once the
COOK
b tton is to ched from the Ready
To Cook screen. This screen shows the cooking
temperat re, the time remaining in the cook cycle, and the
elapsed time shown with the progress bar at the bottom of
the screen. Hold the X b tton for 2 seconds to stop the cook
in progress. The EXTRA b tton can be sed to add more
cook time to the cycle. The cook cycle ends when the cook
time elapses. This is indicated by three 2 second beeps. If a
hold temperat re was programmed then the Hold screen is
displayed. If no hold temperat re was programmed then the
screen will flash and beep ntil to ched. The highlighted
letter H works as described for the Preheat screen. The T
b tton works as described for the Preheat/Cook Selection
screen. To ching the X b tton for 3 seconds ret rns yo to
the Preheat/Cook Selection screen.
Hold
Displays once the cook cycle is complete if a hold
temperat re was programmed. This screen displays the
hold temperat re (or nothing if set to OFF), and the elapsed
time in the hold mode. The EXTRA b tton is available here
so the prod ct can be cooked for more time if req ired. The
highlighted letter H works as described for the Preheat
screen. The T b tton works as described for the
Preheat/Cook Selection screen. To ching the X b tton for 3
seconds ret rns yo to the Recipe Selection screen.
Extra Cook
Appears when the
EXTRA
b tton is to ched from the
Cooking or Hold screens. Use the p and down arrow
b ttons to set the amo nt of additional cook or hold time in 5
min te increments. To ch the GO b tton to add the
additional time yo set. To ch the X b tton to ret rn to the
previo s screen witho t adding any extra cook or hold time.

Rotisserie Oven Operation
10
Software Controls – Programming Screens
Screen Name
Screen
Description
Start p
Appears when the Main Power Switch is placed in the on
position.
Controller Off
Appears after the Start p screen displays. Indicates that the
controller is t rned off. To ching anywhere on the screen
will t rn the controller on and display the Recipe Selection
screen.
Recipe
Selection
Appears once the Controller Off screen is to ched. To ch
any recipe for 3 seconds to enter the programming mode.
To ch the X b tton for 3 seconds to t rn the controller off.
Program
Sec rity
ENTER CODE
0 0 0 0
Appears pon entering the programming mode and is sed
to enter a 4 digit passcode. When the controller is first
powered, 0000 is sed to access the programming mode.
Upon s bseq ent access, if yo don’t want to se a special
passcode b t want to leave it 0000 j st press the GO b tton.
If yo do want to se a special passcode, config re one
sing the Basic Set p screen. Use the left and right arrow
b ttons to move the c rsor nder the digit to be changed.
The p and down arrow b ttons increase or decrease the
digit as desired. To ch the GO b tton to s bmit the sec rity
passcode. If the passcode is valid the Programming mode
Selection screen will appear. If the passcode is invalid the
Program Sec rity screen will reappear showing the
passcode yo entered. To ch the X b tton to ret rn to the
previo s screen.
Program Mode
Selection
Appears once a valid passcode is entered from the Sec rity
screen. To ch the BASIC SETUP option to change basic
controller parameters. To ch the COOK PROGRAMS
option to change cook parameters for a specific recipe.
To ch the X b tton to ret rn to the Recipe Selection screen.
Basic Set p
Appears when the
BASIC SETUP
option is to ched from
the Programming Mode Selection screen. Use this screen to
config re the controller to display temperat re in Fahrenheit
of Centigrade, to se short or long beeps at the end of a
cook cycle and to modify the fo r digit passcode. The E in
the bottom right corner toggles between English and
Spanish on the display. To ch the X b tton to ret rn to the
previo s screen.
Recipe Edit
Selection
Appears when the
COOK PROGRAMS
option is to ched
from the Programming Mode Selection screen. This screen
is sed to select the recipe yo want to edit. Use the p and
down arrow b ttons to highlight the recipe then to ch the
EDIT b tton. To ch the X b tton to ret rn to the previo s
screen.
Rotisserie Oven Operation
11
Screen Name
Screen
Description
Recipe
Parameter
Selection
Appears when a recipe is selected and the
EDIT
b tton is
to ched from the Recipe Edit Selection screen. This screen
is sed to select a specific recipe parameter to edit. Use the
p and down arrow b ttons to scroll thro gh the list of
parameters and to ch the parameter yo want to change.
To ch the X b tton to ret rn to the previo s screen.
Recipe
Parameter Edit
Appears when a recipe parameter is to ched from the
Recipe Parameter Selection screen. This screen is sed to
edit a specific recipe parameter. The editable parameters
are: Recipe name, Preheat Temp, Cook Temp, Cook Time
and Hold Temp. The left and right arrow b ttons are sed to
move the c rsor nder the character to be changed. The p
and down arrow b ttons changes the character as desired.
The Preheat Temp and Hold Temp parameters can be
t rned off by scrolling the temperat re below 150°. To ch
the SAVE b tton to save the changed parameter. To ch the
X b tton to abort all changes and ret rn to the previo s
screen.

Rotisserie Oven Operation
12
Programming the Controller Using the Touchscreen Interface
Use the proced res below to edit a separate recipe or to change the basic controller config ration.
Edit a Recipe
1. T rn on the Power Switch. The Start p screen will briefly appear then the Controller Off screen will
display.
2. To ch anywhere on the to chscreen. The Recipe Selection screen will appear displaying a list of
recipes.
3. To ch any recipe for 3 seconds. The Sec rity screen will appear.
4. Use the p/down and left/right arrow b ttons to enter the passcode and to ch the GO b tton. The
Program Mode Selection screen will appear if a valid passcode is entered.
5. To ch the COOK PROGRAMS option. A Recipe Edit Selection screen will appear.
6. Highlight the recipe yo want to edit sing the p/down arrow b ttons then to ch the EDIT b tton.
The Parameter Selection screen will appear.
7. Use the p/down arrow b ttons to view the recipe parameters and to ch the parameter yo want to
edit. The Parameter Edit screen will appear.
8. Change the parameter val e sing the left/right and p/down arrow b ttons then to ch the SAVE
b tton to save yo r changes. Yo will ret rn to the Parameter Selection screen.
9. Repeat the process to change any other parameters.
10. To ch the X b tton as necessary to ret rn to the Recipe Selection screen.
Edit the Basic Setup
1. T rn on the Power Switch. The Start p screen will briefly appear then the Controller Off screen will
display.
2. To ch anywhere on the to chscreen. The Recipe Selection screen will appear displaying a list of
recipes.
3. To ch any recipe for 3 seconds. The Sec rity screen will appear.
4. Use the p/down and left/right arrow b ttons to enter the passcode and to ch the GO b tton. The
Program Mode Selection screen will appear if a valid passcode is entered.
5. To ch the BASIC SETUP option. A Basic Set p Selection screen will appear.
6. To ch the parameter that needs to be changed. A Basic Set p Parameter Edit screen appears.
7. Change the parameter val e sing the left/right and p/down arrow b ttons then to ch the SAVE
b tton to save yo r changes. Yo will ret rn to the Basic Set p Selection screen.
8. Repeat the process to change any other parameters.
9. To ch the X b tton as necessary to ret rn to the Recipe Selection screen.

Rotisserie Oven Operation
13
Operation ith the Controller
Use the proced res below to view a separate recipe or to activate a cook cycle sing a one of the
preprogrammed recipes.
Viewing Recipes
1. T rn on the Power Switch. The Start p screen will briefly appear then the Controller Off screen will
display.
2. To ch anywhere on the to chscreen. The Recipe Selection screen will appear displaying a list of
recipes.
3. Use the p/down arrow b ttons to highlight the recipe yo wish to view then to ch it. A Recipe
Settings screen will appear.
4. Use the p/down arrow b ttons to view any settings for the recipe selected.
5. To ch the X b tton momentarily to ret rn to the previo s screen.
Cooking
1. T rn on the Power Switch. The Start p screen will briefly appear then the Controller Off screen will
display.
2. To ch anywhere on the to chscreen. The Recipe Selection screen will appear displaying a list of
recipes.
3. Use the p/down arrow b ttons to highlight the recipe yo wish to se then to ch the GO b tton. If
a preheat temperat re was programmed then the Preheat/Cook Selection screen will appear. If no
preheat temperat re was programmed then the controller enters the Ready To Cook mode
displaying the Ready To Cook screen.
• If the Preheat/Cook Selection screen appears, do either of the following:
• To ch the Preheat option to enter the Preheat mode. The controller will display the
Preheat screen. Once the preheat temperat re is reached the controller enters the Ready
To Cook mode.
• To ch the Cook option to enter the Ready to Cook mode.
Once the temperat re is within 5° of the cook temperat re in the Ready To Cook mode the
controller will emit three 2 second beeps indicating that the oven can be loaded with prod ct.
4. Load the prod ct into the oven. Use the Rotor Switch on the front panel to operate the rotors d ring
loading.
5. Close the door.
6. To ch the COOK b tton. The controller now enters the cook mode and displays the cooking
temperat re, time remaining in the cook cycle and the elapsed time. If necessary, se the EXTRA
b tton to add more cook time to the cycle. At the end of a cook cycle the controller will emit three 2
second beeps and enter the Hold mode and display the Hold screen if a Hold temperat re was
programmed. If a Hold temperat re was not programmed the screen will flash and beep ntil
to ched.
7. Open the oven door and check the prod ct for proper internal temperat re. If necessary, se the
EXTRA b tton to add more cook time.
8. Unload the prod ct if it is done.

Rotisserie Oven Operation
14
Operation After a Gas or Po er Outage
The oven will sh t off a tomatically if the gas s pply is interr pted or the power goes o t. If either of these
conditions occ r yo sho ld perform the following proced re:
For yo r safety, if there is an interr ption in the gas or power s pply, make s re to
wait for at least five min tes before restarting yo r oven. This allows time for any
nb rned gas to dissipate. (LP gas may take longer than five min tes.) If yo
smell gas, do not start yo r oven.
1. Place the Main Power Switch to the “OFF” position.
2. Wait at least 5 min tes to allow gas that may have acc m lated in the b rner compartment to
escape.
3. Follow normal operating proced res once the power or gas is restored.
Normal Shutoff
1. Stop cooking and remove all food prod cts from the oven.
2. T rn the Main Power Switch to the “OFF” position.
3. Allow oven cavity to cool before cleaning.
Installing Rotor System
STEP 1
Install the Rotor Disks by first
inserting the g ide pin into the shaft
center hole. The Rotor Disk with
gears goes on the right side of the
oven. It will be necessary to rotate
this Rotor Disk while p shing in to
engage the gears and the drive h b.
When properly installed there will be
approximately ¼” [6 mm] space
between the Rotor Disk and cavity
side.
STEP
2
Rotate both Rotor Disks so that the
U-shaped slot in the h bs is facing
p and forward as shown. Grasp
the Rotor Shaft with both hands and
insert the ends into the U-shaped
h b slots. The pins in the Rotor
Shaft ends m st insert into the holes
in the bottom of the U-shaped slots
in the Rotor Disk H bs.
STEP
3
Slide the Rotor Shaft N ts on both
ends of the shaft over the Rotor Disk
h b and tighten by rotating the n ts
clockwise.
ROTOR
GUIDE
PIN

Rotisserie Oven Operation
15
Preparing and Loading Chickens
Trussing Chickens
It is recommended that whole chickens be tr ssed before cooking. Tr ssing holds the wings and legs of
the chicken tightly against the body. This improves the vis al appeal of the chickens while they are
cooking. In addition tr ssing keeps the chicken moist by retaining more of the nat ral j ices and helps
prevent the wing tips from b rning.
Using 6 ½” – 7” elastic ties, follow these simple steps to tr ss the chickens.
1.
Fold wing tips back nder the chicken
. 2.
With the back of the chicken p slip
the tie nder the wings and p ll back.
3.
P ll and twist the tie over the back of the
chicken to form an “X”. Make s re wing
tips are nder tie
.
4.
T rn the chicken over and p ll the tie
over the ends of the legs
.

Rotisserie Oven Operation
16
V-Spits
Up to fo r (4) whole chickens can be placed on a DRGV-7 v-spit. Insert the tapered (sq are pin) end of
the v-spit nder the legs and thro gh the cavity of the tr ssed chicken as shown below. Orient the spit
with the “V” toward the breast side of the chicken. The legs and thighs of the chicken sho ld be on the
same side of the v-spit as the breast.
Make s re the chickens are evenly spaced on the v-spit. Do not place more than fo r chickens on a v-
spit. Chickens that are p shed tightly together on the v-spit will not brown properly d ring cooking leaving
“blonde” areas where the two chickens were to ching.
The DRGV-7 will hold p to 7 v-spits. When loading less than 7 spits, space the spits as evenly as
possible on the rotors. Balancing the load on the rotors will extend the life of the rotor drive system.
When loading only 2 or 3 spits DO NOT place them in adjacent mo nting locations on the rotors.
Load the first v-spit on the rotors as described below. Use the rotor jog b tton to advance the rotors while
loading additional v-spits.
STEP 1
Orient the V-spit with the ro nd pin
to the left. Insert the ro nd pin
completely into the hole in the
passive (left) side rotor.
STEP
2
Rotate the V-spit so that the flats of
the sq are pin align with the sq are
opening in the drive (right) rotor.
Insert the sq are pin completely into
the sq are opening in the rotor.
STEP
3
Verify that rotor disk slips into the
slot in the ro nd pin on the left end
of the V-spit.

Rotisserie Oven Operation
17
Baskets
The optional tiered clamping baskets can be sed to cook a wide variety meat portions and proteins. By
sing the intermediate trays two layers of smaller portions can be cooked in a single basket. Note that
these baskets will not prod ce an even browning on the exterior of the cooked prod cts.
Place the portions to be cooked in the Lower Tray of the baskets. The portions sho ld be evenly
distrib ted in the Lower Tray with some space between each portion for adeq ate heat circ lation.
Slide the Upper Tray over the vertical pins in the Lower Tray. P sh the Upper Tray down onto the
portions to be cooked firmly eno gh that the portions do not move in the basket. Tighten the th mb
screws sec rely on each end with the th mb screw wrench. For larger portions, the Intermediate Tray
can be sed in place of the Upper Tray.
To cook two layers of portions in the basket, load the first layer in the Lower Tray and sec re this layer
with the Intermediate Tray as described above. In similar fashion place the second layer of portions in
the Intermediate Tray and sec re this layer with the Upper Tray.
Load the baskets onto the ovens rotor system as described above for the V-spits.
Lower Tra
Intermediate Tra
Upper Tra
Thumb Screw Wrench
(FA55313800)

Rotisserie Oven Installation
18
Installation
Serio s inj ry, eq ipment damage or death co ld res lt if attempting to install this
oven yo rself. Ens re that an a thorized BKI service agent installs the oven.
Unpacking and Handling
It is the owners’ responsibility to file all freight claims with the delivering tr ck line. Inspect all cartons and
crates for damage as soon as they arrive. If damage to cartons or crates is fo nd, or if a shortage is
fo nd, note this on the bill of lading (all copies) prior to signing.
If damage is fo nd when the eq ipment is opened, immediately call the delivering tr ck line and follow p
the call with a written report indicating concealed damage to yo r shipment. Ask for an immediate
inspection of yo r concealed damage item. Packaging material MUST be retained to show the inspector
from the tr ck line.
Remove all packing from the interior and exterior of the oven.
Location and Clearance
Install yo r oven in a well-ventilated area. This will ens re that the gas b rns properly and will help
prevent any fires.
The oven m st be mo nted on a level s rface capable of s pporting the f lly loaded oven. Refer to Chart
1 for oven weight.
Adeq ate clearance m st be provided aro nd the oven for safety, proper operation and ventilation. Refer
to
Chart 1 for req ired minim m clearances. Note that these are minim m clearances. If the oven is to be
permanently mo nted near other immovable objects additional clearance m st be provided for connection
and service of the oven on both sides.
All ventilation slots m st be kept free from obstr ction. The area aro nd oven m st be kept free and clear
from comb stibles.
Specific Instructions
The oven m st be installed nder a ventilation hood. If the oven is not properly
ventilated, carbon monoxide can be released aro nd the oven. Asphyxiation or
s ffocation can occ r if gas is not ventilated properly.
Installation of this appliance m st conform with local codes, or in the absence of
local codes, with the National Fuel Gas Code ANSI Z223.11/NFPA 54 or Natural
Gas and Propane Code CSA 149.1 as applicable.
• This appliance and its individ al sh toff valve m st be disconnected from
the gas s pply piping system d ring any press re testing of that system
at test press res in excess of ½ psi (3.5kPa).
• The appliance m st be isolated from the gas s pply piping system by
closing its individ al sh toff valve d ring any press re testing of the gas
s pply piping system at test press res eq al to or less than ½ psi
(3.5kPa).
When installed, this appliance m st be electrically gro nded in accordance with
local codes, or in the absence of local codes, the National Electric Code
ANSI/NFPA 70 or the Canadian Electrical Code CSA C22.2, as applicable.
A wiring diagram is located on the inside of the appliance’s right side panel.
This appliance is eq ipped with a 3-prong (gro nding) pl g for yo r protection
against shock hazard and sho ld be pl gged directly into a properly gro nded 3-
prong receptacle. Do not c t or remove the gro nding prong from the pl g.
Table of contents
Other BKI Oven manuals


