manuals.online logo
Brands
  1. Home
  2. •
  3. Brands
  4. •
  5. Black Box
  6. •
  7. Control Unit
  8. •
  9. Black Box JHN2047A User manual

Black Box JHN2047A User manual

Order toll-free in the U.S.: Call 877-877-BBOX (outside U.S. call 724-746-5500)
FREE technical support 24 hours a day, 7 days a week: Call 724-746-5500 or fax 724-746-0746
Mailing address: Black Box Corporation, 1000 Park Drive, Lawrence, PA 15055-1018
Web site: www.blackbox.com • E-mail: [email protected]
CUSTOMER
SUPPORT
INFORMATION
SEPTEMBER 2005
JHN2047A
2
GHz
Bandwidth
1. Specifications
Connectors: (8) F-type
Size: 3"H x 6.3"W (7.6 x 16 cm)
Weight: 0.7 lb. (0.3 kg)
2. Overview
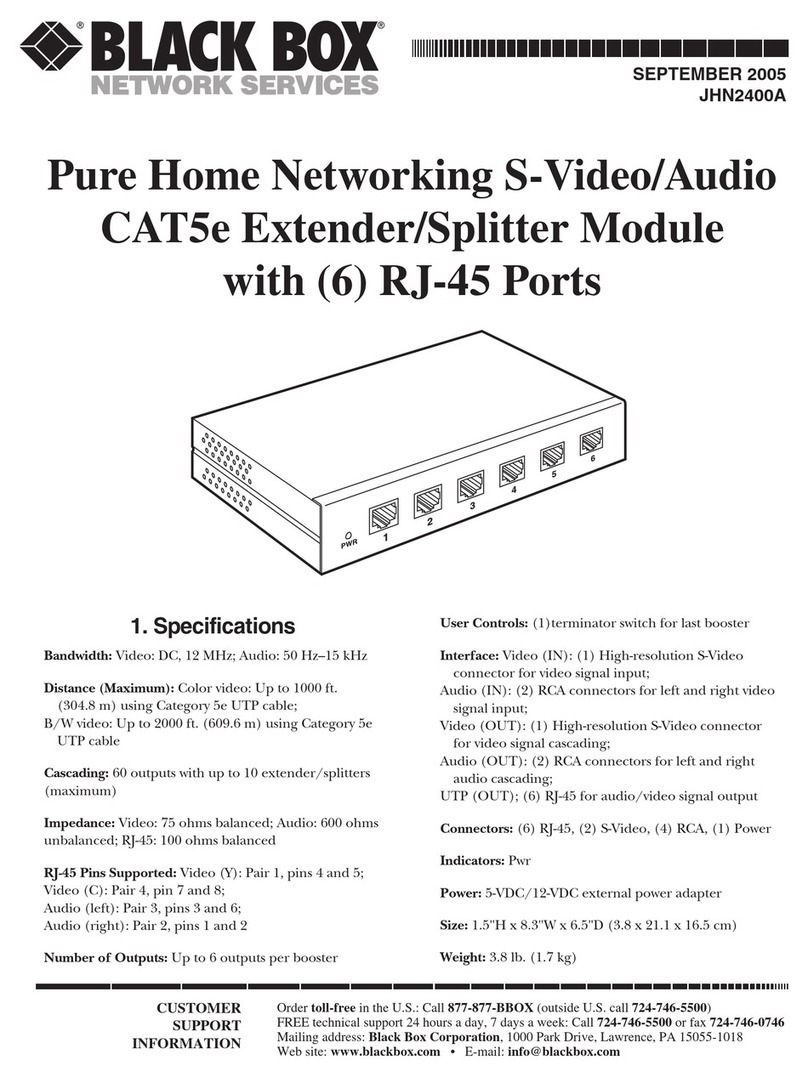
The Pure Home Networking 4 x 4-Port Digital
Broadcast Satellite Video/Audio Module should be
installed in one of the Pure Home Networking Boxes
(JHN1014A, JHN1020A, JHN1030A, or JHN1040A).
This passive module is designed and created for the
central demarcation of satellite cables. It’s compatible
with systems from Dish Network, DirectTV, and many
satellite providers. Check with your service provider for
specific details and instructions.
Pure Home Networking
4 x 4-Port Digital Broadcast Satellite
Video/Audio Module
3. Installation
3.1 Tools You’ll Need
• RG-6 connectors
• RG-6 cable
• RG-6 cable cutter
• RG-6 cable stripper
• RG-6 hex crimping tool
3.2 Cable Handling Guidelines
• Do not route data cables through the same cable
holes as the AC power cables.
• For safety, separate all data cables from parallel AC
power lines by at least 6 inches (15.2 cm)
whenever possible. Avoid kinking the cable.
1000 Park Drive • Lawrence, PA 15055-1018 • 724-746-5500 • Fax 724-746-0746
© Copyright 2005. Black Box Corporation. All rights reserved.
Any trademarks mentioned in this manual are acknowledged to be the property of the trademark owners.
• Do not attach cable tie-downs too tightly. The
cable-fastening hardware should not compress
the cable sheath.
• Do not bend the cable sharply. Place the cables
properly in the cable management after passing
them through the holes, since the edges of the
hole can compress or damage the cable sheath.
• When installing an individual module in the Pure
Home Networking Box, place it above or below
the interfacing module (if possible). This will
eliminate excessive cable crossing.
• For your safety, do not use this or any electrical
product near water (unless it is specifically
designed for wet areas). Do not install wiring
during thunder and lightning storms.
• Use caution when handling or installing any
computer, telephone, video, or electrical devices.
3.3 Installing a Module in the Pure Home Networking Box
1. Determine the area for installation.
2. Position the metal tabs on the left side of the
module at a 45-degree angle and slide them into
the rail holes on the Pure Home Networking Box.
3. Insert the metal tabs on the right side of the
module into the rail.
4. Press the button to fasten the module to the Pure
Home Networking Box.
3.4 Removing a Module from the Pure Home Networking Box
1. Press the button and hold it in while pulling the
module from the Pure Home Networking Box.
2. Swing the module out.
3.5 Module Configuration
The 4 x 4-Port Digital Broadcast Satellite Video/Audio
Module is a pass-through satellite grounding bus, rated
at 2 GHz.
For standard satellite connections, you will need the
module. You will also need to create the necessary
coaxial connections for your application. To do so, you
will need the tools listed in Section 3.1.
1. Install the Pure Home Networking 4 x 4-Port
Digital Broadcast Satellite Video/Audio Module
and connect all incoming devices, such as satellite
feeds.
NOTE
If you are using a multi-switch, place it inline between the
4 x 4-Port Digital Broadcast Satellite Video/Audio Module
and the satellite dish.
2. Next, install the output cables from the 4 x 4-Port
Digital Broadcast Satellite Video/Audio Module to
the desired receivers or cable box.
NOTE
Do not use a splitter between the module and your receiver
or cable box. Doing so will greatly degrade the signal,
resulting in poor reception.
3. Attach one end of the grounding wire (included)
to the connector on the 4 x 4-Port Digital
Broadcast Satellite Video/Audio Module and the
other end of the connector to one of the ground-
ing screws on the Pure Home Networking Box.
Figure 3-1 shows a sample application.
Figure 3-1. Typical setup.
Pure Home
Networking 4 x
4-Port Digital
Broadcast
Satellite
Video/Audio
Module
Ground
From satellite or
multi-switch
To receivers or
cable boxes
Cable
Management
Channel

Other Black Box Control Unit manuals

Black Box FollowMe LH3800A User manual

Black Box

Black Box FollowMe LH3800A User manual

Black Box MTU200CF-N64 User manual

Black Box

Black Box MTU200CF-N64 User manual

Black Box ServSwitch DTX Control User manual

Black Box

Black Box ServSwitch DTX Control User manual

Black Box V.11 LS User manual

Black Box

Black Box V.11 LS User manual

Black Box JHN2050A User manual

Black Box

Black Box JHN2050A User manual

Black Box T568B User manual

Black Box

Black Box T568B User manual

Black Box SOHO 7-Zone Audio Module User manual

Black Box

Black Box SOHO 7-Zone Audio Module User manual

Black Box VIDEOPLEX 4000 User manual

Black Box

Black Box VIDEOPLEX 4000 User manual

Black Box 5 User manual

Black Box

Black Box 5 User manual

Black Box Receive Module for ServSwitch KV1702C User manual

Black Box

Black Box Receive Module for ServSwitch KV1702C User manual

Black Box EVSW-240-100-60 User manual

Black Box

Black Box EVSW-240-100-60 User manual

Black Box LRA1204C User manual

Black Box

Black Box LRA1204C User manual
Black Box JHN2046A User manual

Black Box

Black Box JHN2046A User manual

Black Box LMC5113C User manual

Black Box

Black Box LMC5113C User manual
Black Box ServSwitch KV1400A User manual

Black Box

Black Box ServSwitch KV1400A User manual

Black Box PS590A User manual

Black Box

Black Box PS590A User manual

Black Box ServLINK ACRPWR User manual

Black Box

Black Box ServLINK ACRPWR User manual
Black Box JHN2021A User manual

Black Box

Black Box JHN2021A User manual

Black Box JHN2400A User manual

Black Box

Black Box JHN2400A User manual

Popular Control Unit manuals by other brands

Forte A-BUS AB-BT20 INSTALLATION GUIDE & WARRANTY INFORMATION

Forte

Forte A-BUS AB-BT20 INSTALLATION GUIDE & WARRANTY INFORMATION

Measurement Computing Measurement Advantage USB-TC user guide

Measurement Computing

Measurement Computing Measurement Advantage USB-TC user guide

Antec VFX Series manual

Antec

Antec VFX Series manual

SOMFY EOLIS RECEIVER Installation and operating instructions

SOMFY

SOMFY EOLIS RECEIVER Installation and operating instructions

HBM TN Mounting instructions

HBM

HBM TN Mounting instructions

Blueview M8-B quick start guide

Blueview

Blueview M8-B quick start guide

Fermax 2426 installation guide

Fermax

Fermax 2426 installation guide

Watson-Marlow MC100 user manual

Watson-Marlow

Watson-Marlow MC100 user manual

Advantech PCM-3665 PC/104-Plus Startup manual

Advantech

Advantech PCM-3665 PC/104-Plus Startup manual

CALEFFI Altecnic SATK40103 Installation, operation & maintenance instructions

CALEFFI

CALEFFI Altecnic SATK40103 Installation, operation & maintenance instructions

MG 18KYC instruction manual

MG

MG 18KYC instruction manual

WAGO 750-1405/040-000 manual

WAGO

WAGO 750-1405/040-000 manual

Mitsubishi Electric AJ65BT-68TD user manual

Mitsubishi Electric

Mitsubishi Electric AJ65BT-68TD user manual

VP PBA Series manual

VP

VP PBA Series manual

Dewetron DAQP-LV Technical reference manual

Dewetron

Dewetron DAQP-LV Technical reference manual

SPL De-Esser 500 Series manual

SPL

SPL De-Esser 500 Series manual

Gate Aster BASIC quick start guide

Gate

Gate Aster BASIC quick start guide

M-system R3-RS8 instruction manual

M-system

M-system R3-RS8 instruction manual

manuals.online logo
manuals.online logoBrands
  • About & Mission
  • Contact us
  • Privacy Policy
  • Terms and Conditions

Copyright 2025 Manuals.Online. All Rights Reserved.