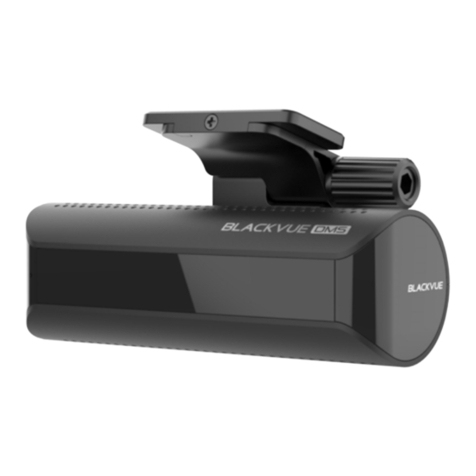
BlackVue R-200WR User manual

R-200WR
R-200WR
FCC ID : YCK-R-200WR / HVIN : R-200WR / IC : 23402-R200WR
©
WIRELESS REARVIEW SYSTEM
Wireless Rearview System
2019

For manuals, customer support and FAQs go to www.blackvue.com
BLACKVUE
R-200WR

R-200WR 3
Important safety information
For user safety and to avoid property damage, read through this manual and follow these
safety instructions to use the product correctly.
yDo not disassemble, repair, or modify the product yourself.
Doing so may cause fire, electric shock, or malfunction. For internal inspection and
repair, contact the service center.
yDo not adjust the product while driving.
Doing so may cause an accident. Stop or park your car in a safe place before installing
and setting up the product.
yDo not operate the product with wet hands.
Doing so may cause electric shock.
yIf any foreign matter gets inside the product, detach the power cord immediately.
Contact the service center for repair.
yDo not cover the product with any material.
Doing so may cause external deformation of the product or fire. Use the product and
peripherals in a well-ventilated location.
yIf the product is used outside the optimal temperature range (-20°C - 70°C / -4°F - 158°F),
performance can decline or malfunctions may occur.
yDon't use voltages other than the input voltage.
It may cause malfunction or fire.
yPlease disconnect the power cable if you will not be using the product for a long time.

4BLACKVUE
FCC Compliance Information
This equipment has been tested and found to comply with the limits for a Class B
digital device, pursuant to Part 15 of the FCC Rules. These limits are designed to provide
reasonable protections against harmful interference in a residential installation.
This equipment generates, uses and can radiate radio frequency energy and, if not
installed and used in accordance with the instructions, may cause harmful interference to
radio communications. However, there is no guarantee that interference will not occur in a
particular installation.
If this equipment does cause harmful interference to radio or television reception which
can be determined by turning the equipment off and on, the user is encouraged to ty to
correct the interference by one or more of the following measures.
yReorient or relocate the receiving antenna.
yIncrease the separation between the equipment and receiver.
yConnect the equipment into an outlet on a circuit different from that to which the
receiver is connected.
yConsult the dealer or an experienced radio, TV technician for help.
yOnly shielded interface cable should be used.
Finally, any changes or modifications to the equipment by the user not expressly approved
by the grantee or manufacture could void the user’s authority to operate such equipment.
This device complies with Part 15 of the FCC Rules. Operation is subject to the following
two conditions:
(1) This device may not cause harmful interference, and
(2) This device must accept any interference received, including interference that may
cause undesired operation of this device.
FCC ID: YCK-R-200WR

R-200WR 5
CAUTION
Any changed or modifications in construction of this device which are not expressly
approved by the party responsible for compliance could void the user’s authority to
operate the equipment.
There is a risk of explosion if the battery is replaced by an incorrect type.
Dispose of used batteries according to the instructions.
CE WARNING
yChanges and modifications not expressly approved by the party responsible for
compliance could void the user’s authority to operate the equipment.
yIt is desirable that it be installed and operated with at least 20cm or more between the
radiator and a person’s body (excluding extremities: hand, wrists, feet, and ankles).

6BLACKVUE
ICC Compliance
This Class [B] digital apparatus complies with Canadian ICES-003.
This radio transmitter has been approved by Industry Canada to operate with the antenna
types listed below with the maximum permissible gain and required antenna impedance
for each antenna type indicated. Antenna types not included in this list, having a gain
greater than the maximum gain indicated for that type, are strictly prohibited for use with
this device.
- IC Warning
This device complies with Industry Canada licence-exempt RSS standard(s).
Operation is subject to the following two conditions:
(1) this device may not cause interference, and
(2) this device must accept any interference, including interference that may cause
undesired operation of the device.
Le présent appareil est conforme aux CNR d’Industrie Canada applicable aux appreils radio
exempts de license.
L’exploitation est autoriséee aux deux conditions suivantes:
(1) l’appareil ne doit pas produire de brouillage, et
(2) l’utilisateur de l’appareil doit accepter tout brouillage radioélectrique subi, méme si le
brouillage est susceptible d’encompromettre le fonctionnement.
IC: 23402-R200WR

R-200WR 7
In the box
Wireless Rearview Kit
(R-200)
Wireless Rear Camera
(ERC-100W)
R-200 Mounting Tape
(2EA)
R-200 Power Cable
(4.5m)
LCD Power Cable (4m) AV Cable (4m)
Car Reverse Extension
Cable (15m)
2dBi Antenna for
ERC-100W
2dBi G-mouse
Antenna for R-200
(3m)
User Guide
Wire Connector (5ea) Magnet (for pairing)
* Components of this product may be changed/modified without prior notice in order to
improve product performance.
* The Rearview system (R-200WR) is compatible with the front camera of DR750S-2CH and
DR900S-2CH provided that the latest firmware is installed in the dashcam.

8BLACKVUE
At a glance
Wireless Rearview Kit (Receiver)
- Top view
Pairing LED
Recording LED
- Front view
Wireless Rear Camera Image
Mirroring Button
Pairing Button

R-200WR 9
- Back view
LCD Power Cable
Connector
AV Out Cable Connector
(for display)
Antenna Connector
Coaxial Cable Connector
for Front Camera
R-200 Power Cable
Connector
Wireless Rear Camera (ERC-100W)
External Mounting
Bracket
Illumination
Sensor
Hood
Antenna
IR LED
Camera lens
Power Cable
(5m)
Hall effect sensor
(for pairing)
The illumination sensor detects when it is dark and activates the IR LEDs which help to pick
up more detail in dark areas. The rear camera housing is dust-proof and waterproof.
* When installing, make sure that the orientation of the camera is correct. If installed
otherwise its image/video will display upside down.

10 BLACKVUE
Installation guide
LCD
Blackvue dashcam
yInstall the product in a location that doesn’t interfere with diver’s vision.
yTurn off the engine before installation.
yRefer to your vehicle Owner’s Manual to locate the fuse box.

R-200WR 11
Full wiring diagram
GND
RCA jace
(MALE)
G-mouse
antenna
Reverse Light or
ACC power
Reverse Light Fuse or
R-200
ACC
POWER
POWER
Fuse Box DR750S-2CH/
DR900S-2CH
Front camera
Wireless Rear
Camera
(ERC-100W)
LCD LCD already in use
(navigation etc.)
Note
The RearView kit and Wireless rear camera are compatible with DR750S-2CH and DR900S-2CH.
However Resolution, Image quality and Camera (video) orientation settings of the wireless rear
camera are fixed and cannot be changed from the dashcam’s firmware settings.

12 BLACKVUE
1. Installing Wireless RearView Kit (R-200):
1.1. Find a suitable place to install the R-200 on the dashboard.
1.2. Connect the power wire (red) to an ACC fuse.
Please refer to your vehicle Owner’s Manual to identify an ACC fuse in the fuse box.
Typical examples are the cigarette lighter and car stereo fuses.
Caution
If you connect the power wire directly to a Constant Power (BATT) fuse it may result in depletion of
your vehicle’s battery when ignition is off.
1.3. Connect the ground wire (ring) to a ground point, such as a bolt, located directly on
a bare metal part of the vehicle's frame. Secure the ground wire to the bare metal
frame (for example by securing it under the bolt).
2. Installing Wireless Rear Camera:
2.1. Find a suitable location to install the rear camera on the back side of your vehicle.
2.2. There are two ways to power the rear camera:
A. When you want to connect the front camera of DR750S-2CH/DR900S-2CH to
R-200 to save recordings of the wireless rear camera as well during driving.
Find a power source (12V/24V) on the backside of your vehicle that stays
constantly powered on as long as engine is ON. Connect the power cable of
rear camera to it according to wires’ color; red to red (power) wire and black to
black (ground) wire.

R-200WR 13
B. When you want to use the wireless rear camera as back-up camera only.
Locate the wires that power the reverse lights. Connect the red wire and black
wire of the rear camera to the red (power) wire and black (ground) wire of the
reverse lights respectively.
3. Connecting R-200 to the display
* Explained for BlackVue RearView LCD only. Other LCDs in use might have different configuration.
3.1. There are two ways to connect LCD to R-200.
A. If you want the rear camera image to display on LCD only when the reverse
gear is engaged, then connect the red (power) and black (ground) wire of LCD
interface cable to the respective color wires of LCD power cable and connect
the green (reverse signal) wire to the reverse lights’ fuse in the fuse box to the
lights wiring directly. Use the Car Reverse extension cable if needed.
LCD
R-200
Reverse signal wire
LCD interface cable LCD Power cable
B. If you want the rear camera image to display on LCD all the time during driving,
connect the green (Reverse signal) and red (power) wire of LCD interface cable
to the red wire of LCD power cable and black (ground) wire to black wire of LCD
power cable.
LCD
R-200
LCD interface cable LCD Power cable
3.2. Connect male connector of AV cable to RCA jack (female) of the LCD interface cable.

14 BLACKVUE
4. Connect G-mouse antenna and AV cable to R-200.
* Peel off the protective film from the double-sided tape and attach the G-mouse antenna at high
point on the windshield.
Note
<When you connect to the LCD (navigation, etc.) already in use>
yConnect AV cable (male) to RCA jack (female) of the LCD already in use.
yThe specifications and operating methods may differ for each product. Please connect after
reviewing the user’s manual of the LCD being used.
Once all the wires are properly connected and routed, turn on the engine to check the
operation of the product.
5. Connecting the front camera of DR750S-2CH / DR900S-2CH to
R-200
5.1. Peel off the protective film from the double-sided tape and attach the front camera
to the windshield behind the rear-view mirror.
* Refer to DR750S-2CH / DR900S-2CH Quick start guide to check further details of installation for
the front camera.
5.2. Connect R-200 (V-OUT port) and front camera using the coaxial cable.
5.3. Plug the power cable of the front camera into the cigarette lighter socket
Pairing R-200 and ERC-100W:
The BlackVue Wireless Rear camera (ERC-100W) and the Rear View Kit (R-200) are factory
paired. However, if you replace any of these with another one, you will have to pair the new
set manually using a magnet. To do so, please do following steps:
1. Connect the antennas of R-200 and ERC-100W, then power them up along with the LCD.
* Place R-200 and ERC-100W at least 30cm apart.
2. Press and hold the pairing button on R-200 for few seconds (until “LINK” LED starts to
blink).
3. Then place and hold the south pole of the magnet on the Hall effect sensor (magnetic
field sensor) on the wireless rear camera for 5~7 seconds.

R-200WR 15
Place the south pole of
the magnet over here
Once paired, the “LINK” led will turn off and “SAVE DATA” or “Wait TX Signal” will appear
on the LCD. Restart the wireless rear camera (if the rear camera is already installed and
hardwired, simply turn OFF ignition of your vehicle and turn back ON) and the image will
appear on the LCD. If pairing fails, repeat the above procedure or contact the BlackVue
dealer

16 BLACKVUE
Note
yIf you want to record the front camera and wireless rear camera footage in
parking mode as well, hard wire the front camera using a Power Magic Pro (sold
separately) to the fuse box of your vehicle (Please refer to respective product
manual for installation guide). Then, connect the red and black wire of R-200
power cable to the output wires of Power Magic Pro. (To increase the parking
mode recording time, turn off the LCD when the engine is off.)
R-200 Power Cable
Power Magic Pro
Fuse Box
Dashcam
Then use another Power Magic Pro to hardwire the wireless rear camera.
yUse wire connectors for stable and secure connection.
yIf wires are connected directly, insulate them properly.

R-200WR 17
Product Specications
Rearview Kit (Receiver)
Model Name R-200
Color/Size/Weight Black / 80mm x 80mm x 18mm / 70g
Analog Video-out CVBS : NTSC 525 line @ 60Hz (Display)
Digital Video-out BT.656 : 704 x 480 @30fps (Rear Camera Recording)
Transmit Frequency 2.4~2.4835GHz ISM band
LED Indicators Pairing LED, Recording LED
Button
Pairing button : 1ea
Video Mirror Switch : 1ea
Fuse Built-in Poly Fuse
Input Power DC 12V-24V (DC Plug: (Ø3.5 x Ø1.35), MAX 1A/12 V)
Power Consumption
Avg. 150 mA (1.8 W at 12 V, when LCD is not connected)
Avg. 220 mA (2.64 W at 12 V, when LCD is connected but
OFF)
Avg. 420 mA (5.04 W at 12 V, when LCD is connected and
ON)
* Actual power consumption may vary depending on use
conditions and environment.
Output Power(for
display) DC 12V-24V, 0.5A
Operation Temperature -20 °C − 70 °C (-4 °F − 158 °F)
Storage Temperature -20 °C − 70 °C (-4 °F − 158 °F)
Certificates FCC, CE, RoHS, IC

18 BLACKVUE
Wireless Rear Camera
Model Name ERC-100W
Color/Size/Weight Black / 72.7mm x 58.6mm x 45.8mm / 452g
Viewing Angle Diagonal 130°, Horizontal 101°, Vertical 75°
Camera VGA CMOS Sensor (Approx. 0.3 megapixel)
Image quality 2Mbps
Transmit Frequency 2.4~2.4835GHz ISM band
LEDs 850nm IR LEDs (12ea)
Sensor
Hall Effect Sensor (for Pairing)
Ambient Light Sensor
IP rating IP68
Input Power DC 12V-24V (MAX 0.5 A/12 V)
Power Consumption
Avg. 160 mA (1.92 W at 12 V, when IR LEDs are OFF)
Avg. 220 mA (2.64 W at 12 V, when IR LEDs are ON)
* Actual power consumption may vary depending on use
conditions and environment.
Operation Temperature -20 °C − 70 °C (-4 °F − 158 °F)
Storage Temperature -20 °C − 70 °C (-4 °F − 158 °F)
Certificates FCC, CE, RoHS, IC
* The Rearview system (R-200WR) is compatible with the front camera of DR750S-2CH and
DR900S-2CH. You can download the latest firmware of the dashcams from
www.blackvue.com > Support > Downloads.

Notes

Notes
Table of contents
Other BlackVue Automobile Accessories manuals
Popular Automobile Accessories manuals by other brands

Torklift central
Torklift central X7286 installation instructions

ATI Technologies
ATI Technologies ePod installation manual

Steeda
Steeda Tri-Ax installation instructions

Altox
Altox WBUS-4 v2 Operational manual

SafeGuard
SafeGuard 69200 Operating instructions & parts manual

Witter
Witter F144 Fitting instructions

TurboCharge
TurboCharge EVC15 Series user manual

Magneti Marelli
Magneti Marelli AC723 Installation instruction

B-Speech
B-Speech Tera user manual

Cruz
Cruz Alu Cargo AF 118 Assembly instructions

Tuff Tonneaus
Tuff Tonneaus 141 FITTING INSTRUCTION

Tuff Tonneaus
Tuff Tonneaus Colorado Dual Cab with Headboard 250 FITTING INSTRUCTION