BlueBuilt CBL1166 User manual

In the box
1
Stacking kit,
2
Plastic strips (4x),
3
Narrow anti-slip components (4x),
4
Strap,
5
Strap tensioner,
6
Wide anti-slip components (4x),
7
Plastic protective cover.
Your own tools
Spirit level.
15 minutes 2 people 2 cups
of coffee
AT TACHMENT.
No issues.
123
5
4
76
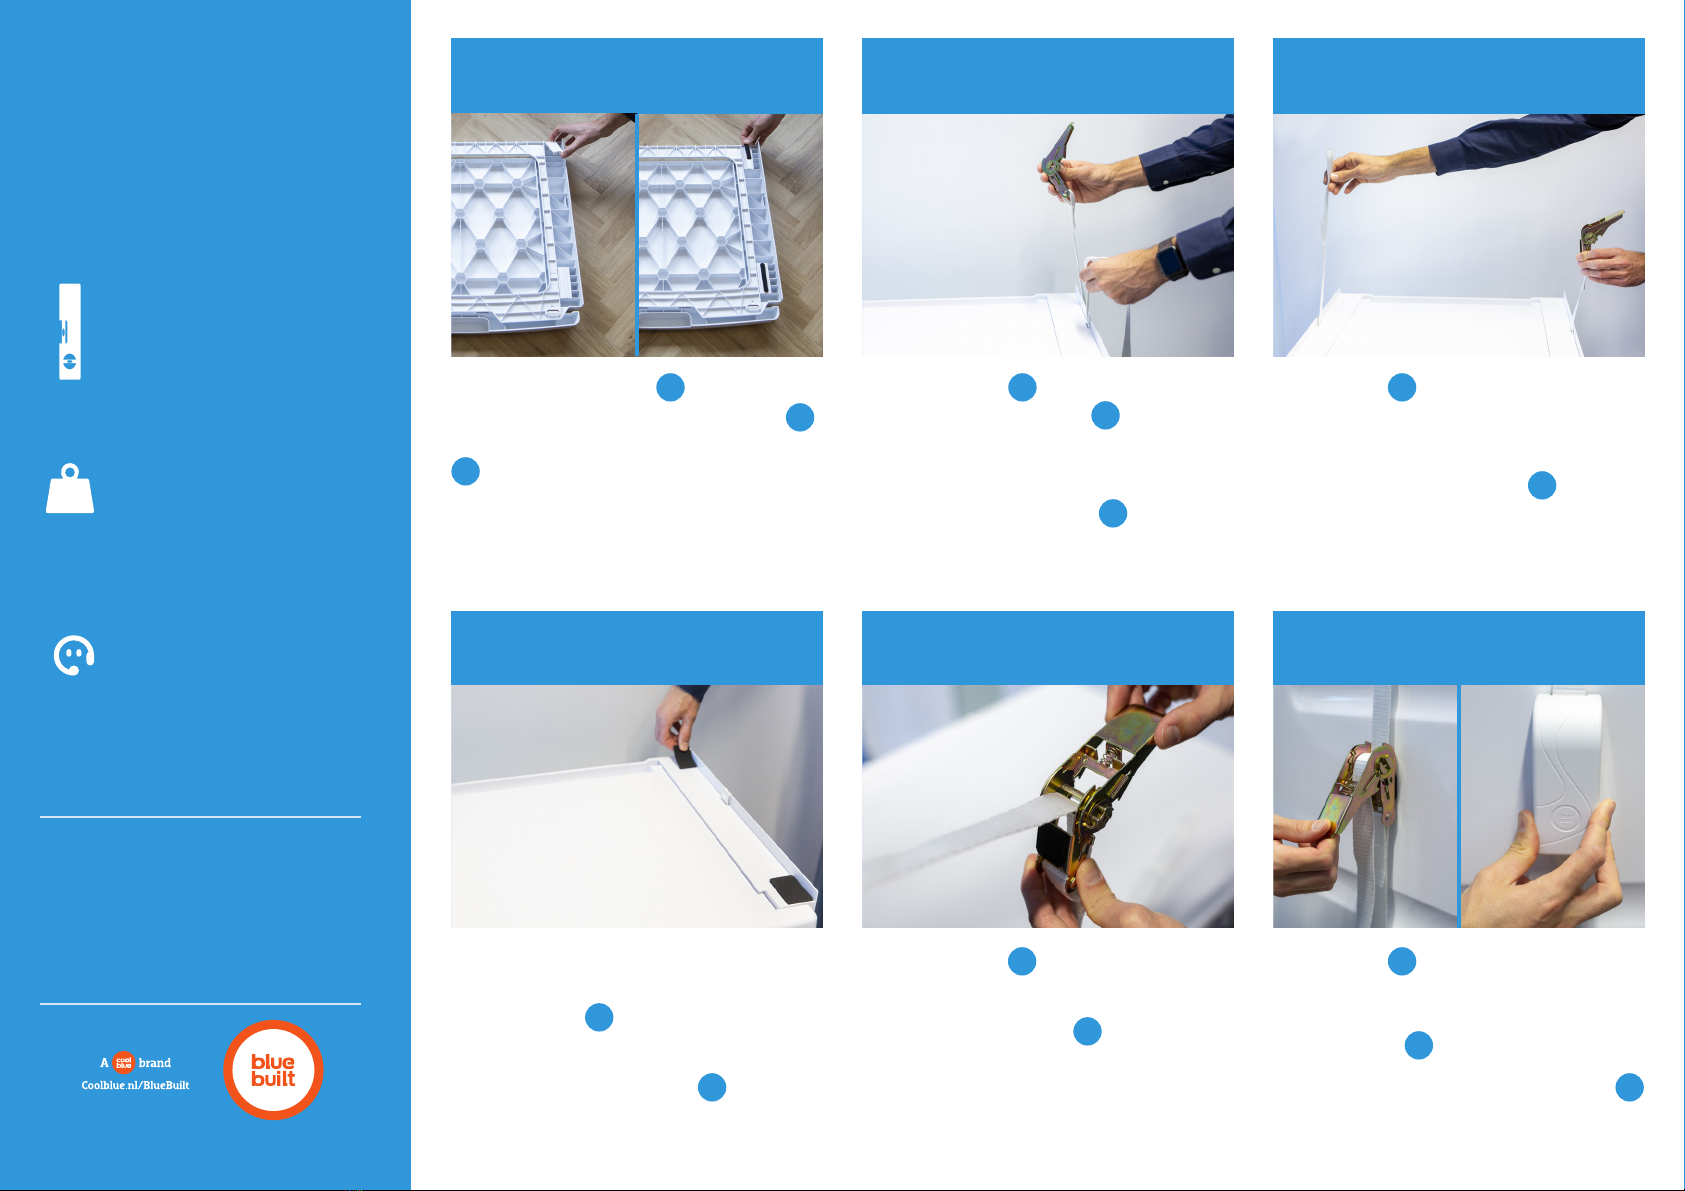
1.PLACING THE STACKING KIT 2.ATTACHING THE STRAP (1) 3.ATTACHING THE STRAP (2)
If the dryer’s legs are all the way in the
corners, place the dryer onto the middle of
the stacking kit
1
.
If not, unscrew all 4 legs and apply the
4 wide anti-slip components
6
onto the
corners of the stacking kit. Next, place your
dryer in the middle of the stacking kit.
Roll out the strap
4
and make sure the
lever of the strap tensioner
5
is pointing
outwards.
Pull the strap down through the slot on the
right side of the stacking kit
1
.
Tighten the strap
4
around the top or side
of your dryer as follows:
Open the strap tensioner
5
and pull the
strap through the middle slot. Next, pull
the strap all the way through the strap
tensioner.
Pull the strap
4
and tighten it around your
washing machine and dryer until it’s fixed
in place. Do this by pulling the lever of the
strap tensioner
5
up and down.
Finally, place the plastic protective cover
7
on top of the strap tensioner.
Pull the strap
4
underneath the washing
machine, keeping it straight in the middle.
Next, pull the strap up through the slot on
the left side of the stacking kit
1
. Leave the
strap hanging for now.
Need help?
Call 010 798 89 99
Coolblue.nl/en/customer-
service
Worktop load capacity.
e worktop is only suitable
for a maximum weight of 10
kilograms.
Placing it level.
Make sure the washing
machine is level before
placing the stacking kit.
CBL1166
4.PLACING THE DRYER 5.TENSIONING THE STRAP (1) 6.TENSIONING THE STRAP (2)
Follow all instructions as described here and
only use the included tools. Only use the
worktop for your laundry basket or to fold your
laundry. If you fail to do so, the warranty will be
voided and Coolblue won’t be liable. at would
be a waste of your purchase.
Press the 4 plastic strips
2
against every
corner on the bottom of the stacking kit
1
,
then stick the narrow anti-slip components
3
on top of them.
Samsung washer? Push them against the
outer edge. Turn the kit over and place it on
the middle of the machine.
CHECKLIST.
You’re 50% there.
Other BlueBuilt Household Appliance manuals


