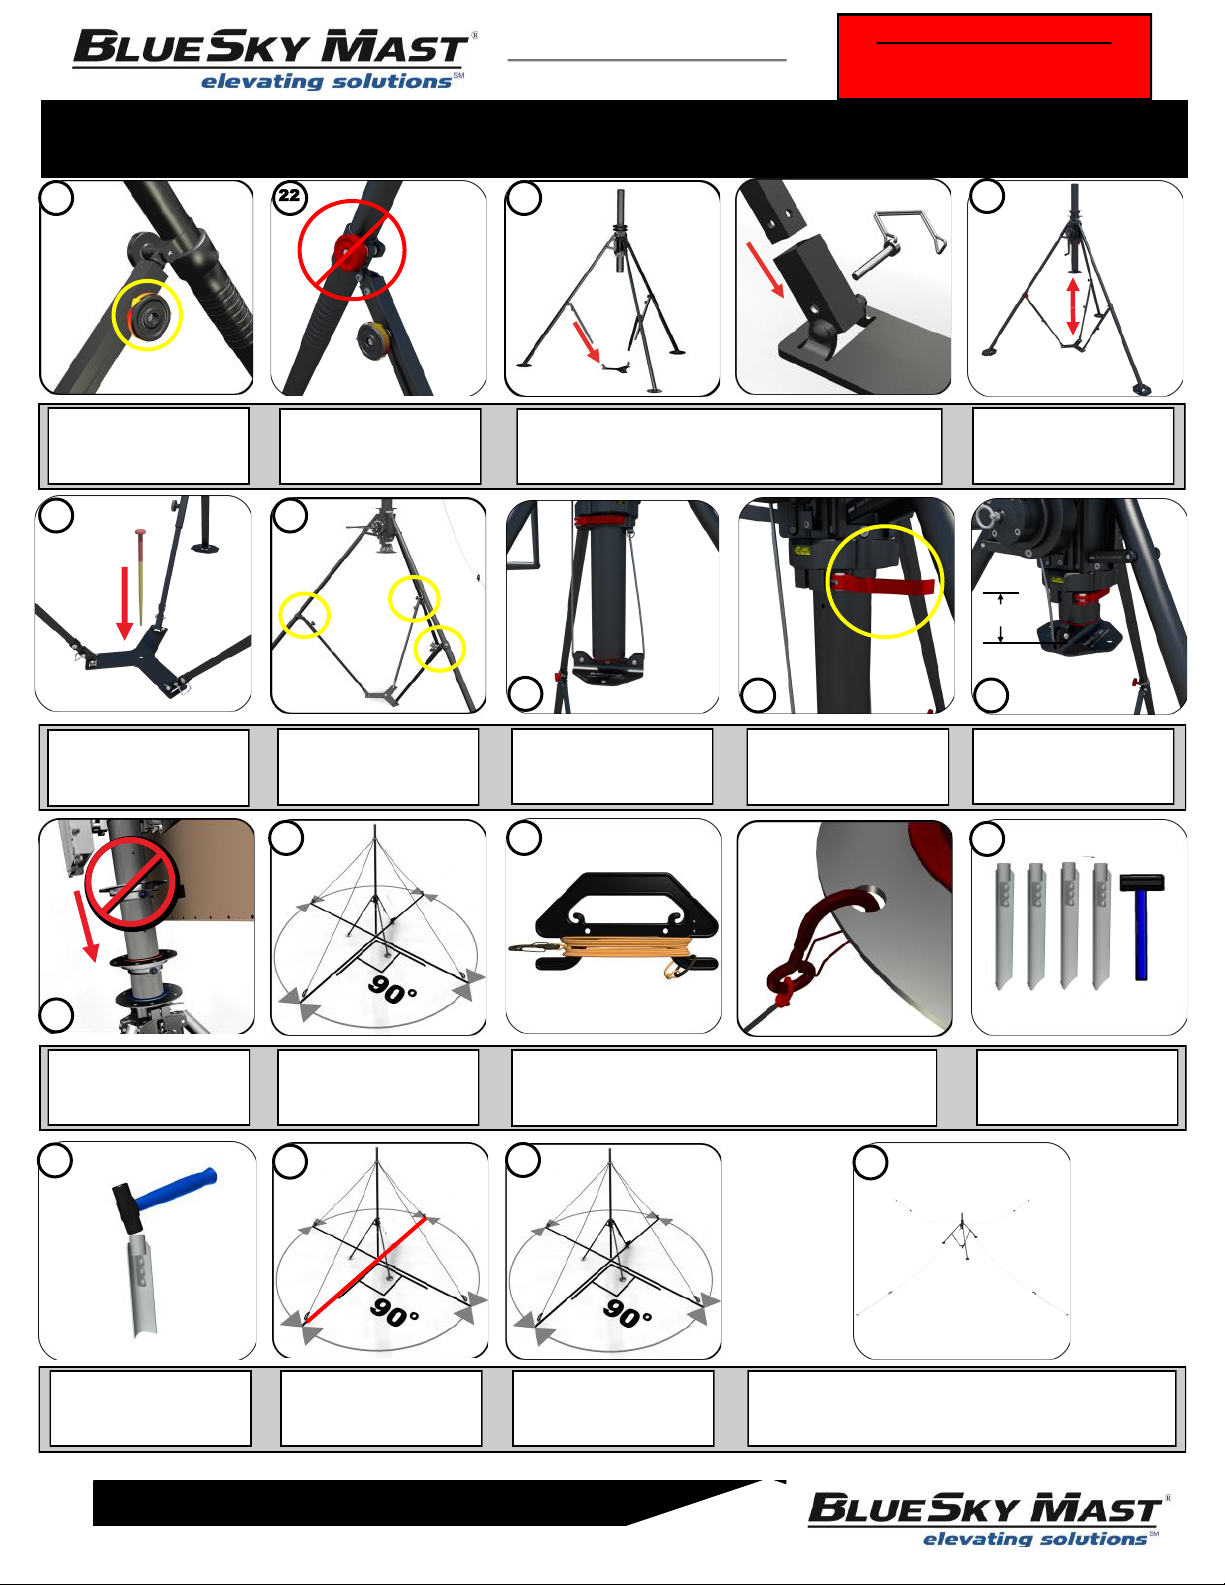
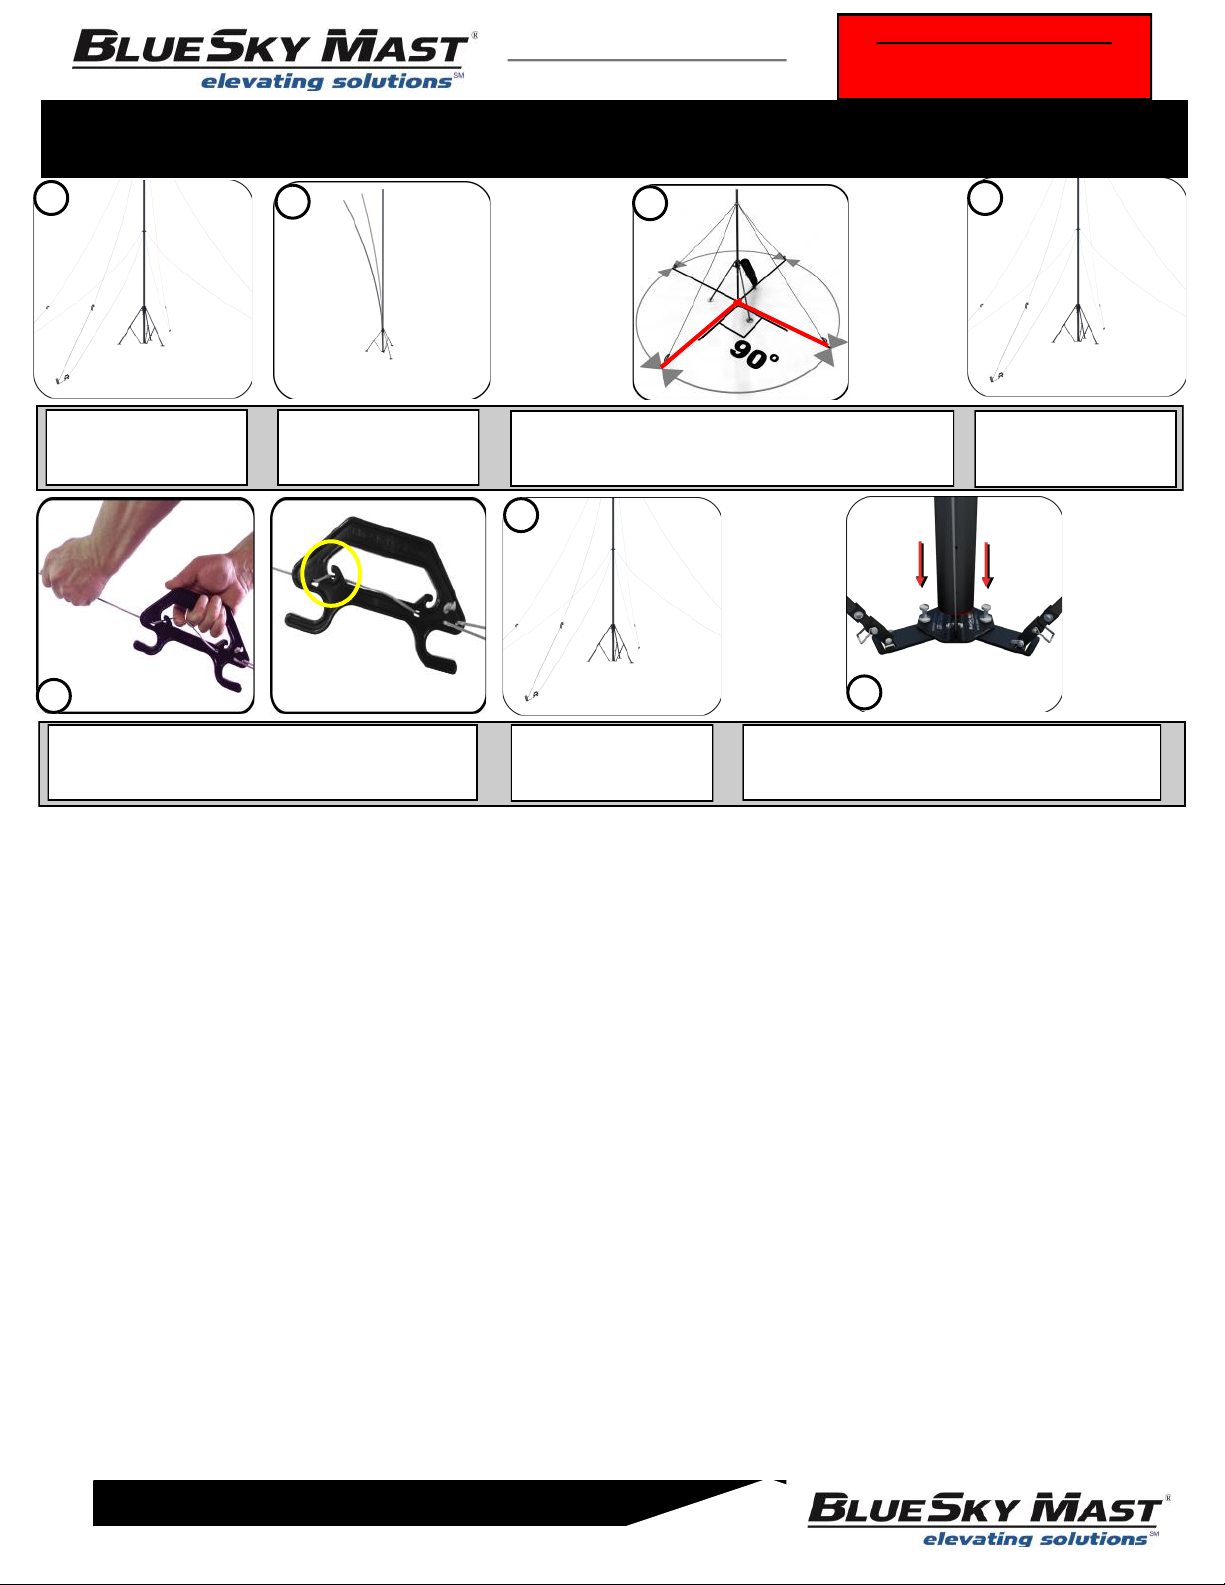
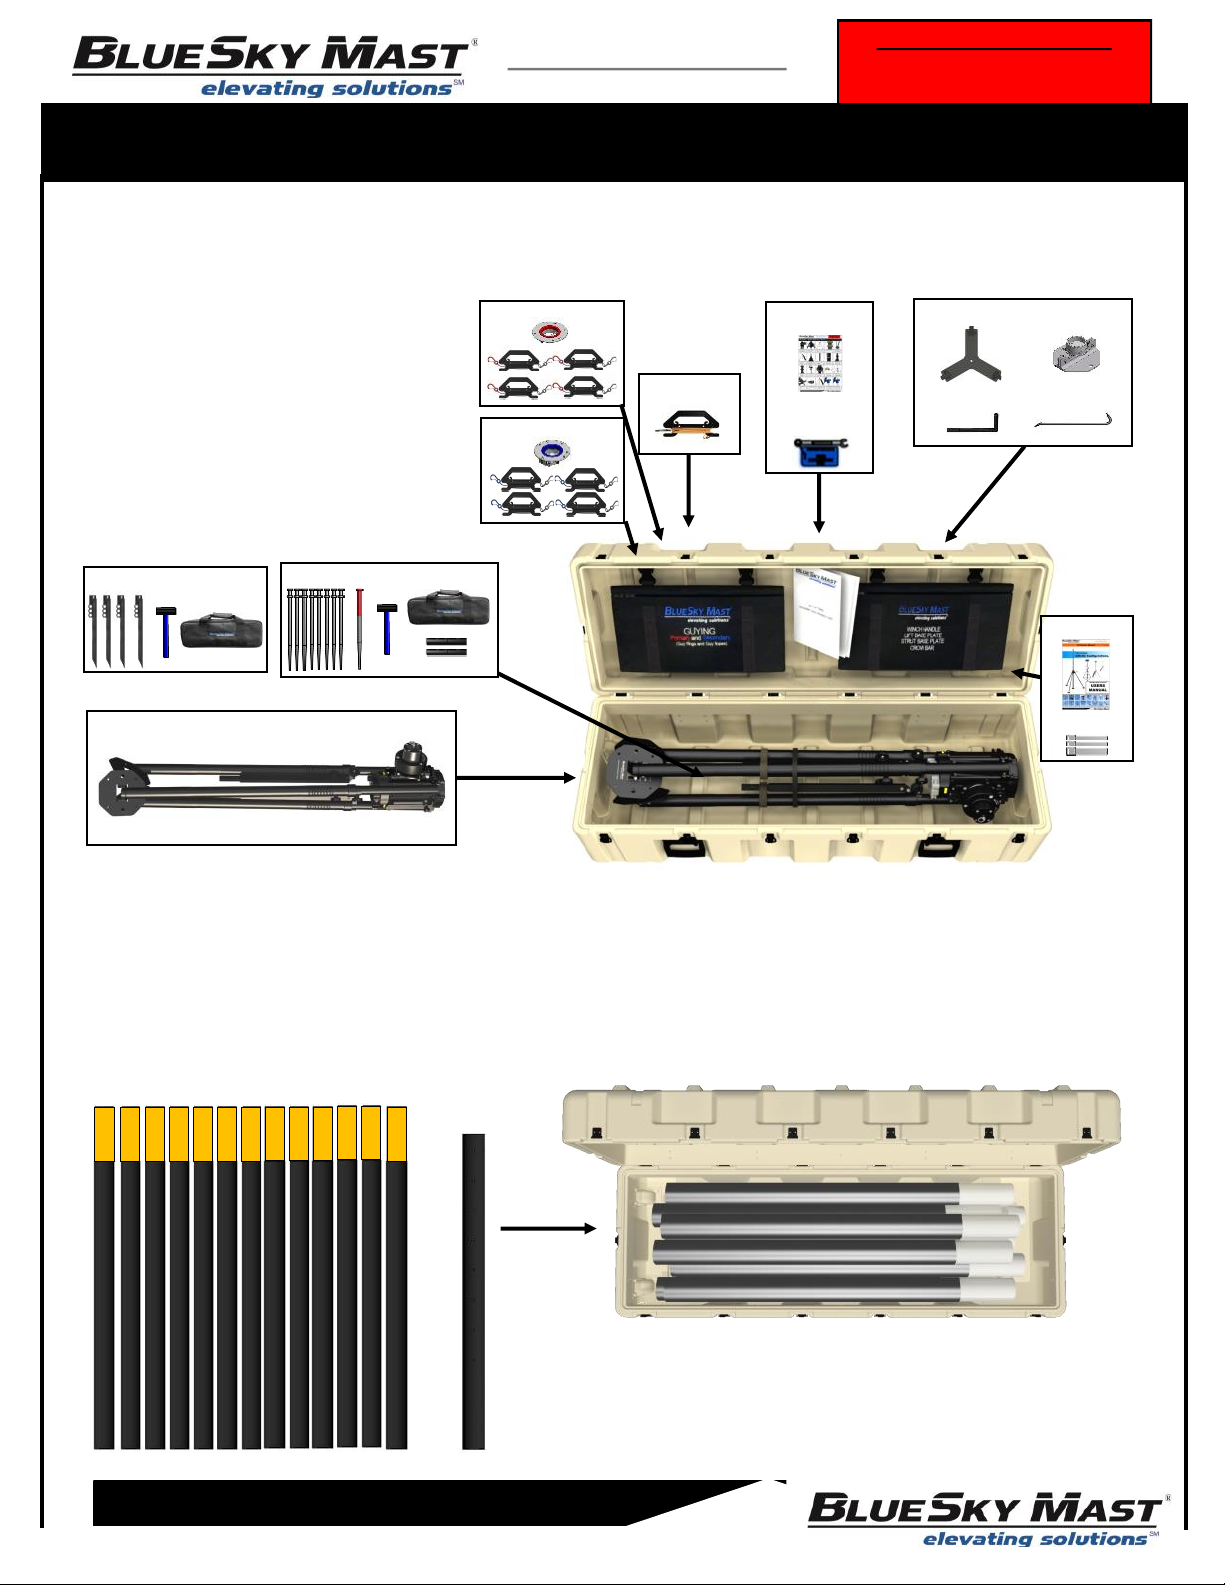
BlueSky Mast AL350 User manual


Other BlueSky Mast Lifting System manuals

BlueSky Mast
BlueSky Mast AL2 STANDARD Series User manual

BlueSky Mast
BlueSky Mast 350G XL Series User manual

BlueSky Mast
BlueSky Mast AL3 Series User manual

BlueSky Mast
BlueSky Mast 350G XL Series User manual

BlueSky Mast
BlueSky Mast AL350G Series User manual

BlueSky Mast
BlueSky Mast AL3 Series User manual
Popular Lifting System manuals by other brands

Sinoboom
Sinoboom GTJZ0608SE Operation manual

BraunAbility
BraunAbility GA Series Service manual

Oshkosh Corporation
Oshkosh Corporation JLG AE1932 Service maintenance manual

Lifter
Lifter HX10E Use and maintenance manual

Intellistage
Intellistage QuickLock R60LIGR installation instructions

Sinoboom
Sinoboom 1323RD Maintenance manual

stellar labs
stellar labs Slider50 owner's manual

Grundfos
Grundfos Sololift2 C-3 Installation and operating instructions

Braun
Braun Millennium 2 AD NL Series Service manual

HydroHoist
HydroHoist HarborHoist G1.5 owner's manual

Grove
Grove toucan 1010 Service manual

Jet
Jet JRL-912 Operating instructions and parts manual

Braviisol
Braviisol LUI S.I. 460 manual

Nussbaum
Nussbaum 4.65H Plus Operating Instruction and Documentation

Dhollandia
Dhollandia DH-LSP SeriesDH-LSP.05 Operation manual

morse
morse 515-N-110 Operator's manual

EZ-ACCESS
EZ-ACCESS PASSPORT user manual

Bend-Pak
Bend-Pak HDS-18EA Installation and operation manual