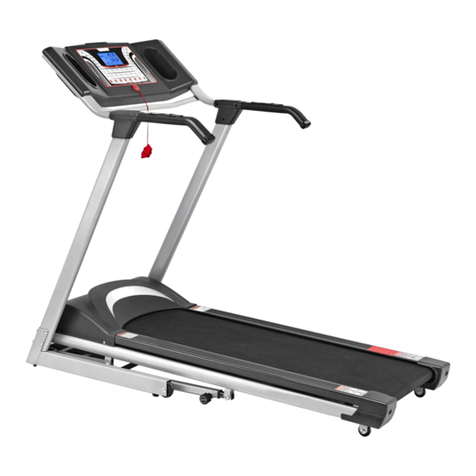
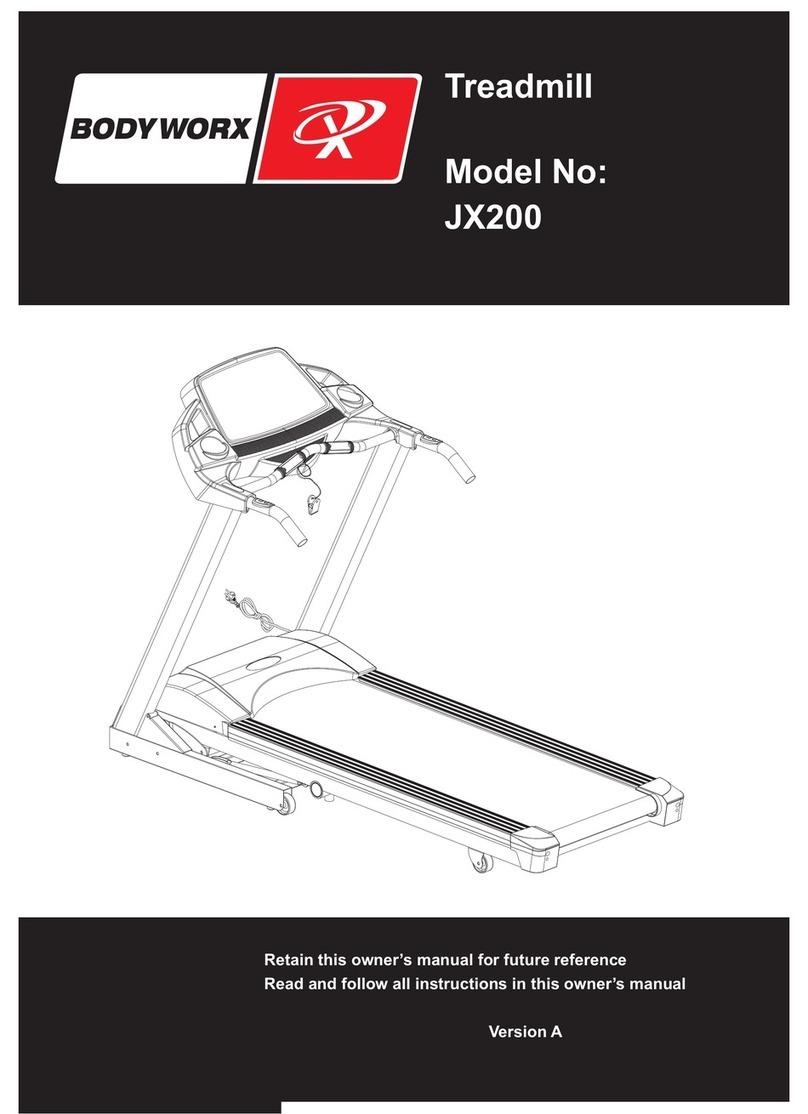
Bodyworx JTM2000 User manual

Model No: JTM2000
BODYWORX
JTM2000 TREADMILL
Retain this owner’s manual for future reference. Read and follow all instructions in this owner’s manual.
THE BELT COMES PRE-LUBRICATED
NO LUBRICATION REQUIRED
WARNING

CONTENTPAGE
WARRANTY REGISTRATION FORM 3
IMPORTANT SAFETY INSTRUCTIONS 4
SAFETY GUIDELINES 5
PRODUCT OVERVIEW 6
ASSEMBLY INSTRUCTIONS 7-9
FOLDING INSTRUCTIONS 10
GROUNDING METHODS 11
OPERATION GUIDE 12-17
GETTING STARTED GUIDE 18
SAFETY EXERCISE 19
EXERCISE INSTRUCTIONS 20-21
BELT ADJUSTMENT 22
EXPLODED DRAWING 23
PART LIST 24-25
ERROR CODE AND SIGNIFICANCE 26


Before beginning any tness program, you should obtain a complete physical examination
from your physician.
This exercise equipment is designed and built for optimum safety for home use. However,
certain precautions always apply whenever you operate any exercise equipment. Be sure to
read the entire manual before assembly and operation of this machine. Also, please note the
following safety precautions.
WHEN USING EXERCISE EQUIPMENT, YOU SHOULD ALWAYS TAKE BASIC PRECAUTIONS
INCLUDING THE FOLLOWING:
•Read all instructions before using the machine. These instructions are written to ensure your safety and to protect
the unit.
• Do not allow children on or near the equipment.
• Use the equipment only for its intended purpose as described in this guide.
• Do not use accessory attachments that are not recommended by the manufacturer. Such attachments might
cause injuries.
• Wear appropriate exercise clothing and shoes for your workout, no loose clothing. Do not wear shoes with
heels or leather soles. Ensure shoes are clean of dirt and embedded stones.
• Use care when getting on or off the unit.
• Do not over exert yourself or work to exhaustion.
• If you feel any pain or abnormal symptoms, stop your workout immediately and consult your physician.
• Never operate the unit after it has been dropped or damaged. Return the equipment to a service center for
examination and repair.
• Never drop or insert objects into any opening in the equipment.
• Always check the unit before each use. Make sure that all fasteners are secure and in good working condition.
• Do not use the equipment outdoors or near water.
• Only one person may use the machine at a time.
CHILDREN AND PETS
• Most exercise equipment is not recommended for small children. Children should not use the equipment
unless they are under strict adult supervision. To ensure safety, keep young children off the machine at all
times.
• Exercise equipment has many moving parts. In the interest of safety, keep others (especially children and
pets) at a safe distance while you exercise.
PERSONAL SAFETY DURING ASSEMBLY
•It is strongly recommended that a qualied dealer assemble the equipment. Assistance is required.
• Before beginning assembly, please take the time to read the instructions thoroughly.
• Read each step in the assembly instructions and follow the steps in sequence. Do not skip ahead. If you skip
ahead, you may learn later that you have to disassemble components and that you may have damaged the
equipment.
• Assemble and operate the machine on a solid, level surface. Locate the unit at least 1 meter from the walls or
furniture to provide easy access.
The machine is designed for your enjoyment. By following these precautions and using common sense, you will
have many safe and pleasurable hours of healthy exercise.
After assembly, you should check all functions to ensure correct operation. If you experience problems, rst
recheck the assembly instructions to locate any possible errors made during assembly.
Maximum User Weight: 130KG
IMPORTANT SAFETY
INSTRUCTIONS
4

Successful tness training programs have one prominent feature in common...safety. Fitness
training has some inherent dangers, as do all physical activities. The chance of injury can
be greatly reduced or completely removed by using correct techniques, proper breathing,
maintaining equipment in good working condition, and by wearing the appropriate clothing.
• It is highly recommended that you consult your physician before beginning any exercise program. This is
especially important for individuals over the age of 35, or persons with pre-existing health problems.
• Always warm up before starting a workout. Try to do a total body warm up before you start.
• Maintaining equipment in proper operating condition is of utmost importance for a safe training program.
• Keep hands, limbs, loose clothing and long hair well out of the way of all moving parts.
• Inspect the machine before each use for loose or worn parts. Ensure all nuts and bolts are fully tightened. If a
problem is found do not allow the machine to be used until all parts are tightened or worn or defective parts are
repaired or replaced.
SAFETY
GUIDELINES
5

The main technical parameters
Input supply voltage: 240V Working temperature: 0-40 ℃
Speed range: 0.8-16KM/H Incline range: 15 level motor incline
Max. user weight: 125kg Distance display range: 0.00-99.9km
Calories display range: 000-999 Time display range: 00:00-99:59 (min : sec)
Heart rate range: 50-200 (time / min) Running surface: 460*1350mm
Product size: 1750*760*1410mm Folding size: 1010*760*1540mm
Side cover
Product Overview
Computer
Upright
Handrail
Motor cover
End cap
Running belt
Side rail
Safety key
Base frame
Main frame
Cushion
6

WHEN YOU OPEN THE CARTON, YOU WILLFIND THE BELOW SPARE PARTS:
Main frame 1 set
D21 Inner washer M8
8 pcs
D13 Round hex bolt
M8*15 4 pcs
C13 Safety key 1 set
D2 Allen wrench 6mm,
1 pc
D3 Allen wrench 5mm,
1 pc
D1 Screw driver 1 pc
D16 Round hex bolt
M8*45 4 pcs
B18 Silicon oil 1 pc
B49 Bottle holder 2 pcs
D48 Cross self-tapping
bolt ST4.2X19, 4 pcs
C19 MP3 line 1 pc
B11
Left Side cover
1 pc
B11 Right Side cover
1 pc
STEP1:Follow these steps to lift up the uprights.
7

STEP3:According to the picture, tighten the bottom frame with bolt M8*45 (D16) and inner washer (D17).
Then lock the console frame with M8*15 (D13) and inner washer (D17).
D16
D17
D13
D16
D17
D13
D17
D13
Step 4: Attach the left/right side covers (B11L) and (B11R) to the base frame with bolt ST4.2*19 (D48)
as shown in the picture below.
8

Step 5: Attach the safety key (C13), MP3 Line (C19) and put on the bottle holder (B49) on the console.
B49
C13
Step 6: To check if the running belt runs correctly, place the treadmill in folding position
and tightening all the bolts. Then set speed under 3km/h and see if running belt runs without any
problems.
ATTENTION: Must confirm complete assembly as the required above and lock all bolts. Do
the following operations after checking everything is OK. Before you use the treadmill, please
read the instructions carefully.
9

Lift up the machine up from
back until you heard "click" that
made by safety casing stuck
the pneumatic cylinder.
Kick the safety sleeve lightly and
pull down the machine at the
same time as the arrow direction.
Then the machine will fall down
smoothly.
10

This product must be grounded. If it should malfunction or breakdown, grounding provides a path of
least resistance for electric current to reduce the risk of electric shock. This product is equipped with
a cord having an equipment-grounding conductor and a grounding plug. The plug must be plugged
into an appropriate outlet that is properly installed and grounded in accordance with all local codes
and ordinances.
DANGER – Improper connection of the equipment-grounding conductor can result in a risk of
electric shock. Check with a qualified electrician or serviceman if you are in doubt as to whether the
product is properly grounded. Do not modify the plug provided with the product – if it will not fit the
outlet, Please find a proper outlet installed by a qualified electrician.
This product is for use on a nominal 240V circuit and has a grounding plug. Make sure that the
product is connected to an outlet having the same configuration as the plug. No adapter should be
used with this product.
11

1.1 WINDOW DISPLAY
1.2. START
Normal start after 5 seconds countdown.
1.3 PROGRAM
1 manual mode,15 pre-set programs, 1 body fat program, 3 countdown function and 3 users.
1.4 SAFETY LOCK FUNCTION
The window shows"---" when take away the safety lock and the treadmill will stop quickly with "didi" alarm
noise. Put the safety lock on, the computer will display for 2 seconds and the date count down to “0”.
1.5 BUTTON FUNCTION
1.5.1 START/STOP
“START”--When the treadmill is not running, press this button to start, speed is “0.8”.
“STOP”--When the treadmill is running, press this button to stop, then set program default and then return to
manual mode after stopped.
12
Operation Guide

1.5.2 “PROGRAM” BUTTON
When the treadmill is not running, press this button and choose from manual mode to pre-set mode P1-P15, body fat
program, 3 countdown function, U1-U3.
1.5.3 “MODE”BUTTON
When the treadmill is not running, press this button to choose countdown modes:”H-1”,”H-2”,”H-3”, “H-1” is the time
countdown mode, and “H-2” is the distance countdown mode,“H-3” is the calorie countdown mode; press the “SPEED
+/-” or “INCLINE+/-“ button to adjust the data. After that, press the “START” button to start this treadmill.
1.5.4“SPEED +/-“BUTTON
SPEED +/–, Adjust speed when treadmill start, the increment is 0.1km/time in kilometer. Press the button
more than 2 seconds, and it will be up or down automatically.
1.5.5 SPEED QUICK BUTTON
Press the speed quick button 3km/h,6km/h,9km/h,12km/h to adjust the speed directly when the treadmill is running.
1.5.6 “INCLINE+/-” BUTTON
INCLINE +/ –, Adjust incline when treadmill start; the increment is 1 level/time. Press the button more than 2
seconds, and it will be up or down automatically.
1.5.7 INCLINE QUICK BUTTON
Press the incline quick button 3,6,9,12 to adjust the incline directly when the treadmill is running.
1.6 DISPLAY FUNCTION
1.6.1 SPEED
Display running speed.
1.6.2 TIME
Display the running time or countdown time.
1.6.3 DISTANCE
Display the running total distance or distance countdown.
1.6.4 CALORIE
Display the calorie or calorie countdown.
1.6.5 INCLINE
Display the incline.
1.6.6 PULSE
Display pulse data.
13

1.6.7 ALL WINDOW DISPLAY DATA RANGE
TIME:0:00 – 99.59 (MIN)
DISTANCE: 0.00 – 99.9 (KM)
CALORIES: 0.0 – 999 (C)
SPEED:0.8-16.0(km/h)
PULSE: 50 – 200 (BPM)
INCLINE:0 – 15
1.7 PULSE FUNCTION
When the treadmill is running, hold the hand pulse about 5 seconds, it will display pulse data. The pulse data range
is 50-200 times/minute. It has heart-shaped graphics when testing pulse. This data is only for reference, can not be
as medical data.
1.8 PROGRAM EXERCISE CHART
TIME
MODE
SET TIME / 16= EVERY GRADE TIME
1 2 3 4 5 6 7 8 9 10 11 12 13 14 15 16
P1
SPEED
2
5
5
5
10
10
5
5
5
3
3
2
5
5
3
2
INCLINE
0
0
1
1
1
1
2
2
2
2
3
3
3
2
2
0
P2
SPEED
2
2
7
2
2
7
7
12
4
4
12
4
4
12
4
2
INCLINE
0
1
2
2
3
3
2
2
3
3
2
2
3
2
2
0
P3
SPEED
2
4
9
9
4
4
8
8
10
10
12
4
4
8
4
2
INCLINE
0
1
2
3
4
5
4
5
4
2
1
2
3
2
1
0
P4
SPEED
2
6
6
6
12
12
12
12
6
6
3
3
3
5
5
2
INCLINE
0
1
2
3
4
5
6
7
6
6
5
4
3
2
1
0
P5
SPEED
2
4
6
12
12
12
3
3
3
3
12
12
12
6
4
2
INCLINE
0
2
4
6
4
2
1
0
1
1
2
2
2
2
3
0
P6
SPEED
2
4
5
5
6
6
8
8
6
6
8
8
6
9
6
2
INCLINE
0
1
3
4
4
3
3
1
2
1
2
1
2
1
2
0
P7
SPEED
2
7
7
9
9
4
4
12
12
4
4
8
8
4
4
2
INCLINE
0
1
1
2
2
3
3
4
4
3
3
2
2
1
1
0
P10
SPEED
2
2
6
6
6
8
9
10
11
12
9
5
5
5
3
2
INCLINE
0
1
2
4
2
1
2
4
2
1
2
4
2
1
2
0
P9
2
4
8
10
2
4
8
10
2
4
10
2
4
10
4
2
0
1
2
3
4
5
6
7
8
9
8
6
4
2
1
0
2
5
6
7
8
9
10
11
10
9
8
6
7
5
4
2
1
2
4
6
6
6
4
4
4
2
2
2
1
1
0
P11
SPEED
2
5
6
7
9
9
6
9
6
9
6
10
6
10
7
2
INCLINE
0
2
2
2
3
3
3
4
4
4
5
5
5
4
4
0
P12
SPEED
2
6
8
10
8
6
4
6
8
12
8
6
8
12
12
2
INCLINE
0
1
1
3
3
5
5
7
7
5
5
3
3
1
1
0
P13
SPEED
2
12
4
12
4
12
4
12
4
12
4
12
4
12
4
2
INCLINE
0
8
10
13
4
8
10
13
4
8
10
13
4
8
10
0
P14
SPEED
2
8
10
12
4
8
10
12
4
8
10
12
4
8
10
2
INCLINE
0
8
12
13
4
8
12
13
4
8
12
13
4
8
12
0
14
SPEED
INCLINE
INCLINE
P8
0
SPEED

P15
SPEED
2
12
10
8
12
12
10
8
12
12
10
8
12
12
10
2
INCLINE
0
3
4
5
6
8
7
8
8
7
7
6
5
4
3
0
1.9 Manual model operation
1.9.1 Press start key, time count down 5 seconds, then treadmill will start to work with initial speed 1km/h.
1.9.2 Press speed +/-, you can adjust the speed.
1.9.3 Press incline +/-, you can adjust the incline.
1.9.4 Press stop, you can stop treadmill at working state.
1.9.5 Press quick speed key, you can quickly adjust the speed you want.
1.9.6 Press quick incline key, you can quickly adjust the incline you want.
1.10 3 COUNTDOWN FUNCTION PARAMETER DATA
Countdown time initial setting 30:00 minutes, setting range 5:00---99:00 minutes , each step 1:00.
Countdown calorie initial setting 50 therm, setting range 10---990 term,each step 10.
Countdown distance initial setting 1.0km,setting range 0.5---99.9 km,each step 0.1.
Cycle switch order is: manual, time, distance, calories.
1.11 BODY TESTER(FAT)
At the beginning state, press “ PROGRAM” continually to enter “FAT“ body fat test,window display “FAT”.
Press “MODE” to enter (F1 SEX, F2 AGE, F3 HEIGHT, F4 WEIGHT). Press “SPEED +”, “SPEED -” to set. After
setting, the computer will display F5 and grasp the hand pulse, the window will display your body quality index.
The body quality index is to test the relation between height and weight not the body scale.
The body FAT suits for any male and female to adjust the weight according together with other body quality index.
The ideal FAT should be between 20-25, if under 19, it means too thin. If between 25 and 29, it means overweight,
if over 30, it means obesity. (The data is just for reference and can not be as medicinal data).
01 Sex 01 Male 02 Female
02 Age 10------99
03 Height 100----200
04 Weight 20-----150
05 FAT ≤19 Under weight
FAT = (20---25) Normal weight
FAT = (25---29) Over weight
FAT ≥30 Obesity
15

1.12 User Program
Besides 15 pre-set programs, there have 3 user-defined programs: U1, U2 and U3 Each user
program has 10 segments. The user can set the desired speed and incline. Press "PROGRAM"
button to choose U1 ,U2 or U3, press "MODE" button to enter setting condition, then set the time
of the first segment. Press "SPEED+" and "SPEED-" to set speed. Press” INCLINE+” and
“INCLINE-“ to set incline. Press "MODE" button and your choice will be set. The next workout
segment will flash, go through the same setup as you completed with segment one. You must
complete all 10 segments and then your user program is ready to use. Press “STOP” key to return to
last segment setting any time.
1.13 HRC Program
There are 3 HRC programs (HRC1-HRC3) in total.
The parameter data setting order is “AGE” -> “THE(HRC) data” -> “TIME”.
HRC: Detect user’s actual heart rate through wireless receiver and set different the heart rate data as
goal to adjust speed and incline during running.
It’s recommended that user uses the wireless chest belt while running HRC function.
1.13.1 After turning on the power, press “PROG” key to choose HRC function. HRC function is
turned on when “HRC” characters shown on the screen.
User can use “SPEED +/-“ to adjust age (data from 13 to 80) after seeing the “30” shown on the
screen.
1.13.2 Press “MODE” key to enter the setting of heart rate. The standard heart rate is fixed at
different data from HRC1 to HRC3. Heart rate data can be adjusted from 50 to 200. User can use
“SPEED +/-“ to adjust the data. (It’s recommended that standard heart rate data doesn’t need to be
changed for physical health condition.)
Formula is calculated as below:
HRC1 is T.H.R = (220-age) x60%,
HRC2 is T.H.R = (220-age) x70%,
HRC3 is T.H.R = (220-age) x80%.
16

After finishing the setting of HRC data, user can press “MODE” key to modify the time. When “TIME”
window flashes, it displays the default time as 30:00 minutes, and user can press “SPEED+/-“ to set up time.
1.13.3 Enter “START” key to begin the workout (Remember only can press “START” key after all setting is
completed).
It’s suggested that user use wireless chest belt to detect the heart rate. If chest belt and hand pulse are used at
the same time, data from chest belt will show up only on the screen.
1.13.4 During the operating of HRC, speed and incline will adjust as below:
(1) If Target heart rate <THR-15, then the speed and incline will adjust automatically every 15 second, the
SPEED will increase 0.8km/h and incline add 1 section until they reach the max. data.
(2) If THR-5> Target heart rate >=THR-15, then the speed and incline will adjust automatically every 15
second, the SPEED will increase 0.4km/h and incline add 1 section until they reach the max. data.
(3) If THR+5>= Target heart rate >=THR-5, then the speed and incline will not change.
(4) If THR+15>= Target heart rate >=THR+5, then the speed will adjust automatically every 15 second, the
SPEED will decrease 0.4km/h and incline less1 section until they reach the min. data.
(5) If Target heart rate >=THR+15, then the speed and incline will adjust automatically every 15 second, the
SPEED will decrease 0.8km/h and incline less 2 section until they reach the min. data.
1.14 OTHERS
1.14.1 The system will enter into power saving mode automatically if there is no any action within 10
minutes under IDLE MODE and there is no display and backlit on the computer. Press any key to resume the
system.
1.14.2 Countdown time, countdown calorie and countdown distance, you just can set one of them at one
time, press last item to set running, the setting parameter is countdown, others display normal data.
1.14.3 MP3 audio function: Insert the MP3 line in the input hole of the right side in the computer.
1.14.4 Bluetooth music function: Press the Bluetooth key till the display show Bluetooth icon, turn on the
Bluetooth of your device to match with computer and play the music, user can increase or decrease the
volume from the device, and also can turn back to last song or jump to next song.
1.14.5 On display – Distance covered, Calories burnt, Pulse reading, Body Fat test shown is only for
indicative purpose and may vary from machine to machine. Do not compare these readings to a medical
instrument.
17

PREPARE
If you are around 35 years old, or have health problem, even this is your first time to do fitness exercise,
please consult doctor or professional before use it.
Before you exercise, please stand on the side to learn how to operate, such as start, stop and speed
adjustment. After that stand on the plastic deck of the treadmill board, catch hold of the handrail, start by
1.6--3.2 km/h low speed, stand straight, look forward, one foot try to do few times, then stand on the belt to
do exercise. After adapting, you can adjust the speed to 3--5 km/h and keep doing about 10 minutes, then
stop.
EXERCISE
Please stand on the side to learn how to operate, such as speed and incline, until you know it then can
start do exercise. Walk 1km by constant step need about 15-25 minutes, please record it in fact. And walk
1km by 4.8 km/h need about 12 minutes. If you can do it easily by few times, then can adjust the high
speed and incline, and go on to do 30 minutes, you can take a good exercise. Start exercise by walking
slowly. Remember it is for your health and if you feel uncomfortable stop exercising immediately and seek
medical advice.
AMOUNT OFEXERCISE
SHORTCUT——The best way to save time is do 15-20 minutes exercise.
Warm up 2 minutes by 4.8 km/h, and adjust the speed to 5.3 km/h and 5.8 km/h, continue do exercise by
this two speeds. Then add 0.3 km/h per 2mins speed increase, until you feel breathing quickened but not
breathe hard. Keep this speed to do exercise, if feels uncomfortable, please reduce 0.3 km/h. Leave 4
minutes to reduce speed at last. If you are finding that it is difficult to increase your exercise intensity by
increasing the speed, you can alternatively choose to increase the incline slowly which will also increase the
exercise intensity for you.
EXERCISE FREQUENCY
Target is 3--5 times per week, do 15-60mins each time. It is better to make a weekly time schedule for your
exercise routine to ensure it forms parts of your busy schedule. You can get the strenuous exercise degree
through adjusting speed and incline. We'd suggest that do not set incline when start do exercise.
18

Please consult professional staff before starting an exercise program. They can help
recommend the exercise rate/intensity and time according to your age and health condition.
When running, if you feel chest tightness or chest pain, irregular Heartbeats, short of breath,
dizziness or other unwell, please stop immediately! And consult professional before you want
continually to do exercise. If you often use treadmill, you can choose normal walk speed or jog speed.
If you have no experience or can't make sure the best testing speed, you can reference below
standard:
Speed 1-3.0 km
Speed 3.0-4.5 km
Speed 4.5-6.0 km
Speed 6.0-7.5 km
Speed 7.5-9.0 km
Speed 9.0-12.0 km
More than 12.0 km
weak constitution people.
slow walker.
walking quickly.
fast walk.
jogger.
intermediate speed runner.
excellent runner.
ATTENTION:It is suitable for walker to choose less than or equal to 6km speed.
19

Using your exerciser will provide you with several benets, it will improve your physical
tness, tone muscle and in conjunction with a calorie controlled diet help you lose weight.
1. THE WARM UP PHASE
This stage helps get the blood owing around the body and the muscles working properly. It will also reduce the risk of
cramp and muscle injury. It is advisable to do a few stretching exercises as shown below. Each stretch should be held
for approximately 30 seconds, do not force or jerk your muscles into a stretch - if it hurts, STOP.
2. THE EXERCISE PHASE
This is the stage where you put the effort in. After regular use, your muscles will become more exible. Work to your own
level but it is very important to maintain a steady tempo throughout. The rate of work should be sufcient to raise your
heart beat into the target zone shown on the graph below.
This stage should last for a minimum of 12 minutes though most people start at about 15-20
minutes.
SIDE BENDS
FORWARD
BENDS
OUTER THIGH
INNER THIGH
CALF/ACHILLES
EXERCISE
INSTRUCTIONS
20
Table of contents
Other Bodyworx Treadmill manuals

Bodyworx
Bodyworx JX735 User manual

Bodyworx
Bodyworx JTC200 User manual

Bodyworx
Bodyworx TM3000 User manual

Bodyworx
Bodyworx JX125 User manual

Bodyworx
Bodyworx JOSLO User manual

Bodyworx
Bodyworx JSPORT3000 User manual

Bodyworx
Bodyworx COLORADO175 User manual

Bodyworx
Bodyworx JX540 User manual

Bodyworx
Bodyworx JX335 User manual

Bodyworx
Bodyworx JT175 User manual

Bodyworx
Bodyworx JX300 User manual

Bodyworx
Bodyworx JX200 User manual

Bodyworx
Bodyworx JX150 User manual

Bodyworx
Bodyworx J5001 User manual

Bodyworx
Bodyworx JI2040 User manual

Bodyworx
Bodyworx JT175 User manual

Bodyworx
Bodyworx J1530CA User manual

Bodyworx
Bodyworx J1651EA User manual

Bodyworx
Bodyworx J4715 User manual

Bodyworx
Bodyworx JT8500 User manual