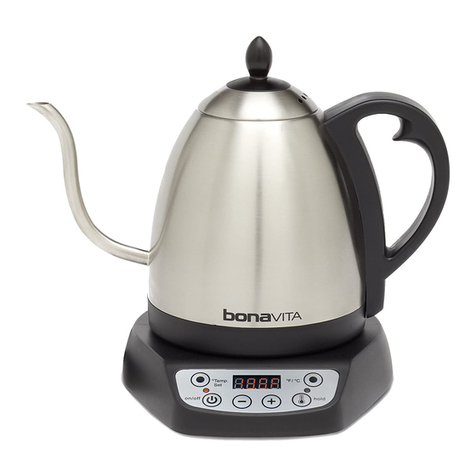
Bonavita Cosmopolitan BV07001US User manual

Cosmopolitan
Glass Kettle
1.3L DIGITAL VARIABLE TEMPERATURE
CUSTOMER SUPPORT
USA 1-855-664-1252
TECHNICAL DATA
Rated voltage: 120V, 60Hz,
AC only
Rated power input: 1000 W
1-year limited warranty
Item # BV07001US

2
Table of Contents
Safeguards
Important Safeguards...............................................................................3
Warranty
Limited Warranty ......................................................................................6
Instructions
Product Features......................................................................................7
Operating Kettle .......................................................................................8
Kettle Set-Up..................................................................................8
Before First Use ..............................................................................9
Temperature Scale, °F or °C ...........................................................9
Preset Temps Button ......................................................................9
Manually Setting Temperature .........................................................9
Boil Button....................................................................................10
Hold Button ..................................................................................11
Count-Up Timer / Stopwatch Feature ...........................................11
Emptying Kettle ............................................................................11
High Altitude Use....................................................................................12
Cleaning and Maintenance .....................................................................13
Pour-Over / Manual Brew Coffee ............................................................14
Recommended Temperatures.................................................................15
Troubleshooting......................................................................................15

3
BonavitaWorld.com
IMPORTANT SAFEGUARDS
WARNING: This appliance utilizes a high wattage relay for arriving at the
desired water temperature. In some instances, this relay may cause slight
flickering of lights on the same circuit. It is best to use this appliance on a
dedicated circuit or with all other appliances off during this appliance’s use.
It will not damage electrical systems but caution should be used to not
overload this circuit with other appliances running at the same time.
When using electrical appliances, basic safety precautions should always be
followed, including the following:
Read all instructions.
• Do not touch hot surfaces. Use handles or knobs.
• To protect against re, electric shock and injury to
persons, do not immerse cord, plugs, base or kettle
in water or other liquid.
• Never leave the appliance unattended when in use.
Close supervision is necessary when any appliance is
used by or near children.
• Unplug from outlet when not in use, when empty,
and before cleaning. Allow to cool before putting on
or taking off parts, and before cleaning the appliance.
• Do not operate any appliance with a damaged cord
or plug, after the appliance has malfunctioned, or
has been damaged in any manner. Call our toll-free
Customer Support Number 1-855-664-1252 for
examination, repair, or replacement.
• Do not use a base unit other than the one
supplied. The use of accessory attachments is not
recommended by the appliance manufacturer and
may result in re, electrical shock or personal injury.
• Do not use outdoors.
• Do not let the cord hang over the edge of a table,
countertop, or touch hot surfaces. Always store the
excess portion of the power cord in the underside
compartment of the base unit.
0.5L
1.0L
1.3L
Min
MAX
0.5L
1.0L
1.3L
Min
MAX
4
• The digital kettle must be operated on a at surface. Do not place on or near
a hot electric or gas burner, or in a heated oven, or on the top of other electric
appliances.
• Plug cord into the wall outlet and then turn on. To disconnect, turn base off, then
remove plug from wall outlet.
• Do not use appliance for other than intended use.
• To avoid circuit overload, do not operate another high wattage appliance on the
same circuit.
• Always remove kettle from base before lling. Remove all moisture on the bottom
of the kettle before placing it onto the power base.
• Be aware of steam being emitted from spout or lid especially during relling.
Do not remove lid during heating cycle. Scalding may occur if the lid is removed
during heating cycles.
• Do not use the kettle to heat anything other than water. Do not ll above the 1.3L
indicator on the kettle. If the kettle is overlled, hot water may be ejected.
• Do not insert any object into slots or holes of the kettle.
• This appliance is not intended for use by persons (including children) with
reduced physical, sensory or mental capabilities, or lack of experience and
knowledge, unless they have been given supervision or instruction concerning
use of appliance by a person responsible for their safety.
• Children should be supervised to ensure that they do not play with the appliance.
• If the supply cord is damaged, it must be replaced by the manufacturer, its
service agent or similarly qualied person in order to avoid a hazard.
DO NOT ATTEMPT TO OPERATE APPLIANCE IF THE POWER CORD
SHOWS ANY DAMAGE, OR IF APPLIANCE WORKS INTERMITTENTLY,
OR STOPS WORKING ENTIRELY.
EXTENSION CORDS
A short power-supply cord is provided to reduce the risk resulting from becoming
entangled in or tripping over a longer cord. Longer, detachable power-supply
cords or extension cords may be used if care is exercised in their use. If a longer
detachable power-supply cord or extension cord is used:
• The marked electrical rating of the cord set or extension cord should be at least
as great as the electrical rating of the appliance.

5
BonavitaWorld.com
• The extension cord should be a grounding-type 3-wire cord.
• The longer cord should be arranged so that it will not drape over the countertop
or tabletop where it can be tripped over, snagged, or pulled on unintentionally
(especially by children).
CAUTION: This appliance must be grounded when in use. To ensure
protection against risk of electric shock, connect to properly ground
outlets only.
SAVE THESE INSTRUCTIONS!
GROUNDING INSTRUCTIONS
The appliance has a plug that looks like Figure A. An adapter, as shown in Figure
B, should be used for connecting a 3-prong grounding plug to a 2-wire receptacle.
The grounding tab, which extends from the adapter, must be connected to a
permanent ground such as a properly grounded receptacle as shown in Figure C,
using a metal screw.
Circuit grounding
conductor
connected
properly
grounding prong
Adapter
grounding means Cover of grounded
outlet box
Metal mounting
screw

6
Limited Warranty
1-year limited warranty from the date of original purchase.
1. This warranty extends only to the original consumer purchaser or gift recipient.
An original sales receipt from an authorized retailer is required as proof of
purchase for all warranty claims.
2. Damages or defects which are not the responsibility of the manufacturer
including but not limited to the following are not covered under this limited
warranty:
• Defects resulting from improper connection, improper handling, impermissible or
improper use or failure to follow instructions
• Use of any third party products not designed or specied for use in or on the
product (e.g. cleaning and decalcifying agents)
• Repairs or modications made by the consumer or unauthorized third parties
3. Failure to comply with any safeguards listed in the Important Safeguards
section will void limited warranty.
4. This device was designed and built for household use only. It is not suited for
other uses.
5. ETL Listed
Please call 1-855-664-1252
or e-mail CustomerSupport@BonavitaWorld.com for warranty claims.
DISCLAIMER OF IMPLIED WARRANTIES; LIMITATION OF REMEDIES IMPLIED
WARRANTIES, INCLUDING TO THE EXTENT APPLICABLE WARRANTIES OF
MERCHANTABILITY OR FITNESS FOR A PARTICULAR PURPOSE, ARE EXCLUDED
TO THE EXTENT LEGALLY PERMISSIBLE. ANY IMPLIED WARRANTIES THAT MAY
BE IMPOSED BY LAW ARE LIMITED TO ONE YEAR, OR THE SHORTEST PERIOD
ALLOWED BY LAW. SOME STATES AND PROVINCES DO NOT ALLOW LIMITATIONS
OR EXCLUSIONS ON HOW LONG AN IMPLIED WARRANTY OF MERCHANTABILITY
OR FITNESS LASTS, SO THE ABOVE LIMITATIONS OR EXCLUSIONS MAY NOT
APPLY TO YOU. IF THIS PRODUCT FAILS TO WORK AS WARRANTED, CUSTOMER’S
SOLE AND EXCLUSIVE REMEDY SHALL BE REPAIR OR REPLACEMENT
ACCORDING TO THE TERMS OF THIS LIMITED WARRANTY. BONAVITA, ESPRESSO
SUPPLY, Inc. or SMARTCO INTERNATIONAL LIMITED DO NOT ASSUME ANY
RESPONSIBILITY FOR INCIDENTAL OR CONSEQUENTIAL DAMAGES. This warranty
gives you specic legal rights and you may also have other rights which vary from
state to state, country to country or province to province.

7
BonavitaWorld.com
Product Features
Gooseneck
Spout
Rated voltage: 120V 60Hz
Rated current: 8.3 A
Rated power input: 1000 W
Capacity:
max. 43.95 oz (1.3L)
Lid
Water Level
Indicator
Handle
Power Cord
with Plug
Base with
Cord Storage
Boil Button
Hold Button
with LED Light
+ Button & Count Up Timer
Start / Stopwatch Function
- Button
On/Off Button
with LED Light
Preset
Temps
Button
LCD Screen
0.5L
1.0L
1.3L
Min
MAX

8
Operating Kettle
Visit the Support section of BonavitaWorld.com to view instructional videos on
using your Bonavita Kettle.
Please note: Before plugging the kettle into the
wall outlet, check that the electrical circuit is not
overloaded with other appliances.
KETTLE SET-UP
1. Set the base on a at, even and steady surface.
2. Take off the kettle lid, ll kettle with cold water
(Fig. 1).
3. After adding the minimum to maximum amount
of cold water, insert lid into kettle opening with
holes facing towards the handle (Fig. 2).
4. Place the kettle rmly on the stainless-steel base
and plug power cord into standard wall outlet
(Fig. 3).
5. When ready, press the On/Off Button (Fig. 4).
The LCD will turn on, and the display will ash
set temperature for 3 seconds, then begin
heating.
6. This product is pre-programmed to display °F
settings. You have the capability of switching to
°C by holding down both - and + Buttons at the
same time for three seconds to switch between
Fahrenheit and Celsius while the power is on.
7. The factory default temperature is 185°F (85°C)
1
2
0.5L
1.0L
1.3L
Min
MAX
0.5L
1.0L
1.3L
Min
MAX
0.5L
1.0L
1.3L
Min
MAX
0.5L
1.0L
1.3L
Min
MAX
3
1
3
2
4

9
BonavitaWorld.com
BEFORE FIRST USE
1. Fill the kettle to 1.3L ll line with cold water then heat at the maximum boil
temperature setting.
2. Empty the kettle, and let the appliance cool down for one minute.
3. Repeat the same heating cycle written in the directions above once more and
rinse. Your kettle is now ready for use.
TEMPERATURE SCALE, ˚F OR ˚C
This product is pre-programmed to display °F settings. You have the capability of
switching to °C by holding down both - and + Buttons at the same time for three
seconds to switch between Fahrenheit and Celsius while the power is on.
PRESET TEMPS BUTTON
Immediately after turning kettle on, press the Preset Temps Button and continue
to press it until your desired preset temperature is displayed. If you would like
to see which temperatures are best for certain beverages, please check out the
Recommended Temperatures table on page 15.
Please note: The Factory preset temperatures are: 140°F (60°C), 176°F (80°C),
185°F (85°C), 190°F (88°C), 205°F (96°C) and 208°F (98°C).
Please note: While these preset temperatures can’t be reprogrammed, you can
manually set the kettle to a customized temperature by following the instructions in
Manually Setting Temperature below.
MANUALLY SETTING TEMPERATURE
1. Press the Power Button. The last temperature set
point ashes on the display.
Please note: Pressing the Hold Button while the
temperature flashes will maintain your selected
temperature for up to one hour (see Hold Button on
page 11 for more information).
2. Press or hold the - or + Button to select your
preferred temperature (Fig. 5).
3. Once the display stops ashing the temperature is set and the display shows
current water temperature. The kettle will now begin heating.
Hold
192F
5

10
Please note: Once you have set a desired temperature, it is stored in memory
and will be recalled whenever you turn on the kettle. You only need to reset the
temperature when you want a different water temperature.
During the heating cycle the LCD display shows the current water temperature,
unless you are using the Boil Button in which the display will show BOIL.
After the set temperature is reached the heater will turn off but the display will
continue to show water temperature for up to 1 hour if the kettle remains on
the base.
If the kettle is removed from base during a heating cycle, the heating cycle and
power indicator light will turn off. The LCD will display 0 00. When the kettle is
returned to base the display will show current water temperature for 7 minutes
and then turn off.
To manually interrupt the heating process, press the On/Off button at any time.
The heater and LED lights will turn off.
The maximum manual temperature setting is 208˚F. This kettle is designed to heat
at the specic temperature you select, up to the boiling point. Boiling is 212°F
at sea level and may be lower based on your elevation. If the kettle is set at a
temperature higher than the boiling point of your elevation, it will stop heating once
it reaches boiling.
BOIL BUTTON
Using the Boil Button is the fastest way to boil water
with your kettle. Your kettle adjusts its boiling point to
your altitude. At higher elevations water boils at lower
temperatures. The Boil Button is an optional feature.
1. Press the Power Button and the LED surrounding the
button will illuminate. The last temperature set point
ashes on the display.
2. Press the Boil Button (Fig. 6).
3. The kettle will now begin heating. The LCD screen will display BOIL until the
water boils. After the water boils the screen will display the current water
temperature.
Please note: If the LED around the power button is illuminated your kettle is already
on and you can skip Step 1. If you change your mind and do not want to heat your
water to boiling after pressing the boil button, press the boil button again or lift
Hold
6
Step 1
Step 2

11
BonavitaWorld.com
your kettle off of the base to reset. To select a new temperature follow instructions
in Preset Temps Button or Setting Temperature Manually. In addition, the previous
temperature set point used on the kettle does not affect the boil temperature.
HOLD BUTTON
The Hold Button allows the kettle to reach and maintain set temperature for up to
one hour. This is an optional feature.
1. First press the Power Button, then select the temperature set point using
Manually Setting Temperature directions.
2. Press the Hold Button and the LED around the Hold Button will illuminate.
3. When set temperature is reached the heater will turn off and on as needed to
maintain set temperature.
4. When you lift kettle to pour and return to the base, the Hold Button must be
pressed again if you want to continue the hold temperature function. If you don’t
press the Hold Button after returning the kettle to the base, the display will show
current water temperature for 7 minutes and the unit will proceed to power off.
Please note: The hold function is disabled when the boil button is in use.
COUNT-UP TIMER / STOPWATCH FEATURE
When you lift the kettle, the LCD display will show a count-up timer / stopwatch.
The rst number indicates the minutes, and the last two numbers indicate the
seconds (the maximum count time is 7 minutes). Press the + button to start the
timer. Set the kettle back on the base and lift back off to reset timer to zero.
EMPTYING KETTLE
The combination of a glass body with a gooseneck spout in the Cosmopolitan
creates an unparalleled precision glass kettle. When pouring, the rst 1.24L of water
will ow evenly and offer great control. The spout shield, which is a safety feature,
prevents the last 0.06L of water from pouring continuously. When emptying the
kettle, if the water ow pauses, pivot the kettle back to a level position and allow
the remaining water to pass over the spout shield, then continue pouring. You may
need to repeat this process to completely empty the kettle.

12
High Altitude Use
At higher elevations water boils at lower temperatures. Use the graph below to set
your kettle temperature.
Cleaning and Maintenance
Clean your Bonavita Kettle regularly. This appliance contains no user serviceable
parts and requires little maintenance. Please leave any servicing or repairs to a
qualied professional.
Clean outside of the stainless-steel base and the kettle with a damp, soft cloth.
Clean the inside of the kettle with dishwashing detergent and rinse thoroughly with
warm water.
Do not use abrasive cleansers on this product.
After cleaning, dry the kettle and the stainless-steel base thoroughly.
When mineral scale builds up in your kettle, it can affect temperature consistency
and extend heating time. To ensure optimum performance, Bonavita recommends
descaling the kettle when mineral build-up is visible inside the kettle with a good
quality biodegradable and phosphate-free descaler. Based on the specic mineral
BOILING
POINT OF
WATER
IDEAL
BREWING
TEMPERATURE
MAXIMUM
TEMPERATURE
SETTING
ELEVATION (meters above sea level)
TEMP. (°C)
BOILING
POINT OF
WATER
IDEAL
BREWING
TEMPERATURE
MAXIMUM
TEMPERATURE
SETTING
ELEVATION (feet above sea level)
TEMP. (°F)

13
BonavitaWorld.com
content of the water, you may see white, grey, black or reddish brown discoloration.
The mineral content of the water will determine how frequently you will need to
descale.
Please note: Vinegar may not effectively descale the kettle and can be difcult to
thoroughly rinse. Vinegar may also leave behind an odor that could affect future
uses. Bonavita recommends using a good quality biodegradable and phosphate-
free descaler for kettles rather than vinegar.
USE OF DESCALER:
Please follow the instructions on the descaler packet.
STORAGE:
Clean and dry all parts of this kettle before properly storing. Store the kettle in its
original box or in a clean, dry place. Never wrap the power cord around the kettle.
Always use the cord storage on the bottom of the base.
12 3
Boil
12
6
9
:15 min
3
4 5

14
Pour-Over / Manual Brew Coffee
Pour-Over is a manual brewing method that ensures the precise control of the
temperature of the water, the duration of the brew and allows thorough saturation
of the grounds. Many coffee enthusiasts consider Pour-Over an artisanal method
for brewing coffee.
Equipment Suggestions:
Suggested water to coffee ratio – 16:1
Pour-Over Dripper:
1. Set the temperature of your Bonavita Kettle to 205 °F / 96 °C.
2. Add a paper lter to the dripper and rinse with hot water until the lter is
completely saturated.
3. Place the dripper on a drinking cup or carafe.
4. Add desired amount of coffee, we suggest a water to coffee ratio of 16:1
5. Add approximately 25% of the total water. We recommend starting in the center
and pouring in a circular pattern moving towards the edge of the dripper.
6. Wait 30-40 seconds. This pause enables the blooming process when gasses are
released from the grounds allowing them to absorb the water.
7. Slowly pour in the remaining amount of water in a circular pattern allowing the
nished coffee to ow through the dripper. Be mindful of your drinking cup or
carafe capacity to prevent spilling.
MA
X
Grinder
Bonavita®
Scale
Drinking Cup
or Carafe
Paper Filter, Cloth
or Permanent Filter
Bonavita®
Immersion
Dripper
or Pour-Over
Dripper
Bonavita®
Kettle 0.5L
1.0L
1.3L
Min
MAX

15
BonavitaWorld.com
Immersion Dripper:
1. Ensure the lever is at the “open” position, add a paper lter to the dripper, and
rinse with hot water until lter is completely saturated.
2. Set the lever to “close” and follow steps 3-4 above, then add your desired
amount of water, allowing the coffee to immerse in the water for 2 minutes
30 seconds.
3. Move the lever to “open” to allow the coffee to drain into your drinking cup
or carafe.
RECOMMENDED TEMPERATURES
Coffee 205 °F 96 °C
Black Tea 208 °F 98 °C
Green Tea 176 °F 80 °C
Oolong Tea 190 °F 88 °C
White Tea 185 °F 85 °C
Cereal (Oatmeal) 208 °F 98 °C
Cocoa 190 °F 88 °C
Troubleshooting
Regular descaling helps extend the life of your kettle. Scale forms when hot water
evaporates and solid minerals are left behind. Based on the specic mineral content
of the water, you may see white, grey, black or reddish brown discoloration. The
mineral content of the water will determine how frequently you will need to descale.
If neglected too long, limescale can shorten the life of your kettle. We recommend
periodically using a good quality biodegradable and phosphate-free descaler.
Bonavita is a trademark of Smartco International
© 2018 Smartco International (Asia) Limited. All rights reserved.
Printed in China
Part #29709-00

Bouilloire en verre
Cosmopolitan
TEMPÉRATURE NUMÉRIQUE VARIABLE DE 1,3l
SERVICE À LA CLIENTÈLE
États-Unis:1-855-664-1252
DONNÉES TECHNIQUES
Tension nominale: 120V, 60Hz,
CA seulement
Puissance absorbée nominale: 1000W
Garantie limitée de 1an
Article noBV07001US

17
Table des matières
Mises en garde
Mises en garde importantes .........................................................................18
Garantie
Garantie limitée.............................................................................................21
Instructions
Caractéristiques du produit...........................................................................22
Utilisation de la bouilloire...............................................................................23
Mise en place de la bouilloire
...........................................................
23
Avant la première utilisation...........................................................24
Échelle de température, °F ou °C..................................................24
Bouton de préréglage de la température.......................................24
Réglage manuel de la température................................................24
Bouton d’ébullition........................................................................25
Bouton de maintien au chaud .......................................................26
Fonction de compteur progressif / minuterie .................................26
Vider la bouilloire...........................................................................26
Utilisation à haute altitude.............................................................................27
Nettoyage et entretien ..................................................................................28
Infusion par versement / manuelle ................................................................29
Températures recommandées ......................................................................30
Dépannage...................................................................................................30

18
BonavitaWorld.com
MISES EN GARDE IMPORTANTES
AVERTISSEMENT: Cet appareil utilise un relais de puissance électrique élevée
pour atteindre la température de l’eau souhaitée. Dans certains cas, ce relais
peut provoquer le clignotement des voyants sur le même circuit. Il est préférable
d’utiliser cet appareil sur un circuit dédié ou d’éteindre tous les autres appareils
lors de son utilisation. Cela n’endommagera pas les systèmes électriques, mais
la prudence est de mise pour ne pas surcharger ce circuit avec d’autres appareils
fonctionnant en même temps.
Lors de l’utilisation d’appareils électriques, il est recommandé de prendre des
mesures de sécurité élémentaires, dont les suivantes:
Veuillez lire toutes les instructions.
• Ne touchez pas les surfaces chaudes. Utilisez les
poignées ou les boutons.
• Pour vous protéger contre les incendies, les chocs
électriques et les blessures, n’immergez pas le cordon,
les ches, le socle ni l’appareil dans l’eau ni tout autre
liquide.
• Ne laissez jamais un appareil en cours d’utilisation sans
surveillance. Une surveillance étroite est requise lorsqu’
un enfant utilise un appareil ou se trouve à proximité de
ce dernier.
• Débranchez l’appareil de la prise lorsqu’il n’est pas
utilisé ou vide et avant le nettoyage. Laissez refroidir
l’appareil avant d’y ajouter ou d’en retirer des pièces et
avant le nettoyage.
• N’utilisez pas l’appareil si la che ou le câble
d’alimentation sont endommagés, après une défaillance
ou s’il a été endommagé de quelle façon que ce soit.
Appelez gratuitement notre service à la clientèle au
1-855-664-1252 pour toute vérication ou réparation
ou pour tout remplacement.
• Utilisez uniquement le socle fourni avec l’appareil.
L’utilisation d’accessoires n’est pas recommandée par
le fabricant et risque de causer des incendies, des
chocs électriques ou des blessures.
• N’utilisez pas l’appareil en plein air.
• Faites en sorte que le cordon ne pende pas d’une table
ni d’un comptoir et ne soit pas en contact avec des
surfaces chaudes. Veillez à ranger systématiquement
l’excédant de cordon d’alimentation dans le
compartiment situé sous le socle.
0.5L
1.0L
1.3L
Min
MAX
0.5L
1.0L
1.3L
Min
MAX

19
• La bouilloire numérique doit être posée sur une surface plane. Ne la placez pas sur un
brûleur à gaz ou électrique ni à proximité de ce dernier, dans un four chaud ni sur tout
autre appareil électrique.
• Branchez le cordon sur une prise murale, puis mettez l’appareil en marche.
Pour débrancher: mettez le socle hors tension, puis débranchez le cordon de la
prise murale.
• N’utilisez pas l’appareil à d’autres ns que celles prévues.
• Pour éviter toute surcharge du circuit, n’utilisez pas d’autre appareil à puissance
électrique élevée sur le même circuit.
• Retirez toujours la bouilloire de son socle avant de la remplir. Séchez la base de la
bouilloire avant de la placer sur son socle.
• Soyez attentifs aux émissions de vapeur du bec ou du couvercle, surtout lors du
remplissage.
Ne retirez pas le couvercle pendant le cycle de chauffage. Si le couvercle est retiré
pendant le cycle de chauffage, vous risquez de vous brûler.
• Utilisez la bouilloire pour chauffer de l’eau uniquement. Ne la remplissez pas au-
dessus de la ligne de 1,3l. Il peut y avoir un débordement d’eau chaude si elle est
trop pleine.
• N’insérez aucun objet dans les fentes ni les orices de la bouilloire.
• Cet appareil n’est pas conçu pour être utilisé par les personnes (y compris les
enfants) dont les capacités physiques, sensorielles ou mentales sont réduites ni par
les personnes manquant d’expérience ou de connaissance en la matière, sauf si elles
le font sous le contrôle d’une personne responsable de leur sécurité ou si elles ont
reçu les instructions adéquates de ces dernières pour le faire en toute sécurité.
• Surveillez les enfants pour vous s’assurer qu’ils ne jouent pas avec l’appareil.
• Si le cordon d’alimentation est endommagé, il doit être remplacé par le fabricant,
un agent du service de maintenance de ce dernier ou une personne qualiée, an
d’éviter tout danger.
N’UTILISEZ PAS L’UNITÉ SI LE CORDON EST MANIFESTEMENT ENDOMMAGÉ
OU SI L’APPAREIL FONCTIONNE DE FAÇON INTERMITTENTE OU S’ARRÊTE
COMPLÈTEMENT DE FONCTIONNER.
RALLONGES
Un cordon d’alimentation court est fourni pour réduire tout risque d’enchevêtrement
et de trébuchement. Vous pouvez utiliser des rallonges ou des cordons d’alimentation
plus longs et amovibles à condition de prendre les précautions nécessaires. En cas
d’utilisation d’un cordon d’alimentation amovible ou d’une rallonge:
•La puissance électrique indiquée sur la rallonge ou le cordon d’alimentation amovible
doit être au moins égale à celle de l’appareil.

20
BonavitaWorld.com
Conducteur de
circuit de mise à la
terre correctement
branché
Broche de mise
à la terre
Adaptateur
Adaptateur de
mise à la terre
Couvercle d’une
boîte de prise de
courant
Vis de la monture
métallique
•La rallonge doit comporter trois broches avec mise à la terre.
•Le cordon plus long doit être disposé de sorte qu’il ne pende pas d’un comptoir ni
d’une table pour éviter les trébuchements ou accidents par accrochage ou traction
(notamment des enfants).
AVERTISSEMENT: Cet appareil doit être mis à la terre lors de son utilisation.
Pour éviter les risques de chocs électriques, ne le connectez qu’à une prise de
terre appropriée.
CONSERVEZ CES INSTRUCTIONS!
INSTRUCTIONS DE MISE À LA TERRE
L’appareil comprend une prise ressemblant à celle de la gure A. Utilisez un adaptateur,
tel que celui de la gure B, pour brancher la prise à trois broches sur une prise à deux
trous. La languette de mise à la terre, qui s’étend depuis l’adaptateur, doit être branchée
sur une broche de mise à la terre permanente, telle que celle de la gure C, à l’aide
d’une vis en métal.
Table of contents
Languages:
Other Bonavita Kettle manuals

Bonavita
Bonavita BV382518V User manual

Bonavita
Bonavita BV3825ST User manual

Bonavita
Bonavita Interurban Series User manual

Bonavita
Bonavita BV382510V User manual

Bonavita
Bonavita BV3825B05 User manual

Bonavita
Bonavita BV382510V User manual

Bonavita
Bonavita BV3825B05 User manual

Bonavita
Bonavita BV382517V User manual

Bonavita
Bonavita BV3825B User manual

Bonavita
Bonavita BV3825B05D User manual