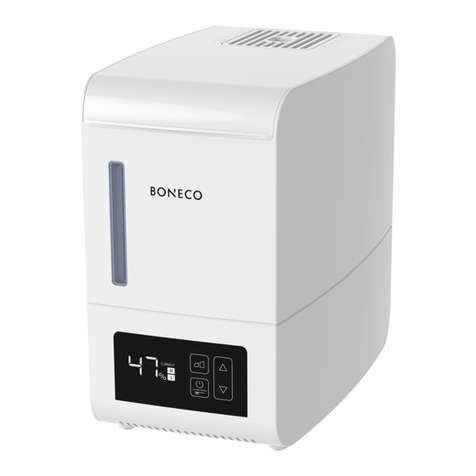
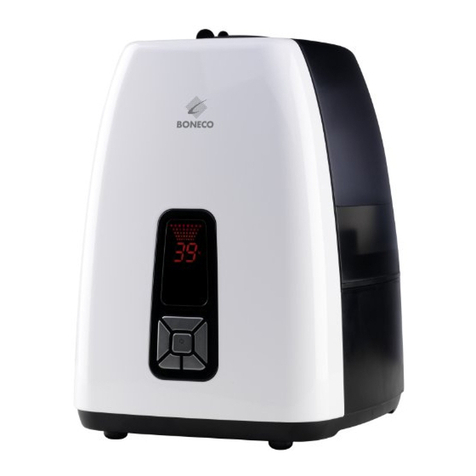
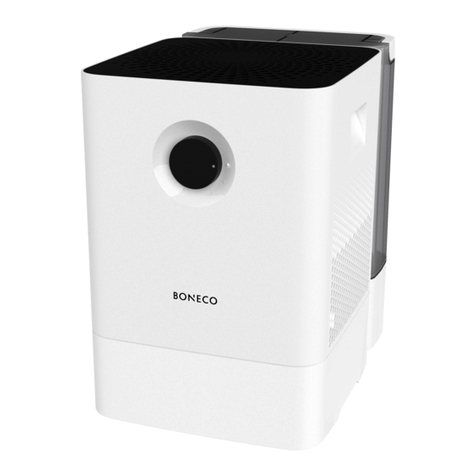
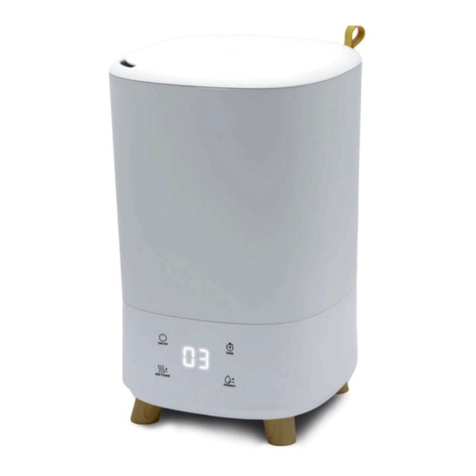
Boneco S150 User manual

BONECO S150
NO WATER
HUMIDIFY
POWER
POWER
ECO
ON
OFF
NORMAL


3
Gebrauchsanweisung (5 – 10)
de
Instructions for use (11 – 16)
en
Instructions d’utilisation (17 – 22)
fr
Gebruiksaanwijzing (23 – 28)
nl
se
Bruksanvisning (29 – 34)
Käyttöohje (35 – 40)
fi
dk
Brugsanvisning (41 – 46)
Bruksanvisning (47 – 51)
no

4

5
de
Gebrauchsanweisung

6
de
Gratulation!
Herzlichen Glückwunsch, dass Sie sich für den Verdampfer
BONECO S150 entschieden haben!
Allgemeines
Wussten Sie, dass zu trockene Raumluft
• Schleimhäute austrocknet sowie spröde Lippen und
Augenbrennen verursacht?
• Infektionen und Erkrankungen der Atemwege
begünstigt?
• zu Abgespanntheit, Müdigkeit und Konzentrations-
schwäche führt?
• Haustiere und Zimmerpflanzen belastet?
• Staubentwicklung fördert und die elektrostatische
Aufladung von Textilien aus Kunststofffasern, Teppichen
und Kunststoffböden erhöht?
• Einrichtungsgegenstände aus Holz und speziell
Parkettböden beschädigt?
• Musikinstrumente verstimmt?
Angenehm ist das Raumklima in der Regel dann, wenn die
relative Feuchtigkeit zwischen 40 und 60% beträgt. Luftbe-
feuchtung ist besonders in der Winterzeit sinnvoll, ersetzt
aber nicht das regelmässige Lüften der Wohnräume.
Vorsicht: heisser Dampf!
Sicherheitshinweise
• Gebrauchsanweisung vor der Inbetriebnahme voll-
ständig durchlesen und zum späteren Nachschlagen
gut aufbewahren.
• Das Gerät nur an Wechselstrom anschliessen – mit
Spannung gemäss dem Typenschild am Gerät.
• Das Gerät nur in Wohnräumen und innerhalb der
spezifizierten technischen Daten verwenden. Ein nicht
bestimmungsgemässer Gebrauch kann Gesundheit
und Leben gefährden.
• Kinder können die Gefahren beim Umgang mit Elektro-
geräten nicht erkennen. Deshalb Kinder immer beauf-
sichtigen, wenn sie sich in der Umgebung des Luftbe-
feuchters aufhalten.
• Personen, die mit der Gebrauchsanweisung nicht
vertraut sind, sowie Kinder und Personen unter Medi-
kamenten-, Alkohol- oder Drogeneinfluss, dürfen das
Gerät nicht oder nur unter Aufsicht bedienen.
• Das Gerät nie in Betrieb nehmen, wenn ein Kabel
oder Stecker beschädigt ist, nach Fehlfunktionen des
Gerätes oder wenn dieses heruntergefallen ist oder auf
eine andere Art beschädigt wurde.
• Das Gerät darf nur in komplett zusammengebautem
Zustand in Betrieb genommen werden.
• Reparaturen an Elektrogeräten dürfen nur von Fach-
kräften durchgeführt werden. Durch unsachgemässe
Reparaturen können erhebliche Gefahren für den
Benutzer entstehen.
• Niemals den Netzstecker am Kabel oder mit nassen
Händen aus der Steckdose ziehen.
• Das Gerät nur auf eine ebene, trockene Fläche stellen.
Wir können keine Schadenersatzansprüche, basierend
auf falscher Platzierung, anerkennen.
• Das Gerät so platzieren, dass es nicht umgestossen
werden kann.
• Das Kabel nicht mit einem Teppich oder anderen
Dingen bedecken. Gerät so platzieren, dass Sie nicht
über das Kabel stolpern.
• Betreiben Sie das Gerät nicht in Räumen, in denen sich
feuergefährliche Güter, Gase oder Dämpfe befinden.
• Keine Fremdgegenstände in das Gerät stecken.
• Lufteintritt unbedingt freihalten.
• Setzen Sie sich keinesfalls auf das Gerät und platzieren
Sie keine Gegenstände darauf.
• Achtung, das Gerät hat während dem Betrieb heisse
Oberflächen.
• Die austretende Luft ist heiss. Sicherheitsabstand von
2 m von brennbaren Gegenständen (z.B. Vorhängen)
einhalten.
• Beim Betrieb darf das Netzkabel nicht auf dem
Gerät liegen oder das Gitter berühren: Brand- und
Kurzschlussgefahr.
• Keine Verlängerungskabel verwenden.
• Es dürfen nur Anschlusskabel für min. 10 A Strom-
stärke verwendet werden.
• Das Gerät ist nicht spritzwassergeschützt.
• Das Gerät nicht auf heisse Oberflächen oder in der
Nähe von offenen Flammen abstellen. Mindestabstand
von 50 cm einhalten.
• Gerät darf nur in Privathaushalten und in trockenen
Räumen angewendet werden.
• Gerät oder Kabel nie in Wasser oder andere Flüssig-
keiten tauchen: Verletzungs-, Feuer- oder Stromschlag-
Gefahr.
• Verwenden Sie nur Original Ersatzteile.
• Vor Reinigung des Gerätes Netzstecker ziehen und
vollständig abkühlen lassen.
• Gerät während des Betriebs nie verschieben
• Kunststoffe, wie sie beim Luftbefeuchter Verwendung
finden, altern nach jahrelangem Gebrauch und können
brüchig werden. Die Sicherheit ist dann nicht mehr
gewährleistet und das Gerät darf dann nicht mehr
betrieben werden.
• Bedienungsanleitung sorgfältig aufbewahren und
allenfalls an Nachbenutzer weitergeben.
• Für Schäden, die durch Nichtbeachten dieser
Gebrauchsanleitung entstehen, wird jegliche Haftung
abgelehnt.
7
de
NO WATER
HUMIDIFY
POWER
POWER
ECO
ON
OFF
NORMAL
Gerätebeschreibung Inbetriebnahme
• Gerät auf eine ebene, stabile und wasserbeständige
Unterlage stellen.
• Gerät niemals direkt unter einer Steckdose aufstellen.
• Beim Aufstellen darauf achten, dass das Gerät sicher
steht und der Luftfluss nicht durch Gegenstände wie
z.B. Möbel, Vorhänge, behindert wird. Mindestabstand
von 2 m zu Wänden, Möbel und Vorhängen einhalten
(Gefahr von Feuchtigkeitsschäden).
• Nicht in die Nähe von Radiatoren oder anderen Heiz-
quellen stellen. Darauf achten, dass niemand über das
Netzkabel stolpern kann und dass das Gerät ausser
Reichweite von Kindern ist (heisser Dampfaustritt).
Kinder dürfen nicht mit dem Gerät spielen.
Gerät nur in trockenen Räumen bis 60 m2/
150 m3 Grösse und ohne Verlängerungskabel
verwenden.
Wassertank
Wassertankdeckel
Duftstoffbehälter
Dampfaustritt
Bedienungs-
panel
Wasser einfüllen
• Gerät mit Ein-/Aus-Schalter ON/OFF ausschalten.
• Netzstecker ziehen.
• Obere Gehäuse-Abdeckung abnehmen (Achtung: nach
Betrieb heiss!) und Wassertank aus dem Gerät nehmen.
• Wassertank auf den Kopf stellen und Verschlussdeckel
abschrauben.
• Restwasser ausleeren und Tank gut ausspülen.
• Wasser einfüllen und wieder gut verschliessen.
Achtung!
• Nur Leitungswasser verwenden, kein Mineralwasser
oder enthärtetes Wasser verwenden! Dem Wasser auf
keinen Fall Salz oder andere Substanzen beifügen!
• Niemals Wasser durch die Dampfauslass-Öffnung
einfüllen!
• Duftstoffe nur in den Duftstoffbehälter und nicht direkt
ins Wasser geben!
Betriebsanzeige
• Grün = Gerät in Betrieb (ON)
• Rot = Wasserstand leer (Verdampferplatte
ausgeschaltet)
Bei leerem Tank wird die Verdampferplatte automatisch
ausgeschaltet. Sobald wieder ein gefüllter Tank eingesetzt
ist, wird die Platte wieder eingeschaltet.
Bei der ersten Inbetriebnahme oder nach län-
gerem Nichtgebrauch, muss sich zuerst der
Wasserkreislauf füllen. Daher dauert es 1 – 2
Minuten, bis die rote Anzeige bei vollem Tank erlischt.
Duftstoffbehälter
• Nur eine kleine Menge von Duftstoffen in den Duftstoff-
behälterring geben
• Achtung! Duftstoffe nicht direkt dem Wasser im Tank
beigeben!
Wasser-
standsanzeige
Netzkabel
Abdeckung für
Verdampfereinheit
Calc Ball
Verdampferplatte
Innenansicht
Dampfaustritt
Abdeckung

8
de
Gerät einschalten
• Netzstecker einstecken.
• Mit Ein-/Aus-Taste ON/OFF (A) Gerät einschalten.
A) Ein-/Aus-Schalter ON/OFF
mit Kontrollanzeige «POWER»
• Leuchtet bei eingeschaltetem Gerät grün.
B) Einstellschalter für zwei Stufen:
« » Hohe Befeuchtungsleistung (NORMAL)
« » Tiefe Befeuchtungsleistung (ECO)
Nach der Anwendung
• Gerät mit Ein-/Aus-Schalter ON/OFF ausschalten.
• Netzstecker ziehen.
• Warten, bis das Gerät vollständig ausgekühlt ist.
• Restwasser ausleeren und Wassertank gut ausspülen.
Gerät regelmässig reinigen und warten, um einen hygieni-
schen und störungsfreien Betrieb zu gewähren:
• Wöchentlich: Gehäuseteile und Wassertank reinigen.
• Je nach Verkalkung: Calc Ball und Verdampferplatte
entkalken (siehe «Reinigung und Wartung»).
• Jährlich: Nach Heizsaison Gerät reinigen.
• Vor der Aufbewahrung Gerät vollständig austrocknen
lassen.
Reinigung und Wartung
Netzstecker ziehen vor dem Reinigen, Warten,
Entkalken oder Ausspülen des Gerätes.
• Gerät vollständig abkühlen lassen.
• Grundgerät (mit Kabel) nie ins Wasser oder in andere
Flüssigkeiten tauchen.
• Restwasser aus Gerät und Wassertank ausleeren und
Wassertank gut ausspülen.
• Abdeckung der Verdampfereinheit nach oben ab-
nehmen.
• Der Calc Ball nimmt einen grossen Teil der Kalk-
partikel auf. Er verhindert durch seine Bewegung auf
der Verdampferplatte eine zu schnelle Verkalkung. Der
Calc Ball muss in regelmässigen Abständen – je nach
Verkalkung – entkalkt werden (Calc Ball komplett in
Entkalkerflüssigkeit eintauchen).
• Auch die Verdampferplatte regelmässig entkalken.
Erzeugt in Betrieb Dampf; Achtung heiss! Falls sich im
Bereich der Verdampferplatte Kalkablagerungen bilden,
Gerät mit Haushaltentkalker entkalken (Mischverhältnis
Entkalker : Wasser = 2:1). Dazu Entkalkerflüssigkeit
auf die schwarze Verdampferplatte geben (nicht auf
Kunststoffteile!). Nach Einwirkungszeit mit Tuch Rück-
stände aufnehmen und anschliessend Verdampfer-
platte trocken wischen. Wichtig: keine kratzenden Ge-
genstände (Messer etc.) oder Schwämme verwenden,
da sonst die Antihaftbeschichtung beschädigt wird!
• Gehäuse feucht abwischen und anschliessend trocken-
reiben.
Hinweise zur Funktionsweise
eines Verdampfer-Luftbefeuchters
• Beim Verdampferprinzip wird Wasser auf der Ver-
dampferplatte zum Verdampfen gebracht.
• Die Luftbefeuchtung wird durch zirkulierende Luft
stark eingeschränkt (z.B. bei geöffnetem oder un-
dichtem Fenster und hohen Räumen).
• Beachten Sie bitte, dass die Feuchtigkeit mit der
warmen Luft aufsteigt und evtl. an einer Stelle un-
erwünscht kondensieren kann.
NO WATER
HUMIDIFY
POWER
POWER
ECO
ON
OFF
NORMAL
B
A

9
de
Lagerung bei längerem Nichtgebrauch
Gerät wie beschrieben reinigen, vollständig austrocknen
lassen und vorzugsweise in der Originalverpackung an
einem trockenen, nicht zu heissen Ort aufbewahren.
Entsorgen
Übergeben Sie das ausgediente Gerät Ihrem
Händler zur fachgerechten Entsorgung. Weitere
Entsorgungsmöglichkeiten erfahren Sie von
Ihrer Gemeinde- oder Stadtverwaltung.
Garantie
Die Garantiebestimmungen sind von unserer Landesvertre-
tung festgelegt. Wenden Sie sich vertrauensvoll an Ihren
Fachhändler, wenn am Gerät trotz strenger Qualitätskon-
trollen ein Mangel auftritt. Für eine Garantieleistung ist die
Vorlage des Kaufbelegs unbedingt erforderlich. Repara-
turen an Elektrogeräten dürfen nur Fachkräfte durchführen.
Durch unsachgemässe Reparaturen können erhebliche
Gefahren für den Benutzer entstehen und der Garantie-
anspruch erlischt.
Technische Daten
Netzspannung 230 V / 50 Hz
Leistungsaufnahme 300 W (150 W*)
Befeuchtungsleistung 390 g/h (195 g/h*)
Geeignet für Raumgrössen bis 60 m2/ 150 m3
Fassungsvermögen 3.0 Liter
Abmessungen 260 x 200 x 280 mm
Gewicht (leer) 1.95 kg
* bei Betrieb mit Eco-Mode
Ersatzteile
Die Ersatzteile können Sie über Ihren Fachhändler bezie-
hen und selbst am Gerät austauschen. Es dürfen nur Ori-
ginalteile des Herstellers verwendet werden. Alle weiteren
Reparaturen dürfen nur Fachkräfte oder der Kundendienst
durchführen. Dies gilt auch für ein defektes Netzkabel.

10
de

11
en
Instructions for use

12
en
Congratulations!
Congratulations on choosing the steam humidifier
BONECO S150!
General information
Did you know that dry room air:
• Dries out the mucous membranes, and also causes
chapped lips and stinging eyes?
• Encourages infections and illnesses of the respiratory
system?
• Causes weariness, tiredness and poor concentration?
• Stresses household pets and house plants?
• Encourages the formation of dust and the electrostatic
charging of textiles made of synthetic fibers, as well as
carpets and plastic flooring?
• Damages wooden furniture and especially parquet
floors?
• Causes musical instruments to go out of tune?
A comfortable indoor atmosphere is achieved at a relative
humidity of between 40 and 60%. Air humidification is es-
pecially sensible in winter, but does not replace the regular
airing of living spaces.
Caution: hot steam!
Safety instructions
• Read the operating instructions carefully before using
the appliance and keep them in a safe place for later
reference.
• Connect the unit only to an AC supply with a voltage
that agrees with the rating label.
• Only use the appliance indoors and within the para-
meters stated in the technical specifications. Using the
appliance for a purpose for which it is not intended
could pose a serious hazard to health and life.
• Children cannot recognize the hazards associated with
the usage of electrical appliances. For this reason,
always supervise children when they are in the vicinity
of the appliance.
• Persons who are unfamiliar with the operating in-
structions, as well as children and persons under the
influence of medication, alcohol or drugs are not per-
mitted to operate the appliance, or are only permitted
to operate it under supervision.
• Never use the appliance if there is any damage to the
appliance or cable, after malfunction has occurred,
after the appliance has been dropped or damaged in
any other way.
• Only operate the appliance when it is completely
assembled.
• Repairs to electrical appliances may only be carried out
by qualified service engineers. Improper repair work
can pose a considerable hazard to the user.
• Never pull the plug from the mains socket by the cable
or with wet hands.
• Always place the appliance on a dry, level surface.
We do not accept any liability for damages due to the
incorrect placement of the unit.
• Position the appliance where it cannot be easily
knocked over.
• Do not run the power cord under a carpet or other
objects. Position the appliance so that you will not trip
over the cord.
• Do not use the appliance in areas where combustible
materials, gases or vapours are present.
• Do not insert foreign objects in the device.
• Do not block the air intake.
• Do not sit, stand or place any heavy objects on the
appliance.
• Warning: the surfaces of the device become hot during
operation.
• The expelled air is hot. Flammable objects (such as
curtains) must be kept at least 2 m away from the
device.
• The power cable must not be left lying on the device
or allowed to come into contact with the grid. Ignoring
this advice may lead to fire or a short circuit.
• Do not use extension cables.
• Use connection cables with a minimum current rating
of 10 A only.
• The device is not splash-resistant.
• The device must not be placed on hot surfaces or
near naked flames. Maintain a minimum safe distance
of 50 cm.
• The device must only be used in private residences,
in dry rooms.
• Never immerse the device or cable in water or other
liquids. Ignoring this advice may lead to injury, fire or
electrocution.
• Use original replacement parts only.
• Before cleaning the device, remove the plug from the
mains and allow it to cool fully.
• Never move the device while in operation.
• The plastics used in humidifiers age with time and
may become fragile. Safety can then no longer be
guaranteed and the device must not be used.
• Keep the instructions in a safe place and ensure that
they are passed to any subsequent users.
• No responsibility is accepted for damage caused
through disregard of these instructions.

13
en
NO WATER
HUMIDIFY
POWER
POWER
ECO
ON
OFF
NORMAL
Description of the appliance Operation
• Position the device on a level, stable and water-
resistant surface.
• Do not position the device directly beneath a plug
socket.
• When positioning the device, ensure that it is steady
and that the airflow is not obstructed by objects such
as furniture or curtains. Position the device at least
2 m away from walls, furniture and curtains (risk of
damage from humidity).
• Do not position the device close to radiators or other
heat sources. Ensure that no one can trip over the po-
wer cable and that the device is out of reach of child-
ren (the steam expelled is hot). Do not allow children to
play with the device.
Use the device only in dry rooms of 60 m2/
150 m3in size, and do not use extension
cables.
Filling up the water
• Use the ON/OFF switch to turn the device off.
• Remove the plug from the mains.
• Remove the upper housing cover (Warning: hot after
operation!) and remove the water tank from the device.
• Turn the water tank upside down and unscrew the cap.
• Empty any remaining water and rinse the tank
thoroughly.
• Fill the tank with water and screw the cap on tightly.
Warning!
• Use tap water only, i.e. not mineral water or any other
softened water! Do not, under any circumstances, add
other substances (such as scents) to the water!
• Never pour water into the steam outlet!
• Add scents only to the scent container and not directly
to the water!
Operation indicator
• Green = Device is in use (ON)
• Red = Water level empty (vaporizer board switched off)
When the tank is empty, the vaporizer board is turned off
automatically. As soon as the tank is refilled, the board is
turned on again.
The first time you turn the device on, or if you
have not used it for a long time, bear in mind
that it takes some time for the water circulation
system to fill up. As such, the red light may stay illuminated
for 1 – 2 minutes.
Fragrance container
• Add only a small amount of fragrances, essences or
inhalants to the fragrance container.
• Warning! Do not add fragrances directly to the water
in the tank!
Water tank
Water tank cap
Fragrance container
Steam outlet
Control panel
Water level
indicator
Power plug
Cover for
vaporizer unit
Calc Ball
Vaporizer board
Steam outlet
Cover

14
en
Turning the device on
• Insert plug into mains socket.
• Use the ON/OFF switch to turn the device on.
A) ON/OFF switch with indicator light
«POWER»
• Green LED is illuminated when device is switched on.
B) Setting switch for two levels:
« » High humidity output (NORMAL)
« » Low humidity output (ECO)
After use
• Use the ON/OFF switch to turn the device off.
• Remove the plug from the mains socket.
• Wait until the device has cooled fully.
• Empty any remaining water and rinse the water tank
thoroughly.
Clean and maintain the device regularly to ensure that it
operates hygienically and smoothly.
• Weekly: Clean housing parts and water tank.
• Depending on quantity of limescale: descale Calc Ball
and vaporizer board (see «Cleaning and maintenance»).
• Annually: clean the device after the heating season.
• Ensure the device is allowed to dry fully before putting
it into storage.
Cleaning and maintenance
Removetheplugfromthe mains before cleaning,
maintaining, descaling or rinsing the device.
• Allow the device to cool fully.
• Never immerse the basic device (including the cable) in
water or any other liquid.
• Empty any remaining water from the device and water
tank and rinse the water tank thoroughly.
• Lift up the cover for the vaporizer unit to remove it.
• The Calc Ball absorbs a large proportion of the lime-
scale particles. It hinders calcification by moving
across the vaporizer board. Depending on the level
of limescale, the Calc Ball needs to be cleaned at
regular intervals (immerse the Calc Ball completely in
limescale-remover).
• The vaporizer board also needs to be descaled on a re-
gular basis. Creates steam when in operation: Warning!
Hot! If limescale deposits form around the vaporizer
board, descale the device with domestic limescale-
remover (mixing ratio limescale-remover: water = 2:1).
To do so, apply limescale-remover to the black vapo-
rizer board (avoiding any plastic components!). After
the limescale remover has taken effect, use a cloth to
remove any residue and then wipe the vaporizer board
dry. Important: do not use any abrasive implements
(knives etc.) or scouring pads as this damages the
non-stick coating!
• Clean the housing with a damp cloth then wipe it dry.
Notes on how a steam humidifier works
• In the steam humidifier principle, the vaporizer board
heats up the water to the boiling point so that it vapori-
zes.
• Humidity is heavily restricted by circulating air
(for example, in rooms with open/poorly sealed
windows or in elevated rooms).
• Please note that humidity rises with warm air and this
can cause unwanted condensation in some areas.
NO WATER
HUMIDIFY
POWER
POWER
ECO
ON
OFF
NORMAL
B
A

15
en
Storing the appliance for extended periods
Clean the appliance as described earlier and allow to dry
thoroughly. Preferably store the appliance in its original box,
in a dry place away from high temperatures.
Disposal
Return your worn out unit to your dealer for
proper disposal. You can obtain information on
other ways to dispose of the unit from your local
district or town council.
Warranty
The warranty conditions are defined by our representative
in the country of sale. Please contact your dealer if, despite
strict quality control, your appliance becomes defective. You
must present your original receipt when making a claim
under the warranty. Repairs to electric appliances can only
be carried out by specialists. Through improper repairs,
considerable danger for the operator can result and war-
ranty claims lapse.
Technical specifications
Mains voltage 230 V / 50 Hz
Power consumption 300 W (150 W*)
Humidity output 390 g/h (195 g/h*)
Suitable for rooms up to 60 m2/ 150 m3
Water capacity 3.0 liter
Dimensions 260 x 200 x 280 mm
Weight (empty) 1.95 kg
* when used with Eco-Mode
Spare parts
Spare parts can be obtained from your specialist dealer
and installed in the appliance yourself. Only original manu-
facturer’s parts may be used. All other repairs must be
carried out by a specialist or customer service. This also
applies to a defective mains cable.

16
en

17
fr
Instructions d’utilisation

18
fr
Félicitations !
Nous vous félicitons d’avoir choisi le vaporisateur
BONECO S150 !
Remarques générales
Savez-vous qu’un air desséché :
• provoque le dessèchement des membranes mu-
queuses, des gerçures aux lèvres et des irritations aux
yeux ?
• favorise les infections et les maladies des voies
respiratoires ?
• mène à un état de lassitude ou de fatigue permanent
et à des pertes de concentration ?
• est néfaste pour les animaux domestiques et les
plantes d’intérieur ?
• favorise l’accumulation de poussière et le chargement
des textiles en fibres synthétiques, tapis et revête-
ments de sol synthétiques en électricité statique ?
• endommage les meubles et certains parquets en
bois ?
• désaccorde certains instruments de musique ?
Le climat ambiant est agréable quand l’humidité relative
de l’air se situe entre 40 % et 60 %. L’humidification de l’air
est surtout recommandée en hiver, mais ne remplace pas
l’aération régulière des pièces d’habitation.
Attention : vapeur chaude !
Consignes de sécurité
• Lisez attentivement le mode d’emploi complet avant la
mise en service, et conservez-le bien pour pouvoir le
consulter ultérieurement.
• Ne branchez l’appareil qu’à l’alimentation électrique ;
la tension doit correspondre à celle indiquée sur la
plaquette signalétique de l’appareil.
• N’utilisez l’appareil que dans des pièces d’habitation et
dans les conditions précisées dans les spécifications
techniques. Une utilisation non conforme aux spécifica-
tions peut mettre en danger la santé et la vie.
• Les enfants ne sont pas encore conscients des dangers
résultant de la manipulation d’appareils électriques.
Ne les laissez donc pas sans surveillance lorsqu’ils
sont à proximité de l’appareil.
• Les personnes qui ne sont pas familiarisées avec le
mode d’emploi, de même que les enfants ou les person-
nes sous l’influence de médicaments, d’alcool ou de
drogues, ne doivent en aucun cas manipuler l’appareil
sans surveillance.
• Ne mettez jamais l’appareil en service quand un câble
ou l’appareil est détérioré, ni après des disfonctionne-
ments ou après une chute ou autre dommage quelcon-
que de l’appareil.
• L’appareil ne doit être mis en service qu’entièrement
assemblé.
• Les réparations d’appareils électriques ne doivent être
exécutées que par des experts autorisés. Des répara-
tions non professionnelles peuvent causer des dangers
considérables pour l’utilisateur.
• Ne débranchez jamais la prise au secteur en tirant sur
le câble ou lorsque vos mains sont mouillées.
• Ne posez l’appareil que sur une surface sèche et
plane. Nous déclinons toute responsabilité pour les
dommages liés à un emplacement inapproprié de
l’appareil.
• Placez l’appareil à un endroit tel que personne ne
puisse le heurter.
• Ne mettez pas le cordon d’alimentation sous une
moquette et ne le couvrez pas par des tapis. Placez le
cordon de sorte que personne ne puisse trébucher.
• N’utilisez pas l’appareil dans des pièces renfermant
des produits, gaz ou vapeurs inflammables.
• N’insérez aucun objet étranger dans l’appareil.
• Ne bloquez pas les arrivées d’air.
• Ne vous asseyez pas sur l’appareil et ne posez pas
d’objets dessus.
• Avertissement : les surfaces de l’appareil deviennent
chaudes lors du fonctionnement.
• L’air refoulé est chaud. Les objets inflammables (tels
les rideaux) doivent être éloignés d’au moins 2 m de
l’appareil.
• Le câble d’alimentation ne doit pas rester sur
l’appareil ou entrer en contact avec la grille.
Le non respect de ce conseil peut provoquer un
incendie ou un court-circuit.
• N’utilisez pas de rallonges.
• Utilisez exclusivement des câbles de raccordement
d’une puissance minimale de 10 A.
• L’appareil n’est pas protégé contre les éclaboussures.
• Ne placez pas l’appareil sur des surfaces chaudes ou
à proximité de flammes nues. Respectez une distance
de sécurité minimum de 50 cm.
• L’appareil doit uniquement être utilisé dans des
résidences privées, dans des pièces sèches.
• Ne plongez jamais l’appareil ou le câble dans de l’eau
ou d’autres liquides. Le non respect de ce conseil peut
provoquer des blessures, un incendie ou une électro-
cution.
• Utilisez exclusivement des pièces de rechange
d’origine.
• Avant de nettoyer l’appareil, retirez la fiche de la prise
de secteur et laissez l’appareil refroidir complètement.
• Ne déplacez jamais l’appareil lorsqu’il est en service.
• Les plastiques utilisés dans des humidificateurs
vieillissent et peuvent devenir fragiles. Dans ce cas, la
sécurité ne peut plus être garantie et l’appareil ne doit
plus être utilisé.
• Conservez les instructions dans un endroit sûr et
transmettez-les à tout nouvel utilisateur.
• Nous déclinons toute responsabilité en cas de dom-
mages résultant du non respect de ces instructions.

19
fr
NO WATER
HUMIDIFY
POWER
POWER
ECO
ON
OFF
NORMAL
Mise en service
• Placez l’appareil sur une surface plane, stable et
résistante à l’eau.
• N’installez pas l’appareil directement sous une prise de
courant.
• Lors de l’installation de l’appareil, veillez à ce qu’il
soit stable et à ce que le flux d’air ne soit pas obstrué
par exemple par des meubles ou des rideaux. Placez
l’appareil à au moins 2 m des murs, des meubles et
des rideaux (risque de dommage dû à l’humidité).
• N’installez pas l’appareil à proximité de radiateurs ou
d’autres sources de chaleur. Veillez à ce que personne
ne puisse trébucher sur le câble d’alimentation et à ce
que l’appareil soit hors de portée des enfants (la va-
peur refoulée est chaude). Veillez à ce que les enfants
ne jouent pas avec l’appareil.
Utilisez l’appareil uniquement dans des pièces
de 60 m2ou 150 m3 et n’employez pas de ral-
longes.
Approvisionnement en eau
• Utilisez l’interrupteur ON/OFF pour mettre l’appareil hors
service.
• Retirez la fiche de la prise de secteur.
• Retirez le couvercle du corps supérieur (Avertissement :
chaud après fonctionnement !) et extrayez le réservoir
d’eau de l’appareil.
• Retournez le réservoir d’eau et dévissez le bouchon.
• Laissez s’écouler toute eau résiduelle et rincez
soigneusement le réservoir.
• Faites l’appoint d’eau et vissez fermement le capuchon.
Avertissement !
• Utilisez uniquement de l’eau du robinet, et pas d’eau mi-
nérale ni toute autre eau traitée ! N’ajoutez jamais d’autres
substances (comme des parfums par exemple) à l’eau !
• Ne versez jamais d’eau dans la sortie de vapeur.
• Ajoutez des parfums uniquement dans le récipient à
parfum et pas directement dans l’eau !
Indicateurs de fonctionnement
• Vert = appareil en service (ON)
• Rouge = réservoir d’eau vide (panneau du vaporisateur
désactivé)
Lorsque le réservoir est vide, le panneau du vaporisateur
est désactivé automatiquement. Dès que le réservoir est à
nouveau rempli, le panneau est à nouveau activé.
La première fois que vous mettez l’appareil en ser-
vice ou si vous ne l’avez pas utilisé depuis long-
temps, gardez à l’esprit que le remplissage du sys-
tème de circulation d’eau prend un certain temps. Par consé-
quent, il faut 1 à 2 minutes avant que le voyant rouge
s’éteigne.
Récipient à parfum
•
Ajoutez uniquement de petites quantités de parfums, d’es-
sences ou d’inhalants dans l’anneau du récipient à parfum
• Avertissement ! N’ajoutez pas de parfums directement à
l’eau dans le réservoir !
Réservoir d’eau
Bouchon du réservoir
d’eau
Récipient à parfum
Sortie de vapeur
Panneau de
commande
Indicateur du
niveau d’eau
Prise de courant
Couvercle de
l’unité vaporisateur
Calc Ball
Panneau du vaporisateur
Vue intérieure
Sortie de vapeur
Couvercle
Description de l’appareil

20
fr
Mise en service de l’appareil
• Insérez la fiche dans la prise de courant.
• Utilisez l’interrupteur On/Off pour mettre l’appareil en
service.
A) Interrupteur ON/OFF avec afficheur
de contrôle «POWER»
•
La DEL verte est allumée lorsque l’appareil est en service.
B) Interrupteur de réglage sur
deux niveaux :
« » Performance élevée (NORMAL)
« » Performance basse (ECO)
Après utilisation
• Utilisez l’interrupteur On/Off pour mettre l’appareil
hors service.
• Retirez la fiche de la prise de secteur.
• Attendez que l’appareil soit totalement refroidi.
• Retirez toute eau résiduelle et rincez soigneusement
le réservoir d’eau.
Nettoyez et procédez à l’entretien de l’appareil régulière-
ment afin de garantir un fonctionnement hygiénique et sans
problème.
• Chaque semaine : nettoyez les pièces du corps et le
réservoir d’eau.
• Selon la quantité de tartre : détartrez la Calc Ball
et le panneau du vaporisateur (voyez «Nettoyage et
entretien»)
• Chaque année : nettoyez l’appareil après la saison de
chauffe.
• Laissez l’appareil sécher totalement avant de le ranger.
Nettoyage et entretien
Retirez la fiche de la prise de courant avant de
nettoyer, d’entretenir, de détartrer ou de rincer
l’appareil.
• Laissez l’appareil refroidir entièrement.
• Ne plongez jamais l’appareil de base (y compris
le câble) dans de l’eau ou tout autre liquide.
• Laissez s’écouler toute eau résiduelle de l’appareil
et du réservoir d’eau, et rincez soigneusement le
réservoir d’eau.
• Soulevez le couvercle de l’unité vaporisateur pour
le retirer.
• La Calc Ball absorbe une grande proportion des par-
ticules de tartre. Elle empêche la calcification en se dé-
plaçant sur le panneau du vaporisateur. Selon le niveau
d’entartrage, la Calc Ball doit être nettoyée à intervalles
réguliers (plongez complètement la Calc Ball dans un
détartrant).
• Le panneau du vaporisateur doit aussi être détartré ré-
gulièrement. Avertissement ! Danger, la vapeur générée
est chaude ! Si du tartre se dépose autour du panneau
du vaporisateur, détartrez l’appareil avec un détartrant
ménager (rapport de mélange détartrant : eau = 2:1).
Pour ce faire, appliquez du détartrant sur le panneau
du vaporisateur noir (pas sur les composants en pla-
stique !). Après l’action du détartrant, utilisez un chiffon
pour enlever tout résidu et ensuite séchez le panneau
du vaporisateur. Important : n’utilisez pas de produits
abrasifs (couteaux, etc.) ni des tampons à récurer afin
d’éviter tout endommagement du revêtement anti-
adhésif !
• Nettoyez le corps avec un chiffon humide et ensuite
séchez-le.
Notes sur le fonctionnement d’un
humidificateur a vapeur
• Dans le principe de vaporisation, de l’eau se vaporise
sur le panneau du vaporisateur.
• L’humidité est fortement entravée par de l’air en circu-
lation (par exemple, dans des pièces avec des fenêtres
ouvertes/mal étanchéifiées ou dans des pièces hautes).
• Veuillez garder à l’esprit que l’humidité augmente
avec de l’air chaud et peut provoquer une conden-
sation indésirable à certains endroits.
NO WATER
HUMIDIFY
POWER
POWER
ECO
ON
OFF
NORMAL
B
A
Table of contents
Languages:
Other Boneco Humidifier manuals

Boneco
Boneco H320 User manual

Boneco
Boneco H300 Installation guide

Boneco
Boneco W200 Installation guide

Boneco
Boneco E200 User manual

Boneco
Boneco 7145 User manual

Boneco
Boneco S450 User manual

Boneco
Boneco E2441A User manual

Boneco
Boneco W210 User manual

Boneco
Boneco S450 Installation guide

Boneco
Boneco U100 User manual

Boneco
Boneco W300 Installation guide

Boneco
Boneco U700 User manual

Boneco
Boneco H300 User manual

Boneco
Boneco U700 Installation guide

Boneco
Boneco U250 User manual

Boneco
Boneco S450 User manual

Boneco
Boneco U7145 User manual

Boneco
Boneco W220 Installation guide

Boneco
Boneco S250 Installation guide

Boneco
Boneco S200 User manual