Bosch ICP-EZM2 User manual

Easy Series
ICP-EZM2
en System Reference Guide


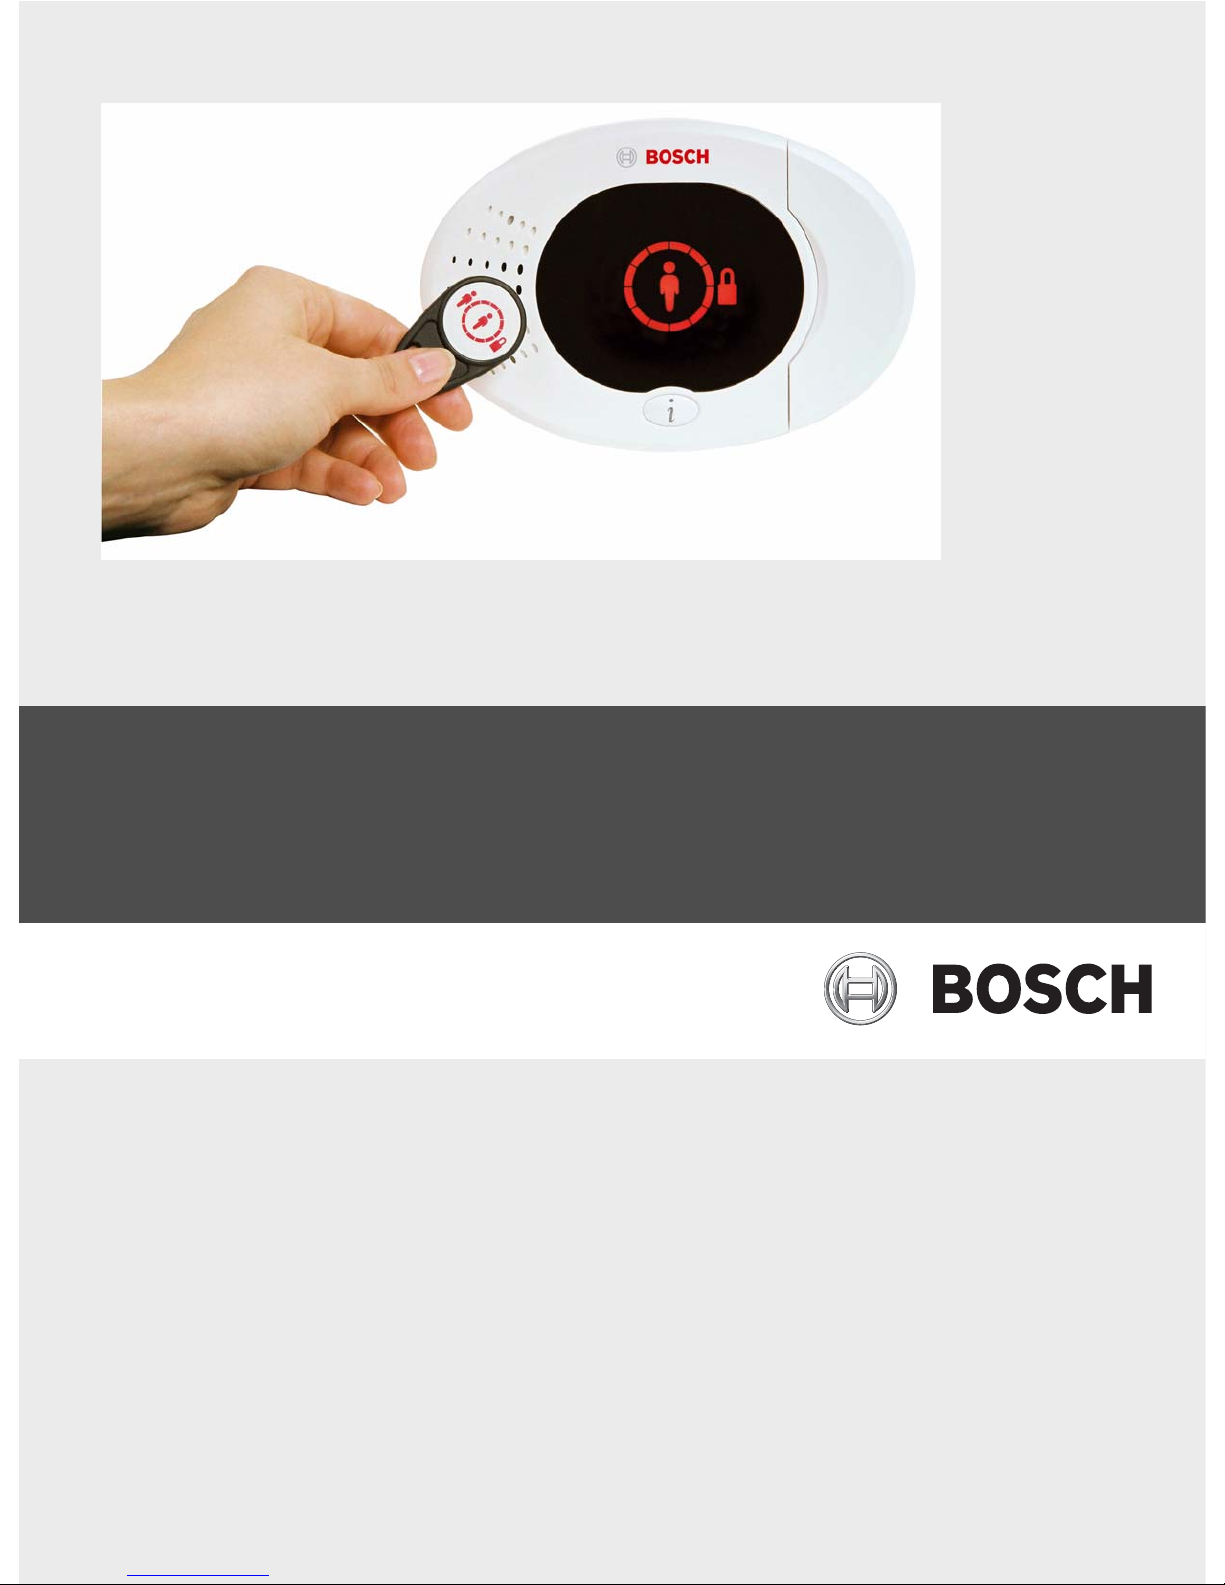
Easy Series Table of Contents | en 3
Bosch Security Systems, Inc. System Reference Guide F01U087835 | 02 | 2008.10
Table of Contents
1Overview 6
1.1 Installation Workflow 6
1.2 System Components and Wiring 6
1.3 Phone Menus 10
1.3.1 Installer Phone Menu 10
1.3.2 User Phone Menu 11
2 System Installation and Configuration 12
2.1 Plan the Installation 12
2.2 Install System Components 13
2.2.1 Install the wLSN Hub 13
2.2.2 Install the Control Panel Enclosure 13
2.2.3 Install the Control Center 14
2.2.4 Route Power-limited Wiring 15
2.2.5 Install the ITS-DX4020-G Communicator and Antenna 15
2.2.6 Install the DX2010 Input Expander 16
2.2.7 Connect the Conettix DX4020 Network Interface Module 16
2.2.8 Connect Supervised Points 16
2.3 Apply System Power 17
2.4 Initial System Startup 18
2.5 Perform the RFSS Site Test using the wLSN Installation Tool 18
2.5.1 Prepare the wLSN Hub for Site Testing and RFSS Mode 19
2.5.2 wLSN Installation Tool Mode 1 19
2.5.3 wLSN Installation Tool Mode 2 20
2.5.4 wLSN Installation Tool Mode 3 21
2.6 Install wLSN Devices 22
2.7 Configure the System from the Installer Phone Menu 22
2.7.1 Upgrade the Control Panel (Optional) 22
2.7.2 Initiate a Phone Session from the Control Panel 22
2.7.3 Configure Required Control Panel Settings 22
2.7.4 Discover Wireless Devices 23
2.7.5 Add Users, Tokens, and Key Fobs 24
2.8 Configure the ITS-DX4020-G Communicator 25
2.8.1 Configure the Control Panel for Cellular Communication 25
2.8.2 Configure the ITS-DX4020-G 25
2.8.3 Test ITS-DX4020-G Communications 27
3 Point Expansion 28
3.1 Perform a RFSS Site Test with the Hub and the Device 28
3.2 Establishing the Wireless Network and Configuring Wireless Devices 28
3.2.1 Discover a New System 29
3.2.2 Establish and Configure the Wireless Network 29
3.2.3 Configure Devices 30
3.3 Wireless Maintenance 31
3.3.1 Wireless Configuration Menu 31
3.3.2 Assigning Points 1 to 8 as Wireless Points 32

4en | Table of Contents Easy Series
F01U087835 | 02 | 2008.10 System Reference Guide Bosch Security Systems, Inc.
3.3.3 Recovering the Wireless Network 32
3.3.4 Wireless System Messages 32
4 Programming Access Options 33
4.1 System Access by Phone 33
4.2 RPS 34
4.2.1 RPS Connection Methods 34
4.3 Programming Keys 36
5Programming 37
5.1 Basic Programming 38
5.1.1 Enter Basic Programming 38
5.1.2 Points 39
5.1.3 Report Configuration 40
5.1.4 Outputs 41
5.2 Expert Programming 42
5.2.1 ROM Firmware Version Items 43
5.2.2 System Programming Items 43
5.2.3 Communicator Programming Items 47
5.2.4 RPS Configuration Items 49
5.2.5 Route Reporting Options 50
5.2.6 Point Programming Items 52
5.2.7 Output Programming Items 54
5.2.8 Control Center Programming Items 55
5.2.9 User Programming Items 56
5.2.10 Factory Default 57
5.3 Exit Programming 57
6 Control Panel Event Codes (SIA and Contact ID) 58
7 Default the System 60
7.1 Default the Control Panel and the wLSN Hub 60
7.2 Default wLSN Devices 60
8 System Test and Maintenance 61
8.1 Test the System 61
8.2 Maintain the System 61
8.3 Installer History Event Announcements 61
8.4 Event Messages 61
9 ITS-DX4020-G Communicator Configuration 62
9.1 ITS-DX4020-G Communicator Overview 62
9.2 Short Message Service (SMS) Configuration 63
9.3 Accessing the User Interface and Logging On Using USB 65
9.3.1 Downloading the ITS-DX4020-G USB Driver 65
9.3.2 Installing the ITS-DX4020-G USB Driver 65
9.3.3 USB Main Menu 67

Easy Series Table of Contents | en 5
Bosch Security Systems, Inc. System Reference Guide F01U087835 | 02 | 2008.10
9.3.4 USB Option Menu 68
9.4 Upgrading the ITS-DX4020-G Software 70
9.4.1 Downloading the Latest Software 70
9.4.2 Installing the Software with Hyper Terminal 70
9.4.3 Installing the Software with Tera Term 71
10 Device Specifications and Overview 72
10.1 Control Panel 72
10.1.1 Standby Battery Calculation 74
10.2 Control Center 75
10.3 DX2010 Input Expander 78
10.4 Conettix DX4020 Network Interface Module 79
10.5 ITS-DX4020-G Communicator 79
10.6 wLSN Installation Tool 80
10.7 wLSN Hub 81
10.8 wLSN PIR and Dual Motion Detectors 82
10.9 wLSN Door-Window Contact 83
10.10 wLSN Recessed Door-Window Contact 83
10.11 wLSN Mini Door-Window Contact 84
10.12 wLSN Inertia Detector 85
10.13 wLSN Key Fob 87
10.14 wLSN Relay Module 89
10.15 wLSN Indoor Siren 90
10.16 wLSN Outdoor Siren 91
10.17 wLSN Smoke and Heat Detectors 92
10.18 wLSN Glassbreak Detector 95
10.19 wLSN Water Sensor/Low-temperature Sensor 100
11 Programming Details and Defaults 102
11.1 Programming Item Programming Details 102
11.2 Country Codes 107
11.3 Country Code Specific Default Programming Codes 108
12 Agency Approvals and Requirements 112
12.1 Certifications and Approvals 112
12.2 FCC 113
12.3 Industry Canada 114
12.4 SIA 114
12.5 Underwriters Laboratories (UL) 116
12.6 PD6662 and DD243 Requirements 118
12.7 EN50131 Requirements 119
12.8 INCERT 120
12.9 cUL 120
12.10 NF A2P 120

6en | Overview Easy Series
F01U087835 | 02 | 2008.10 System Reference Guide Bosch Security Systems, Inc.
1Overview
This document contains instructions for a trained installer to properly install, configure, and
operate the Easy Series control panel, and all optional peripheral devices.
You will install and configure the system using the figures starting in Section 1.2 System
Components and Wiring, page 6 and the information in Section 2 System Installation and
Configuration, page 12. The sections following Sections 1 and 2 provide supporting details for
installation, configuration, testing, and support.
1.1 Installation Workflow
To properly install, configure, and test the system, use the following workflow:
Table 1.1 Installation Workflow
1.2 System Components and Wiring
Refer to Figure 1.1 through Figure 1.3 for overviews of the system components and wiring.
Figure 1.1 System Component Wiring Overview
Step Description Page
1. Plan the Installation Identify suitable locations for system component in the installation
site.
Page 12
2. Install the Hardware Install all system components. Page 13
3. Perform RFSS Site Test Perform radio frequency signal strength (RFSS) test. Page 18
4. Configure the System Enroll wireless devices into the system, perform basic programming
for the system, and add users to the system.
Page 22
5. Program the System Update the system with expert programming. Page 33
6. Test the System Perform a full system test. Ensure that the central monitoring station
received test reports.
Page 61
B
G
Y
R
+
-
IUI-EZ1
B
G
Y
R
ISW-BHB1-WX
B
G
Y
R
DX4020
B
G
Y
R
ITS-DX4020-G
B
G
Y
R
DX2010 (+) (-) (-)
(+)
(+) (-)(+) (-)(+) (-)
ICP-EZPS
1
4
2
5
11
3
12
6
7
8
9
10
T
T
(-)
(+) (-)
(+) (+)

Easy Series Overview | en 7
Bosch Security Systems, Inc. System Reference Guide F01U087835 | 02 | 2008.10
Callouts for Figure 1.2, Page 8
1Control Center Mount within 3 m of control panel, Use CAT5 cable (twisted pair) for audio
bus, Set data bus address (1 - 4), up to 4 controls max
2wLSN Hub S1 S2 S3
1 0 0 = Normal Operation
9 2 0 = RFSS Mode
9 8 7 = Default Hub (refer to Page 60)
DX2010 Point Expander Data Bus Adr 102: Points 9 - 16
Data Bus Adr 103: Points 17 - 24
Data Bus Adr 104: Points 25 - 32
4DX4020 Network Interface Module Data Bus Adr 134 1 - On
2 - Off
5ITS-DX4020-G Data Bus Adr 134 (Fixed)
6Supervised Points (single EOL) Normally open and normally closed options (2.2k Ω)
7Supervised Points (dual EOL) Normally closed (2.2k Ω)
8Keyswitch Options (single and dual EOL) ((2.2k Ω)
9Prog Output (PO) 1 Options Switched 12v Switched Ground Dry Contact
10 Prog Outputs 2 - 4 NF A2P requires that sirens have a backup battery. When this siren
requires a 14,1V to 14,4V supply, use the optional board EZPS-FRA or the
auxiliary power supply IPP-PSU-2A5. Set the output as interior burglary
alarm.
11 2-wire Smoke Detector Option EOL resistor (P/N: 25899) required.
12 4-wire Smoke Detector Option EOL resistor (P/N: 25899) and Bosch EOL relay module required
Note: The system uses a 12 VDC battery, connected as shown.

8en | Overview Easy Series
F01U087835 | 02 | 2008.10 System Reference Guide Bosch Security Systems, Inc.
Figure 1.2 Overview of the System Component Location for the ICP-EZM2-R Enclosure
Figure 1.3 Overview of the System Component Location for the ICP-EZM2-EU Enclosure

Easy Series Overview | en 9
Bosch Security Systems, Inc. System Reference Guide F01U087835 | 02 | 2008.10
Callouts for Figure 1.2 Page 8 and Figure 1.3, Page 8
1Port for ICP-EZRU-V3 ROM Update Key and Programming Key
2Enclosure Cover and Wall Tamper Switch
3Ground connection
Connect ground wire from enclosure to enclosure door.
4Module mounting location
ITS-DX4020-G shown.
5Module mounting location
DX2010 shown.
6System test button
When the system is completely installed and programmed, press the system test button to start a full system
test.
7Port for ICP-EZVM voice module
8Enclosure terminal cover (ICP-EZM2-R Enclosure only)
Shipped in hardware bag. Install over terminals when power supply wiring is completed.

10 en | Overview Easy Series
F01U087835 | 02 | 2008.10 System Reference Guide Bosch Security Systems, Inc.
1.3 Phone Menus
1.3.1 Installer Phone Menu
Basic
Programming
User Menu
System
Maintenance
Event history
System test menu
Set date and time
Full system test
Reset system
Exit
1
Wireless configuration
1
2
3
5
6
#
Exit
Warning device test
Battery test
Communication test
Control center test
Point test
Operate Outputs
2
3
4
5
6
#
1
Exit
Most recent events
Events by date
Last alarm event
Last 10 events
2
3
4
#
1
4
Exit
Replace a device
Add a device
Delete a device
Transfer wireless data
(control panel-to-hub)
Transfer wireless data
(hub-to-control panel)
Erase and discover
2
3
4
5
6
#
1
2
Change installer passcode
Change master user (User 1) passcode
Exit user menu
2
#
1
Installer
Passcode
3
Points
Report configuration
2
1
Record point description
Set point type
Exit
2
#
1
Enter account number
Configure report destinations
Remote programming success
Exit
2
3
#
1
Exit
Outputs
Country code
3
4
#
Select output function
Exit
#
1
Expert
Programming
4Enter programming item, enter selection.
Two-Way
Voice Session
5
Talk to person at control center
Listen to person at control center
Exit
2
#
1
Custom
Messages
6
Record site description
Record Call for Service message
Exit
2
#
1
Programming
Key
7
Send data from key to control panel
Send data from control panel to key
Exit
2
#
1
#Exit
= The system’s arming status (on or off) and Expert Programming Item Number 142 setting of (0 or 1) determines the availability of
these menu items. Refer to Section 5.2.2 System Programming Items, Page 43.
When recording any description (point, output, user, or custom message), do not press any buttons on your phone until
prompted by the system.

Easy Series Overview | en 11
Bosch Security Systems, Inc. System Reference Guide F01U087835 | 02 | 2008.10
1.3.2 User Phone Menu
Exit system test menu
Two-Way
Voice Session
Talk to person at control center
Listen to person at control center
End voice session
1
2
#
Exit
1
2
#
Event history
System test menu
1Set date and time
Full system test
Reset system
2
3
Warning device test
Battery test
Communication test
Control center test
Point test
1
2
3
4
5
#
4
5
Exit
#
Most recent events
Events by date
Last alarm event
Last 10 events
Exit
1
2
3
4
#
System
Maintenance
2
3
Phone
Menu
Enter user
passcode
1
To hear this option, custom protection must be
enabled.
Only use this option
on non-UL systems.
Turn System On or Off
5
To turn an output on or off, press the
corresponding number key on the phone.
Operate Outputs
Turn system on and leave
Turn system on and stay inside
Turn on custom protection
1
2
3
#Exit
End phone session.
}The voice session only lasts 90 seconds.
To reset the timer, press [1] on the phone during talk mode,
or [2] during listen mode.
User Menu3
Add new user
Change user
Delete user
1
2
3
4
#Exit
To add or change a user:
}
Operate outputs
OR
Expert Programming (Enable Installer Access)
4
6
Only the Master User can
access the full User Menu.
Users 2 to 21 can only change
their own passcode.
Change token
Record description
Change passcode
Change key fob
Exit
1
2
3
4
#
1Only a user passcode (Users 1 to 21) can access the User Menu.
2If the system is on, the System Maintenance option is not available.
3Only the master user can add, change, or delete users. Users 2 to 21 can only change their own passcodes. User voice descriptions are
stored in the voice module and are not transferred to the control panel with programming data.
4Option 6 allows the master user (User 1) to enable the Installer Passcode. Refer to Expert Programming Item Number 142 in
Section 5.2.2 System Programming Items, Page 43.
Availability of the menu items shown above depends on the system's status.
When recording any description (point, output, user, or custom message), do not press any buttons on your phone until prompted
by the system.

12 en | System Installation and Configuration Easy Series
F01U087835 | 02 | 2008.10 System Reference Guide Bosch Security Systems, Inc.
2 System Installation and Configuration
2.1 Plan the Installation
When planning the installation, identify suitable locations for the control panel, control
center, hub, and wireless devices before installing any system components. When identifying
these locations, ensure that the following considerations are addressed.
Table 2.1 Installation Considerations
Task Considerations
1. Identify the location for
the control panel.
– Only use authorized service personnel to install this system.
– Plan to install the control panel in a centrally located room that is near the AC
Power MAINS.
– Plan to install the control panel in a location with a good earth ground.
– Because the control panel is permanently connected equipment, a readily
accessible disconnect device must be included into the building installation
wiring.
2. Test for GSM signal
strength.
Use your cell phone to identify an area with good GSM signal strength by monitoring
the signal strength on your mobile phone.
If the intended location of the control panel has poor GSM signal strength, find a
new location for the control panel.
3. Identify the location for
the control center.
Plan to install the control center near the primary entry and exit door.
4. Identify the location for
the wLSN Hub.
Plan to install the wLSN Hub in a location with good radio-frequency (RF)
characteristics and within 100 m of the control panel.
5. Identify the location for
the wLSN devices.
– wLSN devices are intended only for indoor, dry applications. Avoid installing the
devices where excessive humidity or moisture, or temperatures outside of the
acceptable operating range, exist.
– Mount wLSN devices on flat, rigid surfaces. For more information, refer to each
device's installation instructions.
– Avoid mounting wLSN devices in areas with large metallic objects, electrical
panels or electric motors. They might reduce the (RF) range of a wLSN device.

Easy Series System Installation and Configuration | en 13
Bosch Security Systems, Inc. System Reference Guide F01U087835 | 02 | 2008.10
2.2 Install System Components
2.2.1 Install the wLSN Hub
1. Separate the wLSN Hub from its base.
2. Set the wLSN Hub's rotary switches to enable RFSS mode: S1 = 9, S2 = 2, S3 = 0.
This is the setting required for the RFSS site test. Refer to Figure 1.1, Page 6.
3. Connect the wLSN Hub's data bus to the control panel's data bus. The wLSN Hub's
terminal block is removable.
–Wire Gauge: 0.14 mm to 1.5 mm (18 AWG to 24 AWG)
–Wire Length (sLSN Hub to control panel): <= 100 m
4. Reconnect the wLSN Hub and base, and then lock the wLSN Hub.
5. Mount the wLSN Hub temporarily in the desired location. You might need to relocate the
wLSN Hub if it does not pass RFSS testing.
2.2.2 Install the Control Panel Enclosure
1. Remove the desired knockouts from the control panel enclosure and optional mounting
skirt.
2. Attach the optional mounting skirt to the enclosure.
3. Route the wires through the desired knockouts.
4. Mount the enclosure to the desired surface. Use proper anchor and screw sets when you
install the enclosure on non-load-bearing surfaces, such as drywall.
i
NOTICE!
– Use proper anchor and screw sets when installing the enclosure on non-load-bearing
surfaces, such as drywall.
– Follow anti-static procedures when handling the control panel board. Touch the earth
ground terminal on the control panel board to discharge any static charge before working
on the control panel board.
– If you install more than one control center, mount them at least 1.2 m apart.
– Do not install the wLSN Hub within 15 cm (6 in) of the control centers metal enclosure.
i
NOTICE!
Refer to Figure 1.2, Page 8 or Figure 1.3, Page 8 throughout this section for the location to
install each of the hardware components in the enclosure.

14 en | System Installation and Configuration Easy Series
F01U087835 | 02 | 2008.10 System Reference Guide Bosch Security Systems, Inc.
2.2.3 Install the Control Center
1. Unlock the control center and separate it from the base.
2. If you install more than one control center, each control center must have a unique
address. Valid address are 1 to 4. Refer to Figure 2.1 for the location of the address
switch.
Figure 2.1 Control Center Address Switch
3. Mount the control center base to the desired surface using the appropriate mounting
holes. Use the built-in level in the control center base as a guide.
4. Connect the control center data bus terminals to the control panel data bus terminals.
Refer to Figure 1.1, Page 6.
5. Connect the control center audio bus terminals to the control panel audio bus terminals.
Twisted pair wiring is recommended for audio bus terminals. Refer to Figure 1.1, Page 6.
6. Reconnect the control center and base, and then lock the control center.
Refer to Section Control Center Display States, Page 75 for an overview of the various control
center display states.
1 Control Center’s front cover
2 Address switch’s default settings
i
NOTICE!
Mount the base to a non-metallic surface that is near the primary entry/exit door.
If you install more than one control center, ensure that there is at least 1.2 m between each
control center.
Avoid mounting the control center near existing phone lines.
Avoid mounting the control center near other electronic devices.

Easy Series System Installation and Configuration | en 15
Bosch Security Systems, Inc. System Reference Guide F01U087835 | 02 | 2008.10
2.2.4 Route Power-limited Wiring
All wiring except primary AC power and standby battery is power-limited. Separate primary
AC power and standby battery wires from other wires by at least 6.4 mm (¼ in), and secure to
enclosure to prevent movement. Primary AC power and standby battery wiring cannot share
the same conduit, conduit fittings, or conduit knockouts with any other wiring. Refer to
Figure 2.2, Page 15.
Figure 2.2 Power-limited Wire Routing
2.2.5 Install the ITS-DX4020-G Communicator and Antenna
The ITS-DX4020-G is powered from the bus.
Refer to Figure 1.1, Page 6 for wiring instructions.
1. Install the ITS-DX4020-G SIM card.
a) Hold the ITS-DX4020-G communicator in the orientation shown in Figure 9.1, Page 62.
b) Slide the SIM cardholder door upward to unlock it, and then open the door.
c) Hold the SIM card in the orientation shown in Figure 9.1, Page 62, and then Insert the
SIM card into the cardholder door; the notched edge is away from the hinge.
d) Close the cardholder door, and then slide the door downward to lock it.
2. Mount the communicator into the control panel's enclosure using the side wall mounting
location.
3. Place the magnetic antenna on the panel enclosure (on top recommended for vertical
polarization). The antenna must be placed on a metal surface for proper operation.
4. Connect the antenna cable to the communicator.
5. Connect the audio terminals on the ITS-DX4020-G to the control panel’s inside phone
terminal block.
6. Connect the communicator option bus molex connector to the to the communicator and
connect the bus wires to the option bus terminals on the control panel. If preferred, the
terminal screws on the communicator can be used instead of the molex connection.
7. Install the configuration jumper on the CONFIG MODE (J200) pins. Refer to Figure 9.1,
Page 62 for the jumper location.
i
NOTICE!
When using the ITS-DX4020-G GSM channel for communications, do not permanently connect
a telephone to the Easy Series house phone terminals.

16 en | System Installation and Configuration Easy Series
F01U087835 | 02 | 2008.10 System Reference Guide Bosch Security Systems, Inc.
2.2.6 Install the DX2010 Input Expander
The control panel supports up to three DX2010 Input Expanders for Points 9 to 32.
Refer to the DX2010 Installation Instructions (P/N: 49533) for more information.
1. Set the DX2010's DIP switches.
2. Mount the DX2010 into the control panel's enclosure (back wall or either side wall), or
other suitable enclosure.
3. Connect the DX2010 to the control panel. Refer to Figure 1.1, Page 6.
Connect a wire jumper to the TMPR and COM terminals to disable the DX2010's tamper
input. For point wiring options, refer to Section 2.2.8 Connect Supervised Points, Page 16.
To disable the tamper input on the DX2010, connect a wire jumper between the TMPR
and COM terminals.
2.2.7 Connect the Conettix DX4020 Network Interface Module
The control panel supports one DX4020 for wired network communication.
Refer to the DX4020 Installation Instructions (P/N: F01U045288) for more information.
1. Set the DX4020's DIP switches to Address 134 for network communication.
2. Mount the DX4020 into the control panel's enclosure using the back wall or side wall
mounting location.
3. Connect the DX4020 to the control panel. Refer to Figure 1.1, Page 6.
2.2.8 Connect Supervised Points
For wiring diagrams, refer to Figure 1.1, Page 6.
Fire Point Wiring
Supervised Point 1 supports two- and four-wire smoke detectors.
Supervised Points 2 to 32 support only four-wire smoke detectors.
To program supervised points as fire points, refer to Section 5.1.2 Points, page 39.
For intrusion point configuration, refer to Section Intrusion Point Wiring, Page 16.
When using an output to supply power to a four-wire smoke detector, program the output
function for System Reset. Refer to Section 5.1.4 Outputs, page 41.
Intrusion Point Wiring
You can wire Supervised Points 1 to 32 as wired or wireless intrusion points.
To program Supervised Points 1 to 32 as intrusion points, refer to Section 5.1.2 Points,
page 39.
i
NOTICE!
In an NF A2P certified installation, mount the DX2010 module on one side of the panel
housing, or on one side of the auxiliary power supply IPP-PSU-2A5).

Easy Series System Installation and Configuration | en 17
Bosch Security Systems, Inc. System Reference Guide F01U087835 | 02 | 2008.10
2.3 Apply System Power
1. Connect battery power to the control panel. Refer to Figure 1.1, Page 6.
2. Use a cable tie to secure the incoming AC wires to the enclosure, where required. Refer
to Figure 2.3, Page 17.
Figure 2.3 Cable tie for MAINS to Power Supply
3. Place the terminal cover over the power supply terminals.
i
NOTICE!
Because the control panel is permanently connected equipment, a readily accessible
disconnect device must be included into the building installation wiring.
An external earth ground is required to ensure safe and proper system operation. Failure to
ground the system can cause personal injury and degraded system performance, such as
problems with tokens or noise on the control center.

18 en | System Installation and Configuration Easy Series
F01U087835 | 02 | 2008.10 System Reference Guide Bosch Security Systems, Inc.
2.4 Initial System Startup
1. Apply AC power to the system.
2. Refer to Table 2.2 for the Initial System Startup sequence.
Table 2.2 Initial System Startup Sequence (No wLSN devices discovered)
2.5 Perform the RFSS Site Test using the wLSN Installation Tool
The wLSN Installation Tool communicates signal strength levels, noise levels, signal-to-noise
ratio (SNR), and packet success rates. Use it to determine the best locations for wLSN device
installation.
Stage Time Interval Control Center wLSN Hub
1 0-15 sec Intermittent flashing green icon LED on steady
2 15-45 sec Flashing amber circle
3 45-75 sec Single rotating amber segment
4 75 sec Solid green circle
i
NOTICE!
Before permanently installing any wLSN device, verify that the radio-frequency signal strength
(RFSS) between the planned device location and the planned wLSN Hub location is
acceptable.
!
CAUTION!
If you have wireless devices that you will not immediately install, reinsert the battery tabs or
remove the batteries to prevent battery depletion.
i
NOTICE!
You can perform the RFSS site test using the wLSN Hub and the specific device you wish to
test. However, you must use the Installation Tool with the wLSN Smoke Detector. You cannot
determine RFSS with the detector itself. Refer to Section 3.1 Perform a RFSS Site Test with the
Hub and the Device, page 28 for instructions.

Easy Series System Installation and Configuration | en 19
Bosch Security Systems, Inc. System Reference Guide F01U087835 | 02 | 2008.10
2.5.1 Prepare the wLSN Hub for Site Testing and RFSS Mode
1. Unlock the wLSN Hub and separate it from its base.
2. Set Switch S1 to 9 and Switch S2 to 2 to enable RFSS mode. This disables normal
operation. Refer to Figure 1.1, Page 6.
3. Set Switch S3 to a value of 0 to 4, based upon the RF power level or EN50131 security
grade you wish to use. Refer to Table 2.3.
Table 2.3 wLSN Hub RF Power/EN Settings
Refer to individual device's specification for their EN50131 classification.
4. Find a suitable location for the hub base and apply power by either connecting it to the
control panel (refer to the control panel's installation instructions), or temporarily
connecting a 9 VDC to 12 VDC battery.
5. Reconnect the wLSN Hub and base, and then lock the wLSN Hub.
2.5.2 wLSN Installation Tool Mode 1
Mode 1 identifies if a device location has acceptable or unacceptable RFSS.
To test the wireless devices with the Installation Tool in Mode 1:
1. Verify that the wLSN Hub rotary switch is set to S1 = 9, S2 = 2, S3 = 0. Refer to Figure 1.1,
Page 6. The wLSN Hub's LED flashes slowly.
2. Go to the first device location, and then press and hold [*][#] on the Installation Tool for
2 sec.
3. Press [1] for Mode 1.
4. Place the Installation Tool in an upright position at the first device location, or hold it in
the location, if necessary.
5. Wait 10 sec and then review the display.
– Acceptable RFSS Display:
– Unacceptable RFSS Display:
If the location tests:
–OK: Confirm that the location is OK by testing it with the actual wireless device for this
location.
–Not OK: Test a different location.
Switch 3 Setting RF Power (EN50131 Security Grade
0Maximumpower
1 3 dB lower than maximum (Security Grade 1)
2 6 dB lower than maximum (Security Grade 2)
3 9 dB lower than maximum (Security Grade 3)
4 12 dB lower than maximum (Security Grade 4)
i
NOTICE!
You must test the devices at the same EN50131 Security Grade at which the control panel
discovers the devices.
MODE 1: +++OK+++
MODE 1 : - NOT OK -

20 en | System Installation and Configuration Easy Series
F01U087835 | 02 | 2008.10 System Reference Guide Bosch Security Systems, Inc.
2.5.3 wLSN Installation Tool Mode 2
To test the wireless devices with the Installation Tool in Mode 2:
1. Verify that the wLSN Hub rotary switch is set to S1 = 9, S2 = 2, S3 = 0. Refer to Figure 1.1,
Page 6. The wLSN Hub's LED flashes slowly.
2. Go to the first device location, and then press and hold [*][#] on the Installation Tool for
2 sec.
3. Press [2] for Mode 2.
4. Place the Installation Tool in an upright position at the first device location, or hold it in
the location, if necessary.
5. Wait 10 sec and then review the display.
The Mode 2 display shows power bars on the left and the number of packets received on the
right. The bars indicate the signal strength. The Installation Tool shows the number of packets
received: 1, 2, or 3.
Table 2.4 Mode 2 Display Data
If the location tests:
–OK: Confirm that the location is OK by testing it with the actual wireless device for this
location.
–Not OK: Test a different location.
MOD E 2 :
PACKETS=3
Power Bars Signal to Noise Ratio Packets Signal Strength
< 9 dB ≤2Unacceptable
9 dB ≥2Marginal (not recommended)
13 dB ≥2Acceptable
16 dB ≥2Good
20 dB ≥2Very good
22 dB ≥2Excellent
Other manuals for ICP-EZM2
3
Table of contents
Other Bosch Door Lock manuals
Popular Door Lock manuals by other brands

NUKI
NUKI SMART LOCK 3.0 manual

LOCKLY GUARD
LOCKLY GUARD VISION DUO user manual

SCS Sentinel
SCS Sentinel XO 403 + CLES Installation and operation manual

Schlage
Schlage KING COBRA KC5196-R Installation instructions and user manual

Assa Abloy
Assa Abloy EMTEK installation guide

Yale
Yale Real Living Installation and programming instructions