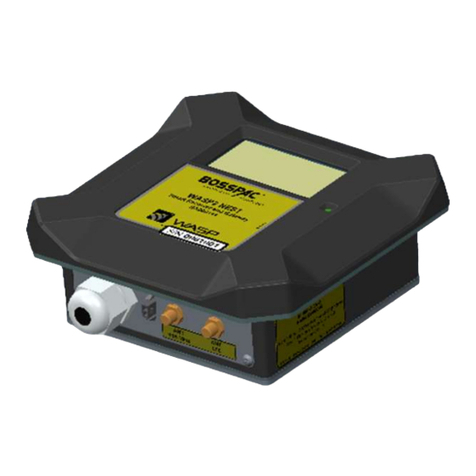
BossPac WASP NEST2 User manual

WASP™ NEST2
Smart Reciever
And Gateway
UserManual
VERSION 4.14
2021-05-04
www.bosspac.com

BossPac Engineering & Technology
3016 10th Avenue NE, Unit 102, Calgary, Alberta, Canada T2A 6A3
Visit our website for more information www.bosspac.com
WASP™ is a registered trademark
owned by BossPac Engineering &
Technology
WASP™ is a PATENT PENDING
technology owned by
BossPac Engineering &
Technology
2021 2

WARNING
READ THIS MANUAL BEFORE OPERATING THIS DEVICE.
MISE EN GARDE
LISEZ LE MANUEL AVANT UTILISATER
WARNING
TO PREVENT EQUIPMENT FAILURE, AND/OR DAMAGE,
AND/OR PERSONAL INJURY, REGULAR CALIBRATION AND
INSPECTION OF THIS DEVICE IS REQUIRED.
MISE EN GARDE
POUR PRÉVENIR LE DOMMAGE À L’EQUIPMENT, ET/AU AUX
PERSON, LA CÀLIBRATION ET L’INSPECTION REGULIER EST ŔEQUIS.
WARNING - EXPLOSION HAZARD
READ THIS MANUAL BEFORE OPERATING THIS DEVICE.
AVERTISSEMENT – RISQUE D’EXPLOSION
NE PAS BRANCHEZ LA PRISE DANS UN ENVIRONMENT FLAMMABLE.
WARNING - EXPLOSION HAZARD
SUBSTITUTION OF COMPONENTS MAY IMPAIR
SUITABILITY FOR CLASS 1, DIVISION 2.
AVERTISSEMENT – RISQUE D’EXPLOSION
LA SUBSTITUTION DECOMPOSANTS RENDRE CE MATÉRIEL
INACCEPTABLE POUR LES EMPLACEMENTS DE CLASSE 1, DIVISION 2
User Manual www.bosspac.com 3

Table of Contents
Table of Contents
1. Introduction 6
1.1 NEST Receiver Introduction 6
2. Installation 6
2.1 Included In The Package 6
2.2 Installation 6
2.2.1 Nest Receiver Installation 6
2.3 Wiring NEST Receiver 6
2.3.1 Nest Receiver Mounting 6
2.3.2 Attaching the Antenna 7
2.3.3 Wiring NEST Circuit Board 7
2.3.4 Circuit Board Terminal Block 7
3. Interface 8
3.1 System Status Screens 9
3.2 Main Menu 10
3.2.1 System Info 10
3.2.1.1 Version 10
3.2.1.2 Uptime 10
3.2.1.3 Radio 10
3.2.2 System Settings 11
3.2.2.1 Log Data Out Direct 11
3.2.2.2 Set Time/Date 11
3.2.2.3 Set Password 12
3.2.2.4 Set Modbus Parameter 12
3.2.2.4.1 RTU Address 12
3.2.2.4.2 BAUD Rate 12
3.2.2.4.3 Stop Bits 13
3.2.2.5 Set Temperature Unit 13
3.2.2.6 Set Velocity Units 13
3.2.2.7 Set Pressure Units 13
3.2.2.8 Set Level Units 13
3.2.2.9 Clearing All Sensors 14
3.2.2.10 Adjust Brightness 14
3.2.2.11 Reset System Settings 14
2021 4

3.2.3 LOGS 15
3.2.3.1 Connecting to the USB port 15
3.2.3.2 Retrieving the Logs 15
3.2.3.3 Formatting the microSD Card 15
3.2.3.4 microSD Card Specifications 15
3.2.4 Sensor Lists 15
3.2.4.1 Binding and Ignoring Sensor Pucks 16
3.2.5 Alarm Overide 17
3.2.6 Diagnostic 17
3.2.7 Configuring Individual Sensors 17
3.2.7.1 Setting Sensor Name 18
3.2.7.2 Setting Update Rate 18
3.2.7.3 Setting Sensor Vibration Axes 19
3.2.7.4 Setting Temperature Warning and Critical Alarm Thresholds 19
3.2.7.5 Setting Acceleration Warning and Critical Alarm Threshold 20
3.2.7.6 Setting Velocity Warning and Critical Alarm Thresholds 20
3.2.7.7 Setting Sensor Lost Warning 20
3.2.7.8 Setting Temperature Multiplier Factor 21
3.2.7.9 Temperature Calibration 21
4. Maintenance 21
4.1 Rear Cover 21
4.2 Replacing Batteries 21
5. Contact Info 22
Appendix A: Resetting The System Board 24
User Manual www.bosspac.com 5

1. Introduction
This Operations Manual provides basic information on how to operate the
WASP™Nest Smart Receiver and Gateway. This manual covers the follow-
ing topics:
• InstallationofWASP™NEST
• WiringofWASP™NEST
• ConfiguringofIndividualWASP™Sensors
• SystemInformationandSettingsofWASP™NEST
• MaintenanceofWASP™NEST
2.Installation
2.1IncludedInThePackage
The BossPac WASP™ NEST Receiver is shipped with an attachable antenna
and required cables. The BossPac WASP™ sensors, (configurable), are typi-
cally shipped alongside.
2.2Installation
2.2.1Nest ReceiverInstallation
The equipment should be installed by a professional or certified technician
conversant with the certification requirements of the installation site.
2.3WiringNESTReceiver
2.3.1Nest ReceiverMounting
The BossPac NEST™ receiver may be installed into existing panels or an
enclosure mounted within 300 meters (1000’) of the WASP™s. Ideal loca-
tion would have direct line of sight to the sensors. There are four mounting
locations (threaded holes) and an environmental gasket on the flange of
the receiver. A cutout mounting template is also included with the receiver.
1.1 NEST Receiver Introduction
2021 6

2.3.2 Attaching the Antenna
A mobile antenna is provided by BossPac, included and shipped with the NEST Receiver. BossPac recom-
mends any replacement or additional antenna be compliant. BossPac currently uses the following models:
• MRO Model: M2425, 2.4 GHz band, N Female connector, Sealed in fiberglass tube.
• Larsen Model: RO2408NF, 2.4 GHz Omnidirectional, N Female connector, Fiberglass
• Nearson Model SG1013NF-2450, 2.4 GHz, N Type, Fiberglass, IP67
The technician must ensure proper mounting of antenna to meet certification requirements of
installation site.
To attach the antenna, carefully
screw the antenna cable to the
SMA connection at the base of the
BossPac NEST™ Receiver Gateway.
See photo below. Attach antenna
to opposite end of cable, (N type
connector).
Figure 1: Attach Antenna to
NEST
WARNING – EXPLOSION HAZARD
DO NOT CONNECT OR DISCONNECT THE ANTENNA IN A HAZARDOUS ENVIRONMENT.
AVERTISSEMENT – RISQUE D’EXPLOSION. NE PAS BRANCHER OU DÉ-BRANCHER L’ANTENNE DANS UN ENVIRON-
MENT FLAMMABLE.
2.3.3Wiring NESTCircuit Board
The rear cover, (backplate),
needs to be removed to access
the following connections: Power
(+5 to 30 VDC), GND, Inputs and
Outputs, RS485, USB and SD Card
connections.
Figure 2: NEST Circuit Board
Block
2.3.4Circuit BoardTerminal Block
The NEST circuit board has an 8 pin terminal block. A diagram of the
terminal block is shown to the right.
INPUT 1 and INPUT 2 have not been enabled on the WASP™ system.
OUTPUT 1 and OUTPUT 2 are assigned for critical error and warning
signals respectively.
RS485-1B and RS485-1A are assigned for MODBUS connections.
+5V-24V and GND are the power connections. The NEST Receiver must
be powered with a Class 2 power supply providing an input voltage
between 5 VDC to 30 VDC
Figure3: NESTTerminal Block
User Manual www.bosspac.com 7

3.Interface
The touch screen interface on the BossPac NEST™
displays important current information through-
out all its screens. The name of the current screen
is displayed at the top center. The current time and
date are displayed at the bottom right. Current crit-
ical error count and warning count are displayed in
the bottom left of the interface. These information
sections, top bar and bottom bar of the touch screen,
are not interactive and are only intended to provide
current system statistics to the viewer.
NOTE: Warnings indicate a sensor(s) has reached the warning limit pre-determined in the Sensor Setup
screen. Critical Alarms indicate a sensor(s) has reached the pre-determined shutdown limit and a shut-
down signal has been issued. See the section of this manual on “Configuring Individual Sensors” for details
about setting warning and critical alarm limits.
Figure 4: BossPac
NEST showing Touch
ScreenInterface
2021 8

3.1SystemStatusScreens
When activating the BossPac WASP™ system for the first time the BossPac NEST receiver will
automatically detect all sensor pucks within the working radius (assuming battery modules are
attached to the sensors).
The default screen, when turning on the BossPac
NEST™ receiver or waking the screen from sleep
mode, is the SYSTEM STATUS screen. The SYSTEM
STATUS screen displays the number of sensors
attached to the system as well as any current crit-
ical or warning alarm. The screen will also cycle
through the critical screen and warning screen
when the top half of the screen is tapped. The max
values displayed are the current max values of the
entire sensor array.
Tapping on the SENSOR STATUS square will take
you to the sensor status grid screen. Further tapping
on a sensor square, EXHA 01 for example, will take
you to a status screen for that individual sensor.
Tapping on NEXT will cycle through available status
grid pages, (all other sensors).
Each individual sensor status screen will display the
name of the sensor along with the current status.
Tapping on the bottom half of the screen will cycle
the screen through more status data and settings
of the sensor. Tapping on the top half of the screen
will cycle the screen through the available sensors.
(For example: Tap on right side of the top section
cycles to next listed sensor EXHA 02. Tap on left side
of the top section cycles to previous listed sensor
INTK 10). To configure a sensor, or modify the
settings, tap on the SETUP section.
Instructions on configuring individual sensors are covered under Section 3.2.9
Note: if no limits have been set, zeros will be displayed beside the parameter.
User Manual www.bosspac.com 9

3.2MainMenu
The NEST system information, sensor settings,
configuration area, and log options are accessed
through the MAIN MENU tab of the SYSTEM STATUS
default screen. Tapping MAIN MENU will bring up a
list of options. Tap the UP/DOWN arrows to scroll
through the available options. Choose SELECT to
access the desired high-lighted option. Tap SYSTEM
STATUS to return to the default startup screen.
3.2.1System Info
Choosing the SYSTEM INFO screen will display 3 options: VERSION, UPTIME, and RADIO. Use
the UP/DOWN arrows to highlight the desired system information option and tap SELECT.
3.2.1.1Version
Selecting VERSION displays the current NEST firm-
ware version. The screen also displays the firmware
compile date/time as well as the revision number.
Tap BACK to return to the SYSTEM INFO screen, or
MAIN MENU to return to the MAIN MENU screen.
3.2.1.2Uptime
The uptime screen simply displays how long the
NEST has been active.
3.2.1.3Radio
Selecting RADIO from the SYSTEM INFO screen will
access the PROTOCOL STATUS screen. This screen
displays the number of data packets received
by the NEST from active connected sensor pucks.
RADIO RESETS displays the number of times the
NEST has reset its internal radio. CRC MISMATCHES
displays the number of packets received that
contain incomplete or bad data.
2021 10

3.2.2System Settings
To input or modify settings you will need to access
the SYSTEM SETTINGS from the MAIN MENU screen.
Use the UP/DOWN arrows to highlight the SYSTEM
SETTINGS option and tap SELECT. The SYSTEM
SETTINGS screen will be displayed with several
options that can be configured or modified.
3.2.2.1LogDataOut Direct
The SET LOG OPTION allows you to either log bound
sensor data on the internal non-volatile memory,
externally, or stream live data over RS485 port to an
external device. The stream live data option is for
use with the optional data logger or the accompa-
nied NEST software on a personal computer.
Set the log data out direct option by choosing SET
LOG OPTION from the SYSTEM SETTINGS menu.
> MAIN MENU > SYSTEM SETTINGS > SET LOG OPTION
Once in the LOG DATA OUT DIRECT screen simply choose LOG TO INTERNAL, LOG TO
EXTERNAL, or STREAM TO RS485 and tap on SELECT.
3.2.2.2SetTime/Date
To set the time and date on the NEST select the SET
TIME/DATE option from the SYSTEM SETTINGS
screen. Set the time using the UP / DOWN arrows to
change the numeric value of the hour character.
Use the LEFT / RIGHT arrows to move the cursor to
the minute character position. Once the time has
been entered, tap SET DATE and use the arrows to
input the correct date. Once both the time and date
have been entered, choose DONE to save new time
and date and return to the SYSTEM SETTINGS screen.
User Manual www.bosspac.com 11

3.2.2.3SetPassword
You can setup a system password by selecting SET
PASSWORD from the SYSTEM SETTINGS menu. Once
in the SET/CHANGE PASSWORD screen choose a
4-digit password by using the up/down and right/
left arrows. Click SAVE to save the new password.
3.2.2.4SetModbusParameter
To configure MODBUS parameters, select SET
MODBUS PARAM from the SYSTEM SETTINGS selec-
tion screen. A submenu will display the parameters
to select: RTU ADDRESS, BAUD RATE, or STOP BITS. If
the direct output option was enabled, you would
be asked to disable it before modifying MODBUS
parameters.
IMPORTANT: The non-volatile memory where Writable registers are stored has as an endurance of 100,000
program/erase cycles. Any automated MODBUS Write functions should only issue Write commands to the
NEST when required. Continuously issuing Write commands will destroy the non-volatile memory and will
void the warranty.
3.2.2.4.1 RTU Address
Configure the RTU ADDRESS of the receiver by using
the arrow keys to navigate and input the digits.
3.2.2.4.2 BAUD Rate
Configure the BAUD RATE of the receiver to either
9600, 14400, 19200 or 38400 by using the arrows on
the right of the screen and choosing SELECT.
2021 12

3.2.2.4.3 Stop Bits
Configure the STOP BITS of the receiver to either 1 or
2 by using the arrows on the right of the screen and
choosing SELECT.
3.2.2.5SetTemperatureUnit
You can set the units of temperature to either
Celsius or Fahrenheit by selecting SET THERM UNITS
from the SYSTEM SETTINGS menu. Simply choose the
unit of measurement and press SELECT.
3.2.2.6SetVelocityUnits
You can set the units of velocity to either mm/s or
IPS (inch-per-second) by selecting SET VEL UNITS
from the SYSTEM SETTINGS menu. Simply choose the
unit of measurement and press SELECT.
3.2.2.7SetPressureUnits
You can set the units of pressure to either BAR or PSI by selecting SET PRESS UNITS from the
SYSTEM SETTINGS menu. Simply choose the unit of measurement and press SELECT.
3.2.2.8SetLevelUnits
You can set the units to either METERS or FEET by selecting SET LEVEL UNITS from the
SYSTEM SETTINGS menu. Simply choose the unit of measurement and press SELECT.
User Manual www.bosspac.com 13

3.2.2.9ClearingAllSensors
You can clear all sensors from the NEST’s memory
by choosing CLEAR SENSORS from the System
menu. Once in the SENSOR SETTINGS> CLEAR ALL
screen tap OK to clear the sensors or CANCEL to go
back to the System screen.
WARNING – CLEARING ALL SENSORS WILL REMOVE
THE SENSORS AND ALL SETTINGS FROM THE NEST’S
MEMORY. BE SURE THIS IS WHAT YOU INTEND TO DO BEFORE CLICKING “OK”
MISE EN GARDE – “CLEAR ALL” DÉGAGE LA LISTE DE CAPTEUR ET TOUT LEUR PARAMÈTRAGE. SOYEZ SURE AVANT
DE CLIQUER “OK”
3.2.2.10AdjustBrightness
The adjust brightness option allows you to change
the brightness of the screen to improve the read-
ability of the screen under different lightning
conditions.
*Note: the higher level of brightness will increase
the current consumption.
You can adjust and set the screen brightness by
choosing ADJUST BRIGHTNESS from the SYSTEM
SETTINGS menu. In the ADJUST BRIGHTNESS screen use the UP/DOWN arrows to change the brightness level
and tap DONE to save the level.
3.2.2.11ResetSystemSettings
The reset system settings option allows you to
restore the receiver to its default setting. You can
restore the receiver default setting by choosing
RESET SYS SETTINGS from the SYSTEM SETTINGS
menu. Once in the RESET SYS SETTINGS screen tap
on OK to authorize the system setting reset.
2021 14

3.2.3LOGS
The BossPac NEST System has extensive logging
capabilities. The logs are stored on a microSD card
in csv format.
3.2.3.1Connectingtothe USB port
The logs can be retrieved by connecting a computer
to the USB micro-B connector on the NEST main
board. As the NEST is itself certified as a stand-
alone electrical enclosure, the connector is located
behind the back panel for Hazardous Location certification purposes.
IMPORTANT: IT IS NOT RECOMMENDED TO POWER THE DEVICE VIA THE USB PORT, AS THE SUDDEN REMOVAL OF
POWER MAY CORRUPT THE MICRO SD CARD.
3.2.3.2RetrievingtheLogs
The microSD card will appear on the computer as a removable storage drive. Navigate to the drive using the
File Explorer. Copy the logs of interest from the microSD card to a folder on your computers hard drive.
3.2.3.3FormattingthemicroSD Card
From the Main Menu select LOGS and then FORMAT SD CARD to clear all logs from the microSD card.
3.2.3.4microSDCardSpecifications
The NEST will work with microSD cards using either a FAT or FAT32 file system. The NEST ships standard with a 2
GB microSD card rated down to -40C. Larger cards can be used; however, care should be taken in selecting
the SD card for the operating environment. Consumer grade SD cards are typically only rated for tempera-
tures down to -25C.
3.2.4Sensor Lists
When first configuring or adding WASP™ Sensors
to the WASP™ systems, it is necessary to “bind” the
sensors to the receiver. The SENSOR LISTS will show
all available sensors within range of the NEST.
To access SENSOR LIST:
> MAIN MENU > SENSOR LISTS > SELECT.
This brings up the main SENSOR LISTS screen with 3
options: FREE, BOUND, and IGNORED.
FREE: Shows all available sensors within range.
BOUND: Identifies all sensors currently “bound” to
the NEST Receiver.
IGNORED: Identifies all sensors chosen to be ignored
by the NEST Receiver, (if any).
User Manual www.bosspac.com 15

3.2.4.1BindingAndIgnoring Sensor Pucks
To bind a sensor to the receiver, you will need to select a sensor from the FREE sensor list and bind it to the
receiver. To access the FREE SENSOR LIST:
> MAIN MENU > SENSOR LISTS > FREE.
The FREE SENSOR LIST displays all sensors which
have been seen by the receiver, and currently
not bound to the receiver. Each sensor listed is
displayed with list index, sensor serial number, and
the elapsed time since last update.
Example: “1: 1366, 3S” means the NEST received the
last data update 3 seconds ago from the WASP
sensor with serial number 1366.
To bind a sensor, scroll up/down and highlight a
sensor from the FREE sensor list. Once found, tap
SELECT to move to BIND/IGNORE screen.
BIND will add this sensor to this receiver’s data-
base IGNORE will ignore the sensor allowing another
receiver to pick up that sensor. This is useful in large
installations where you may have overlap between
the effective range of sensors and receivers.
After BIND action is selected, you need to select an
input to attach the sensor to. Attaching to an input
allows the information to be pulled for that individ-
ual sensor via MODBUS. The SELECT INPUT screen
will highlight the next “available” input and will also
show the current bound sensor inputs. Choose
SELECT to attach to next available input or scroll to
desired input and SELECT.
The NEST Receiver will request confirmation to bind
the sensor to the selected input, tap YES or NO.
The receiver will jump back to the FREE list screen
after the confirmation allowing this process to be
repeated.
Repeat this process until all the sensors you would
like to bind are bound to the receiver.
2021 16

If you happen to bind a sensor that you should not have - go to SENSOR LISTS. Then choose BOUND and scroll
to find the sensor that should not have been bound. Select the sensor - then choose to IGNORE or REMOVE.
IGNORE places the sensor on the ignored list - it can be bound at a later time.
REMOVE- removes the sensor entirely from the system (until the next packet of information is received) allo
ing another sensor to take its place. There is a functional limit to the number of sensors that can be bound to
the system. If the number of sensors in the area is greater than the functional limit, then the remove feature
should be used to give the wanted sensor a chance to get on the list.
3.2.5Alarm Overide
The ALARM OVERIDE is used to ignore an alarm
during the startup process of the machinery. During
startup, or restart procedure, some machinery may
run rougher than normal. The override provides a
waiting period, (usually about 5 minutes), to allow
the machinery to get into sync, or natural rhythm,
prior to sending out warnings or alarms.
3.2.6Diagnostic
The DIAGNOSTIC info and sensor log are both set to “Disable” as a default.
3.2.7Configuring IndividualSensors
To configure an individual sensor, you must access
that particular sensor’s SENSOR SETTINGS screen.
To access this screen, follow the instructions, start-
ing from the default SYSTEM STATUS screen. First
tap the bottom right SENSOR STATUS section of
the default screen. This will take you to the sensor
status grid screen.
From this screen choose the sensor you would like
to configure, (EXHA 01 for example). Tapping on the
sensor square, will take you to a status screen for
this individual sensor.
User Manual www.bosspac.com 17

To configure or modify the settings for this sensor,
tap the SETUP section, (bottom right), from the
SENSOR STATUS screen. This will take you to the indi-
vidual sensor SETTINGS screen.
This SETTINGS screen allows the user to modify the
sensor name, update rate, choose vibration axes,
and configure the warning alarm and critical alarm
thresholds for the supported parameters.
To set an individual parameter scroll the UP/DOWN
arrows to the desired setting, or by tapping either
thetop or bottom part of the screen. Press SELECT
when the desired option is highlighted.
3.2.7.1SettingSensorName
The sensors are identified by serial number and can
be named to display a descriptive nomenclature
of up to 7 characters. To name a sensor, select the
SENSOR NAME option from the SETUP menu and
use the UP / DOWN arrows to toggle through the
numeric and alphabetic option for each character.
The LEFT / RIGHT arrows will move the cursor to the
next character position. Tap SAVE when completed.
The new name will appear in the SENSOR STATUS
windows. Serial numbers remain intact and visible in the SENSOR STATUS>DETAILS window.
3.2.7.2SettingUpdateRate
The update rate of each sensor can be individually
set within a range of 3 seconds to 10 minutes. To
modify the update rate, tap the SETUP section from
the SENSOR STATUS screen. This takes you to the
individual sensor SETTINGS screen. Scroll and high-
light UPDATE RATE and tap SELECT.
2021 18

At the SENSOR UPDATE RATE menu use the arrow
keys to move the cursor LEFT / RIGHT to the desired
character position. Use the UP / DOWN arrows to
add or subtract the minute or second numeric
options. Tap OK to complete or CANCEL to return to
settings screen.
*Note: The sensor will finish the current cycle, then
complete one full cycle at the previous update rate prior to switching to the new update time. While the
request is waiting to be sent, three dots (…) are shown instead of the update interval.
3.2.7.3SettingSensorVibration Axes
The sensors can be individually configured to
measure all three vibration axes (XYZ) combined,
a combination of, or independently. To set the
preferred option, highlight VIB AXES from the sensor
SETTINGS screen and tap SELECT.
Use the arrow keys to move cursor LEFT / RIGHT to
the desired character position. Use the UP / DOWN
arrows to toggle between 1 (enabled) or 0 (ignore).
*Note: The request is sent to the sensor at next complete update cycle. While the request is
waiting to be sent, three dots (…) are shown instead of the axes selection.
3.2.7.4SettingTemperatureWarning and Critical Alarm Thresholds
To set the desired temperature warning and critical
alarm thresholds for each individual sensor, select
the desired option from the SENSOR SETTINGS
screen, HI TEMP / HI-HI TEMP / LO TEMP / LO-LO TEMP.
Press SELECT when the desired option is highlighted.
The bottom left quadrant of the screen will display
the current setting in Celsius (C) or Fahrenheit (F) or
DISABLED if there is no current threshold setting.
Select or modify the desired temperature by
tapping the UP / DOWN and LEFT / RIGHT arrows. Once the desired number, (temperature), has been selected
press OK to save, or CANCEL the editing and return to the SENSOR SETTINGS screen.
User Manual www.bosspac.com 19

3.2.7.5Setting AccelerationWarningandCriticalAlarmThreshold
To set the desired acceleration warning and crit-
ical alarm thresholds for each individual sensor,
select the desired option from the SENSOR SETTINGS
screen, HI ACCEL / HI-HI ACCEL / LO ACCEL / LO-LO
ACCEL
The bottom left quadrant of the screen will display
the current setting (in G’s) or DISABLED if there is no
current threshold setting. Select or modify the
desired maximum warning or maximum critical
value by tapping the UP / DOWN and LEFT / RIGHT arrows. Once the desired value has been selected press OK
to save or CANCEL the editing and return to the SENSOR SETTINGS screen.
3.2.7.6SettingVelocityWarning and Critical Alarm Thresholds
To set the desired velocity warning and critical
alarm thresholds for each individual sensor, select
the desired option from the SENSOR SETTINGS
screen, HI VEL / HI-HI VEL / LO VEL / LO-LO VEL
The bottom left quadrant of the screen will display
the current setting (in mm/s) or DISABLED if there is
no current threshold setting. Select or modify the
desired maximum warning or maximum critical
value by tapping the UP / DOWN and LEFT / RIGHT
arrows. Once the desired value has been selected
press OK to save or CANCEL the editing and return to the SENSOR SETTINGS screen.
3.2.7.7SettingSensorLost Warning
A warning can be issued to alert that a sensor has
not reported to the NEST Receiver for a pre-deter-
mined timeframe.
To set the amount of elapsed time a sensor can go
without reporting, scroll down to, and highlight the
LOST WARN parameter, and tap SELECT to access
the LOST SENSOR WARNING screen.
The bottom left quadrant of the screen will display
the current setting (in minutes) or 0000 if no setting.
Tap the UP / DOWN and LEFT / RIGHT arrows to set
the desired value and OK to save. Press CANCEL to
cancel the editing and return to the SENSOR
SETTINGS screen.
2021 20
Table of contents
Other BossPac Gateway manuals
Popular Gateway manuals by other brands
APARIAN
APARIAN A-HRIO quick start guide

Smartenit
Smartenit Harmony Platinum 6005A quick start guide
Dell
Dell EMC Edge Gateway 5200 user guide
Linksys
Linksys WAG54G - Wireless-G ADSL Gateway Wireless... Quick installation guide
RIGADO
RIGADO Cascade-500 Series user manual
Edgewater Networks
Edgewater Networks EdgeMarc 250W Hardware installation guide
